
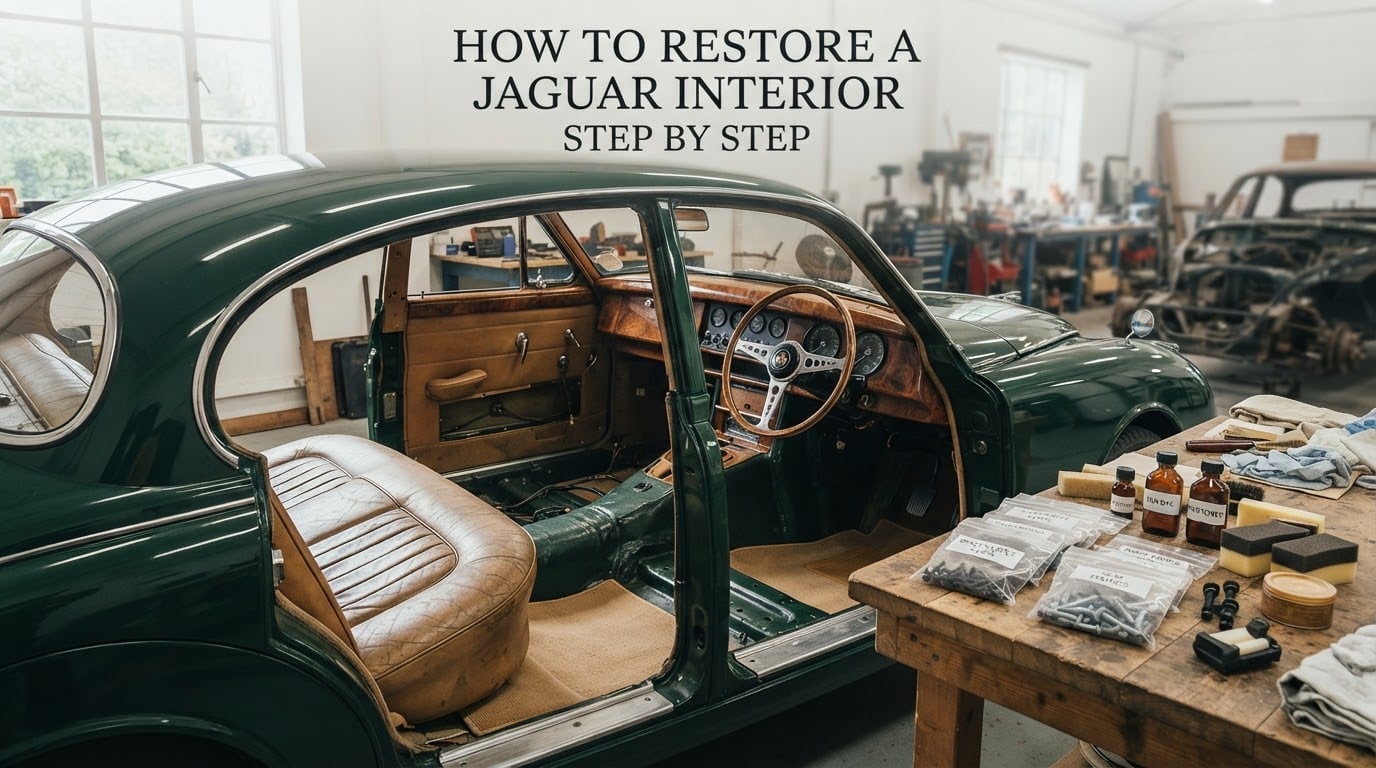
Restoring a Jaguar interior is a strip, clean, repair, refinish and reassemble job that works in one direction only, and most of it is achievable in a home garage over a series of weekends. The cabin comes apart into leather or vinyl seats, door cards, a dash pad, wood veneer, hard plastics, carpets and a headliner, and each of those gets a different treatment depending on how far it has faded, cracked or lifted.
Jaguar interiors fail in a very specific pattern, and once you can read that pattern the job stops being guesswork. Sun-facing bolsters bleach and crack first, the vinyl on the door cards goes chalky and sticky, wood veneer lifts at the edges where hands and jackets catch it, carpets go brittle and grey from the backing breaking down, and a sealed cabin with a tired seal traps enough moisture to grow mold behind the trim.
Below is the full sequence, in the order it actually needs doing, with the assessment checklist, the tool list, the color-matching problem and the reassembly traps that most write-ups leave out. I have kept it honest about which cars are friendly first projects and which ones will test you.
Everything here is based on what owners report in Jaguar owner forums and project-car threads, including the parts of the job that go wrong. The recurring message from people who have done it is consistent: an interior is mechanically easy compared with the engine or the body, the difficulty is concentrated in one or two places, and the biggest regret is almost always the same one.
Table of Contents
- What Jaguar interior restoration actually involves
- Before you start: assess your Jaguar’s interior
- Tools and supplies you will need
- How to restore a Jaguar interior step by step
- Step 1: Remove the seats, then the trim around them
- Step 2: Bag and label every fastener
- Step 3: Vacuum and deep clean everything
- Step 4: Treat mold and musty odor while the cabin is bare
- Step 5: Repair cracks and tears with leather filler
- Step 6: Sand the repair smooth
- Step 7: Re-dye the leather and recolor the vinyl
- Step 8: Apply the top coat and let it cure
- Step 9: Restore plastics, brightwork and vinyl
- Step 10: Restore the wood veneer and trim
- Step 11: Fit the carpets and repair the headliner
- Step 12: Reassemble in reverse order and reconnect the wiring
- How to match color to already-aged Jaguar leather
- Removing mold and musty odor from a sealed British cabin
- Re-dye vs. re-trim vs. replace: how to decide
- Restoring interior plastics and vinyl so they look new again
- Reassembly pitfalls: seat belts, seat memory, heated seats and console fasteners
- Model-specific notes for Jaguars from the E-Type to the F-Type
- Common mistakes that ruin a Jaguar interior redo
- Making the restoration last: conditioning and UV protection
- When a Jaguar interior restoration is not worth doing
- Frequently Asked Questions
- How can I make my car interior plastic look new again?
- Is Jaguar expensive to repair?
- How much is a restored E-Type Jaguar worth?
- What old cars are worth restoring?
- Can you re-dye leather car seats?
- How do you remove mold from a car interior?
- How do I match new leather to old leather?
- How long does interior leather dye take to cure?
- Conclusion
What Jaguar interior restoration actually involves
A Jaguar interior restoration is the process of returning the cabin to original or better-than-original condition through assessment, deep cleaning, repair, re-dyeing, refinishing and careful reassembly. That definition sounds broad because the job genuinely is broad, but it splits into three practical routes.
The first route is clean and condition. If the leather is intact with no deep cracking, the only real issues are surface grime, dryness and faded dye, then a proper deep clean, a leather conditioner and some UV protection will recover a surprising amount. It is the cheapest route in effort terms and the right one for a low-mileage survivor car whose hide still has life in it.
The second route is repair and re-dye. This is the standard Jaguar job, and it covers the majority of cars: fill the cracks, sand flat, prep with alcohol, apply matched dye in thin coats, seal with a low-lustre top coat, then condition. Owners on the Jaguar forums report near-showroom results on S-Type X200 interiors using a color-code matched dye system, which is why this route gets recommended so often.
The third route is full re-trim, where every upholstered piece is cut and replaced. This is the only answer when the hide has physically failed, the foam has turned to powder, the seat frames are rusted through, or the stitching has rotted. It is the most expensive by a wide margin and the only route you cannot realistically undo.
Which route you need depends almost entirely on two things: the state of the hide and the state of the frames. That is why the assessment comes first.
Before you start: assess your Jaguar’s interior
Do a full walk-around with the car in daylight, doors open, before you buy a single thing. This takes an hour and it decides the route. Work through this checklist in order.
- Check the sun damage pattern. Compare the driver’s side bolster with the passenger’s, and the top of the seat back with the base. A consistent fade on one side means UV and it can be re-dyed. Random blotching usually means previous repair work.
- Separate cracks from tears. Cracks in the finish of the hide can be filled and sanded. A tear through the hide into the foam, a split at a seam, or a hole where the bolster has worn through to the padding is a different job entirely.
- Press the bolsters and the seat base. Compressed foam that does not spring back, or foam that crumbles, means re-trim. Foam that is merely flattened can often be improved by working it back with your hands after cleaning.
- Look at the frames and springs. Lift a seat skirt and check the frame, the pivot points and the springs. Surface rust is treatable. Perforated or seized springs mean replacement panels.
- Open the doors and smell. A musty, damp or sour smell that intensifies with the windows up is mold, and it changes the order of the job. You will be handling that section for the mold treatment.
- Look at the wood veneer edges. Lifting veneer, often with a black line of adhesive failure along the trim strip, is a repair rather than a replacement in most cases.
- Check the headliner. Sagging at the rear or around the sun visors is a tension problem, not a stain problem. A headliner with a torn seam or a water mark needs more than adhesive.
- Count the fasteners you already have. Note which trim clips are missing before you start. Jaguar interiors use a mix of trim clips, expanding rivets and self-tapping screws, and the expanding rivets do not survive being removed.
- Photograph everything before disassembly. Especially connector locations, seat-belt routing and any trim that will go back in one of two orientations.
Two questions come up constantly in owner threads about whether an old car is worth restoring at all. The honest answer is that a Jaguar with a complete, serviceable frame and sound hide is usually worth the effort, because the cabin parts that make these cars appealing are the hardest to find, and a tired interior is the single most common reason a sound car sells slowly.
Tools and supplies you will need
Here is the full kit, grouped by what it does. Nothing on this list is exotic, and most owners who have done several of these jobs end up buying the same core set over and over.
| Item | What it is for | Notes |
|---|---|---|
| Trim removal tools and a pick set | Releasing clips and brightwork without gouging the paint edge | Wide plastic picks on an older car; a trim fork on X300 and X308 plastics, which fracture easily |
| Socket and driver set | Seat bolts, console fasteners, belt anchorages | Seat bolts are often Torx or recessed hex, so check before assuming |
| Labels, masking tape and numbered bags | Keeping fasteners with their trim | The single most important item on this list |
| Vacuum with crevice tool and brush head | Dry debris out of seat tracks, sills and carpet edges | Do this before any wet cleaning |
| Foaming cleaner or pH-neutral interior shampoo | Deep cleaning leather, vinyl and carpet | Test on a hidden panel first, especially on perforated inserts |
| Soft detailing brushes | Agitating grime out of perforations, grain and seams | A toothbrush works in the tight spots |
| Isopropyl alcohol and lint-free cloths | Degreasing before filler, sanding and dyeing | This is the step people skip, and it is why their dye peels |
| Leather filler matched to the hide colour | Filling cracks, abrasion and scuffs | Tan filler is the usual choice on Jaguar hides; colour-match it to your leather, not to the seat |
| Sanding paper from 400 to 800 grit | Levelling filler and scuffing for adhesion | 800 grit is the standard finishing grit; go finer only if the grain is very coarse |
| Colour-code matched leather dye | Recolouring the hide | Match to the Jaguar colour code and test on a hidden panel first |
| Foam applicator squares or small foam brushes | Applying dye evenly without brush lines | The squares supplied with dye kits work as well as household foam brushes, which owners confirm repeatedly |
| Low-lustre top coat | Sealing the dye against wear and UV | Match the sheen of the original hide; high gloss on a matte original looks wrong immediately |
| Nitrile gloves | Hands stay clean and dye does not transfer to your skin | Buy proper black nitrile gloves; the disposable gloves included in kits are poor quality |
| UV protectant and leather conditioner | Post-job conditioning and long-term protection | Not a silicone shine product; those make the surface slippery and collect dirt |
| Mold treatment product and extractor or steamer | Musty odor and mold remediation | Needed only if the assessment turned up a damp or sour smell |
| Wood veneer repair kit or veneer glue | Lifting trim on door tops and dashboards | A syringe of glue and a clamp handle works better than most retail kits |
| Contact cleaner and fine abrasive | Cleaning plastic and vinyl and scuffing for adhesion | For the plastics and door cards |
Where it is worth spending more: the vacuum, the alcohol and lint-free cloths, and a good low-lustre top coat. Those three decide how the job looks at the end. Where economy is fine: the brushes, the applicator squares, the trim picks and the masking tape.
How to restore a Jaguar interior step by step
This is the sequence. The order matters more than the technique, because several of these steps are only possible when the previous one is finished, and two of them cannot be corrected afterwards.
Step 1: Remove the seats, then the trim around them
Take the seats out first. Disconnect the seat-belt buckles, unplug any seat memory or heated seat connectors, and photograph the connectors before you pull them, because a memory module that is unplugged for an hour loses its stored positions. Then remove the sill trim, the door sill plates, the kick panels and the console trim to expose the carpet edges. The centre console usually comes out as one long piece, and on the X200 the top of that console is the single most difficult item on the car, because it sits so close to the seats that you cannot get a brush angle to it. Take your time there rather than forcing it.
Step 2: Bag and label every fastener
This is the step that separates a job you enjoy from a job you regret. Every trim clip, every screw and every expanding rivet goes into its own labelled bag, and the label matches a numbered mark you put on the trim piece itself with a pencil. Do not reuse expanding rivets; they exist to be destroyed on removal, and a reused one works loose on the road within a few hundred miles. Losing track of seat and centre-console fasteners is the most commonly reported regret in Jaguar owner threads, and it is entirely avoidable with a label and a bag.
Step 3: Vacuum and deep clean everything
Vacuum the seat pans, the tracks, the sills, the footwells and under the carpet while everything is still accessible. Then work the shampoo through with a soft brush, section by section. Leather takes it best with a damp cloth rather than a soaking; vinyl and the door cards can take more water. Keep the shampoo away from the seat frames and any electrical connectors, and check that the foam inside the seat is drying rather than holding water. Over-wetting a seat is the most common way a clean job turns into a mold job.
Step 4: Treat mold and musty odor while the cabin is bare
Do this now, while the interior is stripped, because the treatment only works if it reaches the surfaces you cannot reach later. Follow the full mold procedure below. The key point is that a sprayed surface treatment on an assembled interior will make the smell go away for a few weeks and then return, because the source is still sitting in the carpet underlay, behind the kick panels and inside the seat foam.
Step 5: Repair cracks and tears with leather filler
Work the hide dry and open the cracks with a fine abrasive first so the filler has somewhere to sit. Apply filler in thin layers with a palette knife or a foam wedge, following the grain, and let each layer cure fully before adding the next. Build the last layer slightly proud of the surface. Filler applied in one thick coat cracks again within months, which is the second most common failure I see after dyeing over grease. Keep filler off the perforated inserts entirely; there is no grain to blend into and the repair always shows.
Step 6: Sand the repair smooth
Work up through the grits and finish on 800. Sand with the grain and light pressure, and stop the moment the filler matches the surrounding sheen. You are removing filler, not leather, and leather thins faster than filler does. Check the repair under a bright light at a low angle before you move on, because this is the last point at which the surface can still be corrected without dyeing over a flaw. Run a fingertip along it; any ridge your finger catches will catch light later.
Step 7: Re-dye the leather and recolor the vinyl
Degrease the entire panel with isopropyl alcohol, not just the repaired areas, and give it a few minutes to evaporate. Dye grabs onto clean, slightly textured leather and will not bond to a surface with body oils on it. Apply the matched dye in two thin coats rather than one heavy coat, using foam applicator squares and working from the centre of the panel outwards. Allow full flash-off between coats. Heavy coats look blotchy and take days to cure, and they are the reason people conclude that re-dyeing does not work.
Step 8: Apply the top coat and let it cure
Once the dye has fully flattened and lost its wet look, apply two thin coats of low-lustre top coat with the same technique. Match the sheen to the original; Jaguar hides range from a flat matte on early cars to a light satin on later ones. Then leave the car alone. Owners consistently report that the result does not look right until it has sat for a full day or more, because the finish keeps settling and the colour keeps evening out as it cures. Judging the job at the twenty-minute mark is how people end up putting a second coat on something that was already fine.
Step 9: Restore plastics, brightwork and vinyl
The door cards, the rear parcel shelf, the pillar trims and the headliner bow all take a different approach to the leather because they are textured plastic and vinyl, not hide. Clean them, scuff them lightly where a coating needs to grip, and then dress them rather than paint them, unless the piece is already painted and you are matching an existing colour. Painting textured plastic badly is far more visible than painting smooth plastic badly. Full technique in the plastics section below.
Step 10: Restore the wood veneer and trim
Handle the veneer before you refit anything around it, because it is far easier to reach while the cabin is bare. Lift the failing edges with a non-marring pick, work thin glue underneath with a fine nozzle, clamp the edge flat and leave it under weight overnight. Clean the surrounding surface with a suitable cleaner, keep all liquid off the veneer face, and protect the repaired edges from the sun once they are back in. A repaired edge that is protected will stay repaired; a repaired edge in an unprotected, sun-facing dash will lift again within a season.
Step 11: Fit the carpets and repair the headliner
Cut new carpet to the shape of the old, not to the shape of the floor, and leave a generous overlap at every edge. Tack it rather than glue the perimeter, so it can be removed later without tearing. Trim the heel pads, the transmission tunnel hump and the seat track covers to suit. For the headliner, work in sections with adhesive on the flanges rather than trying to stretch one large sheet; if it is sagging at the rear, tension it toward the front as you stick it down. Leave a service access panel in place rather than closing the roof fully and losing the clips that hold it.
Step 12: Reassemble in reverse order and reconnect the wiring
Work back through the exact sequence you stripped in, which is the reason for doing step 2 properly. Seat belts get re-touted and anchored last, and their anchor points need to be checked and free-running before anything is bolted over them. Reconnect seat memory modules and heated seat elements, then cycle the seat through its travel to confirm the memory is saving positions again. Refit the console trim, the door cards and the brightwork, and clip everything home with new clips rather than reusing tired ones. Before you start the car, check that nothing is pinched under a rail and that the seat-belt warning lamp goes out with the belt unfastened.
How to match color to already-aged Jaguar leather
New leather will never match aged leather exactly, because aged hide has darkened unevenly and dye has worn off the high points. The rule most experienced owners use is to aim slightly darker than the original colour, never lighter. New trim in a lighter shade sits next to dark aged hide and looks like a patch; new trim slightly darker reads as a shadow and looks intentional.
- Find the Jaguar colour code from the build plate, the original order card or the workshop manual, and take that code to a leather dye supplier rather than matching by eye at the shop.
- Compare against a hidden panel, such as the underside of a seat back flap or the fold under the bolster, where the dye has not been touched by sun or hands. That is closer to the original colour than the visible bolsters are.
- Test a small swatch on that hidden area and let it cure for a full day before judging it. A wet swatch looks darker and glossier than the cured result.
- Do all panels of the same hide together, back to back, in the same session. Leather that has aged for twenty years varies across a single seat, and a gap of an hour between panels shows.
- Order carpet a shade darker than the hide if the seats are staying unrestored. One owner on a project-car thread ordered replacement carpet in a deliberately deeper red than the original for exactly this reason, and it is the single most useful piece of matching advice in any of these threads.
If you are only dyeing one seat or one panel, expect a visible difference against the others. A single-panel touch-up on a car with a complete, evenly faded interior usually makes the mismatch worse rather than better.
Removing mold and musty odor from a sealed British cabin
The musty smell in an old Jaguar is almost never in the air; it is in the fabric. Water gets in through a tired windscreen seal, a blocked cabin filter, a wet headliner leak or a car that has been parked outside, and it sits in the carpet underlay, the seat foam, the back of the door cards and the hollows under the carpet. Sealed cabins in the British climate dry slowly, which is why the smell is so common here.
- Strip the interior fully and take the carpets, the seat pads where removable, and the door cards out of the car. Surface spraying on an assembled interior cannot reach any of the actual source.
- Dry first, treat second. Wet mold is easier to kill, but a soaked carpet in a closed cabin will grow more. Use an extractor or a steamer on the carpet and pads, then let everything dry with the car open and well ventilated.
- Apply an anti-mold treatment to the carpet underlay, the foam and the back of every trim panel, following the product directions on coverage and dwell time.
- Wash the hard parts — kick panels, sills, parcel shelf, boot floor and the underside of the dashboard — with a cleaner that suits vinyl and plastic.
- Replace what you cannot save. Carpet underlay that is already delaminating, and foam padding that is crumbling and black inside, are not recoverable. Replacements cost little compared with the hours you would spend trying.
- Fix the cause before reassembly. Check the windscreen and rear screen seals, replace the cabin filter, and confirm the headliner has no leak. Reassembling over a wet source guarantees you are back here next spring.
- Check the A-pillar and sill drains are clear so water has somewhere to go, and leave the car dry and aired after reassembly before you consider the job finished.
An ozone treatment is an option for residual odor in the closed cabin, but it is a finishing step for whatever odor survives the cleaning, not a substitute for it. It does nothing for a carpet that is still damp.
Re-dye vs. re-trim vs. replace: how to decide
The decision rule is simple: if the hide is intact, re-dye it; if the hide is gone, re-trim it; if the frame is gone, replace the seat. Everything else in this choice is about how far the damage has spread.
| What you find | Route | Why |
|---|---|---|
| Surface fade, no cracking, dye still present | Clean and condition, or re-dye | The hide is structurally perfect; you are changing colour, not repairing material |
| Fine surface cracking, bolster scuffing, small splits at seams | Filler, sand, re-dye | Cracks in the finish are exactly what filler and dye fix well |
| Perforated inserts fading faster than the bolsters | Re-dye the whole seat front to back | Panel-by-panel dyeing on perforated seats almost always shows at the joins |
| Tears through the hide, worn-through bolsters, split seams | Re-trim | Filler cannot span a hole into the foam, and a patched bolster fails again quickly |
| Foam crushed to powder, springs seized or rusted through | Replace the seat or the frame | No surface treatment fixes a structural failure |
| Hide sound but stitching rotted throughout | Re-trim | The hide is the wrong choice only if the sewing is gone; a stripped seat has to be re-sewn anyway |
| Dash pad surface crazed or lifting at the edge | Re-dye or replace the pad | The pad is a separate item from the leather and can be re-dyed on its own |
| Wood veneer lifting but surface intact | Re-glue and refinish | Lifting veneer is nearly always an edge-adhesion failure, not a veneer failure |
The honest failure case: a re-dye over an unfilled crack, or over a bolster worn through to the foam, produces a result that looks worse than the tired original, because the flaws are now high-contrast. Fear of ruining good original leather is the most common reason owners hesitate, and it is a fair fear. Test on a hidden panel, and if the seat is your only good hide, dye the front seats first and leave the rears alone until you are happy with the result.
Restoring interior plastics and vinyl so they look new again
You make tired interior plastic and vinyl look new by cleaning it, removing the chalky oxidised layer, and then dressing it with a product matched to whether the surface is smooth or textured. Painting is a last resort, because most Jaguar plastics are textured and a painted textured surface is nearly impossible to blend convincingly.
- Wash with a pH-neutral cleaner and a soft brush, working the grain and the perforations.
- Degrease with alcohol on a lint-free cloth and let it evaporate fully.
- Scuff smooth plastic lightly with fine abrasive so a coating has something to grip, and skip this on textured surfaces.
- Paint only smooth, already-painted parts, in matched colour, in thin coats from a distance.
- Dress textured plastic with a dressing rather than paint, and apply thin coats, letting each one flash off.
- Replace what will not come back — pieces that have gone brittle, cracked through mounting points, or lost their grain are cheaper and faster to replace than to rescue.
The related complaint in owner threads is broken trim on late X300 and X308 cars, where plastics crack at the mounting points and are hard to source. If the piece is structurally sound but cosmetically tired, dress it. If it is brittle, replace it.
Reassembly pitfalls: seat belts, seat memory, heated seats and console fasteners
- Inventory the fasteners first. Lay every clip and screw out in a row on a sheet of paper and photograph it before you refit anything. Missing trim clips are what make a finished interior look cheap.
- Replace expanding rivets. They are one-use fasteners. Reuse one and it works loose under load.
- Photograph connectors before unplugging. Seat memory modules and heated seat elements have latches and keys that are awkward to reassemble by feel.
- Cycle the seat after reconnecting so the memory module stores positions again, and confirm the heated seat element still responds before you close the seat base up.
- Route seat belts last, and test them. Check each belt runs free through its anchor and retractor with no twist, and that the warning lamp behaves correctly with the belt fastened and unfastened.
- Work the centre console slowly. The tight clearance between console and seat is the most commonly reported difficulty on the X200, and the fix is patience, not force.
- Check nothing is pinched under a seat rail or trim edge before you start the car, and confirm every clip is seated home.
Model-specific notes for Jaguars from the E-Type to the F-Type
Model matters more in an interior job than in most mechanical work, because the cabin was built to a different standard in each era.
| Model | What you will face |
|---|---|
| E-Type and XK series | Early cars have flat, plain hides that dye very evenly, which makes them among the most satisfying re-dye jobs there is. The harder part is trim: fragile brightwork, lots of small trim clips, and a lot of it. Cars that have been off the road for decades often need the entire cabin stripped to bare metal, and the headliner may be original, brittle and worth photographing before you touch it. |
| MK2 3.4 and 4.2 | Full-leather interiors that responders have documented being fully restored. The hide is usually excellent, the damage is concentrated in the door cards and the seat frames. A good first serious project. |
| XJ6 Series 1 to 3 | Wood veneer and the dash pad are the centrepiece, and both are the items most often sent out for specialist work. Owners on these threads are broadly positive that the rest is a manageable weekend project, and carpet replacement plus fastener discipline are the two things they stress most. |
| XJS and XJ12 | Large cabins with a lot of trim, and a lot of surfaces for UV to reach. The wood is often more solid than people expect once the edges are re-glued. |
| S-Type X200 | The most commonly re-dyed Jaguar there is, and the one with the most published owner results. The difficulty is concentrated in the centre console top rather than the leather itself. Good project for a confident first-timer. |
| X300 and X308 | The hardest interiors to restore, and the most likely to send you to a specialist. Late-model plastics crack at the mounting points, the door cards and trim are prone to failure, and the parts are the least available. Dash pad, wood trim and cluster work is frequently outsourced. |
| X-Type and F-Type X152 | Less faded than the older cars but with more glued plastic trim and bonded interfaces that resist clean disassembly. The leather is often in better shape than the plastics around it. |
Common mistakes that ruin a Jaguar interior redo
Sanding through the grain. Leather thins faster than filler, and once you are through the finish you cannot dye your way back. Sand only the filler.
Dyeing over grease. Body oils on the surface stop the dye bonding, and the failure shows as peeling within weeks. The alcohol wipe is not optional.
Filler applied in one thick coat. It cracks again, and it is very hard to repair once it has been dyed over.
Dyeing one panel too light or too dark. Do all panels of a hide in the same session, and match against a hidden panel rather than the faded visible surface.
Reusing expanding rivets and tired trim clips. The cheapest way to end up with a rattle and a panel working loose.
Over-wetting leather during cleaning. Water trapped inside a seat is how a cleaning job becomes a mold job.
Judging the finish too early. The result needs a day or more to settle before it looks right, and re-dyeing a panel that would have cured fine is the most expensive mistake in the whole process.
Using the supplied disposable gloves. Owners report the gloves included with dye kits are poor quality and leak. Buy proper nitrile gloves.
Making the restoration last: conditioning and UV protection
A re-dyed interior is protected mostly by keeping sunlight off it. Once the top coat has fully cured, apply a leather conditioner every three to four months and a UV protectant on the horizontal surfaces — the seat top surfaces, the dash top and the parcel shelf — twice a year. Wipe those areas with a damp cloth before applying, so the product goes onto clean hide.
Use a water-based conditioner rather than a silicone-based dressing. Silicone makes the surface slick, which is unpleasant on a dash top and on the driver’s seat, and it traps dust. It also makes the next dye job harder, because nothing will bond to it.
On carpets, keep an eye on the underlay rather than the visible pile. Carpet that looks fine from above is often already delaminating underneath, and that is the thing that will let water into the cabin and restart the mold problem.
When a Jaguar interior restoration is not worth doing
Sometimes the honest answer is to stop. If the seat frames are rusted through, the foam is gone, the hide has rotted at the stitching and the carpet underlay has turned to powder, you are not restoring an interior any more, you are rebuilding one, and the cost of that belongs in a different conversation from a weekend project.
Break-even thinking also depends on the car. A low-mileage survivor E-Type with a complete interior already present is a case for careful cleaning and conditioning, not for a full strip and re-dye, because the existing hide is the most valuable thing the car has. A tired but structurally sound car in daily use is where a restoration pays back fastest, in the quality of every drive rather than in resale.
Take photographs of the finished interior as you go. Before, during and after images are the evidence you want when you sell the car, and they are the only way to prove what was done if you ever sell without being there to explain it.
Frequently Asked Questions
How can I make my car interior plastic look new again?
Clean the plastic with a pH-neutral cleaner and a soft brush, degrease it with isopropyl alcohol, then scuff smooth surfaces lightly so a coating will grip. Textured plastic should be dressed rather than painted, because a painted textured surface is very hard to blend. Paint only smooth, already-painted parts in matched colour, in thin coats. If the plastic has gone brittle or cracked at its mounting points, replacing it is faster and cleaner than trying to rescue it.
Is Jaguar expensive to repair?
It depends less on the mechanical side and more on what has gone missing. Mechanical work on a well-supported car is broadly predictable, but interior restoration costs are driven by parts availability. Original Jaguar leather, door cards, wood veneer, dash pads and trim for older cars can be hard to find, and late X300 and X308 plastic trim is particularly difficult to source. That is why so many owners restore what they already have rather than replace it, and why a tired interior is usually the cheapest part of a Jaguar to improve.
How much is a restored E-Type Jaguar worth?
It varies enormously with condition, provenance and how much of the car is original, so no single figure is honest. The useful direction of travel is that a correctly restored cabin supports a far higher sale than the same car with a tired one, because an E-Type is judged on how it presents, and a faded, cracked, musty interior is the most common reason a sound car sells slowly. Leaving a good original hide unrestored can cost you more than the value you gain by having it look new.
What old cars are worth restoring?
The cars worth restoring are usually the ones with a complete, serviceable structure and worn cosmetics rather than the reverse. For a Jaguar that means sound frames and springs, a hide with life in it, and interior components that are present even if tired. A car with a tired interior and good bones is one of the best restoration candidates there is, because the work is repetitive rather than inventive and most of it is achievable in a home garage. A car with rusted seat frames, crumbled foam and rotted stitching is a rebuild, not a restoration.
Can you re-dye leather car seats?
Yes, and Jaguar leather takes dye well. The process is to clean and degrease the whole panel with isopropyl alcohol, repair any cracks or scuffs with colour-matched leather filler, sand the repair to 800 grit, apply a colour-code matched dye in two thin coats, then seal with two thin coats of low-lustre top coat. It is not reversible, so test on a hidden panel such as the fold under a bolster and let it cure for a full day before committing. Fills and surface cracks, but cannot span a tear into the foam or a worn-through bolster.
How do you remove mold from a car interior?
Strip the interior completely first, because a surface spray on an assembled interior will not reach the source and the smell will return. Vacuum, then dry the carpet and pads with an extractor or steamer and let them dry with the car open and well ventilated. Apply an anti-mold treatment to the carpet underlay, the seat foam and the back of every trim panel, wash the hard parts, and replace any underlay or foam that is crumbling or black inside. Finally, check the screen seals and cabin filter so water is not still getting in.
How do I match new leather to old leather?
Aim slightly darker than the original colour, never lighter. Aged hide darkens unevenly, so a lighter replacement reads as a patch while a slightly darker one reads as shadow. Find the Jaguar colour code rather than matching by eye, compare against a hidden panel such as the underside of a seat back flap where the dye has not faded, and test a small swatch that you let cure for a full day. If the seats stay unrestored, order the carpet a shade darker than the hide so the two read as a set.
How long does interior leather dye take to cure?
Allow at least a day, and longer before you judge the result. The colour evens out and the finish settles as it cures, which is why a job that looks blotchy and glossy while it is wet can look correct the following day. Re-dyeing a panel that would have cured fine is the most expensive mistake in the whole process, so resist the urge to add another coat early. Keep the car dry and out of direct sun while the finish settles, and avoid applying conditioner until the top coat has fully hardened.
Conclusion
How to restore a Jaguar interior comes down to one rule: strip it completely, work in a fixed order, and never judge a finish before it has cured. Assess honestly first, because cracks and tears decide your route, and then clean, treat any mold while the cabin is bare, repair, sand, dye in thin coats, seal, and give it a day before you look at it again.
Start with the front seats on any car you have never dyed, take your time with the console, and label every fastener as it comes off. Get the assessment right and the rest of the job is repetitive rather than difficult.