
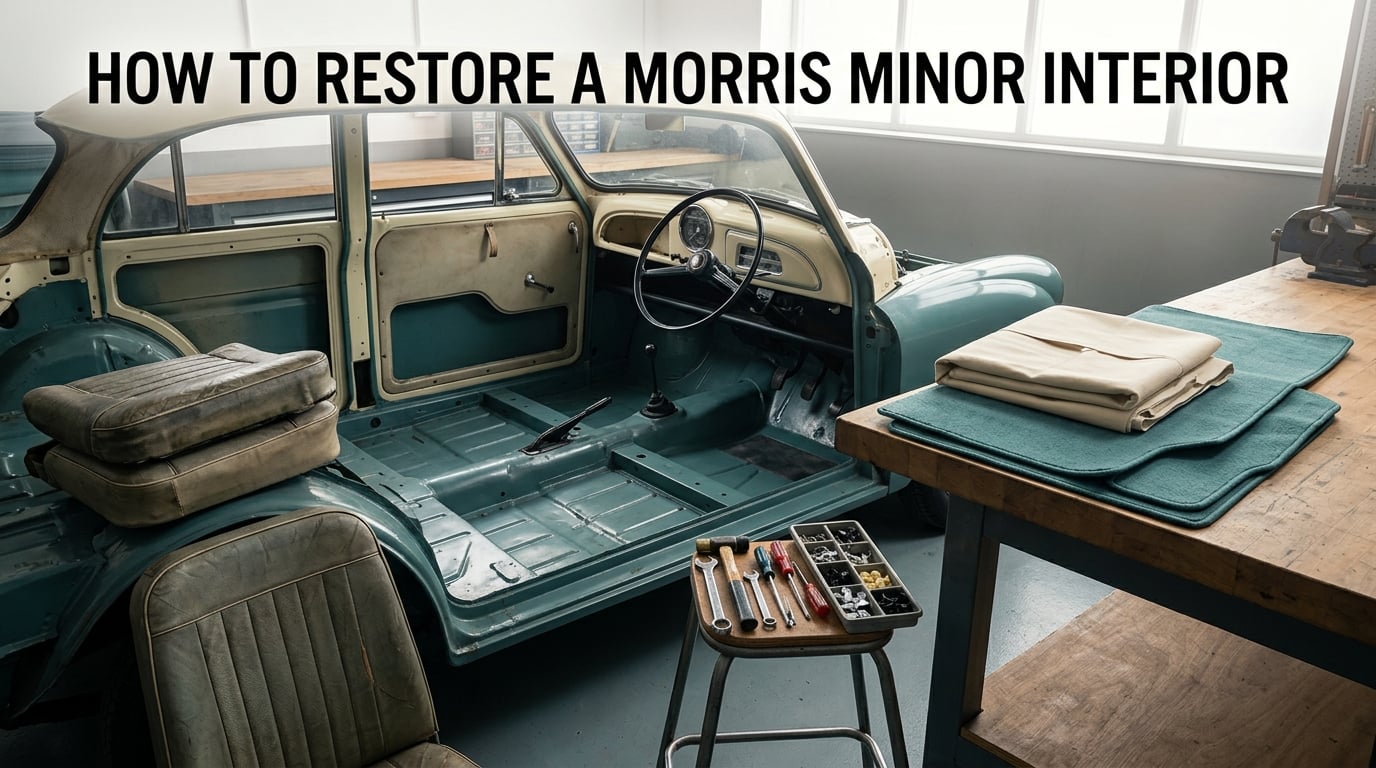
Restoring a Morris Minor interior means taking the cabin back to bare shell, fixing what the trim was hiding, then rebuilding the seats, door cards, side trim, carpet, headlining and dashboard with materials and fasteners that suit your car. The job runs in one direction: strip in a fixed order, assess, repair, rebuild, then refit in reverse. A full strip-out and re-trim on a saloon is a long weekend of work spread over several weeks of evenings for most people. Whatever your Minor is a 2-door, 4-door, Tourer, Van, Pickup or Traveller, the sequence below holds. Only the parts differ.
We have worked through this guide against owner accounts on the Morris Minor Owners Club board and the Morris Minor Owners forum, where the same problems come up repeatedly: waist rails that hide every fixing, black mastic that turns removal into a knife job, and original vinyl that has gone brittle. What follows is the process we would follow, in the order that avoids the most damage.
Table of Contents
- What Restoring a Morris Minor Interior Actually Involves
- Know Your Minor’s Variant Before You Start
- The 8-Step Morris Minor Interior Restoration Process
- Step 1: Plan, Photograph and Label Everything
- Step 2: Strip the Interior in the Correct Order
- Step 3: Assess and Repair What the Trim Was Hiding
- Step 4: Re-trim or Rebuild the Seats
- Step 5: Rebuild Door Cards and Side Trim
- Step 6: Fit the Carpet
- Step 7: Fit the Headlining and Dome Light
- Step 8: Refit the Dashboard, Glovebox and Steering Wheel
- Tools and Materials Checklist
- Trim Colours by Series and Year
- DIY vs Specialist Trimmer: Time, Cost and Result
- Common Mistakes That Ruin a Morris Minor Re-trim
- Making a Tired Interior Look Factory-Fresh on a Budget
- Frequently Asked Questions
- How much does it cost to restore a Morris Minor interior?
- What order should you restore a car interior in?
- What are the steps involved in restoring a Morris Minor interior?
- How do I remove Morris Minor door cards?
- Can I reuse original Morris Minor trim?
- How do you fit a new headlining to a Morris Minor?
- What tools do I need to re-trim a car interior?
- Does a Morris Minor have a chassis?
- Conclusion
What Restoring a Morris Minor Interior Actually Involves
A Morris Minor interior restoration is a complete teardown and rebuild of the cabin trim, not a clean and a polish. You remove every interior panel, recover the seats or fit new ones, and return the car to a finished state where the trim is taut, the fasteners are sound and no panel rattles.
Five things make the Minor different from a modern car and worth knowing before you start:
- The trim is clip and screw mounted over a separate pressed steel inner body structure, so fasteners live behind the waist rails and the seat backs.
- Original vinyl from the late 1950s and early 1960s becomes brittle and splits along the flutes and seams. Repair is often not achievable, which is the single most common complaint from owners.
- Panels are sealed with old black mastic and sometimes a previous owner’s modern adhesive, so removal needs a scraper and patience rather than force.
- Water ingress from failed seals or a blocked drain leaves rot under the carpet and behind the rear quarter panels, and it usually appears during strip-out.
- Colour combinations varied by series and year, and a lot of owners want the factory combination back rather than a generic modern retrim.
Budget for the possibility that strip-out reveals more than you planned. Owners on the MMOC board warn about spiralling into a much larger job once the trim is off. Decide in advance where your line is: a full retrim, a partial refresh of the worst items, or cleaning and conditioning what is already there.
Know Your Minor’s Variant Before You Start
The variant decides which panels exist, what order they come off in, and where the hidden fixings sit. Check the body and chassis number against your records before you order anything, because part names and colours overlap heavily across the range.
| Variant | Interior differences to plan for | Strip-out note |
|---|---|---|
| 2-door Saloon | Front and rear seat frames, front door cards, rear quarter trim, no rear door cards | Simplest layout. Remove rear quarter trim before the seats where fixings run behind the seat back |
| 4-door Saloon | Two front and two rear door cards, plus quarter trim | Door aperture seals and the window winder mechanism come out with the card |
| Tourer and Convertible | Fold-down rear seat, carpet often cut around the seat frame, no fixed headlining on early cars | Check whether the headlining is original or a later addition before pulling it down |
| Van and Pickup | Bare or basic trim, flat load floor, no rear quarter carpets | Load floor boards hide fixings and can trap water |
| Traveller | Structural wood frame, thin timber and aluminium side panels, interior wood finish | Treat panels as structural. Refit the fuel filler neck as soon as the filler-side panel is off |
On a Traveller the wood is part of the body, not decoration. The panels that screw to it are thin, so levering from the wrong side bends or marks them. A restorer on the Morris Minor Owners forum drove a 1964 Traveller for two days with the side panels removed, which proves they come off intact if you work from the correct side.
The 8-Step Morris Minor Interior Restoration Process
Here is the full order, from first photograph to final check. Each step assumes the one before it is finished.
Step 1: Plan, Photograph and Label Everything
Photograph and label before you undo a single screw. Take wide shots of the whole cabin from each corner, then close-ups of every fixing, clip, trim tab and wire run you can see.
Label every panel and screw bag with the panel name and position. Half the strip-out time on a Minor is spent hunting for the screw you dropped in the footwell, and the other half is spent working out which quarter trim goes back on which side.
Also photograph the existing trim colour in daylight with a colour card if you have one. Forum members point out that screens and mixed lighting shift the apparent shade, so a phone photo alone can send you to the wrong colour.
Step 2: Strip the Interior in the Correct Order
Remove trim in reverse assembly order, starting with the waist rails, because they cover the tops of everything else. The waist rail fixing is hidden along the top edge of the trim, so with the rail still in place you simply cannot reach it.
Work through this sequence:
- Waist rails, both sides. Unclip or unscrew the end caps first.
- Rear seat, then the boot floor or rear load area. Owners confirm that removing both first buys you access to fixings that are otherwise unreachable.
- Front seats, noting which bracket goes on which rail.
- Rear quarter trim and rear side panels.
- Door cards. Remove the window winder, interior handle and armrest, then the screws around the perimeter including the lower edge near the sill.
- Dashboard, after disconnecting the wiring and dropping the steering wheel.
- Headlining last among the removals, once nothing else is in the way.
Break the mastic seal with a paint scraper worked from the inside so any marks land on a hidden face. Have a second person push the panel in from the outside while you work the seal. Never lever against a visible face.
Warning: Modern adhesives applied by a previous owner can make intact removal impossible. If a panel will not come free, stop. Cut around the fixings, keep the panel, and rebuild a replacement rather than destroying the car structure behind it.
Step 3: Assess and Repair What the Trim Was Hiding
With the cabin bare, treat the metal and the inner structure before you cover anything again. Push a screwdriver through the carpet at the seams, the sills and the rear footwells to find soft metal, and check for damp under the front and rear mats.
Repair rust properly. Cut back to sound metal, treat the inside of the panel, weld or patch in a repair panel, then prime and paint. Filling with seam sealer alone under a carpet is a temporary fix that comes back within a season.
Check the seat frames while they are out. Sagging springs and tired rubber isolators are common, and both make a brand new cushion feel wrong. Refit the original frame if it is sound, or fit a reproduction frame with new springs and isolators.
While the wiring is accessible, check the dashboard and door harness, the demister vents and the dome light terminals. Corroded connectors behind the dash are the usual cause of a failed heater blower and a headlight that works only when you wiggle the switch.
Step 4: Re-trim or Rebuild the Seats
Recover the seats if the foam and frame are good, and re-trim them if the foam has gone. Take the covers off carefully because they stretch, and cut the old staples out rather than tearing the flutes. Original vinyl on a 60s car is often split along the piping seams, which is the point at which owners accept a rebuild.
Fit new foam, cut new flutes, and hand stitch or machine stitch the piping. One MMOC owner put the whole seat job at the price of a small trailer and a roll of vinyl rather than a full trim kit, having the covers made up and stitching the flutes by hand, and the result was perfectly presentable.
Where the seat is being rebuilt rather than replaced, replace the springs, the isolator bushes and any perished webbing. New vinyl over tired springs looks tired in a month. Stretch the covers onto the foam, align the flutes along the centre of each panel, and staple at even intervals without tension.
Step 5: Rebuild Door Cards and Side Trim
Door cards come apart in layers: the outer card, the vinyl or mohair face, and the pull, handle and winder. Keep the original hardware where it survives, but replace perished fixings, the listing wires, and the winder handle and knob. Original 1950s hardware is the main source of rattles once the vinyl is new.
Fit the windlace along the top edge of the door aperture. It closes the gap between the door card and the sill trim, and it is the detail most often skipped. Windlace is a pre-formed channel with a moulded profile, so buy the correct section rather than forcing flat trim into the corner.
Side and rear quarter trim goes back on last, after carpet, so the lower edge tucks under the carpet edge instead of sitting on top of it. Check that the trim sits flat against the body and that no edge sits proud where a door will close on it.
Step 6: Fit the Carpet
Cut the carpet to shape from a paper template, not by eye. Lay the old carpet out, mark the transmission tunnel, pedal box, seat frames, drain holes and heater apertures, then transfer the shape to the new carpet.
Work from the front of the car backwards, and fix at the front first. A common error is starting at the sills and then having too much material bunched at the transmission tunnel. Use the original fixings or the correct reproduction trim clips, and fit a heel pad on a driver-side carpet that has worn through.
Trim the carpet edge level with the sill, not below it. Carpet that hangs too low collects water and pushes trim clips out of alignment, which is why lower trim edges are the first thing to rattle on a rebuilt interior.
Step 7: Fit the Headlining and Dome Light
The headlining goes on after the trim is complete and before the dome light housing is fixed, because the light surround is trapped between lining and roof. Fit it across the car in one piece if the old material is intact enough to use as a pattern. Never wet-fit a new headlining. A stretched, damp lining shrinks as it dries and ends up slack and rippled within a month.
Work from the centre of each bow outwards toward the edges, pulling only enough to take out the slack. Trim the openings for the demister vents and the sun visor fixings with a sharp blade once the lining is set.
Seat the dome light surround in its aperture and refit the lens. If the original surround has perished, a reproduction item is the sensible swap, and it is the part visitors notice first when they get in.
Step 8: Refit the Dashboard, Glovebox and Steering Wheel
Refit in the reverse of removal. Fit the dashboard and glovebox, reconnect the wiring, then refit the door cards, side trim, carpet edges, seats and finally the waist rails. The waist rails go on last so they sit over the top edge of the trim as they did from the factory.
Tighten fasteners evenly and check panel gaps with the doors closed. Run the car with the heater blower on and the lights at full beam for fifteen minutes to find rattles, then work each one out by cushioning the contact point. Check the throttle and brake pedal travel is unobstructed before you drive it out.
Tools and Materials Checklist
No competitor publishes a quantities list, so here is one that will get you through a saloon. Adjust the vinyl and carpet figures for a 4-door, and for a Traveller add a full set of wood and aluminium interior parts.
| Item | Approximate quantity for a saloon | Notes |
|---|---|---|
| Vinyl for seats, door cards and quarter trim | 5 to 7 metres | Buy a single roll from the same batch so the shade matches |
| Carpet | 1 full set, cut to template | Heel pad if the driver side is worn through |
| Headlining material | 1 panel plus scrap | Match the bow count and dome light aperture to your car |
| Foam for seats and door cards | 2 to 3 sheets | Closed cell foam is easier to fit in a confined door card |
| Flute cord and piping | 10 metres | For front and rear seat covers |
| Windlace | 3 metres | Buy the pre-formed section matching your aperture profile |
| Upholstery staples | 2 boxes | Stainless resists rust bleed into new vinyl |
| Trim clips, screw assortment and seat frame bolts | 1 comprehensive set | Buy original pattern, not universal |
| Thin gauge body panel, rust treatment and primer | Enough for the repairs you find | For structural repair under carpet |
| Adhesive and sealant | One tube each | Trim adhesive, plus a seam sealer for structural joins |
As for tools, a good screwdriver set, a socket set, an awl or trim knife, a paint scraper, a staple gun, a hog ring plier, an upholstery needle and thread, and a torque driver will cover it. A heat gun set at low heat helps lift old adhesive without cracking the panel underneath.
Trim Colours by Series and Year
Factory trim colour changed more often than owners expect, and the same body colour was offered with different interiors. The Morris Minor Owners Club colour database records combinations across the range, and the table below is a starting point for a saloon.
| Series | Years | Typical trim and carpet notes |
|---|---|---|
| Series MM | 1948 to 1953 | Single tone interiors, vinyl in the body colour, matching carpet and headlining |
| Series II | 1954 to 1956 | Two tone options appear, with contrast trim against the body colour |
| 1000 and later 2-door | 1956 to 1959 | Trim in body colour or a dark contrast, headlining often a lighter shade |
| 1000 and later 4-door | 1961 onward | Duo-tone trim available on Deluxe cars, adding a second vinyl colour |
| Minor 1000 | 1962 onward | Duo-tone combinations standard on some specs, more trim shades offered |
Verify rather than assume. Check the number plate or body number, look for build records, and ask the colour database or a specialist trimmer to confirm the combination. If the car has been re-trimmed once already, the interior you are removing is not evidence of the original, which is exactly the judgement the reference tables were built for.
DIY vs Specialist Trimmer: Time, Cost and Result
A specialist trimmer will do a better job on seams and flutes in less time than most owners will manage in a weekend. The realistic question is where the skill threshold sits for each stage.
| Stage | DIY is realistic when | Send it out when |
|---|---|---|
| Strip-out and metal repair | Always, with basic tools and a weekend | Structural rust needs welding and panel fabrication |
| Seat rebuild | You can stitch a straight seam and stretch vinyl evenly | You want factory flutes, pleats and a concours finish |
| Door cards and side trim | The cards are complete and the fixings are intact | Cards are missing or the trim is brittle and will not refit |
| Carpet and headlining | You can pattern from the old material and work without creasing | Headlining is torn beyond use as a pattern |
| Dashboard and refit | Wiring is intact and fasteners are not seized | Dash is cracked, the loom is brittle, or trim is missing |
On cost, the material bill for a full retrim kit is the largest single cost in the job by a wide margin, and the alternative route of buying vinyl by the metre and having covers made up costs a fraction of the kit. Forum members on the MMOC board describe both routes in detail. The deciding factors are hours available, whether you have a sewing machine, and how fussy you are about stitch tension and flute symmetry.
Allow several full weekends of work for a saloon strip, repair, re-trim and refit if you are doing it for the first time, and considerably longer if the car has been sat damp.
Common Mistakes That Ruin a Morris Minor Re-trim
These are the failures we see repeatedly, and most trace back to rushing strip-out.
- Forcing panels off with a lever. Work the seal with a scraper from the hidden side. Damaged trim tabs and torn card edges cost more to replace than the time saved.
- Fitting the waist rail back over already-fitted trim. The rail covers the top of the trim. If you fit it first you will cut or stretch the vinyl trying to get the top edge underneath.
- Reusing perished trim fixings. Reusing 1950s hardware causes rattles and premature wear, and is the reason a fresh interior can still feel tired.
- Fitting universal clips. The pattern differs from car to car. Original pattern clips hold the panel as designed.
- Wet-fitting the headlining. A damp stretched lining shrinks as it dries and goes slack within weeks.
- New vinyl over tired seat springs. Refit new springs and isolators, or the new covers look saggy almost immediately.
- Skipping the windlace. The gap at the door aperture lets water and road noise in and is a visible unfinished edge.
- Sealing rust with mastic under the carpet. It hides the problem and holds damp against the panel.
- Painting before the metal work is finished. Refitting trim over untreated repair means pulling it all back out again.
Making a Tired Interior Look Factory-Fresh on a Budget
Not every tired interior needs a full retrim. Many owners have fitted new carpet and headlining on an earlier restoration and left the seats, which is a perfectly serviceable compromise that still transforms the cabin.
Work down this list in order of visual impact:
- Replace the headlining first. It is the largest single area and the first thing you see.
- Fit new carpet and mats. It costs less than a door card and changes the whole tone of the cabin.
- Re-trim or recover the seats. Seats carry the wear, and flutes and piping define whether a cabin looks maintained.
- Clean and condition the door cards and quarter trim rather than replacing them. A sound card with clean vinyl is worth far more than a new cheap one.
- Replace the dome light surround, handles, winder knobs and any missing trim clips, which is small cost and highly visible.
For vinyl that is tired but not split, a proper clean with a pH-neutral cleaner followed by a plastic conditioner will remove surface crazing and stop it drying further. For vinyl that is split, hardened or flaking at the seams, patching looks worse than a re-trim, so spend the money there instead.
Frequently Asked Questions
How much does it cost to restore a Morris Minor interior?
The largest single cost in a Morris Minor retrim is the full trim kit itself, which covers seats, door cards, side trim and headlining. The lower-cost route is buying vinyl by the metre and having the covers made up, with the flutes hand stitched, which owners on the MMOC board describe as a fraction of the kit cost. Add metal repair, foam, carpet, windlace, fasteners and adhesives, and budget more if the car has been sitting damp. A specialist trimmer adds labour as the second major cost line.
What order should you restore a car interior in?
Strip in reverse assembly order: waist rails first because they cover the top edge of everything else, then the rear seat and boot or load floor for access, then the front seats, rear quarter trim, door cards, dashboard and finally the headlining. Treat and repair the bare metal and inner structure next, then rebuild the seats, refit trim and fit the carpet, and refit the dashboard and waist rails last so they sit over the trim as they did from the factory.
What are the steps involved in restoring a Morris Minor interior?
The process is eight steps: plan and label everything with photographs, strip the interior in the correct order, assess and repair rust rot and seat frames, rebuild or re-trim the seats, rebuild the door cards and side trim, fit the carpet, fit the headlining and dome light, then refit the dashboard glovebox and steering wheel and run the car to find rattles.
How do I remove Morris Minor door cards?
Remove the window winder, interior handle and armrest, then undo the screws around the card perimeter including the lower edge near the sill. Work the old mastic seal with a paint scraper from inside the car so any marks land on a hidden face, and have a second person push the card in from the outside. Keep the original pull and handle if they survive, but replace the listing wires and perished fixings.
Can I reuse original Morris Minor trim?
Yes, if it is complete, flexible and the fixings are intact, and many owners do exactly that on a partial refresh. Original vinyl from the late 1950s and early 1960s does become brittle and split along flutes and seams, so any panel that is already hardened or flaking is not worth rebuilding. Always replace the trim fixings even when you keep the panels, because 1950s hardware is the main cause of rattles in an otherwise new interior.
How do you fit a new headlining to a Morris Minor?
Fit the headlining across the car in one piece if the old material is intact enough to use as a pattern. Never wet-fit new material, because a stretched damp lining shrinks as it dries and ends up slack and rippled. Work from the centre of each bow outwards, pulling only enough to remove slack, and trim the demister and visor openings with a sharp blade once the lining is set. Fit the dome light surround after the lining is on.
What tools do I need to re-trim a car interior?
A good screwdriver set, a socket set, an awl or trim knife, a paint scraper, a staple gun, hog ring pliers, an upholstery needle and thread and a low heat heat gun will cover most of a Minor interior. Add a torque driver for even fastener tension and a paper template method for the carpet. If you are rebuilding seats you also need a sewing machine or the patience to hand stitch the flutes and piping.
Does a Morris Minor have a chassis?
It has a separate pressed steel chassis with a body and interior structure mounted on it, rather than a monocoque shell like a modern car. That separation is why interior trim is clip and screw mounted over the structure, and why fixings hide behind the waist rails and seat backs. On a Traveller the timber and aluminium side panels are structural and screw to the wood frame rather than being applied trim.
Conclusion
Learning how to restore a Morris Minor interior comes down to one rule: strip it in the reverse of the order it went together, and never fight the mastic. Waist rails off first, rear seat and boot floor next for access, then trim, dash and headlining. Repair the metal you find, rebuild the seats properly rather than cosmetically, refit the waist rails last, and check every panel gap with the doors shut before you call it finished.
Start with the headlining and carpet if you are working to a smaller budget, label and photograph everything on day one, and check your series and year before ordering colour. Whichever route you take, a labelled, methodical strip-out is what makes the refit fast and the rattles disappear.