
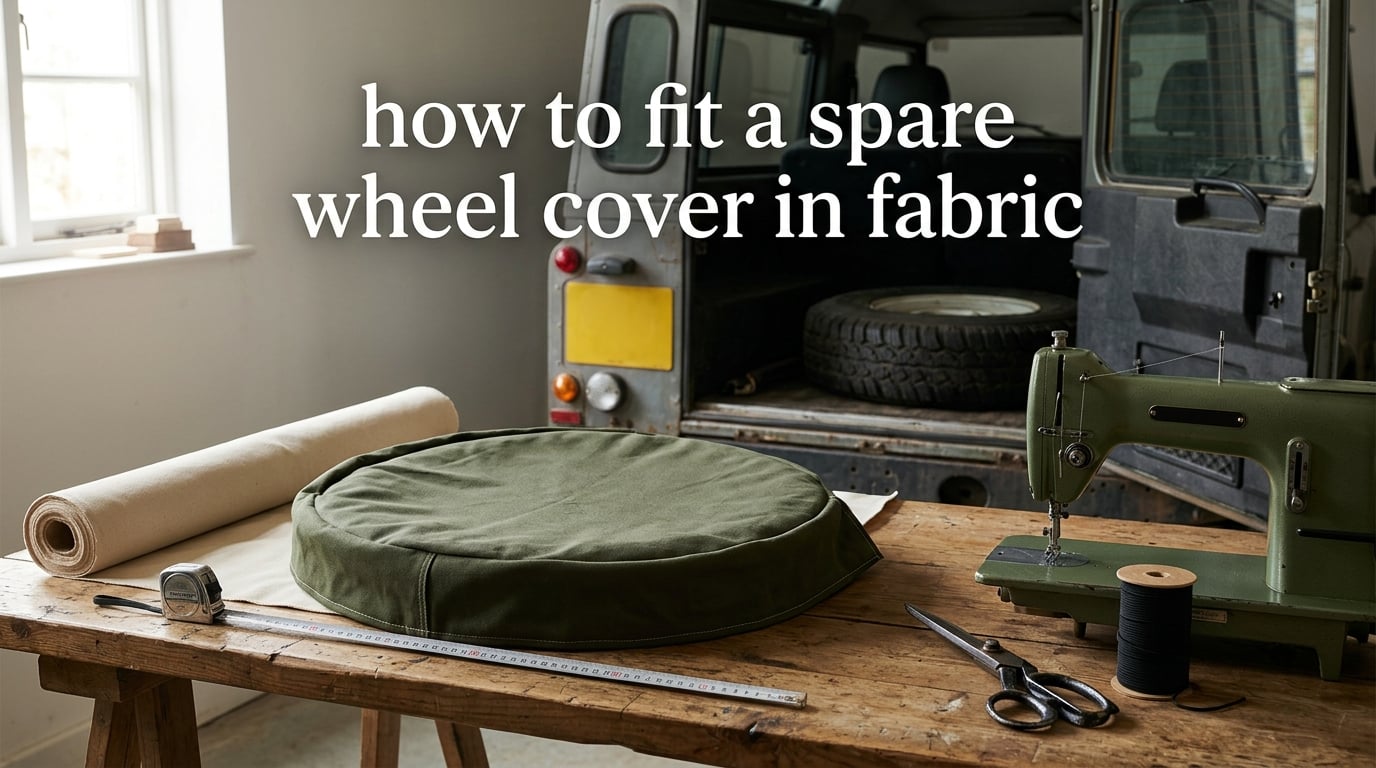
If your spare wheel cover is the wrong size, split at the seam or simply too shabby for a freshly trimmed boot, learning how to fit a spare wheel cover in fabric is the fix. It is a small sewing job: one circular disc, one long side band, and a closure that draws the fabric tight around the tyre.
What makes it tricky is measurement, not sewing. Most covers that do not fit were cut from the rim diameter instead of the overall wheel diameter, which quietly leaves you several centimetres short all the way round. Get the first measurement right and the rest is straightforward.
Over the years we have been asked the same questions from classic car owners, overlanders and caravan owners: how do I work out the cut size from my tyre code, which fabric will not go mouldy over a damp tyre, and how do I stop a cover creasing where the spare sits in the boot. This guide answers all three, and works whether you are making a cover from scratch or adapting one you already own.
A word on what this is not. A cover does not extend the life of a tyre that has already perished, and it is not a legal requirement in most markets. It is, however, the cheapest protection you can put between a spare tyre and a respray.
Table of Contents
- What a spare wheel cover actually does
- Before you start: work out which type of cover you have
- Step 1: measure the wheel correctly
- Step 2: choose the right fabric
- Step 3: cut the fabric
- Step 4: fit the cover to the wheel
- Step 5: fit the cover to the car
- Tools and materials checklist
- Common problems and fixes
- Turn the cover into a wheel-bin storage sleeve
- Classic cars and 4x4s: matching a 14 or 15 inch spare
- When it is better to buy a ready-made cover
- Care, storage and seasonal removal
- Frequently Asked Questions
- What is the best material for a spare tire cover?
- How do I size a spare tire cover?
- How do I make my own spare wheel cover?
- Should you cover your spare tire in the trunk?
- Do tire covers help prevent dry rot?
- Why does my spare tire cover not fit my wheel?
- How do I stop a fabric cover going mouldy?
- Is it illegal not to have a spare tyre in my boot?
- Wrapping up
What a spare wheel cover actually does
A spare wheel cover is a soft sleeve that shields a stored spare tyre from sunlight, dust and moisture. On a car that is used regularly, that is most of the value: ultraviolet light and damp are the two things that age rubber fastest.
Dry rot shows as fine spider-web cracking across the sidewall and tread blocks. A tyre that sits uncovered in a tailgate or an open trailer bed will develop it far quicker than the same tyre stored in a shaded garage, and a dry, crazed tyre is a poor thing to discover at the roadside.
The second job is protecting the car. New tyres carry an anti-scorch wash-off compound on the sidewall that transfers as a grey-brown film. Owners on the Classic Rover forum have described that film marking boot paint and trim badly enough to need a respray, and one owner was explicit that running a boot-mounted spare without a cover is a false economy.
Third, a cover keeps dust, grit and pet hair out of the tread blocks, and stops the wheel bouncing around under a closed boot floor.
Before you start: work out which type of cover you have
Most confusion comes from naming, so start by identifying what is actually in your car. Owners use “spare wheel cover” for four different things.
- Sewn fabric cover — a disc with a side band, closed with elastic, a drawstring or toggles. This is what this guide builds, and it is the only type that can be altered to fit.
- Moulded hard shell — a plastic or composite clamshell, usually part-moulded to one vehicle. Correct by size only; it cannot be adjusted, and a decal is the only personalisation it takes.
- Wheel-bin or tray cover — a flat board or soft panel that covers the spare well itself rather than the tyre. Common on classic saloons and estate cars.
- Trim board or boot floor — a moulded carpeted board fitted over the boot floor with the wheel well cut into it. This is a vehicle-specific part, not a cover, though people search for one when they mean the other.
If your car takes a moulded shell or a trim board, skip ahead to the section on classic cars. For a sewn cover, whether bought in or homemade, carry on to measurement.
Step 1: measure the wheel correctly
Measure the tyre’s overall diameter from the outer face of one sidewall to the outer face of the other, across the tread, and add roughly 5 mm for the bulge of the tread blocks. This single figure drives every cut you make.
You can work it out from the tyre size code printed on the sidewall, which reads width / profile + rim diameter, for example 195/65R16:
- 195 is the section width in millimetres.
- 65 is the aspect ratio — the sidewall height is 65% of the width, so 195 x 0.65 = 127 mm each side.
- R16 is a radial construction on a 16 inch rim, which is 406 mm.
Overall diameter = rim diameter + (2 x section width x profile). For 195/65R16 that is 406 + 254 = 660 mm.
Confirm the calculation with a tape measure rather than trusting the arithmetic alone. Old tyres, retreaded tyres and anything with a heavy shoulder all vary from the code.
Next, measure the tyre width across the sidewalls, because the depth of the side band has to cover the widest point of the wheel. Add 20 mm for seam allowance and gathering.
Finally, calculate the side band. The band wraps the wheel right around at the opening, so its length is the circumference of the wheel at that opening:
Circumference = π x overall diameter. For a 660 mm wheel that is 2073 mm, or 207 cm. Add 10 to 15% for the seam allowance and the gathers pulled up by the elastic or drawstring, which gives roughly 228 to 238 cm. Instructables readers cutting their first cover will recognise this — their worked example used a 215 cm band for a 203 cm requirement.
Measure the band on the finished wheel, not on paper, if you can. Wrap a soft tape around the opening at the height the band will sit and add the same 10 to 15%.
Step 2: choose the right fabric
Choose a fabric that breathes, resists UV and will not scratch paint. Cotton canvas in the 12 to 17 oz range is the safest all-round answer; vinyl is waterproof but traps condensation against the tyre.
- Cotton canvas, 12 to 17 oz — the traditional choice. Breathable, easy to sew, soft against paint, takes a water-repellent finish well. Use 17 oz for off-road and tailgate-mounted spares.
- Polycotton tough canvas — cotton/poly blend, lighter and stronger than pure cotton, dries faster and resists mildew. A good middle choice for daily-driven cars.
- Waxed canvas — heavier, water-repellent straight from the bolt, but stiff to sew and slow to clean.
- Polyenduro or coated polyester — the most durable and colourfast, and it shrugs off scuffs. It is the least breathable of the group.
- Oxford cloth — fine enough for a small 13 or 14 inch spare, but too thin for a full-size 17 inch wheel and not UV-stable for the life of the tyre.
- Vinyl — fully waterproof and wipe-clean, best for a wet climate or a caravan stored outside. Line it with canvas or fit it only over a bone-dry tyre.
Check the weight in ounces per square yard before you buy. Anything under 10 oz is decorative.
On condensation: an unsealed cover over a wet tyre will grow mould within weeks, and the smell will stay in the boot. Breathable fabric lets moisture escape; vinyl does not. Either dry the tyre thoroughly before fitting the cover or choose a breathable cloth.
Step 3: cut the fabric
Cut two pieces: a circular disc for the face of the cover and one long band for the side. The disc diameter is the overall wheel diameter plus 20 to 40 mm so the disc laps over the band seam and encloses the tread bulge.
For the band, use the circumference figure from Step 1 including its allowance. If your closure is a gathered elastic hem, add a further 5 cm so the gathering has something to pull into.
Fold the band in half along its length and mark the centre. That mark is the bottom of the cover and it must sit opposite the closure. Mark the top, then add quarters, so you can check the band has not twisted before you stitch.
Common cut sizes, band length already including the 10 to 15% allowance:
- 155/65R13 — 532 mm overall, 187 cm band
- 165/65R14 — 570 mm overall, 201 cm band
- 165/70R14 — 587 mm overall, 207 cm band
- 175/70R14 — 601 mm overall, 212 cm band
- 185/60R15 — 603 mm overall, 212 cm band
- 195/65R16 — 660 mm overall, 232 cm band
- 215/65R17 — 711 mm overall, 250 cm band
- 245/70R17 — 775 mm overall, 273 cm band
Re-tape two or three of these before cutting fabric. A tape that disagrees with the table by more than about 10 mm usually means the tyre is a different size from what is stamped on it.
Cut the disc by folding the fabric into quarters and cutting the folded edge, which gives you a clean circle without drawing on the full panel. Finish both raw edges with bias binding or a strip of the same fabric turned under twice, because a bound edge will not fray when the cover is pulled on and off.
Step 4: fit the cover to the wheel
Fit the cover by drawing the opening tight around the widest point of the wheel, so it cannot slide off. Pick the closure from the shape of your wheel, not from what is in the sewing box.
Elastic casing is the most common and the quickest to fit on a round wheel. Stitch a single channel around the band edge, thread 8 mm elastic through it with a bodkin, secure the ends with a knot and a box stitch, and the cover pulls itself on. It is ideal for a boot-mounted spare on a standard alloy or steel wheel.
Drawstring channel suits covers that need to come off and go on often, or that stretch across a wheel with a flat face. Stitch a channel wide enough for cord, run a drawcord through it, and finish with a toggle or a knot stop on each end.
Toggle closure gives you adjustable tension, which matters on 4×4 and all-terrain spares with a chunky profile. A plastic or wooden toggle on a cord pulls the fabric into a gather and holds it flat.
Hook-and-loop tabs suit a wheel that needs a wide, flat opening to get past a chunky tread block. Stitch three or four short tabs around the band, keep them clear of the wheel edge, and expect to re-position them a few times as the cover settles.
Whichever closure you use, stitch the band to the disc with a 15 mm seam allowance and a double row of stitching, and do a short bar tack at the closure point. That is the joint that takes the pulling force every time the cover comes off.
Step 5: fit the cover to the car
Seat the spare wheel down on its retainer or chock first, then pull the cover down over it and close the closure. Fitting the cover with the wheel already in place keeps the retainer engaged and stops the wheel rolling while you work.
On a boot-mounted spare, tuck the closure facing inboard so it cannot catch on the closing edge of the boot lid, and make sure the retaining strap or wheel brace still passes over the cover without pinching it.
On a tailgate-mounted spare, leave the cover slightly slack. A tight cover on a tailgate takes the whole load of the wheel every time the gate is slammed, and the seam at the top is where it will fail first.
Under a boot floor or tray, work the cover on before you drop the board back into place, and check that the clearance under the board is at least the cover’s extra thickness. Where the board sits directly on the cover, a soft gathered hem is better than a hard bound edge.
Tools and materials checklist
You need very little. A tape measure, a fabric marker, sharp scissors or a rotary cutter, a sewing machine with a zigzag or overlocker stitch, matching thread and a bodkin are enough for a full-size cover.
- Measuring tape and a straightedge
- Cotton canvas, polycotton tough canvas or your chosen fabric, 1.5 m to 2 m for a full-size wheel
- 8 mm elastic or 6 mm drawcord, plus a toggle
- Bias binding or folded fabric strips for the raw edges
- Needles, pins, a bodkin and a seam ripper
- Water-repellent spray for untreated canvas
If you have no machine, a hand speedy stitcher with heavy thread will get a serviceable cover together, though expect it to be slower than a stitched seam.
Common problems and fixes
Almost every fitting problem traces back to one of four causes: the wrong measurement, the wrong closure, a damp tyre, or a cover with no allowance for seam and gathering.
- Cover is too tight to get over the tread. The disc was cut to rim diameter rather than overall diameter. Add 20 to 40 mm to the disc, and check you allowed 10 to 15% on the band.
- Cover slips off in transit. The elastic is too weak or the closure is on the wrong side. Move the closure to the inboard face, or take a 20 mm tuck in the band seam and re-stitch the hem.
- Cover creases across the face. The disc is too large for the band. Bring the disc back to the band circumference rather than adding a separate panel, and press the disc flat after sewing.
- Mould and musty smell. The cover went on over a damp tyre, or it is vinyl with no breathing layer. Dry the tyre fully, wash the cover, and re-fit it only to a dry wheel.
- Seam fraying or splitting. A single row of stitching with no allowance at the closure. Reinforce with a second seam line and a bar tack across the joint.
- Marking on boot paint or trim. Usually the tyre’s wash-off residue transferring through a torn or missing cover, not the fabric itself. Replace the cover rather than scrubbing the paint, and fit a new one over a cleaned, dry tyre.
- Cover crushed on the boot floor. Move the spare forward so the load rests on the tyre rather than the cover, or use a wheel-bin cover with a pocket instead of a fabric sleeve.
Turn the cover into a wheel-bin storage sleeve
Add a pocket to the disc panel and the cover does a second job. Straps, the wheel brace, a jack, wheel trim tools and a small torch all fit in a patch pocket on the inside face, and the finished cover can still double as the wheel-bin cover for a car that has an open spare well.
Sew the pocket to the disc before you attach the band, keep it 30 mm clear of the band seam so the tension does not pull on the pocket corners, and round the corners to stop the points digging in when the cover is pulled on.
Classic cars and 4x4s: matching a 14 or 15 inch spare
Classic cars are the hardest to cover, because the spares are small and the wheel diameters are unusual. The standard 32 inch 4×4 cover is generous around a 15 inch wheel but has far too much fabric to gather cleanly.
Two adaptations work. The first is a gathered elastic hem: because the closure pulls the surplus into a hem, up to about 15% extra circumference is absorbed neatly. Beyond that, the gathers get lumpy and the face of the cover creases.
The second is to take the cover in. Unpick the side seam, take in 20 to 40 mm evenly around the band, and either re-stitch it or add a triangular gusset at each side so the band stays symmetrical. Adding a gusset is tidier than a plain seam take-in and keeps the disc flat.
Owners on classic forums also point out that trailer and caravan accessory suppliers stock covers in more rim diameters than car accessory shops do, which makes them the quickest source when a car-specific size is not made.
When it is better to buy a ready-made cover
Buy a ready-made cover when you need the wheel covered this weekend, when the wheel is an unusual size nobody makes for, or when the spare lives in an open trailer bed where a heavy-duty vinyl shell will outlast any sewn fabric.
A custom-fit canvas cover is a middle path worth considering if you want the fabric look and the exact sizing without cutting it yourself. Supply the tyre size code or the measured overall diameter and the band circumference, and the maker sizes to fit.
Be honest about what you are buying. Covers are specified by rim diameter, but the number that matters is the overall wheel diameter, so a cover listed for a 16 inch rim can be right for one tyre and tight on another.
Care, storage and seasonal removal
Take the cover off at least once a year, wash the canvas in cool water with a mild detergent, and let it dry fully in the shade. Dry cleaning and tumble drying will shrink a cotton canvas and shrink it unevenly.
Re-apply a water-repellent spray every second or third year, or whenever water stops beading on the surface. Waxed canvas does not need this, but it does need re-waxing once the nap has worn through.
If the car stands for months, take the spare out, check the date stamp on the sidewall and check the pressure, then refit the cover to a clean, dry tyre. Never store a covered tyre that has been washed and not dried — that is the one combination that reliably produces mould.
Frequently Asked Questions
What is the best material for a spare tire cover?
Heavy cotton canvas or polycotton tough canvas in the 12 to 17 oz range is the best all-round material. It is breathable, so it will not trap condensation and grow mould against a damp tyre, it is soft enough not to scratch paint or trim, and it takes a water-repellent finish. Use vinyl only if you need a fully waterproof surface and you can guarantee the tyre is dry before the cover goes on.
How do I size a spare tire cover?
Measure the overall wheel diameter from sidewall to sidewall across the tread and add about 5 mm for the tread bulge. The side band is a circle, so its length is the circumference of that opening: circumference = pi x overall diameter. Add 10 to 15% for the seam allowance and for the gathers pulled up by the elastic or drawstring. You can check the figure against the tyre size code, where overall diameter = rim diameter + twice the section width times the aspect ratio.
How do I make my own spare wheel cover?
Cut a circular disc at the overall wheel diameter plus 20 to 40 mm, and one long side band at the wheel circumference plus 10 to 15%. Stitch the band to the disc with a 15 mm seam allowance and a double row of stitching, bind or turn under both raw edges, then close the opening of the band with an elastic casing, a drawstring channel, toggles or hook-and-loop tabs. Fit the cover to the wheel with the closure facing inboard.
Should you cover your spare tire in the trunk?
It is worth doing, even though it is not a legal requirement in most markets. Covering the spare shields it from ultraviolet light and dust, which are the two things that age rubber fastest and cause dry rot cracking on the sidewall. A cover also stops the tyre’s wash-off anti-scorch residue transferring onto boot paint and trim, and a Classic Rover forum owner described that marking badly enough to need a respray.
Do tire covers help prevent dry rot?
They slow it down rather than stopping it. Dry rot is caused by ultraviolet light, heat and moisture, and a cover fitted over a clean, dry tyre in a shaded boot removes most of the light and most of the damp. It cannot protect a tyre that has already perished, so check the date stamp and the sidewalls for cracking at least once a year even with a cover fitted.
Why does my spare tire cover not fit my wheel?
Almost always one of three reasons. The disc was cut to rim diameter rather than overall wheel diameter, which leaves it several centimetres short all the way round. The band was cut at the raw circumference with no allowance, so the seam and the gathers have nowhere to go. Or the closure is on the wrong side and the cover is being pulled over the widest part of the tread instead of down onto the sidewall.
How do I stop a fabric cover going mouldy?
Never fit a cover over a damp tyre. Dry the wheel fully, wash the cover in cool water, and let both dry completely in the shade before the cover goes back on. Choose a breathable fabric such as cotton canvas or polycotton rather than vinyl, because vinyl seals moisture against the sidewall. If the cover has already gone mouldy, wash it with a mild detergent and dry it in the sun before refitting.
Is it illegal not to have a spare tyre in my boot?
In the UK and most European markets there is no general legal requirement to carry a spare wheel, and a cover is never a legal requirement anywhere. A usable spare and a wheel-changing kit are simply practical insurance, and many modern vehicles are supplied with a repair kit instead. If your car came with a boot-mounted spare, keep it covered, inflated and serviceable so it is there when you need it.
Wrapping up
To fit a spare wheel cover in fabric, the whole job rests on one measurement and one allowance. Get the overall wheel diameter right, add 10 to 15% to the circumference for the seam and the gathers, and the rest is cutting, stitching and choosing a closure.
Start by measuring your actual tyre and checking the figure against the cut list in Step 3. If it matches, cut a disc and a band this weekend; if it does not, you now know exactly how much fabric your wheel needs.