
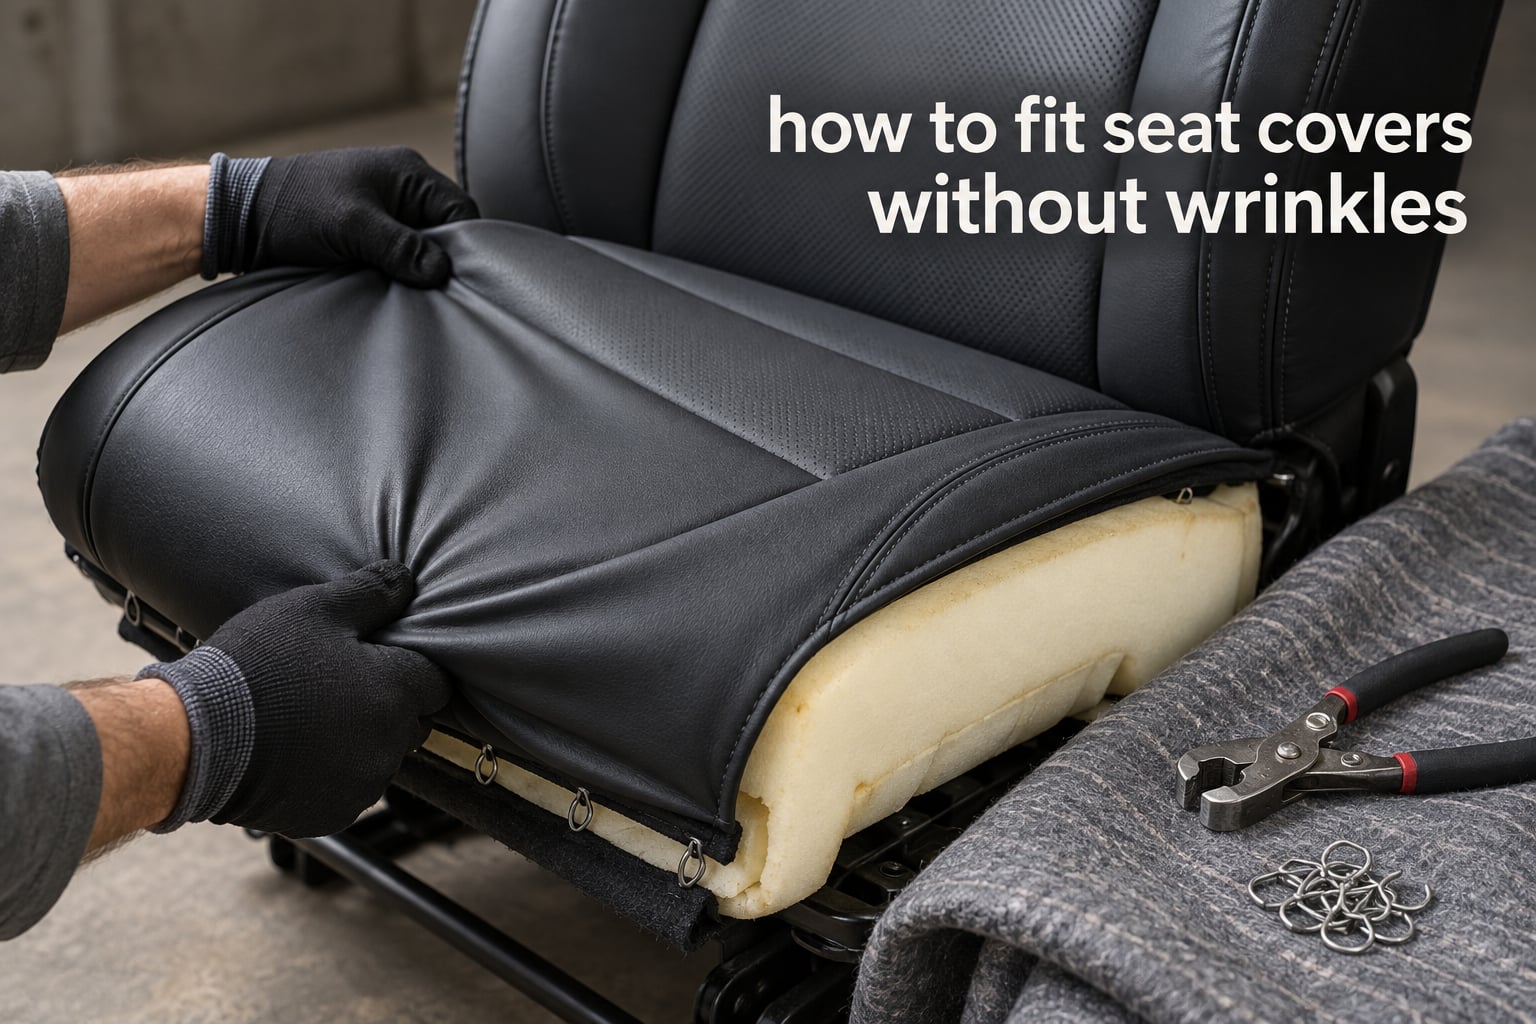
Seat covers wrinkle for four reasons and only four: tension, foam, material memory, and mis-centring. Once you know which one you are fighting, the fix takes minutes instead of a whole weekend. This guide is what auto upholstery forums have been telling each other for twenty years, written down in order.
I have pulled apart enough half-finished retrim jobs to know the pattern. The same covers, the same foam, two different installers, and one looks factory while the other looks like it was stapled on in the dark. The difference was never the product. Professionals say it plainly: the outcome of your seat covers is all in the installation.
If you are searching for how to fit seat covers without wrinkles, the good news is that wrinkling is a solvable problem, not a material defect. Almost every wrinkled cover I have seen had a cause that was diagnosable in under five minutes once you knew what to look at.
Table of Contents
- Tools and Materials You Actually Need
- Why Seat Covers Wrinkle: The Four Causes
- How to Fit Seat Covers Without Wrinkles, Step by Step
- Removing Wrinkles After the Covers Are Already On
- Wrinkle Troubleshooting: Location, Cause and Fix
- How to Fit Seat Covers by Material
- Getting the Cover to Slide On Instead of Fighting It
- Common Mistakes That Create Permanent Wrinkles
- Heat Safety: Why Experienced Installers Avoid Heat Guns
- The 24-72 Hour Settle
- How Long It Takes and When to Call a Shop
- Frequently Asked Questions
- How do I unwrinkle seat covers that are already installed?
- How do I make my seat covers fit better?
- How to properly fit car seat covers step by step?
- How do I tighten up seat covers?
- Are seat covers hard to install?
- Can I install seat covers with side airbags and seat heaters?
- Do new seat covers need steaming before installation?
- Why won’t my seat cover fit tight even with new covers?
- How long do faux leather seat covers last?
- Wrinkle-Free Seat Covers: What to Remember
Tools and Materials You Actually Need
You do not need an entire workshop. You need about six things, and four of them are cheap. The single most common complaint from first-time installers is cheap hog ring pliers, and that complaint is completely justified.
| Tool or material | What it does | Budget substitute |
|---|---|---|
| Hog ring pliers | Cinches closed-loop hog rings to lock the cover to the seat frame and listing wire | None worth using. Cheap pliers slip and round the ring jaws, which is where most frustration comes from |
| Hog rings | The fastener that holds your tension permanently | Short twisted wire loops, which give you more length to grab when cinching foam down |
| Compound side cutters | Snips the ring tails flush without leaving a spike near your thigh | Standard side cutters, but expect a rougher finish |
| Upholstery steamer | Relaxes vinyl, leather and foam fibres so the cover pulls flatter | A hot towel and a flat iron, or a hair dryer on low for small areas |
| Silicone spray or dressmaking powder | Gives the cover a grip on the foam so it stops sliding off mid-install | A dry-cleaner plastic bag slipped over the foam |
| Masking tape and a permanent marker | Marks the centre line on both the seat and the cover so pleats line up | Masking tape alone, or a pencil on cloth |
| Putty knife | Releases the headrests from their posts | A thin hacksaw blade worked between the post and the headrest |
| Flat-blade screwdriver or body trim tool | Unclips plastic seat-back trim panels before you touch the frame | None in practice. Use the tool that fits the clip |
Buy roughly twice the hog rings that come in the pack. Beginners use them, misfire them and lose them into the seat foam, and running out mid-install is a genuinely frustrating way to lose a Saturday.
Why Seat Covers Wrinkle: The Four Causes
Work through these in order. Diagnosing first is the difference between a twenty-minute fix and a full strip-down.
1. Tension
This is by far the most common cause. The cover has more material than the foam beneath it, and nobody removed the excess. Every slack fold you can see is a length of material that should have been pulled tight somewhere and locked in place. The pro rule that circulates in every upholstery shop is short: if you see wrinkles, pull them out and add a hog ring, or use an upholstery steamer.
2. Foam
Old, compressed, dried-out seat foam means a new cover can never pull taut no matter how hard you tug. This cause is usually mistaken for a tension problem, and no amount of cinching will fix it. Seat springs digging into new foam also read as wrinkles, as does crumbled foam under perforated inserts where air has turned the cushion to dust.
3. Material memory
Shipping creases in new vinyl and pleather are real, and the fibres have already taken a set. Installers describe laying new covers in summer sun or near a warm wood stove before fitting, because warmth makes the material noticeably easier to work. Memory is the one cause where waiting helps, and the only one where a little patience beats a tool.
4. Mis-centring
As you work down one side, the cover drifts. By the time you reach the seat bottom the cover is off-centre and the pleats no longer line up with the seat back, which reads as a wrinkle but is really a centring error. This is the cheapest cause to fix and the easiest to create, and masking tape marks on the seat and the cover solve it outright.
How to Fit Seat Covers Without Wrinkles, Step by Step
This is the sequence that works. Do one seat at a time, and photograph each stage on your phone so the second seat goes faster.
- Clear the workspace. Empty the cabin and lay a blanket on the floor. You will drop rings, screws and clips.
- Check compatibility first. Confirm side airbag seam placement, seat heater mat clearance and seat belt slot positions before the cover is on.
- Remove the headrests. Work a putty knife between the post and the headrest, or use a thin hacksaw blade on stuck posts.
- Release the seat-back trim. Unclip the plastic covers on the seat-back panel so the cover can tuck underneath them.
- Mark the centre line. Put a strip of tape down the middle of the seat back and the same on the cover. Align the two before you drape anything.
- Warm the cover if it is new. Lay vinyl or pleather in the sun for an hour or two, or warm it gently indoors, so the fibres relax before you stretch them.
- Drape over the top. Slide the cover over the seat back top, matching the centre marks, with the material hanging evenly on both sides.
- Work down both sides. Tuck the cover into the seam where the seat back meets the seat bottom, pushing the foam into the crease as you go.
- Cinch to the listing edge. Pull the bottom listing of the cover down to the frame and thread it onto the listing wire or fold it under the foam edge.
- Tension with hog rings. Pull the cover taut in small increments, ring at a time, working from the centre outwards. Never pull one side hard first.
- Trim and cut openings. Cut headrest and seat belt holes slightly smaller than the post or belt, because the material stretches and will not recover from an oversized cut.
- Reinstall trim and headrests. Snap the back panels on and push the headrests in, then refit any seat belt shrouds you unclipped.
Tensioning with hog rings properly
Work from the centre mark outwards in roughly 5 cm increments, and re-pull each ring after the next one goes on. Material stretches as you tension, so an early ring set too loose will be the slack you find at the end. Cut the tails with compound side cutters and bend any sharp stub inward.
Some installers prefer custom wire loops or heavy zip ties for the first fit, then convert to hog rings once everything is positioned. That approach lets you move a connection repeatedly without fighting a closed ring, and it is a reasonable move on your first seat.
Removing Wrinkles After the Covers Are Already On
Order these by intensity. Start at the gentlest and stop as soon as the wrinkle releases, because heat plus tension is the combination that works and heat alone just damages the material.
- Re-tension first. Many wrinkles are just slack. Add or loosen a ring and pull the slack to a new anchor point.
- Steam from a distance. Pass the steamer across the wrinkle without letting the nozzle touch the vinyl, then work the material flat with a flat tool while it is warm.
- Steam the foam underneath. A compressed foam insert expands back toward its normal shape when steam reaches it. One veteran installer describes watching the crease in the foam expand and disappear, pretty much just like a sponge.
- Use a hot damp towel and a flat iron for stubborn pucker on vinyl, pressing through the wet cloth so moisture and heat reach the fibres together.
- Use a hair dryer on low for small areas only, keeping it moving and never resting on one spot.
- Re-ring the affected area. The cover will relax slightly as it cools, so pull it taut again while it is still warm.
- Let it settle for 24 to 72 hours. Most residual softening happens over the next few hot days in the car.
A useful companion reference is the widely shared process video on heating and stretching new vinyl upholstery to remove wrinkles. The technique in it matches the steamer step above.
Wrinkle Troubleshooting: Location, Cause and Fix
Wrinkle location tells you the cause before you touch a tool. Use this table as a diagnostic.
| Where the wrinkle is | What actually caused it | How to fix it |
|---|---|---|
| Centre of the seat back | Loose tension across the middle panel | Add a hog ring on the centre line and pull outward to even neighbours |
| Lower back, near the seat bottom crease | Cover not tucked into the seat-back seam | Unclip, tuck the material into the crease, re-clip and then tension |
| On the bolsters, both sides | Compressed foam under the cover | Steam the foam through the cover, or build the bolster out with added foam |
| Along the listing edge | Listing not threaded onto the frame wire | Re-thread the listing and re-ring every third or fourth ring |
| Diagonal creases running to the seat belt slot | Cover drifted off-centre during fitting | Pull the listing back to the centre mark, then re-centre and re-ring |
| Top seam of the seat back | The front and rear panels meet without support | Bridge the seam with a thin foam strip, then re-tension the top edge |
| Lumps that follow the seat spring pattern | Springs pushing into the new foam | Compress the foam locally or add a thin layer over the spring line |
| Hollow feel under a perforated insert | Foam crumbled to dust beneath perforated covers | Fill with wool and rebuild the cushion height with new foam |
| Creases that only appear in cold weather | Material memory, not tension | Warm the cover and re-tension; expect some set to remain |
How to Fit Seat Covers by Material
Different materials respond to heat and tension in completely different ways. Getting this wrong is what makes a good cover look bad.
Vinyl
Vinyl is the most forgiving material under heat. Warm it with a steamer or low dryer setting and it stretches further than anything else you will fit, which makes it the easiest material to tension. It also holds tension well once ringed. Vinyl is where a hair dryer is genuinely useful, and where a heat gun is genuinely dangerous.
Leather
Real leather is thinner and less forgiving under heat than most people expect. Warm it only slightly and use steam rather than dry heat, because leather dries out and cracks long before it relaxes. Leather will not stretch much, so slack has to come from cut and pattern, not from pulling harder. Expect it to settle further over a couple of days than vinyl does.
Faux leather and pleather
Pleather behaves like vinyl on the surface and like leather underneath. It takes warmth well for short bursts but its backing is sensitive to sustained dry heat, which is where scorching shows up first. Faux leather also shows stretch marks as pale lines that do not fade, so tension it in more, smaller increments than you think you need.
Cloth
Cloth gets no direct heat at all. Steam only, and never a flat iron directly on the face of the material. Cloth stretches easily, so it often fits tighter than vinyl and needs less cinching, but it also relaxes more over time in heat. A cloth cover that looks slack on a cold morning may look correct on a hot afternoon.
Neoprene
Neoprene is thick, grippy and stubborn. It is a poor candidate for hog ring tensioning because the material grips the ring jaws and frays. Neoprene suits seats that come out of the car, or covers that rely on elastic straps and hook-and-loop rather than rings. If you are working on a motorcycle or a tight marine seat, treat it as a strap job rather than a ring job.
Perforated inserts
Perforated leather and cloth panels hide rather than eliminate problems, and the foam beneath them is usually the weakest part of the seat. Air circulation dries the foam to dust over the years, so a new perforated cover can sit hollow on an old cushion. This is one of the cases where rebuilding the foam is the right call rather than tensioning harder.
Getting the Cover to Slide On Instead of Fighting It
Most of the frustration in a first install is not tensioning, it is the cover sliding off the foam halfway through. Solve this and the rest of the job gets easier.
- Spray the foam lightly with silicone spray or dressmaking powder before draping. The cover grips instead of sliding off the bolster.
- Slip a dry-cleaner plastic bag over the foam. Installers report it helps the cover slide into position and it can be left in place with no downside.
- Work in a warm space. Warm conditions soften the material and reduce how hard you have to pull.
- Take the seat out of the car if the shape fights you. A bench seat or a seat with a hard plastic shroud is far easier on a bench outdoors.
- Do not take a break mid-seat. Keep going between stripping a seat and reassembling it so you do not lose the order of the steps.
Common Mistakes That Create Permanent Wrinkles
- Cutting holes too big. Headrest and belt openings should always be cut undersized, because the material stretches outward and never returns. This is the most common irreversible error.
- Tensioning one side before the other. The cover rotates off-centre and the pleats never recover.
- Ringing everything at once. The first rings set loose get pulled slack by the later ones. Re-pull earlier rings last.
- Stapling over the listing wire. You lock slack into the seam permanently. Anchor to the frame or the listing, never across it.
- Fighting tight foam instead of fixing it. If the cushion will not compress under the ring, the foam needs attention, not more force.
- Not buying spare rings. Running out mid-seat tempts you to skip tensioning on the final stretch.
- Going heat-gun close to foam or vinyl. You can scorch a cover and melt foam in the same ten seconds.
Heat Safety: Why Experienced Installers Avoid Heat Guns
The warning you will see repeated across the enthusiast forums is blunt: do not use a heat gun. One poster on board.moparts.org put it as a hard rule and offered a hair dryer as the acceptable alternative, and that advice has stood for years.
The reason is physical. An open-flame heat gun concentrates more heat into a few square centimetres than vinyl, leather or seat foam can tolerate. Foam is the real hazard. It can melt and give off fumes long before the cover shows a visible scorch, and melted foam is a repair job rather than a clean-up job.
What to use instead: an upholstery steamer for the main work, a flat iron through a damp cloth for stubborn pucker, and a hair dryer on its lowest setting for small areas while you keep it moving. If you do use any heat tool, keep it moving, keep distance, and never leave it resting on a seat.
The 24-72 Hour Settle
New covers are not finished when the last ring goes on. Leather and pleather relax further as they warm, foam settles into its first compression, and cloth relaxes in a hot car.
Give it a week. Park in the sun if you can, take a longer drive than usual, and then check the centre line and the listing edge again. Most covers need one small re-tension in that first week and then hold their shape for years. A cover that looks perfect on a cold driveway will often look better still after a hot weekend.
How Long It Takes and When to Call a Shop
Reported job times vary enormously depending on what you are starting from, so it helps to know which job you actually have.
| Job type | Realistic time | Skill level | Hire it out when |
|---|---|---|---|
| Front seat pair, cover only, foam reused and sound | Around 1.5 hours | Careful beginner | Never. This is a good first job |
| One stripped seat, seat back and bottom | 2 to 3 hours | Confident beginner | The listing wire is missing or the frame is rusted |
| Full seat remove, re-cover, refit cycle | Up to 10 hours | Intermediate | You need the car back in service the same day |
| Full interior retrim with rebuilt foam | Two to three days | Intermediate to advanced | Almost always. This is a shop job |
| Motorcycle or other small tight cover | Under an hour | Careful beginner | The cover is stretch-limited and will not reach |
Call a shop when the foam is crumbling, when the frame is rusted at the anchor points, when the seat contains a side airbag and you are not confident about the seam, or when the cover keeps coming loose no matter how many rings you add. Be honest with yourself about the last one. Most people will not notice what an experienced eye keeps catching, and a professional trim is cheaper than a second attempt you have to live with.
Frequently Asked Questions
How do I unwrinkle seat covers that are already installed?
Start with the least aggressive fix. Re-tension the cover by loosening an existing hog ring and pulling the slack to a new anchor point, because many wrinkles are simply loose. If that is not enough, pass an upholstery steamer across the area without touching the material, then work it flat with a flat tool while it is warm. For stubborn pucker on vinyl, press a hot damp towel and a flat iron through the cloth. Pull the cover taut again while it is still warm, then let it settle for 24 to 72 hours.
How do I make my seat covers fit better?
Fit improves when you fix the cause rather than pulling harder. Check the foam first, because compressed or crumbled foam stops a cover ever pulling taut no matter how much tension you add. Then check your centring: mark the centre of the seat back and the cover with tape and a permanent marker before you drape anything. Work from that mark outward in small increments instead of tensioning one side at a time. Add grip with silicone spray or a dry-cleaner bag over the foam so the cover stops sliding off while you work.
How to properly fit car seat covers step by step?
Remove the headrests and release the seat-back trim clips, then mark the centre line on both the seat and the cover. Drape the cover over the top of the seat back, align the centre marks, and work down both sides tucking the material into the seat-back crease. Pull the bottom listing down to the frame, thread it onto the listing wire, and tension with hog rings working from the centre outward. Cut headrest and belt openings undersized, then refit the trim and headrests. Expect roughly 1.5 hours for a pair of front seats on sound foam.
How do I tighten up seat covers?
Tighten by adding tension points rather than by pulling one section harder. Work from the centre mark outwards in about 5 cm increments, pulling a small amount at each ring, and re-pull earlier rings after later ones go on because material stretches as you tension. Where the foam will not compress under the ring, more force will not help: steam the foam to let it expand, or add foam. Cut the ring tails flush with compound side cutters and bend any sharp stub inward so nothing sits against the occupant.
Are seat covers hard to install?
A cover-only swap on two front seats with sound foam takes about an hour and a half and is a reasonable first job. Expect two to three hours for a single stripped seat back and bottom, and a full remove, re-cover and refit cycle can run to ten hours. The difficult areas are consistently the headrests, the seat bottom where the springs and foam must be compressed to reach a ring, the top of the seat back, and threading the seams through to the listing wire. A full retrim with rebuilt foam is a shop job.
Can I install seat covers with side airbags and seat heaters?
Yes, provided the cover was made for it. Look for a cover with a side airbag deployment seam along the outer bolster, which is a designed tear line that lets the bag deploy without shredding the cover. Never ring, staple or tack across that seam. Heated seats need the cover’s heater mat clearance confirmed, and perforated inserts or thick neoprene can block or over-heat the mat. If you are unsure where the seam sits on your car, have a shop check it before you pull the first ring.
Do new seat covers need steaming before installation?
Usually, if the material is vinyl or pleather. New covers arrive with shipping creases and the fibres have taken a set, so warming them relaxes the memory and they pull flatter. Lay the cover in summer sun for an hour or two, or warm it gently indoors near a warm wood stove, then fit it while it is still pliable. Real leather wants only light warmth and steam, and cloth should get no direct heat at all. Neoprene does not benefit much and is better fitted cold with straps rather than rings.
Why won’t my seat cover fit tight even with new covers?
The usual reason is the foam underneath, not the cover. Old seat foam that has lost its shape cannot compress under a hog ring, so the cover is asked to span a cushion that will not give, and the excess material has nowhere to go but into folds. Steam reaches the foam and it expands back toward its normal shape, which is why a compressed insert recovers rather than being replaced. Also check that the cover is centred, that the listing is threaded onto the frame, and that you are not tensioning one side before the other.
How long do faux leather seat covers last?
Longevity depends far more on fit and material quality than on the cover itself. A pleather cover that is properly tensioned and allowed to settle is far less likely to crack along a wrinkle line, because the crease concentrates stress every time someone sits down. Warm it only in short bursts, since its backing shows scorching before the surface does, and tension it in more, smaller increments than vinyl because stretch marks appear as pale lines that do not fade. Clean it with a damp cloth rather than solvent, and keep it out of prolonged direct sun when parked.
Wrinkle-Free Seat Covers: What to Remember
Learning how to fit seat covers without wrinkles comes down to one habit: diagnose the cause, then pull out the slack and lock it in. Tension, foam, material memory, mis-centring. Work through them in that order and the problem solves itself.
Tension from the centre outwards, honest foam rather than forced foam, gentle heat instead of a heat gun, and a re-check a few days later. Get those four right in 2026 and the cover will still look factory-fitted years from now.