
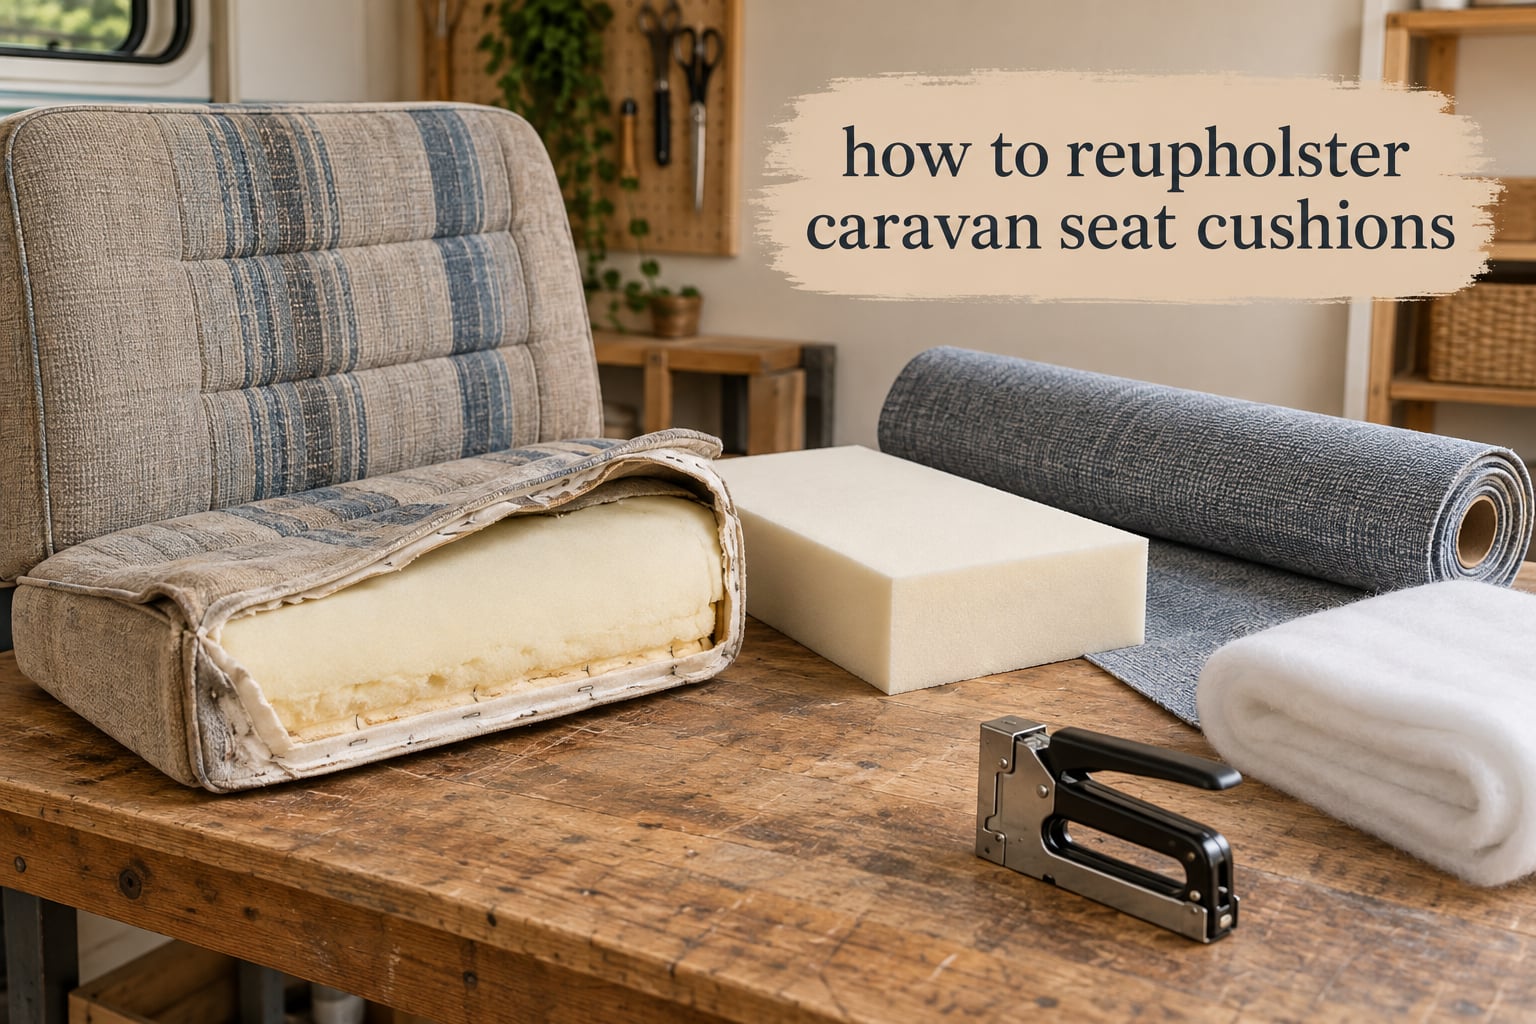
Caravan seat cushions take a beating that furniture at home never sees. They sit in a metal box absorbing summer sun through the roof window, winter condensation, spilled coffee, sand off a beach towel and a decade of British drizzle. After a few seasons the fabric fades, the piping splits and the foam underneath turns to dust, yet the seat frame itself is usually still perfectly good. That is why reupholstering caravan seat cushions has become the most popular interior job on the UK static caravan and motorhome scene: you keep the frame, the layout and the under-seat storage, and you replace only the soft parts.
This guide covers the whole job, from assessing whether the foam is salvageable to re-fitting the finished cushion. It works for static caravans, tourers, campervans and motorhomes, because the cushion itself does not care what is bolted around it. The same nine steps apply whether you own one tired dinette bench or a lounge with twelve cushions that all need attention at once.
We have built it around the three methods that actually work in practice: sewing a proper removable cover, stapling and gluing fabric straight onto the foam, and building a plywood-backed shell. The second and third need no sewing at all, which is why they dominate UK caravan forums. You can also skip ahead to the cost section if the number matters more than the method.
Table of Contents
- How to Reupholster Caravan Seat Cushions: The Short Answer
- What You’ll Need: Tools and Materials
- Choosing Your Method: Sew, Staple-and-Glue or Plywood Backing
- Step-by-Step: How to Reupholster Caravan Seat Cushions
- Step 1: Assess the cushion and decide reuse or replacement
- Step 2: Photograph and measure the cushion before removal
- Step 3: Take the cushion out of the seat frame
- Step 4: Remove the old cover and any perished wadding
- Step 5: Wash and dry the foam, then re-wad it
- Step 6: Cut the fabric with generous extra
- Step 7: Fit the cover by your chosen method
- Step 8: Add piping and any tufting
- Step 9: Refit the cushion and check tension
- How Much Fabric Do You Need?
- Choosing the Right Fabric for Caravan Seats
- Choosing the Right Foam for Caravan Cushions
- Damp, Mice Damage and Perished Foam: What to Do First
- Piping, Wadding and Button Tufting
- Working Around Under-Seat Storage, Seat Belts and Dinettes
- Common Mistakes and How to Avoid Them
- How Much Does It Cost? DIY vs Professional
- Caring for and Storing Your Recovered Cushions
- Frequently Asked Questions
- How much does it cost to reupholster caravan seats?
- How much does it cost to reupholster RV cushions?
- What fabric is best for covering caravan seats?
- How to reupholster caravan seats?
- How to reupholster a camper cushion?
- How can I cover foam cushions with fabric?
- Do caravan cushions need to be fire retardant?
- What foam thickness is best for caravan cushions?
- Conclusion: A Weekend That Fixes a Whole Caravan
How to Reupholster Caravan Seat Cushions: The Short Answer
To reupholster caravan seat cushions, remove each cushion from the seat frame, strip the old cover off, and measure the foam. Check the foam still holds its shape. Then either sew a new cover to size, or pull new fabric over the foam and staple or glue it to a plywood backing. A 150cm-wide fabric roll covers a standard seat cushion in a single drop. Expect half a day per seat once you have a system, and practise on a spare cushion before starting.
What You’ll Need: Tools and Materials
The tool list is shorter than most people expect. Most of the job needs a staple gun, some scissors and a way to pull fabric tight.
Tools
- Staple gun, upholstery grade, with around 500 staples per cushion
- Heavy-duty scissors or a craft knife for cutting foam and fabric
- Long upholstery needle and polyester thread if you are sewing covers
- Tape measure and a steel rule for straight edges
- Cordless drill for removing seat boards and screws
- Sanding block or knife for trimming hard foam edges
- Spray adhesive rated for upholstery, plus a contact cement alternative
- Masking tape, chalk or a fabric marker for marking cut lines
Materials
- Upholstery fabric, ideally on a 150cm-wide roll
- Polyester wadding or fibre wrap if you are recovering existing foam
- Plywood, 6mm to 9mm, cut to the cushion outline for the no-sew shell method
- Calico or barrier cloth to stop cover fabric abrading the foam
- Spray glue and, optionally, double-sided tape
- New cushion zip and slider if you are rebuilding removable covers
- Self-adhesive piping cord for edging, sold by the metre
- Foam, cut to size, only if the existing foam has perished
Tip: buy the fabric first and measure everything else off the roll. A wide roll removes the whole headache of joining two narrow widths down a seat cushion seam.
Choosing Your Method: Sew, Staple-and-Glue or Plywood Backing
There are three viable routes, and the right one depends less on skill than on how the cushion is used. A fixed lounge sofa can take the fastest option; a make-up bed cushion that gets folded and lifted every night needs something sturdier.
Sew a new cover — the most durable and the most versatile. The cushion keeps a removable zip cover you can wash, and you can swap fabric later without redoing the foam. It is also the only method that suits cushions which double as bed cushions, because a sewn cover will not tear when folded.
Staple and glue directly to the foam — the compromise. No plywood, no sewing, but you need a strong staple pattern and good tension. This is the method most people end up using for dinette and fixed-seat bases where nothing needs to be folded.
Plywood-backed shell — the most hard-wearing no-sew option. Fabric is pulled tight across the foam and stapled to a plywood panel that forms a firm back, which also protects the foam from scuffing inside a storage box. It adds a layer you must be aware of where lids hinge.
Forum experience suggests glue on its own is the weakest of the three. Adhesive gives no tension, and a cover with no tension looks slack however good the glue is. Where glue is used, it is better as a holding aid under staples rather than as the primary fix.
Step-by-Step: How to Reupholster Caravan Seat Cushions
Work one cushion at a time and label the back of each base as you go. Seat, dinette backrest and bolster shapes are easy to mix up once they are all off at once.
Step 1: Assess the cushion and decide reuse or replacement
Squeeze the foam. If it springs back within a few seconds and shows no crumbling when you cut a small offcut, reuse it. If it stays compressed, tears easily or crumbles into granules, replace it entirely. A dead foam wrapped in new fabric still feels dead, and no amount of cover will hide it.
Step 2: Photograph and measure the cushion before removal
Take a photo of the cushion in place, including how the seam or piping sits against the frame. Then measure length, width and thickness, and note whether the cushion is a single foam block or a boxed edge with a separate base. Write the numbers on masking tape stuck to the foam, not on paper that will go missing.
Step 3: Take the cushion out of the seat frame
Remove screws or clips holding the seat board or retaining ledge, then lift the cushion out. Dinette backrests often pull straight out once the retaining strip is off. Work carefully around seat-belt fixings, which are bolted through the frame and must never be unbolted.
Step 4: Remove the old cover and any perished wadding
Unzip, unhook or unpick the existing cover. Pull off foam and wadding, and strip the old calico or stockinette layer. Scrape away hardened foam adhesive with a blunt knife rather than cutting the foam, and vacuum the cavity before anything new goes in. If the old cover is still intact, many people simply unpick one seam and reuse the old cover as a pattern.
Step 5: Wash and dry the foam, then re-wad it
Foam that has been in service for years holds years of dust and odour. Wash the foam in lukewarm water with a small amount of non-bio detergent, rinse fully and dry it completely, ideally outdoors in the shade. Only once it is bone dry do you wrap it in new polyester wadding, which gives the finished cover a softer edge than bare foam ever will.
Step 6: Cut the fabric with generous extra
Lay the cushion on the fabric and cut with at least 10cm spare on every side for a sewn cover, or 15cm to 20cm all round for a stapled or plywood-backed wrap. Extra length is what lets you pull the material tight without a crease. Many DIYers cut generously then trim back once the cover is on.
Step 7: Fit the cover by your chosen method
For a sewn cover, wrap the foam, pin the seam with the excess fabric, and stitch it with a long upholstery needle and doubled thread. Work from the centre outwards and keep the seam straight. For the no-sew route, spray adhesive lightly onto the foam, lay the fabric on top, and staple every 5cm to 8cm working from the centre outwards to the plywood edge, pulling firm as you go. Finish the corners last, trimming off the excess and folding small mitres behind the cushion.
Step 8: Add piping and any tufting
Piping hides the seam and stops the cover edge wearing through, so it is worth adding on any cushion that gets daily use. Zip the piping to the cover seam before fitting, then staple or stitch it around the whole edge. If you want buttons, mark the layout first, pull the fabric into the button and fix a button and washer from underneath before the cover goes on.
Step 9: Refit the cushion and check tension
Refit the retaining ledge or seat board, then sit on the cushion properly hard for a few minutes. Look along the seam line. Any small pucker now will become a large crease later, and you can still re-staple it now. Clear the work area and repeat with the next cushion.
Tip: do two spare or least-visible cushions first. Everyone in UK forums who tackled a full lounge says the same thing: the first cushion teaches you the technique and the second one teaches you how fast it goes.
How Much Fabric Do You Need?
Most people over-buy, then stop when the seatbacks are short. For a standard seat cushion of roughly 55cm by 55cm, allow about 1.5 metres of 150cm-wide fabric per seat cushion including the sides. A backrest of roughly 55cm by 35cm needs about 1.2 metres, and a bolster or small corner seat needs around 0.6 metres.
If you have a full lounge of twelve cushions in mixed shapes, budget in the region of 18 to 20 metres. Measure the roll width before you order, because a 140cm roll cannot cover a 55cm seat in a single drop and every join adds a seam you will see.
For a plywood-backed shell you can often use slightly less per cushion, but keep the generous allowance. Fabric bought with spare length can be trimmed later, while fabric that runs short mid-project cannot.
Choosing the Right Fabric for Caravan Seats
Caravan upholstery has a harder brief than home furniture. It needs to survive sun, water, grease and repeated cleaning. These seven factors decide the right pick.
1. How often the seats are used. A holiday-only static lounge sees far less wear than a motorhome seat used daily. Daily-use seats need a hard-wearing woven upholstery grade rather than a decorative print.
2. Who sits there. With young children, a stain-resistant, dark or mid-tone fabric hides spills far better than pale linen. With dogs and muddy boots, wipe-clean is not optional.
3. Where you camp. Coastal and sandy sites rule out anything abrasive, which rules out real leather. Sand works its way into grain leather and tears the hide. Hot and tropical trips rule out PU faux leather, which softens and goes tacky in heat.
4. Climate and UV exposure. Roof beds and window-seat backs take direct sun for hours. Choose a colourfast, UV-rated textile and check the fabric has a Martindale abrasion rating in the tens of thousands rather than thousands.
5. How you will clean it. Removable covers let you wash at home. Fixed stretched covers can only be wiped or hoovered, so a wipe-clean coating is the priority.
6. Colour. Neutral and mid tones age gracefully and hide dust. Very pale fabric shows every crease from a stapled wrap.
7. Budget versus roll width. Many home furnishing fabrics sold on a 150cm roll are heavy enough to work and cost less per metre than true upholstery ranges. That is why so many UK owners end up with a durable mid-priced furnishing fabric from a big roll.
Worth knowing before you buy: marine vinyl is excellent on the coast and easy to wipe, but it needs careful tensioning and a calm working temperature, otherwise it creases permanently. Very heavy woven canvas is forgiving to staple but hard to sew by hand.
Choosing the Right Foam for Caravan Cushions
Foam decides comfort, and the choice is simpler than the grade lists suggest. Seats and make-up beds want a firm grade; backrests can be slightly softer.
- High-density reflex foam — firm, springy and long-lasting. The sensible default for seat bases and dinettes, in 50mm to 60mm for bases and 40mm to 50mm for backrests.
- Memory or viscoelastic foam — comfortable but slower to recover and can feel warm in a hot caravan. Better as a top comfort layer over a firm base than as the whole cushion.
- Chip or reconstituted foam — the cheap option for a hidden base or a storage lid. It feels uneven under a hand and compresses fastest.
- Fire-retardant foam — treated to the BS-5852 standard used for UK caravan and motorhome interiors. Worth specifying if you replace foam in a lounge.
Thickness matters more than brand. Match the original thickness wherever you can, because a seat base that grows from 50mm to 90mm will lift the sitting height and change how the dinette bed converts. If you are wrapping new foam, ask for dacron-wrapped or barrier-clothed foam, which gives a finished edge without a separate cover job.
Warning: if a seat base cushion also forms part of your bed conversion, measure the finished height with the foam in place before cutting anything. A few millimetres too much and the bed will not lie flat.
Damp, Mice Damage and Perished Foam: What to Do First
Some cushions need remedial work before any fabric goes near them. Skip this and the new cover fails within weeks.
Perished foam. If the foam crumbles, powders or has gone yellow and brittle, strip it out completely. Vacuum the cavity and the frame edges afterwards. No adhesive and no staple will hold against crumbling foam, so replacing it is the only option.
Damp and mustiness. Identify the source first, usually a failed window seal, a roof leak or a wet locker above the seat. Dry the frame fully before recovering, and treat the new foam with a mould inhibitor. Covering a damp cavity only traps the moisture against the foam.
Mice damage. Chewed foam and nesting material means removing the cushion from the equation. Clear the bay, check the cable runs and any food storage above, and then rebuild with fresh foam. Mice will return to a bay that still smells of old nesting material, so clean it before the new cushion goes back in.
Stains and ingrained odour. Foam holds smell permanently, so a cover sprayed with odour blocker is a temporary measure. Washing and a thorough dry in sun removes a surprising amount, and a fresh wadding layer absorbs what remains.
Piping, Wadding and Button Tufting
Three finishing details do most of the work in making a DIY job look professional.
Piping. Self-adhesive piping cord pressed along the seam edge makes a cushion look like a made item, and it protects the most vulnerable part of the cover. It is the single most worthwhile upgrade on a no-sew wrap, because the stapled edge is otherwise the weak point.
Wadding. A layer of polyester fibre wrap between foam and fabric rounds the edges, kills the boxy look and hides staple dimples. It is cheap and takes minutes.
Button tufting. Mark the button positions on the bare foam before covering, then pull each one tight and fix it from underneath. It adds depth and stops a soft cushion sagging into a hammock. It does add a lot of work, so it suits a single statement dinette backrest better than twelve seats.
Working Around Under-Seat Storage, Seat Belts and Dinettes
Caravan furniture has constraints that home furniture does not, and most failed attempts fail on these rather than on fabric.
Storage lids. A plywood-backed cushion adds 6mm to 9mm between the cushion and the lid. On a top-hinged locker that can stop the lid closing. Check clearance with the cushion in place before you commit to the plywood method, and keep lids on a gas strut rather than a friction hinge if the fit is tight.
Finger trap risk. A rigid panel sitting under a hinged lid is a real hazard to small children. Where a lid swings over a plywood-backed cushion, fit a soft edge or a foam offcut strip along the closing edge.
Seat belts. Never route or remove a seat belt fixing to make fabric fitting easier. Cut around the anchor, and fit the cover in two pieces if the belt passes across the backrest.
Dinettes. Sleep-converting dinettes are the hardest case. The backrests fold flat, so a cover stitched tight in one plane will pucker when folded. Use a sewn cover with a loose edge or a stretch-backed cover on anything that converts into a bed.
Common Mistakes and How to Avoid Them
Working from the edges inwards. Staple from the centre outwards so you can pull tension as you go. Starting at the corners leaves slack in the middle that no amount of trimming will remove.
Stretching too hard. Over-tensioned fabric flattens the wadding and pushes the foam out of shape. Pull until the surface is drum-tight, then stop.
Skipping barrier cloth. Cover fabric rubbed straight onto bare foam abrades and wears through in a couple of seasons. Calico or a thin non-woven interlayer is a small cost that doubles cover life.
Glue-only finishes. Adhesive holds a cover on but does not tension it. Use spray glue as a holding aid under staples, never as the only fixing.
Gaffer tape on faux leather. Tape-finished PU eventually goes melty, with adhesive oozing out from under the edges. If you choose faux leather, staple and sew it properly instead of taping it.
Skirting the cold corners. Barbed staples in cold or damp conditions bend instead of biting. Warm the room up, use fresh staples of the correct length, and keep the fabric dry.
Trimming corners too early. Cut the excess only after the last staple in. Cut too soon and the corner has nothing left to hold.
How Much Does It Cost? DIY vs Professional
Real UK costs are far easier to judge than most suppliers suggest. A full lounge of twelve cushions done properly comes in at a fraction of a professional quote for the same work.
- Fabric at about £12 per metre — 20 metres for twelve cushions is around £240
- Polyester wadding — roughly £25 to £40 for a full set
- Plywood offcuts — around £30 to £50, though you can often cut panels from a single sheet
- Spray adhesive, staples, needles, thread and calico — around £40 to £60
- Piping cord — around £20 to £30 for a full set
- Foam, if replacing — the largest single line item, and the one most jobs skip by reusing existing foam
One UK owner who recovered all twelve cushions of a static caravan using plywood backing, carpet glue and a staple gun, with no sewing at all, reported a total spend of roughly £500, against professional quotes of £1,000 to £2,000 for the same set. Add a set of new seat-belt webbing or made-to-measure replacement cushions and the arithmetic shifts, which is why a repair is worth costing properly before you commit to a full rebuild.
Add your own labour and the DIY route is a weekend plus evenings, not a weekend. Twelve cushions is realistically three full days for a first-timer working carefully and a day and a half once you have a rhythm.
Caring for and Storing Your Recovered Cushions
Look after them and a new cover looks new for years. Vacuum weekly with a brush head, and deal with spills immediately with a damp cloth and a little upholstery cleaner. Never saturate a stretched cover.
For winter layup, remove cushions from the lounge if the caravan is stored damp, stack them flat with airflow between them rather than leaning them, and keep them away from any rodent bait. Over summer, park nose-down or shade the side that catches direct sun if you can; UV is the factor that fades fabric faster than anything else on the list.
Fit zip covers wherever the cushion is removable. Being able to wash a cover in your own kitchen is worth more over five years than any extra millimetre of foam.
Frequently Asked Questions
How much does it cost to reupholster caravan seats?
Doing it yourself, a full lounge of twelve cushions costs roughly £500 in materials, with fabric at about £12 per metre the largest line item. Professional quotes for the same set commonly run £1,000 to £2,000. Reusing the existing foam is what keeps the DIY figure low, because replacement foam is the biggest cost.
How much does it cost to reupholster RV cushions?
For a US campervan or RV, the DIY route scales the same way. A single seat cushion needs about 1.5 metres of 140cm or 150cm-wide upholstery fabric, plus wadding and staples, while a full lounge runs into many hundreds of dollars. Made-to-measure replacement cushion sets sold in the US commonly start well above £100 per cushion.
What fabric is best for covering caravan seats?
A durable, wipe-clean, UV- and stain-resistant upholstery textile is the best all-round choice. Use marine vinyl for coastal and wet use. Avoid real leather where there is sand, and avoid PU faux leather in hot climates, where it softens and goes tacky. A 150cm roll width covers a standard seat cushion in one drop.
How to reupholster caravan seats?
Remove the cushion from the frame, strip the old cover, measure the foam and check whether it still springs back. Cut new fabric with at least 10cm spare all round, then fit it by sewing a removable cover or by stapling and gluing to a plywood backing. Trim the corners last, add piping if wanted, and refit the seat board.
How to reupholster a camper cushion?
The procedure is identical for a campervan or motorhome cushion, because the cushion is a foam block with a cover and nothing else. Follow the main step sequence, then check two extra things: allow a little more fabric for deeper seat boxes, and use a stretch-backed or sewn cover if the cushion doubles as a bed.
How can I cover foam cushions with fabric?
There are three ways. Sew a cover, which is the most durable and machine-washable. Staple and glue fabric directly to the foam, which needs no sewing but needs firm tension. Or build a plywood-backed shell, pulling the fabric tight across the foam and stapling it to the panel, which gives the firmest no-sew result.
Do caravan cushions need to be fire retardant?
Caravan and motorhome interiors are expected to meet the BS-5852 fire retardancy standard, and replacement foam is commonly supplied treated to that specification. It matters most for the lounge and for anyone replacing foam wholesale. If you reuse your existing foam you should check what it already is, since unknown foam is the weak point.
What foam thickness is best for caravan cushions?
Match the original thickness wherever you can. Around 50mm to 60mm of firm high-density reflex foam suits a seat base, and 40mm to 50mm suits a backrest. Going thicker changes the sitting height and can stop a make-up bed from lying flat, so measure the finished height before you cut anything.
Conclusion: A Weekend That Fixes a Whole Caravan
Reupholstering caravan seat cushions is one of the highest-value jobs on any UK caravan, because the frame rarely fails and the soft parts always do. Assess the foam first, choose between a sewn cover and a no-sew plywood-backed shell, and cut your fabric with more spare than you think you need. Work from the centre outwards, keep the tension firm, and treat any damp, mice damage or perished foam before the new fabric goes anywhere near it.
Start with one cushion, get the finish you want on that, then repeat. Get through the lot and you have a fresh interior for a fraction of a replacement bill, and covers you can strip, wash and re-cover in a weekend years from now.