
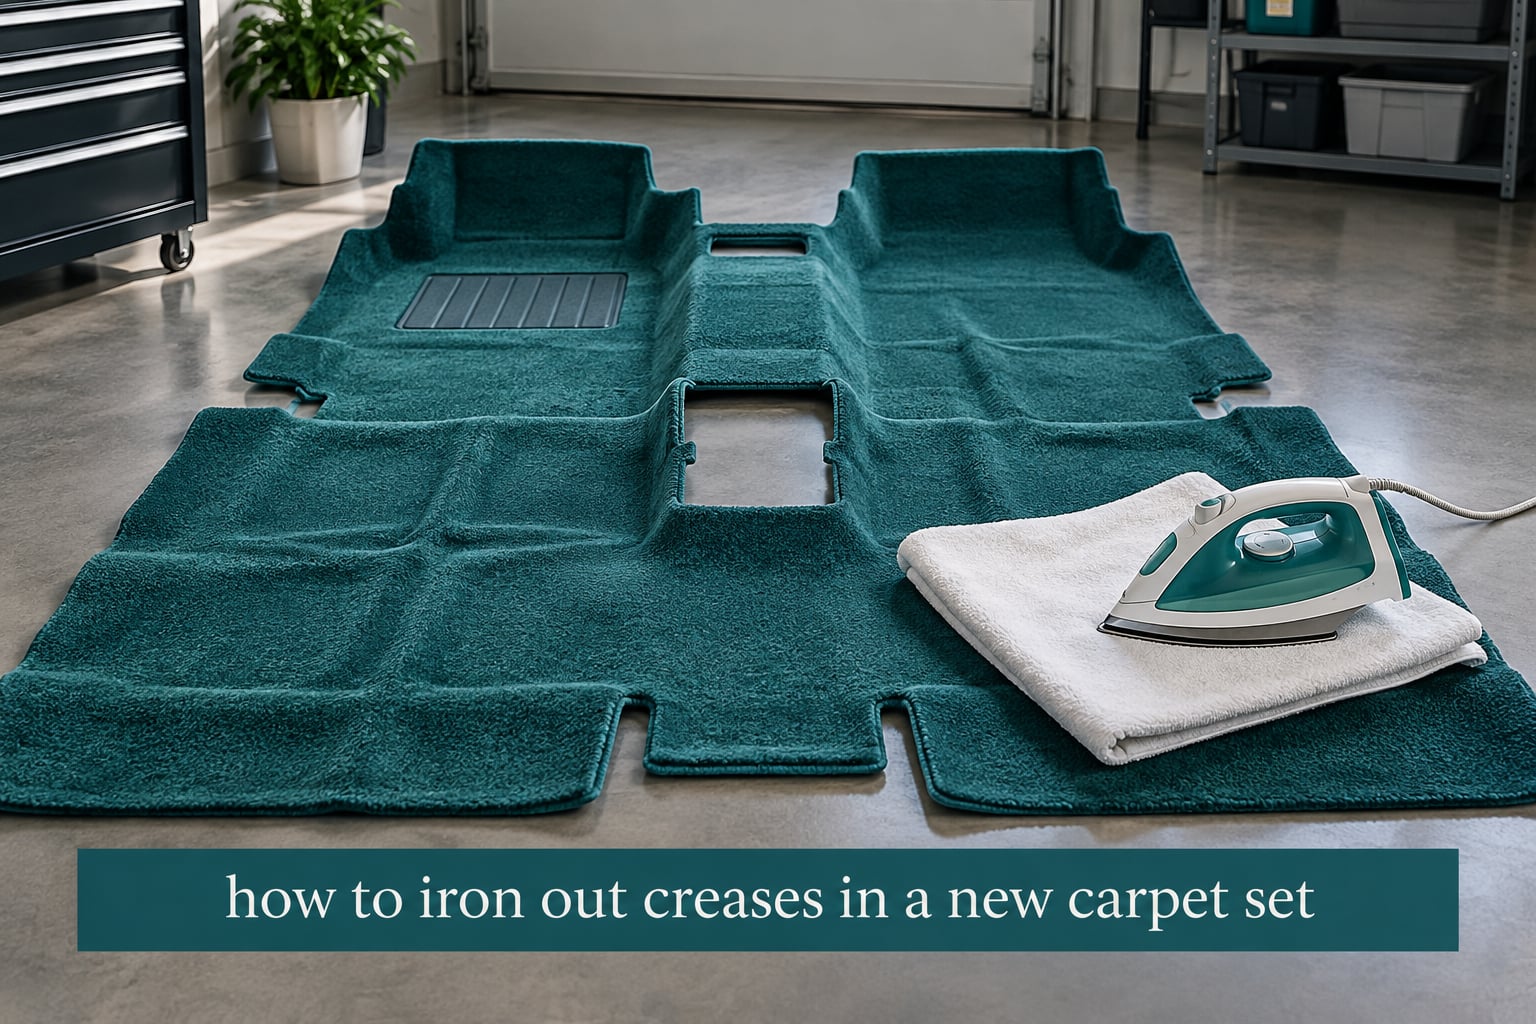
Yes, you can iron a crease out of a carpet, but never touch the iron to the carpet itself. The reliable method is to lay a damp white towel over the crease, press a warm iron on top of the towel, and let the heat and moisture relax the compressed fibers from underneath. This guide walks through exactly how to iron out creases in a new carpet set, how long to wait first, which heat setting each material can take, and what to do when the iron method is not enough. Updated for 2026.
A carpet set that folds in a box, rolls tightly, or sits in a hot trailer for two days arrives with marks that look permanent. Most of them are not. What you are seeing is compressed pile and a backing layer holding tension, and both respond to warmth, moisture, and pressure within a single session.
Table of Contents
- Why a New Carpet Set Arrives With Creases
- What You Need: Tools, Prep Time, and Total Time
- How Long to Wait Before You Apply Heat
- How to Iron Out Creases in a New Carpet Set: Step by Step
- Can You Iron Carpet Directly? Never
- Heat Settings by Carpet Material
- Working on a Vehicle Carpet Set
- How to Flatten Ripples and Waves Without an Iron
- Fixing Curled Corners, Lifted Edges, and Dents
- Method Comparison: Time, Difficulty, and Risk
- When to Stop Fixing and Replace Instead
- Preventing Creases in the First Place
- Frequently Asked Questions
- Can you iron a crease out of a carpet?
- How to get the creases out of a new carpet?
- How do you flatten ripples in a new rug?
- How long does it take for creases to come out of a rug?
- Should you iron a new rug, or will the creases go away on their own?
- Is it safe to iron a vehicle carpet kit before fitting it?
- Conclusion
Why a New Carpet Set Arrives With Creases
A crease is a sharp line where the material was folded. A wrinkle is a soft ripple. A buckle is a wave that runs across a whole floor, and it usually has a different cause entirely. Confusing the three is why so many people give up early.
Four things create shipping creases:
- Fold memory. Carpet folded to fit a box keeps a hard line at the fold for days or weeks.
- Roll memory. Fiber bent around a tight roll and held there sets into a curve. A carpet rolled face-side-in and left in a warm trailer is the worst case.
- Compressed backing. The backing, not the pile, is often what holds the shape. Once it relaxes, the pile follows.
- Molded foam. Trunk liners and molded cargo pieces are shaped to a contour in a factory, and that shape fights you.
Good to know before you start: anything that came from a fold is a DIY fix. Ripples that run wall to wall on installed carpet are usually a loose tack strip or a bad pad, and heat will not solve them. Forum users across automotive and RV boards describe the same split, where creases from packaging relax on their own but post-install wrinkles need a proper stretch.
What You Need: Tools, Prep Time, and Total Time
You need very little. Here is the full list with honest timing.
- A white cotton towel per section. White matters, because a colored towel can bleed dye onto light carpet.
- A household iron with a steam setting. You do not need a garment steamer, though one works as a second pass.
- A spray bottle or damp cloth for wetting the towel.
- Heavy objects for the weight method: books, bricks, or a flat weight you can leave in place.
- A clean work surface large enough to lay a section of carpet flat, such as a driveway, garage floor, or spare room.
- Gloves and a soft brush or carpet rake to reset the pile direction afterward.
Budget roughly 5 minutes of prep, 10 to 15 minutes of active work per section, and about an hour of total time once drying and weighting are counted. The difficulty is easy. A full vehicle carpet set with molded pieces takes longer, closer to two hours.
How Long to Wait Before You Apply Heat
Wait 24 to 72 hours after unpacking before you use an iron. This is the step most guides skip.
Out of the box, the carpet is still holding tension from the fold. Heat applied in the first few hours softens the fibers but the backing has not finished expanding, so the crease springs back when the towel dries. Unroll or unfold the set, lay it face-up in a warm dry room, and put weights on the worst lines.
Sixty seconds of sunshine through a window helps, and installers report that a warm room alone relaxes a good carpet, just far more slowly than a hot towel would. After 72 hours, whatever crease remains is real work rather than settling.
How to Iron Out Creases in a New Carpet Set: Step by Step
Work in sections about two feet wide. Trying to iron a whole carpet set at once leaves the far end unworked and the near end overworked.
Step 1 — Lay the carpet flat. Place the section face-up on a hard flat surface. Pull the pile gently in one direction with your hand so the fibers lie down before you add any water.
Step 2 — Wet the white towel. Soak it in warm water and wring it out until it is damp, not dripping. You want steam off it, not a puddle underneath. A rug that goes waterlogged can take days to dry and may wick dye.
Step 3 — Lay the towel over the crease. Cover the line completely with the damp towel, extending well past both edges. If the crease is stubborn, use two towels, one on top of the other, to spread the heat more evenly.
Step 4 — Press, do not iron. Set the iron to low or medium heat with the steam function on. Touch it down on the towel and hold it in place, then slide slowly along the crease in short passes. Pressing is what reshapes the backing. Sliding fast just dries the towel. Do not scrub or use back-and-forth strokes like laundry.
Step 5 — Weight it and move on. Lay a clean dry towel over the worked area, then set a heavy weight on top. Leave it for 30 to 60 minutes, or overnight for a deep fold. Work the next section while the previous one is under weight.
Step 6 — Dry, then reset the pile. Let the carpet dry fully with the room well ventilated. Once it is dry, brush or vacuum the pile in one direction so it does not look matted. The Reddit lifehacks crowd settles on the same sequence: rug tape along the line, light dampening, then heat through a barrier or a sheet of baking paper.
Can You Iron Carpet Directly? Never
Direct iron contact is the one mistake that permanently damages carpet. A hot sole plate melts low-melt synthetic pile, flattens tufts, and pushes dye onto the towel while fusing the fibers into a shiny flat patch that no amount of brushing restores.
Always keep a white cotton barrier between iron and carpet. A few other limits worth holding to:
- Never raise the heat above medium until you have tested a hidden corner.
- Move the iron constantly. Holding it in one spot scorches, and the scorch mark is worse than the crease.
- Keep the iron dry between passes and let the damp cloth stay damp. A dry iron over a dry towel does nothing but press.
- Work outdoors or in a well-ventilated room. Damp carpet plus a hot iron produces a lot of steam.
What Not to Iron
Some parts of a carpet set will not survive heat at any setting. Check for these before you start.
- Jute or sisal backing. Natural fiber backing browns, scorches, and becomes brittle under sustained heat.
- Latex and rubber backing. Both soften and smear, and the backing may delaminate from the pile.
- Adhesive-backed pieces. Heat can release the bond where a strip has been glued instead of clipped.
- Sound-deadening foil or matting. This is common in vehicle kits and can warp.
- Molded foam trunk liners and cargo pieces. The contour was set with heat. More heat fights the shape.
If you are unsure what the backing is, skip the iron. The weight and reverse-roll methods in the next section do the same job with no risk.
Heat Settings by Carpet Material
Different fibers and backings tolerate different amounts of heat and moisture. Use this as a starting point and always test a hidden corner first.
| Material | Safe heat setting | Moisture tolerance | Notes |
|---|---|---|---|
| Polypropylene | Low to medium | Good | Melts easily, never use high heat or a dry iron on the pile |
| Nylon or polyester | Low to medium | Good | Resets well with heat, watch for dye bleed on dark colors |
| Wool | Medium with steam | Good | Never go hot, wool felt shrinks and felts |
| Needle-punched felt | Medium | Moderate | Thin material, use a thicker towel barrier |
| Latex-backed | Low only | Limited | Backing softens, prefer the weight method |
| Jute or sisal backing | Low, short passes only | Poor | Do not iron, back the carpet with a protective layer |
| Rubber-backed | Do not apply heat | Poor | Use weights only, rubber deforms permanently |
| Molded foam liner | Do not apply heat | Poor | Shape is heat-set, weight it in a warm room instead |
Working on a Vehicle Carpet Set
A vehicle carpet set is the hardest case and the one we get asked about most. Installed, it has clips, retainers, seat-rail hems, molded cutouts, and often a backing that was never designed for an iron.
Start with the two-person method. One person lays the carpet into position, the other walks it toward the clips and retainers, tensioning it as they go. Most crease complaints trace back to a carpet installed by one person with no stretch, which is why the carpet ripples later rather than sooner.
For the heat work itself, section the kit. Handle the front and rear floor sections separately from the trunk liner, and keep the carpet loose and unfastened while you work. Fit clips and retainers only after the carpet has dried and lies flat, otherwise you lock in a wrinkle.
Take the iron to a seam or hem, never to a molded cutout or a foam-backed piece. Forum installers also report that shaped pieces respond better to a garment steamer held a few inches off the surface than to direct contact, and one Mustang owner reported smoothing natural creases by hand with an even coat of spray adhesive. Both are reasonable fallbacks when a molded piece refuses to relax.
Our own advice for a first install: do the flatten work on the driveway before the set goes anywhere near the car. Once a crease is under a seat rail or behind a trim clip, you lose access to exactly the surface you need to work.
How to Flatten Ripples and Waves Without an Iron
Not every carpet tolerates heat, and some do not need it. These four methods work in ascending order of effort.
1. Reverse roll. Unroll the carpet the opposite way from how it was shipped, so the pile faces the direction it was compressed from, and leave it for a few hours. Pulling against the set direction releases tension faster than waiting.
2. Weighted books. Lay the carpet flat, place clean boards or cardboard over the crease lines, and stack books or bricks on top. Leave for 24 hours. This is the safest method and it works on rubber-backed and jute-backed carpet that an iron would ruin.
3. Steam only. Hold a garment steamer a few inches above the carpet and steam the line, then press the area flat with a clean towel and your palms. Give it 10 minutes under weight afterward.
4. Hairdryer on low. A hairdryer on the cool or low setting, moved constantly, can take the chill out of a stubborn line so the weight method works better. This is a helper technique, not a primary one. Hairdryers spit water, so keep them clear of the carpet.
If all four fail, the crease is probably structural. A fold that was set for months, or a molded piece, will not relax, and pressing harder only damages the pile.
Fixing Curled Corners, Lifted Edges, and Dents
Curled corners are a separate problem from creases. A corner that lifts is usually a backing issue, not a fiber issue.
Lay a rug pad under the area first, then secure the corner with rug tape or carpet tape on the underside. Pull the corner flat and press the tape down firmly. Carpet tape grips better once warmed, so a hair dryer on low for 20 seconds after sticking improves the bond.
Furniture dents recover on their own but faster with help. Put an ice cube in a sealed bag, lay it on the dent for 10 minutes, then press the flattened pile with the back of a spoon and vacuum with the nozzle just above the carpet. Never drag furniture back across carpet. Lift it.
For general matting, a carpet rake or stiff brush pulled in the direction of the pile lifts the fibers after drying.
Method Comparison: Time, Difficulty, and Risk
Here is how the main methods compare, so you can pick the right one for the carpet in front of you.
| Method | Active time | Difficulty | Risk to carpet | Best for |
|---|---|---|---|---|
| Weights and books | 5 min plus 24h wait | Easy | None | Any material, heat-sensitive backings |
| Reverse roll | 2 min plus a few hours | Easy | None | Light roll memory after unpacking |
| Steam only | 5 to 10 min | Easy | Low | Molded pieces, damp-sensitive backings |
| Towel and iron | 10 to 15 min per section | Easy | Moderate if rushed | Deep creases in synthetic pile |
| Hairdryer on low | 5 min | Easy | Low | Pre-softening before weighting |
| Knee kicker | 20 to 40 min | Hard | Low | Post-install ripples on wall-to-wall carpet |
| Professional stretch | Varies | Professional | None | Whole-room wrinkles, seams lifting |
A knee kicker is worth mentioning because forums keep coming back to it. A single knee kicker is not enough for large ripples, and it stretches carpet along the wall. If your wrinkle is a post-install buckle rather than a shipping crease, this is the wrong tool and so is the iron.
When to Stop Fixing and Replace Instead
Some damage is not reversible. Replace the piece rather than working on it if you see any of the following.
- Sun-bleached or faded areas, where the pile is weakened and will crush under foot traffic.
- Frayed edges, pulled seams, or yarn that has snapped back in the backing.
- Scorch marks or a shiny flattened patch from a previous iron attempt.
- Molded foam liners that stay contoured after days of weighting in a warm room.
- Carpet that ripples again within a week of being flattened, which points at the pad or substrate rather than the carpet.
Installing on top of a poor-quality pad is the single most common reason carpet will not stay flat. Replacing the carpet without replacing the pad solves nothing.
Preventing Creases in the First Place
Most of this comes down to how the carpet is stored and what it sits on.
Always roll carpet, never fold it. A crease set during storage is a crease you will fight later. Store the roll standing on end in a dry room, and keep it face-side-in only if the manufacturer says so, since face-side-in is the usual source of stubborn roll memory.
Install over a pad of proper density. A pad that is too soft lets the backing move, and a carpet set installed without any pad under vehicle trim will crease where slides and outlets drag across it. Keep indoor humidity steady, because swings in moisture make backing expand and contract and pull the carpet into new ripples.
For a vehicle, fit slides and trim before the carpet is fully dried and tensioned, and never run a hard seat rail over an unfastened edge.
Frequently Asked Questions
Can you iron a crease out of a carpet?
You can, but never let the iron touch the carpet itself. Put a damp white cotton towel over the crease and press a warm iron on top of the towel. Heat and steam relax the compressed fibers and backing from underneath while the towel blocks dye transfer and scorch marks. Use low to medium heat, keep the iron moving in short passes, and put a weight on the area once it dries.
How to get the creases out of a new carpet?
Unroll the carpet and let it relax flat for 24 to 72 hours with weights on the worst lines. Then work in small sections: wet a white towel, lay it over the crease, press a warm iron down on the towel, and hold it as you slide along the line. Cover the finished section with a dry towel and a heavy weight for 30 to 60 minutes. Let it dry fully, then brush or vacuum the pile in one direction.
How do you flatten ripples in a new rug?
Ripples are softer than creases and usually come out without heat. Lay the rug flat, reverse the roll direction so the pile is pulled against the way it was compressed, and leave it for a few hours. Place cardboard over the ripples and stack books or bricks on top for 24 hours. A rug pad under the area prevents the backing from gripping the floor and re-curling. If it still waves, the cause is underneath the rug, not in it.
How long does it take for creases to come out of a rug?
A carpet that was folded in a box needs about 24 to 72 hours of flat settling before any heat is worth applying. The towel and iron method itself takes 10 to 15 minutes per section, then 30 to 60 minutes under weight. A rug with only roll memory often relaxes in a few hours. A crease that was set during long-term storage may never fully relax, and no amount of extra time will change that.
Should you iron a new rug, or will the creases go away on their own?
Most new carpet creases resolve on their own within 24 to 72 hours of being unrolled in a warm room, especially with weights on the lines. Ironing is for the creases that are still there after that window. Jumping straight to an iron on day one often fails because the backing is still under tension and the crease returns as it dries. If the carpet has a rubber, jute, or latex backing, skip the iron entirely and use weights.
Is it safe to iron a vehicle carpet kit before fitting it?
Only if the kit has no molded foam, rubber, jute, or latex backing, and only through a white cloth barrier on low heat. Vehicle kits frequently carry sound-deadening layers and molded trunk pieces that are heat-set in shape, and those will warp or delaminate. Do the flattening work on a flat surface before installation, fit the carpet tensioned with clips and retainers after it dries, and keep the iron away from seat-rail hems and cutouts.
Conclusion
The short version of how to iron out creases in a new carpet set: let the carpet settle flat for 24 to 72 hours, then work in sections with a damp white towel between the iron and the pile, on low to medium heat, and weight each finished section while you move to the next. Skip the iron entirely for rubber-backed, jute-backed, latex-backed, and molded foam pieces, where weights and a warm room do the same job without risk.
If you are installing a vehicle carpet set, do the flatten work first on a flat surface and fit the clips and retainers after the carpet dries and lies flat. That single habit prevents most of the wrinkles people spend weeks trying to remove later.