
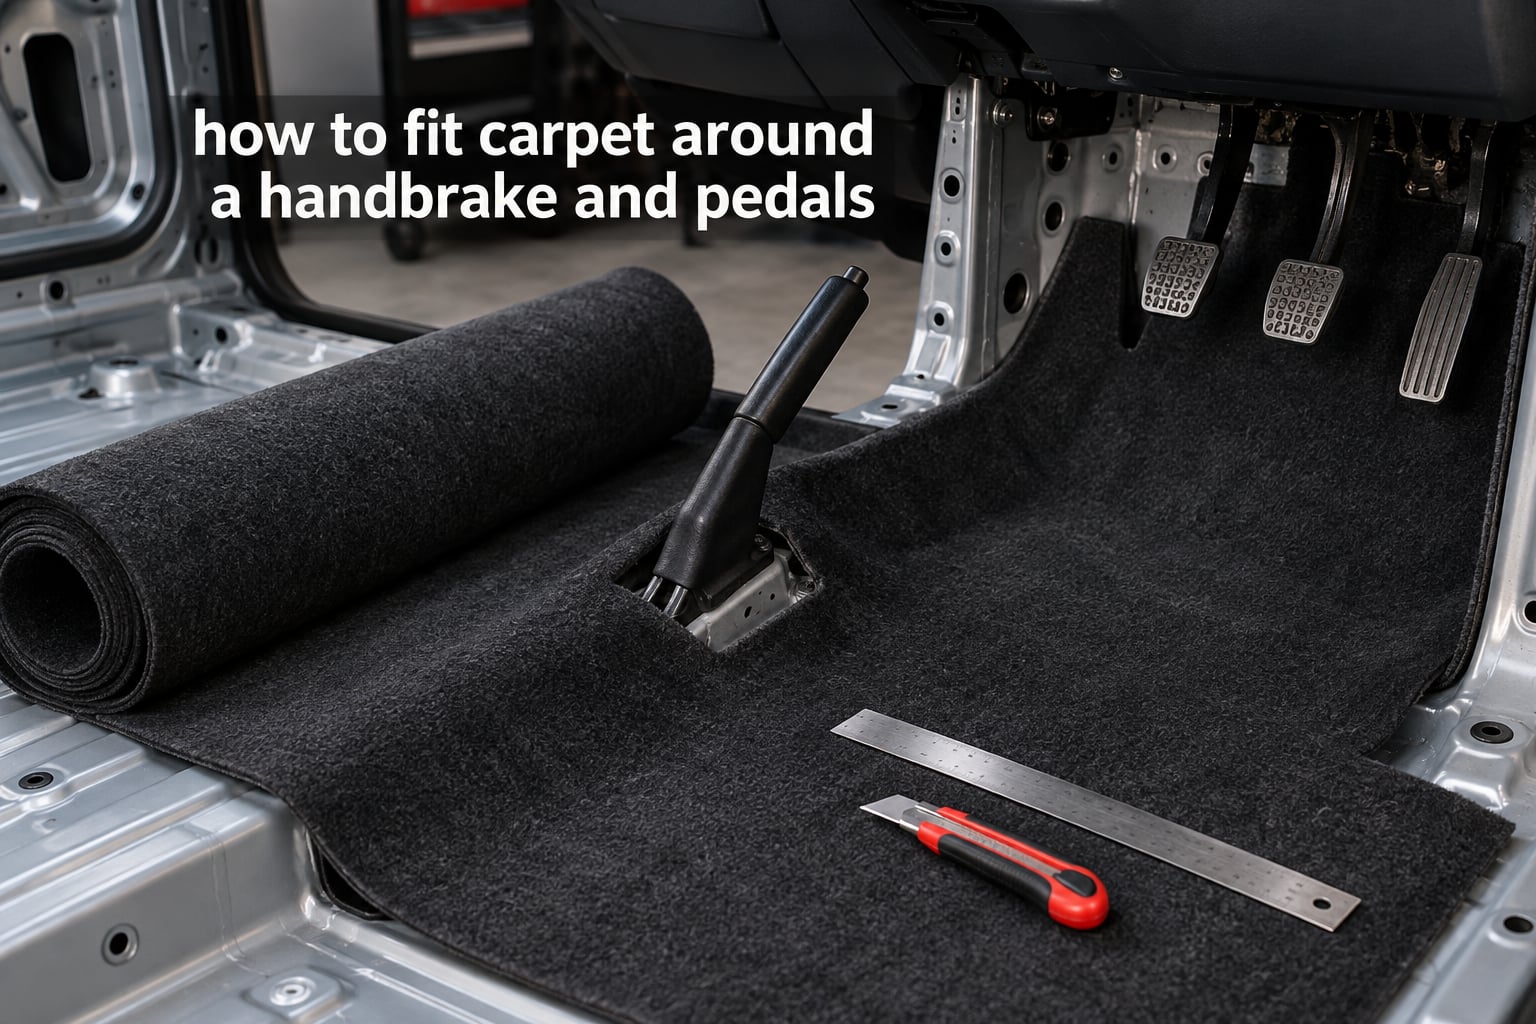
Fitting carpet around a handbrake and pedals is a pattern job, not a guess. You remove the old carpet in one piece, use it as a template, mark every hole with chalk, cut from the centre of the cabin outward, test fit the whole thing loose, and only then bring adhesive into the cabin. The handbrake and pedal box are the two areas where mistakes are hardest to undo, because the holes are small, close together, and in a place where your foot lands every day.
Most of the difficulty is not the cutting. It is the marking, the order of work, and keeping the carpet relaxed while you move around it. Get those three right and the rest is repetitive. This guide walks the whole job from stripping the cabin to refitting the clips, and it gives the handbrake and pedal area the detailed treatment that general carpet guides tend to skip.
A few words of terminology first, because these terms come up throughout:
- Carpet floor — the entire trimmed floor covering of a vehicle, sometimes called the floor carpet or trim carpet.
- Pedal box — the raised steel panel under the dashboard that carries the pedal pivots. Carpet has to be cut and folded around it.
- Dead pedal — the fixed footrest beside the brake and clutch pedals, used by your left foot while you work the clutch. On many cars the carpet wraps up and over this.
- Transmission tunnel — the centre hump that covers the drivetrain. It is the hardest surface in the cabin to get carpet to lie flat against.
- Knee kicker — a long flat plastic tool with a hooked end, slid between the carpet and the body to lever carpet into tight corners.
- Contact cement — an adhesive you coat on both surfaces and let nearly dry before joining. Once it touches, it grabs immediately.
If the car has water damage, a burnt smell or mould, the reason you are here is worth noting: a sound deadening layer goes under the new carpet, and that layer is far easier to fit while the cabin is bare. Treat the floor pan first, then the carpet.
Table of Contents
- How to Fit Carpet Around a Handbrake and Pedals: The Method in Five Phases
- Tools and Materials, and Why Each One Matters
- Step 1: Strip the Cabin and Save the Original Carpet
- Step 2: Lay Sound Deadening and Underlayment
- Step 3: Turn the Old Carpet Into a Template
- Step 4: Mark Every Hole With Chalk
- Step 5: Cut the Holes Middle-Outward
- Step 6: Test Fit Everything Before Any Glue Goes Down
- Step 7: Glue the Carpet Down Rear to Front
- Working the Handbrake and Pedal Box Area Specifically
- Step 8: Trim the Edges to the Door Sill Seam
- Step 9: Reuse Clips, Fasteners and Trim
- Which Adhesive to Use for Automotive Carpet
- Common Mistakes and How to Avoid Them
- Vehicle-Specific Notes: RHD, LHD, Manual and Automatic
- Aftercare for a Freshly Fitted Carpet
- Frequently Asked Questions
- Is it possible to install carpet without a knee kicker?
- How hard is it to recarpet a car?
- Does carpet padding need to be stapled down?
- What is the carpet floor of a car called?
- Should I install carpet before or after installing trim?
- How much does it cost to put carpet in a car?
- How do I make custom automotive carpet?
- Why does carpet wrinkle around the transmission tunnel and pedal box?
- Wrapping Up: Fitting Carpet Around a Handbrake and Pedals
How to Fit Carpet Around a Handbrake and Pedals: The Method in Five Phases
Here is the whole procedure in brief. Remove the seats, console, sill trims and the old carpet, keeping the old carpet intact. Cut and fit any sound deadening and underlayment directly onto the bare floor pan. Lay the old carpet on the new material and trace the handbrake, shifter, seat bolts, pedal box and trunk release with chalk. Cut the middle holes first — shifter and handbrake — then work outward to the seat bolts and pedal box, trimming small amounts and rechecking constantly. Drop the carpet in loose, adjust, then glue from the rear of the cabin forward and refit the trim.
Five phases, and the order matters more than the technique. Cutting holes before the carpet is marked against the real floor is where projects go wrong.
Tools and Materials, and Why Each One Matters
You do not need a workshop full of kit, but you do need a few specific tools. Here is what each one is actually for.
- Utility knife with fresh blades — a dull blade crushes the pile and drags instead of cutting. This is the single most important tool on the list, and the one worth replacing mid-job.
- Long straight edge — a steel rule or a yard stick. Straight cuts in the flat areas keep edges that meet the door sill cleanly.
- Heavy duty snips or shears — for the long curved cuts around the tunnel and wheel arches. A knife is for straight lines and hole detail; shears are for the sweeping arcs.
- Chalk or tailor chalk — marking on carpet with a pen bleeds and is hard to see on dark pile. Chalk brushes off and can be corrected, which matters when you are transferring a pattern.
- Masking or painters tape — holds the template, marks reference points on the floor pan, and stops chalk smearing.
- Punch tool and centre punch — starts a clean hole so a round cutter or scissors has something to follow instead of wandering off the mark.
- Round hole cutter or heavy scissors — for the shifter, handbrake and seat bolt holes. A hole saw sized slightly under the final opening lets you grow it in stages.
- Knee kicker — slides into the gap between carpet and body to push carpet down inside corners and behind the sill. A long flat ruler with tape on the end does the same job in a pinch.
- Staple gun — refixing the reusable plastic clips, and holding carpet at the sill and tunnel base. Use a heavy duty gun; light duty staples pull out of sheet metal.
- Scrap sheet of steel or hardboard — sandwich the clip between this and the carpet so the staple punches through the clip and the carpet in one go instead of skipping off plastic.
- Heat gun or a sunny windowsill — relaxes the carpet backing so it stretches instead of springing back. Sunlight is gentler; a heat gun on low is faster.
- Contact cement or quality spray adhesive — bonds carpet to the floor pan. Cheap spray glue gives up in summer heat.
- Work light — a head torch plus a tripod lamp. Judging a cut in poor light is how a straight edge becomes a wavy one.
Add a marker pen for the floor pan itself, a plastic scraper for spreading adhesive, and a small vacuum or brush for clearing debris out of the corners before the carpet goes down. Grit trapped under carpet is the number one source of rattles and wear holes later on.
Step 1: Strip the Cabin and Save the Original Carpet
Work methodically and photograph as you go. Photos of the console bracket positions, wiring routes and clip locations are worth more than your memory an hour later.
Remove the front and rear seats, then the centre console or transmission tunnel trim if fitted. Take the sill trims off next, because the carpet edge tucks under them and the sill seam is the reference line your final trim is cut to. Store every clip, plug and screw in a tray or a labelled bag as you go.
Pull the old carpet up from the front edge first, working towards the rear. Do not yank it. The carpet is usually stapled around the perimeter and held by plastic push fasteners along the tunnel and around the seat rails, and a sharp pull can stretch or tear the original you want to keep as a pattern. This is the step that decides whether you have a usable template, and enthusiasts are unanimous across restoration forums: never throw the old carpet away.
If the carpet has to be cut to come out, cut it along a seam or around the least complex area so the remaining pattern still includes the handbrake and pedal box. A carpet that loses those two areas is no use as a pattern for the job that matters.
While the cabin is bare, check the floor pan for rust, holes and previous cut lines. Seal any bare metal with a rust primer and paint before anything goes down. Sound deadening applied over a hole will not stop the leak, and moisture under carpet is what caused most of the damage you are replacing.
Step 2: Lay Sound Deadening and Underlayment
Fit the deadening while the floor is bare, because once the carpet is down you cannot reach the pan to press it flat. Cut the sheets to fit between the ribs of the floor, working in the flat sections first and saving the tunnel and footwell corners for last.
Coverage matters more than thickness. Buttyl-based constrained layer material spread across as much of the pan as possible does more for noise and vibration than a thick layer over one small area. Press it down firmly along the full surface, working from the centre outwards to push air out.
Overlap or butt the joins on flat metal. Never bridge a join over a rib or a raised edge, because the carpet will telegraph that ridge underfoot in exactly the area your foot rests. Trim the pieces so every seam sits on flat metal where the carpet will lie smoothly.
Underlayment is optional, and it is a comfort and insulation layer rather than a noise one. Heat reflective underlayment makes a real difference in summer on a car with a lot of glass. Cut it to the same pattern as the carpet and lay it in the same orientation, because any mismatch shows up as ripples. Secure it with the same adhesive and staples you use for the carpet, and keep the staple line a few inches inside the trimmed edge so the staples never show.
Do not staple underlayment so aggressively that the points are waiting to punch through the carpet later. Points under carpet cause rattles that sound like a loose fastener somewhere else entirely.
Step 3: Turn the Old Carpet Into a Template
This is the step that makes the rest accurate. The original carpet already contains the exact position of every hole, moulded to the shape of your floor pan, and no amount of measuring from the outside matches that.
Lay the new carpet face down on a clean flat floor, ideally a large table or the garage floor, and let it sit for several hours or overnight. Carpet arrives rolled with a memory in it, and if you cut it straight off the roll you will fight that curl all the way through the job. Laying it flat overnight lets the pile relax and removes most of the resistance.
Place the old carpet on top of the new carpet, pile side up, and match the weave direction. Run your hand along both and line up the nap. Getting this backwards means the front and back pieces will not blend in tone once the pile is brushed, which is visible immediately under interior lights.
Weight the template so it cannot shift. Masking tape along the edges works well. If the new carpet is a different width from the old one, align the edge that matters most, usually the front-to-back edge nearest the sill, and accept that the opposite edge will need trimming later.
Tape the template down at six or more points. Six is not fussy. Two points allow rotation, and rotation is how a handbrake hole ends up three centimetres out.
Step 4: Mark Every Hole With Chalk
Mark the old carpet from below, on its underside, by pushing chalk or a marker through the existing holes. The underside is where the truth is: the top pile distorts what you see, the underside shows the actual cut edge and the reinforced ring around each hole. Punch through the centre of each opening rather than tracing around it, so you are copying position rather than outline.
Work through this full list before you cut anything:
- Handbrake lever opening and its mounting bracket holes
- Shifter opening, plus any boot or gaiter retaining holes
- Seat bolt or seat rail holes, front and rear
- Pedal box: the accelerator, brake and clutch pivots, plus the dead pedal edge
- Handbrake cable or release lever cutout where it passes through the carpet
- Seat belt buckle or receptacle mounting points
- Trunk release or fuel filler pull
- Any floor ducting openings, heater vents or wiring pass-throughs
- Door sill seam line along both sides
For the pedal box, trace the actual metal edge of the panel rather than a guess. Sit in the driver seat, press the pedals, and note the range of movement. A hole a few millimetres short of the pedal arm binds the pedal under load, and you will not discover it until someone else is driving.
Trace the pedal box as a rough rectangle rather than a line. You want a few extra millimetres of slack, which you trim back later once the carpet is on the car, because a hole cut tight in the flat can never be enlarged once the carpet is fitted.
Mark a reference line for the door sill seam on the template before you remove it. It is much harder to judge that edge with the carpet already installed, and that seam is the line that makes the finished job look factory.
Step 5: Cut the Holes Middle-Outward
Cut the middle holes first, then move outward to the seat bolts and finally the pedal box. The reason is geometric: each hole is cut against the position of the holes already cut, and working from the centre keeps the reference distances short and stable.
Start with the shifter and handbrake openings. Punch a starter hole at the exact centre of each mark, then cut a circle about half the finished size. Cut, check, cut again. A round hole cut in three or four stages cannot run out of position, and it gives you a clean edge without a long spiral cut drifting across the pile.
For the handbrake specifically, cut the large opening first and treat the small bracket holes as a separate stage. Finish the main opening, drop the carpet loosely into place, then reach in and mark the bracket holes against the real bracket. Handbrake brackets vary between models and trim levels, and the pattern from an identical car is a good guide rather than a guarantee.
For round holes, use the X-pattern method. Cut four short straight slits at the compass points of the circle, leaving the centre intact, then open the slits outward in stages until the opening matches the mark. The centre flaps hold the shape while you cut and stop the hole from collapsing into a lopsided oval. Trim the flaps away only once the hole is confirmed correct.
For the seat bolt and rail holes, leave them larger than they need to be. Carpet over a seat rail is compressed by the seat sitting on it, so the hole closes up slightly once the seat is back in. A slightly generous hole here is invisible under the seat and prevents the rail from wearing a hole in the pile.
Cut the pedal box opening as a rectangle with generous corners, not a tight fit. Leave at least a centimeter of slack at the accelerator and brake pivots, then make the fine adjustments with the carpet in the car and the pedals in reach. The accelerator pivot in particular moves as the pedal is pressed, and carpet that touches it at rest will drag on every input.
Trim in small amounts and recheck constantly. A straightedge across the flat areas, short scissor strokes on the curves. Large cuts are the ones you cannot undo, so if you feel uncertain about a line, leave the carpet long and come back to it with the part in position on the car.
Step 6: Test Fit Everything Before Any Glue Goes Down
Drop the carpet into the cabin without fastening or gluing anything. Sit in the driver seat and check the pedal holes against the pedals, the handbrake hole against the lever, and the shifter hole against the boot.
Check that every hole lines up when the carpet is sitting in its natural position, weighted by the seats if possible. A hole that looks right with the carpet held up can sit two centimetres off once the carpet is pushed down into the footwell and the transmission tunnel, because the carpet is a shaped piece and it only reaches its true position when it is sitting where it belongs.
Check the front seats. Slide them fully forward and fully back. The seat rails move, and if a rail hole is too tight, the seat will not reach the end of its travel. This is one of the most common fitment complaints in enthusiast threads, and it is far easier to fix now with a knife than later with the carpet glued down.
Check the door sill edges and the transmission tunnel seam. Anything that does not reach its seam or overlaps by a large amount needs another trim pass. Everything should sit within a few millimetres before adhesive goes down.
If a hole is slightly wrong, mark the correction in chalk on the floor pan, pull the carpet, and make one careful adjustment. Resist the temptation to fix a small misalignment by stretching the carpet, because stretched carpet around a handbrake opening is the thing that pulls loose a year later.
Step 7: Glue the Carpet Down Rear to Front
Adhesive turns a loose piece of carpet into a permanent one, so the order of application determines how much you can still adjust. Work rear to front. The rear of the cabin is the least visible and least accessible once the seats are back in, so it goes down first and gets the least margin for error.
Before opening any adhesive, work out whether the car is a single large piece or separate front and rear sections. Many cars use a front carpet, a rear carpet and a tunnel or hump piece. Where sections meet, the seam should fall under something that will cover it, ideally the console, the tunnel trim or the seat itself. Decide the seam location before you glue the first piece.
Apply adhesive to the floor pan and to the back of the carpet, following the instructions for the product you are using. Contact cement needs a thin coat on both surfaces and a short tack time before contact. Spray adhesive needs a few seconds of settling. Both grab fast, so work in sections you can handle in under a minute rather than trying to coat the whole cabin at once.
Start at the rear centre and work outwards toward the sills, then forward. Lay the carpet down a section at a time and press it into place with your hands, then with a plastic scraper. Follow the ribs and contours of the pan with the scraper; adhesive under a rib that is not pressed down will lift later.
Use the knee kicker at the edges. Slide it between the carpet and the body panel and lever the carpet down into the corner along the sill and the inner wall. Work along the length in short sections rather than one long pull, and never lever against a painted or chromed edge. Put a cloth between the tool and the surface to avoid marking it.
Bring the front section down last and stretch it gently towards the dash as you stick it. This is where heat helps. Warm the carpet with a heat gun on low, or let it sit in the sun for an hour beforehand, so the backing is pliable and stretches instead of springing back. Hold the heat gun moving and keep it well clear of the pile.
Staple the perimeter and the tunnel base as you go, not at the end. A staple every eight to ten centimetres along the sill and every twenty centimetres along the tunnel is plenty; carpet does not need to be pulled drum tight.
Working the Handbrake and Pedal Box Area Specifically
These two areas account for most of the failed attempts, so they are worth treating as separate operations rather than part of the general sequence. The handbrake sits on a raised mechanism, usually in a recess, and the pedal box sits up a vertical panel under the dash. Both mean the carpet must be cut in two planes at once, flat and then up and over.
Handbrake area. Lay the new carpet over the handbrake recess and mark the lever opening from the underside of the old carpet. The opening is usually a rounded rectangle, and the surrounding carpet has to reach down into a recess that may be several centimetres deep. Cut the main opening about five millimetres smaller than the final size. Drop the carpet in, refit the handbrake lever, and check clearance with the lever fully up and fully down.
Fold the carpet into the recess and use the knee kicker to work it into the corners at the back of the well, where the carpet meets the vertical wall. Apply adhesive to the vertical surfaces as well as the floor, since a horizontal bond alone lets the carpet peel away at the fold. Trim the excess at the top edge only after the carpet is fixed, cutting a clean line with the shears against the recess wall.
Check the handbrake release handle or cable pull if your car has one. It often passes through the carpet on its own, and the cut needs to be an L or a slot rather than a circle. A slot cut for a cable is far easier to make and easier to close up than a round hole slightly out of position.
Pedal box area. Mark the pedal box on the old carpet from below, pushing chalk up through each pedal pivot opening and around the dead pedal edge. On the new carpet, cut the rough opening as a rectangle with extra slack, then bring the car-specific adjustment back to the car itself.
Drop the carpet in over the pedal box with the pedals fitted. Sit in the driver seat and press each pedal to its floor. Note where the carpet edge touches. Pull the carpet back out, trim that amount off, and repeat. Two or three small trimming passes get a clean clearance where one aggressive cut would have gone too far.
Wrap the carpet up the front face of the pedal box and secure it to the underside of the dash with staples or the original push fasteners, keeping every fastener clear of the pedal arms and the full travel of the pivots. A fastener positioned a few millimetres low can end up in the path of a pedal under load, which is a genuine safety consideration and not just a rattle.
The dead pedal is the part most often cut short. The carpet needs to cover its outer edge and tuck neatly behind it, but the wrap is tight and the material fights you. Warm the section, tuck with the knee kicker, and cut the relief in small steps. If your car has a dead pedal, do the accelerator and brake first, confirm clearance, and only then tackle the dead pedal.
Finally, check the carpet does not interfere with the throttle or brake cables or any pedal return spring. Route cables through their original clips and never leave a cable resting on top of the carpet where a fastener could pierce it.
Step 8: Trim the Edges to the Door Sill Seam
With the carpet fixed, the final trim goes along the door sill seam, the line where the carpet meets the sill trim when the door is closed. The trim is cut slightly long and tucked under the sill, so the visible edge disappears.
Use the old carpet edge as the guide, or the tape line you marked earlier. Cut with the straightedge and knife in long pulls along the flat sections. Where the carpet runs around the wheel arch or follows the curve towards the A pillar, use shears in short strokes following the contour.
Leave the edge a few millimetres long rather than short. If you cut flush and the edge is even slightly inside the seam, a daylight gap appears the moment the door closes, and that gap is impossible to fill without pulling the whole carpet back off.
Staple the trimmed edge at regular intervals, and refit the sill trim over the top. Where the carpet wraps up onto the inner sill face, cut a small relief at each fastener position so the fastener sits flat rather than pulling the carpet into a dimple.
Finish exposed edges according to the level you want. A raw cut edge is perfectly acceptable for a daily driver and disappears under trim. For a restoration or a show car, bind the cut edges with vinyl or a serge binding, which an upholstery shop will do in minutes and which stops the edge fraying and unravelling over years.
Step 9: Reuse Clips, Fasteners and Trim
Put the original plastic clips back rather than replacing them where you can. They are the part that came with the car, they fit, and reusing them keeps the finish looking factory.
To refit a clip, sandwich it between the carpet and a scrap piece of steel or hardboard, drive a staple through the scrap, the clip and the carpet, then lift the scrap away. Without the scrap the staple tends to skip off the plastic and leave the clip loose.
Rubber push fasteners are the other common headache. If they have swollen with age, warm them with hot water or use a silicone spray or jelly to lubricate the hole, then push them with the palm of your hand rather than a hammer. A warmed fastener goes in far easier than one forced cold. Where a hole has lost its grip, fit a small length of plastic tube into the panel hole to give the fastener something to bite on.
Refit the seats, the console, the tunnel trim and the sills. Recheck pedal clearance with the seats in place, because the seat position changes the carpet tension across the footwell. Tighten seat bolts, check the handbrake holds, and confirm the handbrake lever has full travel with no carpet in the path.
Run the car for a short drive and listen. Rattles that appear on uneven roads almost always come from an unfastened edge or a debris trapped under the carpet, and both are quick fixes while everything is still accessible.
Which Adhesive to Use for Automotive Carpet
There are three options worth considering, and the right one depends on the carpet backing and how permanent you want the job to be.
Contact cement — the traditional choice. Applied to both surfaces, allowed to become tacky, then joined. It grabs instantly and permanently, with no sliding time once contact is made, so accuracy matters more. Best for a final fit, for heavy carpet with a rubber or jute backing, and for anyone who wants the result to stay put for a decade. Its downside is that it is unforgiving, because a misaligned piece is misaligned permanently.
Spray adhesive — a can of general purpose spray glue. Convenient and fast to apply over a large area, and easier to reposition during the working time. Best for underlayment, for thinner carpet, and for a first attempt. Quality varies enormously, and cheap cans soften and fail in a hot car. If you use spray, use a quality automotive product and coat lightly; heavy coats ooze through the pile.
3M style adhesive and double sided tape — a middle ground, useful for seams, for small sections and for securing trim strips. Good for holding an edge without a full coat of cement. Not ideal as the only bond across a whole carpet, but valuable for the fiddly areas around the shifter and the handbrake recess.
Whichever you choose, work in a well ventilated space and follow the product instructions for drying times. Most adhesive problems on a carpet fit are caused by joining surfaces too early or too late, not by the wrong product.
Common Mistakes and How to Avoid Them
Cutting holes before marking the floor. The single biggest error. Always mark from the underside of the old carpet with the new carpet lying flat underneath it, never by eye over the car.
Working the holes outside in. Cutting the pedal box or seat rail holes first and then the shifter leaves you working from a moving reference. Centre out, always.
Not letting the carpet relax. A carpet cut straight off the roll fights you the entire job. Lay it flat overnight.
Getting the pattern backwards. Lay the pieces out and compare them before cutting. A tone mismatch between front and rear is obvious the moment you brush the pile.
Using a dull knife. A dull blade drags the pile forward and cuts a ragged line that shows under any light. Change blades often and cut away from yourself on a firm surface.
Glueing before the test fit. Nothing can be adjusted after contact cement grabs. Test the whole carpet in place, seats included, first.
Stretching instead of trimming. Carpet stretched around the handbrake or the tunnel loses tension within a year and lifts at the edges. Trim the excess and let the carpet lie naturally.
Overheating with the heat gun. Enough warmth relaxes the backing; too much melts it and damages the pile. Keep the gun moving, keep it well clear, and use sun where you can.
Forgetting the pedal clearance. Check every pedal at full travel with the seat in the driving position, and keep all fasteners clear of the pedal arms.
Leaving debris under the carpet. Vacuum the floor pan after the deadening is down. Grit under carpet causes rattles and wears holes in the pile.
Throwing away the old carpet. Keep it until the job is finished and the car has been driven. It remains the only accurate reference for hole positions.
Vehicle-Specific Notes: RHD, LHD, Manual and Automatic
In a right hand drive car the pedal box and its hole positions sit on the opposite side of the cabin, so a pattern taken from a left hand drive car of a different model will be mirrored and wrong. The technique is identical, but the template must come from your own car or one with the same handedness.
Manual cars usually have three pedals and a clutch cable or hydraulic line running to the pedal box, which needs a slot or an L shaped relief rather than a plain hole. The cable is a good reason to cut the relief generously and trim later, because a hard-edged slot around a moving cable wears through quickly.
Automatic cars are simpler in the footwell but often have more going on in the tunnel, with selector cables, a parking brake mechanism and console wiring all routed through or under the transmission tunnel. Photograph those routes before you remove anything, because reinstalling a cable through the wrong clip is a long job.
On modern cars, check for wiring looms, fuel lines, SRS or seat belt pretensioner connectors and any data cables routed under the carpet before you staple or glue anything. Staples and adhesive should never be placed near a connector, and every connector should be reseated and clipped so it cannot rub against a moving part.
On classic cars, the opposite applies. Carpet may be the only thing holding down old trim and trim fasteners, seat rails and the handbrake bracket can be original and worn. Check for seized bolts before you apply any force, and expect to clean or replace handbrake and seat hardware as part of the job rather than fighting it when the carpet is in place.
Aftercare for a Freshly Fitted Carpet
Give the adhesive a few days of open-air time before heavy use, and keep the car out of direct sun while the bond cures. Vacuum regularly with a brush head, working from the centre outwards so grit is lifted rather than driven in.
Use a damp cloth for spills and a proper automotive carpet cleaner for anything more, and avoid soaking the backing. Water getting under the carpet and staying there is what causes the mould and odour problems that lead to the next replacement.
Add a rubber or carpet mat in the footwell, but use one that does not extend above the pedal box, where it can contact the pedals. Check the mats periodically, because a mat that has crept forward interferes with the pedals even though it was correctly fitted on day one.
If a section ever lifts at an edge, do not just push it back down. Lift the carpet enough to get adhesive underneath, bond it properly and staple it. A lifted edge traps grit and the wear spreads quickly from there.
Frequently Asked Questions
Is it possible to install carpet without a knee kicker?
Yes, it is entirely possible. A knee kicker is a convenience tool for pushing carpet into tight corners along the sill and behind trim. A long flat steel rule with a cloth wrapped around the end works almost as well, and a plastic scraper handles the flat areas. On modern cars with generous gaps between the carpet and the body, a ruler is often all you need.
How hard is it to recarpet a car?
It is a moderate DIY job that rewards patience rather than skill. The cutting itself is straightforward once the old carpet is used as a template. The work is in the preparation: stripping the cabin, keeping the old carpet intact, and trimming in small amounts so the handbrake and pedal holes end up in exactly the right place. Allow a full weekend for a car with a console and sills to remove.
Does carpet padding need to be stapled down?
Padding is normally stuck down with the same contact cement or spray adhesive you use for the carpet, and only lightly stapled where it might lift. It does not need the same tension as the carpet itself. Keep staples a few centimetres inside the trimmed edge so the points never sit under the visible surface, where they would rattle and eventually wear through.
What is the carpet floor of a car called?
It is usually called the floor carpet, the trim carpet, or simply the carpet. Restorers often refer to it as the floor covering, and the separate sections are commonly named the front carpet, rear carpet, tunnel carpet or hump piece, and the wheel house carpet over each rear arch. The same names appear in trim catalogues and parts listings.
Should I install carpet before or after installing trim?
Install the carpet before seats, console and sill trims go back on, but after sound deadening and underlayment are down. Refit the sills last of the trim pieces, because the carpet edge is tucked under the sill and trimmed to that seam. Leaving the console off until after the carpet is fixed gives you the access you need to work around the shifter and tunnel.
How much does it cost to put carpet in a car?
The cost depends almost entirely on whether you buy carpet cut to a vehicle-specific pattern or cut it yourself from a wider roll. Patterned carpet and an upholstery shop for binding and stitching raise the material cost considerably, while a wide roll, a can of contact cement and a few hours of your own time keep it low. Add sound deadening as a separate material cost if the floor is bare.
How do I make custom automotive carpet?
Start by cutting a pattern from the old carpet, since it already carries every hole position. Cut a full-size paper or card template, add notches at the transmission tunnel and wheel arches, then transfer the pattern to the new carpet. For a different colour or material, an upholstery shop can cut the pieces and sew the vinyl binding on the raw edges before you fit it, which saves a lot of trimming on the car.
Why does carpet wrinkle around the transmission tunnel and pedal box?
Wrinkles come from three things: cutting the pattern too small for the area, forcing the carpet into place without enough slack, and gluing sections in the wrong order. Leave several centimetres of extra material around the tunnel, stretch gently while working rear to front, and warm the carpet with a heat gun on low or in sunlight so the backing stretches rather than springs back.
Wrapping Up: Fitting Carpet Around a Handbrake and Pedals
Fitting carpet around a handbrake and pedals comes down to four habits: keep the old carpet and use it as a template, mark with chalk from underneath, cut the middle holes first and work outward, and test fit everything before adhesive goes anywhere near the floor. The handbrake and pedal box deserve slow, small trims with the carpet sitting in the car, because they are the holes you cannot enlarge later.
Work rear to front, glue in sections you can handle quickly, and use a knee kicker or a wrapped rule for the corners. Leave the edge a few millimetres long at the door sill so no daylight gap appears. Most of the anxiety around this job comes from the fear of an irreversible cut, and that fear largely disappears once the old carpet is lying on the new one with the holes already chalked.
Take your time with the trimming stages, keep the old carpet until you have driven the car, and the result looks factory rather than homemade. As this guide is current for 2026, the technique applies equally to a classic restoration, a daily driver with water damage, or an interior colour change on a car that deserves better.