
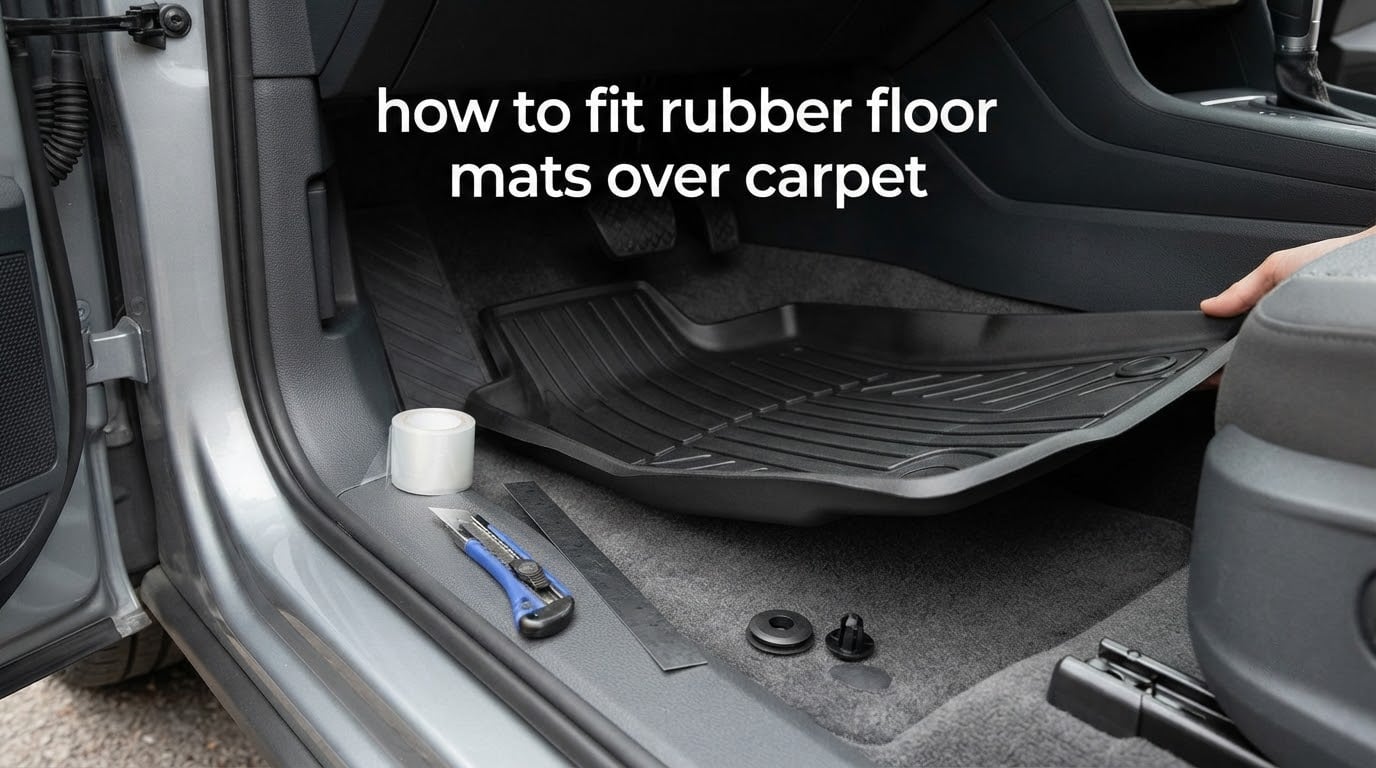
Laying a rubber mat straight over factory carpet is something owners of trucks, vans and camper builds do every week, usually because the vehicle never came with retention pegs or the mat they bought has nowhere to hook. The technique is straightforward once you understand why the mat moves in the first place, and most of the work happens before the mat ever goes down. This guide walks through measuring, templating, cutting, anchoring and verifying a rubber mat on top of carpet, including the fix for vehicles with no factory anchor points.
We have fitted all-weather mats over carpeted footwells on everything from crew-cab pickups to panel vans, and the same four variables decide whether the result stays flat for years or creeps forward under the brake pedal in a fortnight. Clean carpet, a real mechanical anchor, a mat cut to the actual floor pan, and a clear run to the pedals. Get those right and the mat behaves like a bonded floor. Get one of them wrong and you will be re-fitting it monthly.
Table of Contents
- Can I put rubber floor mats over carpet?
- What you need before you start
- How to fit rubber floor mats over carpet, step by step
- Step 1: Remove the existing mat and vacuum the footwell
- Step 2: Wash the carpet and let it dry fully
- Step 3: Locate every anchor point before fitting anything
- Step 4: Take a template of the floor pan
- Step 5: Lay the mat dry in position
- Step 6: Cut the mat from the template
- Step 7: Mould the rubber to the contour, if it is needed
- Step 8: Fit the anchor hardware
- Step 9: Check pedal clearance with the mat down
- Step 10: Air the mat out before the first long drive
- Why a rubber mat moves on carpet
- How to keep rubber floor mats from sliding on carpet
- Stopping rubber dye, oil and damp reaching the carpet
- Checking pedal clearance after the mat goes down
- Vans, trucks and camper conversions
- Custom-fit versus universal rubber mats on carpet
- Trimming and finishing cut rubber edges
- When to replace the mat instead of refitting it
- Frequently Asked Questions
- Can I put rubber floor mats over carpet?
- How to keep car floor mats from sliding on carpet?
- How to make rubber car mats stay in place?
- How do I keep floor mats from sliding in my truck?
- How to get WeatherTech mats to stay in place?
- Will velcro stick to automotive carpet?
- How can I prevent my car mats from slipping?
- What is the best adhesive for rubber matting?
- How to transition carpet to rubber flooring?
- How to keep foam mats from sliding on carpet?
- Conclusion
Can I put rubber floor mats over carpet?
Yes, you can lay a rubber all-weather mat over carpet, and plenty of people do it deliberately. Keep the carpet clean and dry, cut the mat so it sits flat without folds, and anchor it with a mechanical fixing such as a factory retention clip through a grommet, a hook-and-loop pad, or a rubber gripper pad. Avoid the dead pedal area, keep the accelerator and brake fully clear, and expect more grip from custom-fit rubber than from a loose universal mat.
That short answer is the whole method. The rest of this guide is the detail that stops it sliding, creasing or bleeding dye into the pile.
What you need before you start
Most of the tool list is cheap and already in a garage. The one item worth buying properly is a non-marking utility knife, because a dull blade crushes the carpet pile as it cuts and leaves a permanent track.
- Vacuum cleaner with a crevice tool for the footwell, sill channels and seat rails
- Carpet shampoo or spot cleaner plus a clean damp cloth
- Large roll of masking tape or low-tack tape for taking a paper or card template
- Card, thick paper or thin template plastic for tracing the floor pan
- Straightedge and marker pen for scoring the cut line
- Utility knife with fresh blades plus a cutting mat or scrap cardboard underneath
- Retention clips and matching grommets, or hook-and-loop pads and gripper pads if the vehicle has no anchor points
- Protective underlay or offcut of carpet to sit between the pile and the rubber
- Heat gun if the mat needs to be moulded over a transmission hump or seat rail
How to fit rubber floor mats over carpet, step by step
Work from the front of the footwell backwards and check pedal clearance at the end, not halfway through. The order below is the order we use.
Step 1: Remove the existing mat and vacuum the footwell
Take out any old mat, boot liner or tray first. Vacuum the footwell, the sill channels, the transmission hump and under the seats, because grit trapped under a mat acts like ball bearings and will defeat even a perfect fit.
Step 2: Wash the carpet and let it dry fully
Damp carpet under a sealed rubber mat stays damp. Shampoo the area, blot it dry with a clean cloth and leave the doors open until the pile is dry to the touch all the way through, not just on the surface.
Step 3: Locate every anchor point before fitting anything
Look along the door sill and the firewall for factory retention clips, pegs or posts. On trucks and vans built as work vehicles these are frequently missing altogether, and that single fact changes the whole fixing strategy later in this guide.
Step 4: Take a template of the floor pan
For a custom fit you can skip this, because the mat already matches. For a universal mat, tape paper over the floor pan, trace the transmission hump, the seat rail and the firewall, then cut the template out with a relief notch at the seat rail so the mat does not ride up.
Step 5: Lay the mat dry in position
Set the mat in the footwell without fixing it. Walk the edges down by hand, check that it does not overlap the sill plate or the accelerator pedal, and mark any spot where it buckles.
Step 6: Cut the mat from the template
Score the line with a straightedge and pass the blade two or three times rather than trying to cut through in one. Take the waste off in small sections so the mat does not twist and tear. Cut a relief notch at the seat rail and around any raised hump.
Step 7: Mould the rubber to the contour, if it is needed
Warm the rubber with a heat gun held a few inches away and press it into the floor pan by hand, working from the centre outwards. Move the heat source constantly, and only heat until the mat takes the shape, not until it smells.
Step 8: Fit the anchor hardware
If the vehicle has factory clips, press a grommet through the mat at the corresponding point and seat the clip through the grommet eyelet. If it has no anchor points, use the hook-and-loop or gripper pad method below instead of trying to drill the floor pan.
Step 9: Check pedal clearance with the mat down
Sit in the driving position, press the brake and the accelerator, and confirm the rubber stays clear of the pedal box and does not ride up under the pedal. This is the step to repeat a week later, after the mat has settled.
Step 10: Air the mat out before the first long drive
New rubber off-gasses, and a parked cabin traps that smell. Leave the mat outdoors flat for two to three days before the first trip, then run the fan at maximum for ten minutes with the doors open before you drive off.
Why a rubber mat moves on carpet
Almost every complaint about rubber mats sliding comes down to one of five causes. Identify which one applies before you buy hardware, because two of the five are solved with a vacuum and a damp cloth.
| Cause | What you see | Fix |
|---|---|---|
| Carpet is not clean and dry | Mat creeps sideways on the first drive and feels greasy underfoot | Shampoo, blot dry and leave the doors open until the pile is dry throughout |
| Mat is too large for the footwell | Edges bunch at the sill and the mat folds under the pedal | Cut to a paper template taken from the actual floor pan, with a seat rail relief notch |
| No anchor point, or unused anchor point | Mat creeps forward under braking and never returns | Install a grommet and clip, or build up hook-and-loop pads on a truck with no pegs |
| Anti-slip backing is worn or missing | Mat slides even when parked on a level drive | Add a rubber gripper pad under the mat area that moves |
| Adhesive fixing has failed in the heat | Mat holds for a week, then shifts; sticky residue on the pile | Replace the adhesive with a mechanical anchor, since cabin temperatures above 140F break down most tapes |
How to keep rubber floor mats from sliding on carpet
Friction between rubber and carpet pile holds a light mat in place on its own. It does not hold a mat through a panic stop, so every rubber-over-carpet install needs something positive holding it down. Here are the five methods, strongest first.
| Method | Grip through braking | Heat resistance | Install time | Residue on the pile |
|---|---|---|---|---|
| OEM retention clip through a grommet | Mechanical lock, no give | Unaffected by cabin heat | About 10 minutes per mat | None |
| Hook-and-loop pad bonded to the mat | Strong once the hook is well anchored | Hook side fails first if heat-glued badly | About 15 minutes plus cure time | None on the carpet if the hook is fixed to the mat |
| Rubber gripper pad between mat and pile | Good, and it improves with wear | Unaffected | 2 minutes | None |
| Double-sided carpet tape along the edges | Moderate for light mats | Fails above 140F | 5 minutes | Sticky residue in hot cabins |
| Weight alone, on a heavy mat | Works in a van, poor in a car | Unaffected | None | None |
OEM retention clips and grommets
Where the factory clips still exist, this is the correct answer. Punch or pierce a grommet at the anchor point on the mat, then push the clip stem through the grommet eyelet and into the floor post. The clip now holds the mat down and resists the forward pull of braking without any adhesive at all.
Match the grommet to the mat thickness. A thin grommet in thick rubber is easy to distort while fitting, and a grommet far larger than the mat sits proud underfoot, which you will feel through the pedal.
Hook-and-loop pads for vehicles with no factory hooks
Owners of work-spec trucks and panel vans with no pegs in the floor end up here, and the technique that works is a two-layer pad rather than a single strip. The hook side has to reach the rubber backing and grip it, and a single thin strip often cannot bridge the gap.
Lay one or two layers of double-sided tape on the mat, press the hook strip into the tape so the hook face stands proud of the rubber, then peel the liner and press the pad down onto the carpet. On forums the most common refinement is a bead of hot-melt glue along the hook strip with roughly an hour of cure time, because tape alone lets the hook rip off the mat after a few weeks.
Rubber gripper pads, carpet tape and gravity
A textured rubber or rubber-backed gripper pad slipped under the mat improves friction and is a two-minute fix worth trying before anything else. Carpet tape works on light mats in moderate climates, but a cabin above 140F softens the adhesive and leaves residue in the pile that is harder to remove than the tape was to apply.
On thick horse-stall-style rubber in a van, several owners simply roll the mat rather than glue it, so it can be shifted for parking. That only works where the mat is genuinely heavy, and it is why weight appears in the table above.
Stopping rubber dye, oil and damp reaching the carpet
Black rubber sitting on light carpet can transfer a coloured bloom in the first weeks, and oil from the mat face works into the pile over time. A thin underlay between the two surfaces blocks it, and this barrier step is standard practice for rubber flooring in a garage but is almost never mentioned for a car.
Cut a piece of thin offcut carpet, a sheet of protective lining or even a layer of kraft paper to the shape of the mat and lay it over the carpet first. The mat then sits on the barrier rather than on the pile, and the underlay can be replaced independently when it picks up oil.
Damp is the other half of the problem. Rubber does not breathe, so any moisture trapped underneath stays there, and camper builds parked overnight with the vents closed are the worst case. Wipe the carpet dry before fitting, keep the underlay breathable rather than rubber-backed, and lift the mat occasionally in long-stored vehicles.
Checking pedal clearance after the mat goes down
Pedal interference is the reason this job matters, so check it properly rather than assuming. Sit in the driver’s seat with the mat fixed, then press and hold the brake, then the accelerator, then the parking brake.
Watch the underside of the mat as you do it. If the rubber lifts into the pedal box, the mat is too long in that direction and needs trimming even if it looks fine when parked, because the pedal only rises under load.
Repeat the check after a week of daily driving. Rubber creeps as it takes on heat and pressure, and a mat that felt clear on day one can be close by day seven.
Vans, trucks and camper conversions
Truck beds and van interiors are the easiest version of this job because there is no carpet to fight and usually no pedal to protect. Full-coverage rubber tiles go down on a cleaned floor, left with a quarter-inch to half-inch expansion gap at every perimeter, because rubber moves with temperature and a butted joint will buckle into a ridge.
Where a van keeps carpet, the same rules apply as in a footwell, with one addition: cut around the seat rails and any heater or vent channel rather than bridging over them. A ridge under a camper seat rail is both uncomfortable and a trip hazard.
If the van doubles as a camper, fit the rubber before the build-out, and leave the mat in panels rather than one piece so a panel can be lifted for access to the floor beneath.
Custom-fit versus universal rubber mats on carpet
Custom-fit rubber sits noticeably better on carpet because the edges are shaped to the floor pan rather than overlapping the sill. It also usually carries a moulded channel for a factory clip, so anchoring is a two-minute job when the vehicle has pegs.
A universal mat gives you more coverage and a deeper well for mud, but it needs cutting, and a badly cut universal mat is the single most common reason a rubber mat ends up under the pedals. If you go universal, use an old OEM mat as the template where one is available, and check universal templates against the real floor pan.
Foam-backed mats behave differently again. They compress rather than grip, so they need either a hook-and-loop anchor or a gripper pad, and a heavy foam mat over carpet will eventually flatten at the driver heel and lose its edge.
Trimming and finishing cut rubber edges
A cut edge is the part that looks wrong and the part that fails first. Score the line firmly with a straightedge, take three light passes instead of one heavy one, and always cut on a scrap board so you are not cutting into the carpet pile underneath.
Deburr the edge with the blade held at a shallow angle, then press a self-adhesive rubber edge trim or binding strip over it. Trim does three jobs: it stops the cut edge from curling, it hides the ply lines, and it keeps water out of the mat when you wash the footwell.
Round the corners slightly. Square corners lift first, and a lifted corner is exactly where a mat starts to catch the sill plate.
When to replace the mat instead of refitting it
Refitting a mat is worth it when the anchor points still exist, the backing has grip left, and the mat itself is flat. It is not worth it when the mat has hardened, when the cut edges are curling, or when the mat is simply the wrong shape for the footwell.
Rubber that has gone hard and shiny no longer grips, and no amount of cleaning will bring it back. A mat that has to be trimmed every time you refit it is telling you the wrong mat was bought for that car.
Replacement is also the right call when you are chasing pedal clearance you cannot achieve by trimming, because a mat that fights the pedals is a safety problem, not an aesthetic one.
Frequently Asked Questions
Can I put rubber floor mats over carpet?
Yes. Lay a rubber all-weather mat straight over carpet as long as the pile is clean and completely dry. Cut the mat to the footwell contour so it sits flat, keep the dead pedal area clear, and anchor it with a factory clip through a grommet, hook-and-loop pads or a rubber gripper pad. A protective underlay between rubber and pile prevents dye and oil transfer.
How to keep car floor mats from sliding on carpet?
Clean and dry the carpet first, since grit under the mat acts as ball bearings. Trim the mat so it does not overlap the sill, fit a grommet and use the factory retention clip where one exists, and add a rubber gripper pad under any area that still moves. In a hot cabin, mechanical anchors hold far better than tape or hook-and-loop alone.
How to make rubber car mats stay in place?
Use a mechanical anchor wherever the vehicle allows one. A factory retention clip through a grommet is the strongest fix and is unaffected by cabin heat. Where there are no pegs, build up a hook-and-loop pad with one or two tape layers under the hook strip so it reaches the mat backing, and give any hot-melt adhesive about an hour to cure before refitting.
How do I keep floor mats from sliding in my truck?
Most trucks have anchor points along the sill that are simply not being used, so fit a grommet and clip first. On work-spec trucks with no pegs at all, use layered hook-and-loop pads on the mat, or a heavy rubber mat with a gripper pad underneath. In a truck bed, weight alone usually holds the mat, provided it is laid flat.
How to get WeatherTech mats to stay in place?
These mats are moulded for a specific footwell and normally include a channel for the factory clip. Fit a grommet in that channel and push the factory retention clip through it, which is the intended fixing. If the mat is still loose, check that every anchor point on the sill has a clip fitted, and that the mat is not overlapping the sill plate or the dead pedal.
Will velcro stick to automotive carpet?
It sticks to the rubber mat far better than to the carpet, which is why the hook side is often the part that fails. Bond the hook strip to the mat with tape or hot-melt glue rather than relying on the carpet pile, and allow the cure time. Velcro fixed straight to carpet pulls the fibres out and leaves a permanently thinned patch.
How can I prevent my car mats from slipping?
Work through the causes in order: dirty or damp carpet, a mat cut too large, an unused or missing anchor point, a worn anti-slip backing, or a heat-failed adhesive. The first two are fixed with cleaning and trimming, the third with a grommet and clip, and the last with a mechanical anchor. Check pedal clearance again after a week of driving.
What is the best adhesive for rubber matting?
For an automotive install, mechanical fixing beats every adhesive. Cabin temperatures above 140F soften ordinary carpet tape and double-sided foam tape, which then slides and leaves sticky residue in the pile. Where an adhesive is unavoidable, use a hot-melt bead on the mat side with about an hour of cure time, and keep the adhesive off the carpet itself.
How to transition carpet to rubber flooring?
Cut a protective underlay to the shape of the rubber and lay it over the carpet as a barrier against dye and oil. Fit the rubber on top, leaving a quarter-inch to half-inch expansion gap at every perimeter so temperature movement does not buckle the joint. Finish exposed edges with rubber trim or binding tape to stop the cut edge curling and lifting.
How to keep foam mats from sliding on carpet?
Foam mats compress rather than grip, so they need an anchor rather than friction. Fit hook-and-loop pads to the mat backing, keeping the carpet side free of adhesive so the pile is not damaged. A rubber gripper pad underneath adds bite, and in a van a heavier foam tile is often enough on its own if it is laid flat and fully supported.
Conclusion
To fit rubber floor mats over carpet well, the mat matters far less than the preparation does. Clean and dry the pile, lay a barrier against dye and oil, cut the mat to the real floor pan with a seat rail relief, and anchor it mechanically rather than with tape. Check pedal clearance on day one and again a week later, and the mat will stay where you put it for 2026 and well beyond it.