
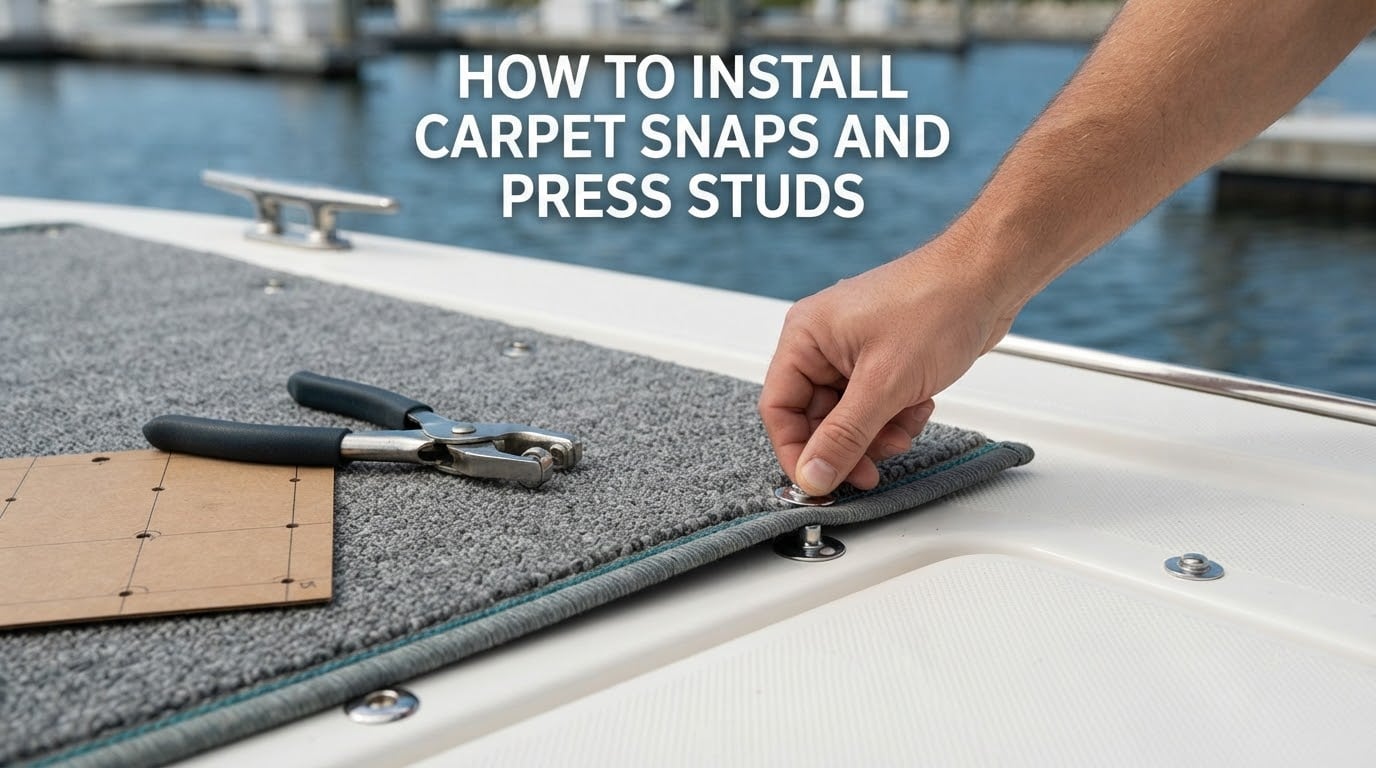
Carpet snaps and press studs are two-part snap fasteners: a male stud is screwed or riveted to the deck or mounting surface, and a matching socket is set into the carpet panel with a snap setting tool. Press the panel down and the socket legs flex over the stud to lock it, then pull upward to release it. The whole job is two halves installed in sequence, and getting the two halves to line up is what makes or breaks the result.
If you have been searching for a way to learn how to install carpet snaps and press studs, this guide covers the complete job on both sides of the panel. You will get the tools list, the anatomy of the fastener, a ten-step walkthrough, the post length rules that decide whether a thick marine carpet grabs the stud or just sits on top of it, and what to do when an old stud is stripped, oversized or in the wrong place.
We run snap-in panels on our own boats and have reworked more than a few that came from previous owners. The pattern repeats almost every time. Somebody gets the hardware right, then marks the panel positions by eye instead of from a template, and the panel lands half an inch off. It looks fine lying flat on the driveway and it will not latch on the deck.
Why bother with a snap-in panel at all? Because glued marine carpet is permanent, and a permanent floor is a problem the first time you get water under it, need to reach a deck screw, or want to hose the deck down. A snap-in panel lifts out, gets washed, dries flat, and goes back in. It also survives a whole lot more abuse than a glue-only install, because the snaps carry the load and the adhesive only has to hold the panel’s own weight.
Snaps are not limited to boat floors. The same fastener sets into seat cushions, hatch covers, tote and pouch bags, leather goods, and boat covers. The principles are identical; only the base of the stud changes.
Table of Contents
- What You Need Before You Start: Tools and Materials
- The Four Parts of a Snap Fastener
- How to Install Carpet Snaps and Press Studs: Step by Step
- Choosing the Right Post Length for Thick Marine Carpet
- Cloth-to-Cloth Studs vs Cloth-to-Surface Screw Studs
- How to Mark Snap Positions So the Panel Drops In
- Why Your Carpet Panel Will Not Snap Down
- Removing and Replacing Old or Mismatched Studs
- Installing Snaps on Boat Covers, Cushions and Canvas
- Frequently Asked Questions
- How do you install snap fasteners?
- What tool do I need to attach snaps?
- What are snap fasteners used for?
- How do you attach snap buttons to fabric?
- How to attach snap fasteners without a tool?
- What size snap stud should I use for thick marine carpet?
- How do I reattach snap buttons that have pulled off?
- How do I install snaps on a boat cover?
- Conclusion: A Panel That Drops In and Stays Down
What You Need Before You Start: Tools and Materials
Here is the short version. You need a snap setting tool with a punch and an anvil, a separate hole punch for the pilot hole, the studs and sockets in a matched pair, and a way to hold the panel while you set the second half.
- Snap setting tool (also sold as snap pliers, snap setting pliers, or an application tool). This is the die-and-punch tool that flares the socket legs and caps the stud post in one squeeze. This is the one tool you cannot substitute.
- Single-hole punch (also called a snap hole punch). It cuts the clean round hole the stud passes through. Leather hole punches do not work well on thick marine carpet.
- Matching studs and sockets, sold as a set. Buy marine grade stainless if the panel lives in a wet environment.
- Correct post length for your carpet thickness. See the post length section below, because this is the single most common failure.
- Backing washers for thin fabric, leather, and anything where the stud head might pull through.
- Interfacing or stabilizer for light fabric such as canvas or pouch material. Marine carpet is dense enough on its own and does not need it.
- Drill and bits sized to the mounting surface, if studs are being screwed into a deck rather than riveted.
- Template material: cardboard, thin plywood, poster board, or a scrap of the carpet itself.
- Masking tape and a pencil for marking positions on a surface you must not scratch.
- Rubber mallet and a scrap block to seat the panel flat while you work.
Two notes on the tool itself. First, practice on a scrap of material before you touch the real panel, because a misaligned punch bends the stud post instead of capping it. Second, if a quality tool feels out of reach, a lighter-duty tool still works for canvas and cushion work; it just will not hold up to thick marine carpet day after day.
The Four Parts of a Snap Fastener
Searchers use all of these names for the same hardware, so here is the naming straight. Knowing which part goes on which side saves a lot of confusion at the bench.
Cap (also called the button, the cap stud, or the male part) — this is the decorative disc on the face of a fastener. On a cloth-to-cloth fastener it snaps over a post and is what you see and press.
Socket (also called the female part, the female socket, or the stud button) — this is the cup-shaped part with four legs that flares open to grip whatever it is pressed onto. The socket is the half that goes into the carpet panel, and the part that receives the deck-side stud.
Stud (also called the male part, the post, the snap stud, or the press stud) — this is the solid post with a barbed tip. It is what the socket grips. On a screw-base stud it also has a threaded shank that screws into the deck, so one part does two jobs.
Back piece (also called the backing, the post back, or the back washer) — the disc on the reverse side that the stud is riveted or set against. It spreads the load so the fastener does not tear through thin material.
Once you have those four words straight, the rest of the job is sequence. Everything on the panel side is one part plus a back piece. Everything on the deck side is a stud plus whatever base it needs to hold on.
How to Install Carpet Snaps and Press Studs: Step by Step
The order below is the order that works. The plan and mark stage comes first because every hole you drill after that point has to agree with it, and the deck side goes in before the panel side because the panel has to be cut to match hardware that is already fixed.
Part A: Plan and Mark Every Position
The first thing to get right is spacing. A panel needs a snap roughly every 12 to 18 inches along its length, closer together along edges and high-traffic areas, and never closer than about 4 inches from a corner. Too few snaps and the middle of the panel lifts. Too many and the panel is rigid and hard to fit in a tight locker or under a seat.
- Lay out the finished panel shape first. Measure the deck, mark the outline, and cut the carpet oversized so there is material to trim later.
- Make a full-size template from cardboard or thin plywood and mark every snap position on it, not on the carpet.
- Check the template against the deck. Hold it in place and confirm the panel clears every fitting, drain, hatch, and seat base before you punch anything.
- Transfer the marks to the back of the carpet with a soft pencil or chalk so nothing bleeds through to the visible face.
A Mastercraft owner building a snap-in panel for his own boat cut a template from plastic sheeting, transferred it to the back of the carpet, and had an upholsterer bind the edges, leaving roughly 2 to 3 mm per edge for the binding. He then set the press studs himself with snap pliers and found the deck-side counterparts already fitted by a previous owner worked fine. That allowance matters: bound edges pull in, and a snap set exactly on the trim line ends up outside the finished panel.
Part B: Install the Deck-Side Studs
On a fiberglass, plywood, or aluminum mounting surface, the stud is fixed to the surface. On soft material, it is fixed to a flat plate or a reinforced area.
- Remove the old carpet and clear the surface. Adhesive residue under the snap positions is what makes studs sit crooked later.
- Drill or punch a pilot hole to the diameter the stud manufacturer specifies for that base material. The hole should be a clean fit, not a clearance fit, on a self-tapping stud.
- Drive the screw-base stud straight in with the snap tool, or seat a rivet-base stud with the setting tool and its rivet post.
- Check every stud is vertical and the same height. Run a straightedge across the set of studs. One proud stud is enough to stop the panel seating flat, and it is easy to miss on a curved deck.
If the old studs are still solid, and they are the same pattern and the same height as the new ones, leave them in. A previous owner’s hardware is not a defect, and one Sea Hunt owner confirmed the deck-side fasteners already on his boat did the job. Replace them only if they are stripped, loose, the wrong height, or incompatible with the sockets you are using.
Part C: Set the Sockets Into the Carpet Panel
- Reinforce the back of each hole with a scrap of carpet, interfacing, or a thin backing plate so the post cannot cut through when the panel is lifted.
- Punch the hole with the hole punch at each mark, working from the back of the carpet so any slugs push out of the visible face.
- Insert the socket post through the hole from the panel side, place the back piece over the protruding post, and squeeze the setting tool until the socket legs flare fully.
- Test each socket on a spare stud before moving on. A socket that will not grip a loose stud on the bench will not grip the deck in the boat.
Hammer-and-anvil kits exist and work on light fabric, but the pliers-style setting tool is far more controllable in thick carpet because it does not depend on a perfect swing angle. Either way, work on a hard surface, not on a soft one, and close the tool completely on every squeeze. A half-set socket is the version that fails six months later.
Part D: Fit and Test
- Lower the panel onto the studs straight down with no twisting, then press firmly along each snap until you feel or hear the socket click over the post.
- Walk the panel and press every corner and edge again. Any snap that lifts under weight is a failed setting and should be replaced, not squeezed harder.
- Remove and refit the panel twice before you call it done. A snap-in floor that only works the first time has a set socket with a bent post or a hole drilled a fraction off.
Choosing the Right Post Length for Thick Marine Carpet
Post length is the number that decides whether this works, and it is the one number most guides skip. A post that is too short never reaches far enough through the socket to be gripped, so the panel rests loose on top. A post that is too long pushes past the socket and the panel never sits flat, which on a deck means a trip hazard and a lifted edge.
Match the post length to the total stack you are building: the carpet thickness, plus any backing or reinforcement you added, plus a small allowance. The common marine lengths are 15mm, 3/8 inch, and 5/8 inch. Most standard marine carpet with a light backing works with 3/8 inch. Woven or thicker sea grass style flooring, layered panels, and carpet with a rubber backing generally need 5/8 inch. Light canvas and pouch fabric use the short post.
Here is the hand-fit test that removes the guesswork. Take one stud and one socket, put the socket over the stud, and press. You want the socket to slide over the post and then stop with a definite click, roughly a third of the way to the base of the post, with the socket face sitting flush against the fabric. If the socket bottoms out before it clicks, the post is too long. If it slides on and falls off, the post is too short. Test before you punch ten holes.
Do not assume a longer post is the safer choice. Owners chasing a panel that will not latch often move up a size, and the panel then rocks on the studs with the edges lifted. That is the second most common complaint after misalignment.
Cloth-to-Cloth Studs vs Cloth-to-Surface Screw Studs
This is the distinction that trips people up when ordering, because both are sold as press studs and the listings look identical.
Cloth-to-cloth studs are the ordinary fabric snap. The stud is solid, with no threaded shank, and it is meant to grip the socket set into the other piece of fabric. A cushion top snapping to a cushion base, a tote flap, a garment closure. Use these when both halves are fabric.
Cloth-to-surface studs, often called screw studs, have a threaded shank below the post. That shank goes into a drilled hole and pulls the stud tight against a hard surface, so a carpet panel can snap straight onto a fiberglass deck, a plywood bulkhead, or an aluminum panel. This is the one you want for a snap-in floor.
The practical tell: hold the stud up. A cloth-to-cloth stud is one continuous piece of metal. A cloth-to-surface stud has a visible step where the post meets the shank, and the shank is longer than the post. If you are installing into a deck and you bought cloth-to-cloth, the panel will fit in your hand and still have nothing to attach to on the deck side.
For a marine panel, choose marine grade stainless rather than plated steel. A wet deck, salt air, and a stud that is rarely removed are a poor match for a finish that pits. A DOT-style heavy snap is a further step up in holding strength and is worth considering where the panel takes real weight, such as a walk-through floor or a hatch cover.
How to Mark Snap Positions So the Panel Drops In
Alignment is the problem forum posts return to most often, and it is the one step where guessing is expensive. If the panel holes and the deck studs do not agree, no amount of pressing will fix it.
The fix is to mark from the deck, not from the carpet. Mark every stud position on the surface with masking tape, then hold the template against the deck and transfer those marks onto the template. Cut and set the carpet from the template, never from a mark on the new carpet itself.
Keep three things in mind as you mark:
- Add a consistent offset. Decide once whether the socket sits 2 to 3 mm in from the finished edge, or in from the binding line, and apply the same number at every position.
- Leave the binding allowance. The 2 to 3 mm per edge that an upholsterer needs is taken off the panel size before you mark the snaps, not after.
- Check the panel clears its surroundings. On a boat, a panel that latches but blocks a drain, a hatch lift, or a seat slide is not finished.
If the carpet is already installed and you need to reach the surface to punch or drill, you do not have to pull the whole panel. Manufacturer instructions for hardware mounted through carpet call for slitting the carpet with a 1/2 inch X over the position, reaching the substrate, doing the work, then closing the slit and re-binding the edge. It is slower than lifting the panel and much faster than re-cutting one.
Why Your Carpet Panel Will Not Snap Down
Four causes account for almost every failed panel I have been asked about.
The sockets and studs do not line up. Either the panel was marked by eye, or the panel shifted between marking and punching. Fix: transfer from a template taken off the deck, and check one position with a socket before punching all of them.
The post is the wrong length. The socket either never reaches the grip or passes straight over it. Fix: run the hand-fit test in the post length section before ordering or punching.
The socket was set on a hole with no backing. On thick carpet the post can cut a diamond-shaped hole and the socket pulls out. Fix: reinforce the back of every hole and re-set those sockets.
The tool was not fully closed. A half-set socket holds on a flat table and lets go the first time someone steps on it. Fix: replace it rather than pressing it harder, and squeeze the setting tool to its stop on every future setting.
Two smaller ones worth knowing. Studs set in a curve or in a slightly domed deck stand at different angles, so a flat-panel alignment will only be close. And old studs that sit proud of the surface or sit at a different height from the new ones will make an otherwise perfect panel rock.
If a stud is physically in the way rather than misaligned, one Facebook owner resolved an over-sized stud on a cushion by shaving it down with a rotary tool or sandpaper until it seated properly in the socket. That is a legitimate repair for a stud that is too tall for a replacement socket you already own. It is not a substitute for the right post length in the first place.
Removing and Replacing Old or Mismatched Studs
Removal is the reverse of installation, with one extra care point: do not let the tool touch the gelcoat or the finished face of the panel.
To remove a socket, support the back of the carpet with a block, place the tool’s release die over the socket legs from the visible side, and squeeze. The legs collapse back through the post and the fastener lifts out. To remove a screw-base stud, back the screw out with the correct driver rather than levering on the post, which will chew the surface around it. To remove a rivet-base stud, use the rivet’s removal die in the setting tool.
For a stripped hole in a fiberglass deck, the practical fixes are a slightly larger self-tapping screw, a bonded-in insert, or a backing plate with fresh screws. Filling the hole with adhesive and driving the stud straight back in works, but it needs a full cure before the panel goes back down.
Once the old hardware is out, clean every position before marking new ones. Residue left under a stud is the reason a re-fitted stud sits at a slight angle and the socket leans on its post.
Installing Snaps on Boat Covers, Cushions and Canvas
The same tool and the same sequence cover a canvas boat cover or a seat cushion, with two adjustments. Use an ordinary cloth-to-cloth stud rather than a screw-base version, and add a backing washer on anything thin enough for the stud head to pull through.
On canvas or webbing, set an interfacing or stabilizer layer over the reverse side before punching. That layer is what stops the hole from stretching into a slot. On leather, use a heavy-duty snap with a solid back piece, and punch with a leather-specific punch rather than the cloth punch. Press studs on a cover go in pairs so the edge can fold closed over the matching stud, spaced 6 to 8 inches apart and set well in from the hem so the finished edge covers the fastener.
Frequently Asked Questions
How do you install snap fasteners?
To install snap fasteners, mark both positions first, then work one half at a time. Set the socket into the fabric or carpet with a snap setting tool, and fix the stud to the second surface. Install the deck side first, transfer the marks to the panel through a full-size template, punch the holes, and set the sockets last. Press the two halves together until the socket legs click over the stud post.
What tool do I need to attach snaps?
You need a snap setting tool, also called snap pliers or a snap application tool. It combines a punch and an anvil so one squeeze flares the socket legs and caps the stud post. A single-hole punch for the pilot hole is the second essential item. Hammer-and-anvil kits work on light fabric, but pliers-style tools are far easier to control in thick marine carpet.
What are snap fasteners used for?
Snap fasteners join two surfaces and release them again with a pull, with no adhesive and no permanent fastening. On a boat they hold removable marine carpet panels to the deck, and they also secure seat cushions, hatch covers, boat covers, and canvas. Elsewhere they are used on tote bags, pouches, wallets, leather goods, and garment closures, wherever a strong join needs to open and close repeatedly.
How do you attach snap buttons to fabric?
Reinforce the back of the fabric with interfacing if the material is light, mark the position, and punch a clean hole. Insert the socket post from the visible side, place the back piece over the protruding post, then squeeze the setting tool until the socket legs are fully flared. Work the tool on a hard surface and close it completely on every squeeze, since a half-set socket is the most common cause of a fastener that later releases itself.
How to attach snap fasteners without a tool?
There is no reliable way to set a metal snap fastener by hand. Pliers alone will not flare the socket legs evenly, and a hammer and anvil kit still counts as a tool because the anvil is what forms the legs. If a setting tool is not practical right now, the alternatives are a temporary fix such as a screw and washer or hook-and-loop tape, or having the panels set by an upholsterer.
What size snap stud should I use for thick marine carpet?
Match the post to the full stack thickness, which is the carpet plus any backing you add. Most standard marine carpet with a light backing works with a 3/8 inch post, while woven or thicker flooring and carpet with a rubber backing generally need 5/8 inch. Light canvas uses the short post. Test one stud and socket together: the socket should slide on, click about a third of the way down, and sit flush against the fabric.
How do I reattach snap buttons that have pulled off?
Lift the detached socket off the stud, check whether the fabric around the hole is stretched or torn, and trim any frayed pile back to sound material. If the hole has opened up, patch it from the back with a scrap of the same carpet or a stabilizer layer, then punch a fresh hole slightly to one side. Set the new socket with its back piece and test it on a spare stud before refitting the panel.
How do I install snaps on a boat cover?
Use cloth-to-cloth studs and add a backing washer wherever the stud head could pull through. Reinforce the reverse of the canvas or webbing with interfacing, punch the holes, and set one half on the cover flap and the other on the body of the cover. Space the fasteners 6 to 8 inches apart and set them far enough in from the hem that the finished edge fully covers them.
Conclusion: A Panel That Drops In and Stays Down
Learning how to install carpet snaps and press studs comes down to three decisions, in this order. Fix the deck-side studs first and check that they are the same height. Mark the panel from a full-size template taken off the deck, allowing a couple of millimetres per edge for binding. Then choose the post length to match your actual stack thickness and test one socket on a spare stud before punching the rest.
Get those three right and the rest is repetition. Work on a scrap first, close the setting tool fully every time, and refit the panel twice before you call it done.
Before you start, lay out the panel in the space it will live and confirm it clears every drain, hatch, and seat base. That check takes a minute and saves a cut panel.