
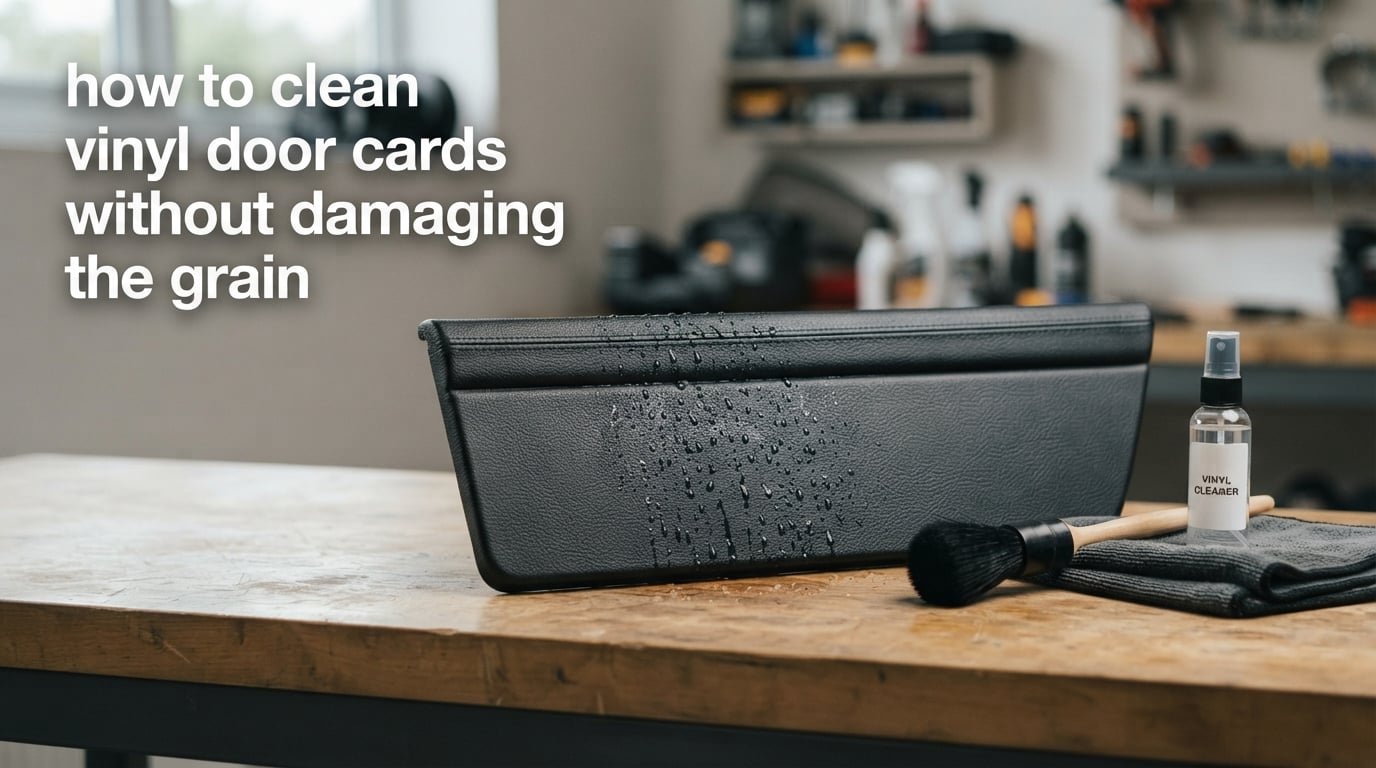
Here is the short answer. Vacuum the panel, patch test, then dilute a pH-neutral, solvent-free interior cleaner roughly 1:10 and spray it onto a microfiber towel rather than the panel. Work it into the grain with a soft detailing brush, let it dwell 30 to 60 seconds, wipe with a clean folded towel until the towel comes up clear, dry fully, then finish with a matte protectant. The two mistakes that ruin vinyl door cards are spraying harsh solvent directly onto the surface and scrubbing hard. Dwell time does the work a stiff brush cannot.
A door card is one of the most-handled surfaces in any car and almost nobody cleans it properly. The armrest takes years of skin contact, body oils and sweat. The switch panel collects sunscreen, hand cream and grit. And the grained upper section traps dust in its texture lines where a damp cloth never reaches. Left alone, that build-up goes hard, then the material loses the softness that makes vinyl feel like vinyl in the first place.
What follows is the method we use on vinyl and leatherette door cards, the reasoning behind the restraint in it, and the point where cleaning stops being the right answer. If you have been wondering how to clean vinyl door cards without damaging the grain, the order of operations matters far more than the product you pick.
Before you start: no two panels are the same. A grained vinyl upper, a stitched armrest, a textured painted plastic bezel and a fabric insert on the same door need four different approaches. We cover that zone by zone further down.
Table of Contents
- What vinyl door cards actually are, and how to tell what yours is made of
- Why vinyl grain cracks: plasticizer loss versus mechanical abrasion
- How to clean vinyl door cards without damaging the grain: the step-by-step method
- Clean each door card zone on its own terms
- Products and tools: safe, moderate, and never-use-on-vinyl
- Deep-cleaning baked-in armrest and handle grime
- Spot removal: crayon, ink, scuffs, sunscreen and hand cream
- Protecting the grain after cleaning
- A maintenance schedule that keeps grain supple
- Cleaning the door card off the car: the workshop method
- When cleaning is no longer enough: signs the panel needs re-trimming
- Frequently Asked Questions
- How to clean car door cards?
- What is the best way to clean plastic car door panels?
- What is the best cleaner for car door panels?
- What is the best thing to clean vinyl in a car?
- What is the best way to clean vinyl doors?
- What is the best cleaner for car plastic trim?
- How do I clean my car’s plastic trim?
- Can I use Dawn dish soap on vinyl wrap?
- Conclusion
What vinyl door cards actually are, and how to tell what yours is made of
A vinyl door card is a rigid carrier panel wrapped or bonded in a synthetic leather. The surface you touch is a grained plastic layer containing flexible additives called plasticizers. That grain is not decoration. It is a moulded texture that lets the surface flex slightly as temperature changes, and the peaks of that texture are the first thing to disappear when the material is treated badly.
Four materials show up on door cards, and they all accept roughly the same method with small adjustments.
- Grained vinyl – the classic. Visible pebble texture, usually with a stitched or moulded seam. It flexes under your thumb when the car is warm.
- Leatherette or vegan leather – a coated synthetic with a softer, sometimes almost flat grain. It feels more like coated fabric than vinyl and reacts badly to alcohol-based products.
- TPO and hard plastic trim – no flexible layer. It is a thin, grained skin over a structural panel and it will not flex at all.
- Soft-touch plastic – textured but grippy and slightly tacky to the touch. It traps fingerprints more than other surfaces and is easy to over-wet.
You do not need to know the exact polymer. You need to know how it behaves. Here is a 30-second check.
The flex test. Press firmly on a hidden area with your thumb for a few seconds. Supple material pushes back and springs. Hard plastic does not move at all.
The water-bead test. Put a few drops of plain water on a low-visibility spot. A coated or sealed surface beads up. A porous or heavily conditioned surface soaks straight in. Leathette and coated leatherette will often absorb slightly.
The grain-peak test. Run a fingernail lightly across the texture. If the peaks feel raised, distinct and slightly soft, you have real grain and you should treat it gently. If the surface feels uniformly smooth and hard, it is a painted or textured plastic and you have more latitude with brushes.
The seam check. Look at how the material is attached. Visible stitching means genuine vinyl or leatherette over foam. A folded and stapled edge points to a cheaper membrane, and those react worse to strong solvents.
Identifying the material before you clean is the single step most guides skip. Nearly everyone reaches for a product, works it in, and discovers the problem afterwards.
Why vinyl grain cracks: plasticizer loss versus mechanical abrasion
Grain damage is not one thing. It is two independent processes that look identical when you look at a worn panel, and you need to know which one you caused because only one of them is your fault.
Chemical attack strips the plasticizers. Vinyl stays supple because of plasticizers suspended in the polymer matrix. Solvents, alcohol, ammonia and strong alkaline cleaners dissolve and carry those plasticizers away with the wipe. The material does not fall apart immediately. It loses flexibility, the surface goes chalky and lighter, and the texture lines are the first place to fail because they are where the material is already under the most strain. Every aggressive clean removes a layer of that cushioning. Age, heat and UV exposure remove the rest.
Mechanical abrasion knocks the grain peaks flat. A stiff bristle brush, a magic sponge, a scouring pad or a dry cloth rubbed over dusty grain all work as abrasives. The raised peaks of the texture are softer and more vulnerable than the flat backing, so they are the peaks that go first. What is left is a flat, dull, oddly smooth patch in the middle of a textured panel. That smooth patch is the visual signature of a surface someone scrubbed rather than cleaned.
Two things accelerate both processes. UV exposure drives off plasticizers and degrades the polymer chain at the same time. Heat does the same job faster, which is why a dashboard in summer takes far more punishment than a door card. This is the honest part of the advice that circulates online: cleaning frequency is not the main cause of cracking. Age drying is. You cannot clean your way out of a fifteen-year-old panel, but you can avoid making it worse.
There is a third, subtler route. Over-wetting. Water-driven cleaners can migrate behind a seam or under an edge and lift the adhesive bond between the vinyl skin and its foam backing. When that bond lets go you get the soft, wrinkly, flaking surface that owners on the Classicrover and Saab Central forums describe as coming back to life months after what seemed like a good clean. The panel looked great on the day. It failed quietly underneath.
How to clean vinyl door cards without damaging the grain: the step-by-step method
This is the core method. Work one panel, one zone at a time, and never move to a new section while the old one is still wet.
Step 1 – Dry clean first, always. Vacuum the panel with a crevice tool and a brush head to pull grit out of the grain grooves and out from behind the switch panel. Then wipe with a dry microfiber towel. A damp cloth on a dusty panel grinds the dust into the grain peaks, and that is abrasion you chose.
Step 2 – Identify the zone and patch test. Confirm what the surface is using the tests above. Then put a small amount of your cleaner on a hidden spot, usually the lower rear corner where the seat meets the panel. Wait a few minutes and look for colour change, stiffness, a shiny spot or a bleached halo. If anything changes, stop and change products. A Miata owner working a full door card with a strong interior cleaner documented exactly this routine of diluting 1:10 for general soiling and only going stronger on genuinely heavy patches.
Step 3 – Dilute properly. A concentrated surfactant cleaner needs water to carry it into the grain and to spread it. Start at roughly 1:10, cleaner to water. For an armrest with real build-up you can go to about 1:4, applied only to that spot, not the whole panel. Water plus detergent alone is acceptable for light dusting but it lacks the surfactant load to shift baked-in body oils, and that is the failure everyone reports.
Step 4 – Spray the towel, not the panel. This is the habit that changes everything. Put your solution into a folded microfiber towel or a spray bottle you can direct precisely. You control the volume, you keep liquid out of the seams and the switch panel, and you avoid the runs and drips that cause over-wetting. Direct spray on a panel is how water gets behind an edge.
Step 5 – Agitate the grain gently. Load a soft detailing brush with the solution and work it across the grain in short overlapping strokes. The goal is to move cleaner into the texture grooves, not to scrub. Use a firmer vinyl brush only where build-up is genuinely heavy, such as the armrest top, and step back to a soft microfiber applicator for the surrounding areas. An Auto Geek Online walkthrough on a late-2000s model demonstrated precisely this graded approach, with the stiff brush confined to the dirty section.
Step 6 – Let it dwell for 30 to 60 seconds. This is where people lose their patience and start scrubbing. Dwell time lets the surfactants soften and lift the grime so the wipe does the lifting instead of the brush. Every piece of forum advice that ends in a scrub pad is advice that skips this step. Give the chemistry a minute before you add any force.
Step 7 – Wipe and flip. Use a clean, dry, folded microfiber towel and wipe in the direction of the grain until the towel comes away clear. When it stops being clear, flip to a clean face. Most people stop far too early and call the haze that is left a failed clean. It is a dirty towel.
Step 8 – Dry fully before you protect. Open the door, run the fan, and leave the panel until the surface is completely dry to the touch. Drying and curing time is the step most people skip, and dressing a damp panel traps that moisture directly against the vinyl. The advice from the Classicrover and Saab Central communities converges on a simple rhythm: open the pores, clean thoroughly, dry properly, then condition.
Once that eight-step cycle is automatic, most door cards need it monthly and heavily used armrests need it more often than that.
Clean each door card zone on its own terms
A door card is not one surface. Treating it as one is why people end up with a clean fabric insert and a wrecked armrest.
| Zone | Method | What to avoid |
|---|---|---|
| Grained vinyl upper panel | Diluted pH-neutral cleaner sprayed on a towel, soft brush into the grain, 30-60 second dwell, microfiber wipe | Direct spraying, stiff brushes, magic sponge, alcohol-based products |
| Stitched armrest | Stronger dilution of about 1:4 applied only to build-up spots, vinyl scrub brush, longer dwell, firm but controlled wipe | Hard scrubbing across the grain, saturating the stitching and seams |
| Textured painted plastic bezel and switch panel | Same cleaner, soft brush to work the texture, careful control of liquid around switches | Flooding the switch cluster, scraping residue with hard tools |
| Fabric or carpet insert | Separate upholstery cleaner worked with an extractor and a stiff brush, not the vinyl method | Getting the insert wet, using the vinyl panel as a drip cloth |
Note the split in the last row. Fabric needs more water and more agitation than vinyl because it has no grain peaks to preserve. Applying the vinyl method to a fabric insert just leaves it dirty and damp.
Products and tools: safe, moderate, and never-use-on-vinyl
What you are looking for is a water-based, solvent-free, pH-neutral interior cleaner with a real surfactant load, plus a matte protectant with no silicone. That is the entire shopping list. The table below is the version worth printing.
| Product or tool | Verdict | Why |
|---|---|---|
| pH-neutral, solvent-free interior cleaner | Safe | Lifts grime with surfactants and dwelling time without dissolving plasticizers |
| Microfiber towel or applicator pad | Safe | Moves dirt without abrasion and controls how much liquid reaches the panel |
| Soft detailing brush, short natural bristles | Safe | Reaches the grain grooves with no risk to the peaks |
| Matte, non-greasy interior protectant or conditioner | Safe | Replenishes surface oils and slows the loss of suppleness after cleaning |
| Vinyl and leather scrub brush | Moderate | Acceptable on heavy build-up only, worked with dwell first and no dry scrubbing |
| Melamine magic sponge | Moderate | Works on flat low-grain surfaces when you do not scrub, as 718forum owners advise; it will flatten pronounced texture if you do |
| Steam | Moderate | Opens pores and loosens grime with no chemicals, but over-wetting risk around electronics and seams |
| Ammonia and window cleaners | Never | Strips plasticizers and dulls the surface permanently |
| Bleach and oxidising cleaners | Never | Attacks the polymer and leaves the texture brittle |
| Silicone shine dressings and exterior trim waxes | Never | Leave a greasy film that traps dust, and some soak into the material |
| Alcohol and solvent-based interior cleaners | Never on leatherette | Dries coated leatherette out and stiffens it |
| Dish soap, degreaser, household spray | Never | Strong alkalinity and fragrance residue that holds dust and dries the surface |
| Stiff bristle brush, scouring pad, abrasive sponge | Never | Abrades the grain peaks flat and permanently dulls the texture |
On that last question specifically, because it comes up constantly: dish soap is a degreaser with a high pH and a strong fragrance load. It will strip plasticizer and leave a residue that attracts dust. It is a reasonable one-off degreaser for a greasy engine bay and a bad choice for anything a person leans on.
On fragrance, take the online complaints seriously. Strongly scented dressings are the single most common reason people abandon a routine. The smell fades in a day and the dust-attracting film does not.
Deep-cleaning baked-in armrest and handle grime
The most common failed approach is reaching for the ordinary interior shampoo, scrubbing the armrest, wiping it, and declaring the panel unbeatable. On a thread on r/Detailing, owners described trying multiple interior shampoo products with no result on stubborn door-card grime. The popular reply was a stronger interior cleaner combined with a scrub pad, and that is where most how-to guides go wrong: it works on the dirt and it abrades the grain at the same time.
The reason ordinary shampoo fails is not a lack of pressure. It is a lack of surfactant concentration and a lack of dwell time. Body oil polymerises into the surface over months and it does not respond to a wet cloth that touched it for two seconds.
Here is what works instead. Work the 1:4 dilution into the armrest with a vinyl brush, and leave it for a full minute. If it has not moved, leave it longer rather than adding force. Then wipe with a clean towel and assess. Most of the build-up comes away on the towel. For what survives, a second dwell is usually enough.
Match the tool to the section, as the graded approach in the Auto Geek Online walkthrough showed. The armrest crown takes the stiff brush. The flatter panel around it, the pull handle and the door pocket take a soft brush or a microfiber applicator. Treat the whole door as one heavy zone and you will damage the three quarters that were already clean.
Handles and the pull strap area get a different trick: a very soft brush loaded with the diluted cleaner, worked along the handle, with a cloth twisted around the handle itself for the parts your fingers grip. Old silicone dressing builds up in the same place and reads as permanent darkness until it is removed with a couple of dwell cycles.
Spot removal: crayon, ink, scuffs, sunscreen and hand cream
Some marks are surface contamination and some are chemical. Identifying which is most of the battle.
Sunscreen, hand cream and fingerprint haze. These are the residue cases people ask about most on door cards, and the pattern is consistent enough to name a source: an owner on 718forum traced persistent fingerprints on their door cards to sunscreen and hand cream build-up rather than to the surface itself. The fix is a melamine sponge dampened with interior cleaner, worked with light fingertip pressure and absolutely no scrubbing. On a low-grain or leatherette surface it will lift the residue in two passes. On a high-grain vinyl upper it will flatten the peaks if you lean on it.
Crayon and ink. Both are wax-based, so both respond to heat and dwell. Warm the panel with a hair dryer on cool for a few seconds, apply a small amount of diluted cleaner to a cloth, dwell for 30 seconds, then lift with the towel. Repeat before you escalate. Ink that has soaked into the grain grooves may need three or four cycles and will still leave a faint shadow, which is normal.
Scuffs and black transfer marks. These are usually a dirty towel dragging grit, not damage. A soft brush with cleaner and patience will shift them. If a mark is still there after three clean cycles, it is inside the material, and further scrubbing only makes it worse.
Sticky switch surrounds and window switches. Do not flood these. Wipe with a barely damp cloth, work around the switch with a fine soft brush, and never spray anything directly into a switch opening. Where grime has hardened around a switch, a cotton swab with a little diluted cleaner works better than any tool with width to it.
The rule that ties all of this together: every spot treatment follows the same rules as the full clean. Dilute, towel not panel, dwell, flip the cloth. Anything that requires more force than that is telling you the mark is not surface contamination.
Protecting the grain after cleaning
Cleaning removes the surface oils along with the dirt. A clean but unprotected panel is more vulnerable to the next month of body oils and more sensitive to UV than the one you started with, so protection is part of the method, not an optional extra.
Wait until the panel is completely dry. Then apply a matte, non-greasy interior protectant or a vinyl conditioner with a foam applicator pad, working it in with light hand pressure across the grain and into the seams. Two thin coats beat one heavy one. A heavy coat is what produces the greasy surface that people mistake for clean and that then collects dust within days.
How often depends on your car and your climate. The reapplication interval most commonly recommended in the walkthroughs is every two to three weeks, and the longer-range community advice for conditioners such as Lexol or Leatherique is every one to three months. For a car parked outside in summer, shorter. For a garage-kept car, the longer end is fine.
Be honest about what protection does. It slows the loss of suppleness and buys you time. It does not repair a surface that has already hardened, and no amount of conditioning will close a crack that has formed. If a panel has already gone hard, treat the conditioner as a way to slow further change, not as a fix.
Skip anything that leaves a shine. A matte finish is the correct target on a grained surface, both because gloss on texture looks wrong and because gloss dressings are usually silicone.
A maintenance schedule that keeps grain supple
Doors that get a short weekly wipe-down never reach the point of needing a deep clean. Panels that skip for months need the full eight-step cycle and often a second one.
| Interval | What to do | Time needed |
|---|---|---|
| Weekly | Dry microfiber wipe of the armrest and switch panel, quick brush of the grain, reapply protectant if it looks thirsty | Five minutes |
| Monthly | Full eight-step method on one door, rotate through the doors across the month | Twenty minutes |
| Quarterly | Deep clean every door card, condition every vinyl surface, check seams and edges for lifting or sticky patches | One to two hours |
Rotate the doors so no single panel takes all the abuse indefinitely. The driver door always needs more, and the rear passenger door usually needs the least.
Cleaning the door card off the car: the workshop method
If you are restoring trim rather than maintaining it, the panel comes off. Removal exposes the back, the hidden edges and the foam backing, which is where trapped dirt and adhesive residue actually live. Those areas are impossible to reach with the panel installed, and they are the reason panels re-trimmed without being stripped smell stale for months.
Off the car, you can use more water than you ever would in the cabin. Low-pressure rinse with a pH-neutral cleaner and a soft brush, keeping the spray pattern wide and the pressure low so you work the grain rather than blasting it. Work both faces and pay attention to the perimeter where the vinyl is folded over the edge.
Steam is a good low-chemical option here. It opens the surface and loosens grime with no surfactant load, which is useful on a panel you have already cleaned once and only need refreshing. Two cautions: do not use it where the panel has electronics, and do not over-wet. Both cause problems behind the skin that you will not see until months later.
Drying is the whole game off the car. Air movement and time, not a heat gun, which will drive off the last of the plasticizers you are trying to preserve. Once it is bone dry to the touch and has sat for a few hours, protect it and re-cover it.
When cleaning is no longer enough: signs the panel needs re-trimming
Cleaning solves a surface problem. It does not solve a material problem, and knowing the difference saves money and avoids turning a mediocre clean into a ruined panel.
Flaking grain. If the texture is lifting in flakes, or your fingernail catches and pulls a small piece away, the surface layer has separated from the backing. Cleaning will only loosen more of it. This panel is a re-trim or a replacement.
Stiffness that will not soften. If the panel has gone hard and leathery and no amount of conditioning changes the feel, the plasticizers are gone. The honest answer from anyone who works on these panels is that a hardened surface cannot be cleaned back into shape.
Wrinkling and delamination. Bubbling or loose edges where the vinyl has lifted from the foam suggest water or solvent has got behind the skin. Refeeding with the right adhesive is a workshop job.
Deep tears and splits at the grain lines. Cracks that follow the texture and open wider than a hairline are structural. A conditioner will not close them, and cleaning around them will not slow them either.
Heavy UV fade with a chalky, flat feel. Sun-damaged plastic has lost both colour and structure. It can be improved cosmetically with dressing, but the panel will never come back to its original depth.
Before you call it, do one careful test cycle on a hidden area. A panel that responds to the eight steps with visibly more suppleness was dirty. A panel that responds with no change at all is a material problem, and the money is better spent on re-trimming than on another bottle of cleaner.
Frequently Asked Questions
How to clean car door cards?
Vacuum the panel, patch test, then dilute a pH-neutral, solvent-free interior cleaner about 1:10 and spray it onto a microfiber towel rather than the panel. Work it into the grain with a soft detailing brush, let it dwell 30 to 60 seconds, wipe with a clean folded towel until it comes up clear, let the panel dry fully, then apply a matte protectant. One panel, one zone at a time.
What is the best way to clean plastic car door panels?
Use a pH-neutral, solvent-free interior cleaner diluted to roughly 1:10, put it on a microfiber towel instead of spraying the panel, and work it into the texture with a soft detailing brush. Give it a 30 to 60 second dwell, then wipe with a clean folded towel and flip it as soon as it stops coming up clear. Dry fully before applying a matte protectant.
What is the best cleaner for car door panels?
A water-based, solvent-free, pH-neutral interior cleaner with a real surfactant load is the right choice, because it lifts grime through dwell time instead of through friction. Read the label for solvent-free or VOC compliant and for a matte, non-greasy finish. Avoid anything ammonia, alcohol or silicone based, and skip household dish soap.
What is the best thing to clean vinyl in a car?
A dedicated interior vinyl cleaner and a matching matte conditioner. The cleaner does the work, diluted and allowed to dwell, with a soft brush into the grain. The conditioner replaces the surface oils that cleaning removes and slows the stiffening and cracking that age and UV exposure cause. Using only one of the two leaves the panel half-finished.
What is the best way to clean vinyl doors?
Treat the door as four separate surfaces rather than one. Grained upper panels get diluted cleaner, a soft brush, dwell and a microfiber wipe. The armrest can take a stronger dilution and a firmer brush on build-up spots. Painted textured plastics need controlled water around the switch cluster. Fabric inserts need a separate upholstery method and more water, never the vinyl method.
What is the best cleaner for car plastic trim?
For hard plastic trim and textured soft-touch panels, a pH-neutral all-purpose interior cleaner at about 1:10 works, applied to a towel and worked into the texture with a soft brush. Soft-touch surfaces are easy to over-wet, so control the liquid. Once the trim is dry, use a matte plastic protectant rather than an exterior trim wax, which leaves a dusty film.
How do I clean my car’s plastic trim?
Dry clean first, because wiping grit over texture is abrasion you chose. Then use diluted pH-neutral interior cleaner, sprayed on a microfiber towel, agitated into the grain with a soft detailing brush, and left for 30 to 60 seconds before wiping. Finish on a fully dry panel with a matte protectant, reapplying every two to three weeks in normal use.
Can I use Dawn dish soap on vinyl wrap?
Not on interior door cards, and be careful with it on vinyl wrap. Dish soap is a strong alkaline degreaser with a heavy fragrance load. It strips plasticizers from grained vinyl and leaves a residue that holds dust, which is the greasy film and repeat-cleaning cycle many owners report. Use a pH-neutral interior cleaner instead.
Conclusion
How to clean vinyl door cards without damaging the grain comes down to three habits. Put the cleaner on the towel, not the panel. Let it sit for a minute instead of scrubbing it off in ten seconds. And protect the surface once it is dry.
Everything else is detail. Identifying the material first, treating the four zones separately, matching the brush to the section, and being honest that a panel already gone hard or flaking will not come back through cleaning alone.
Start with one door this month, using the full eight steps. If the armrest feels softer and the grain still has its texture when you are done, you have the method right and the routine will keep it there.