
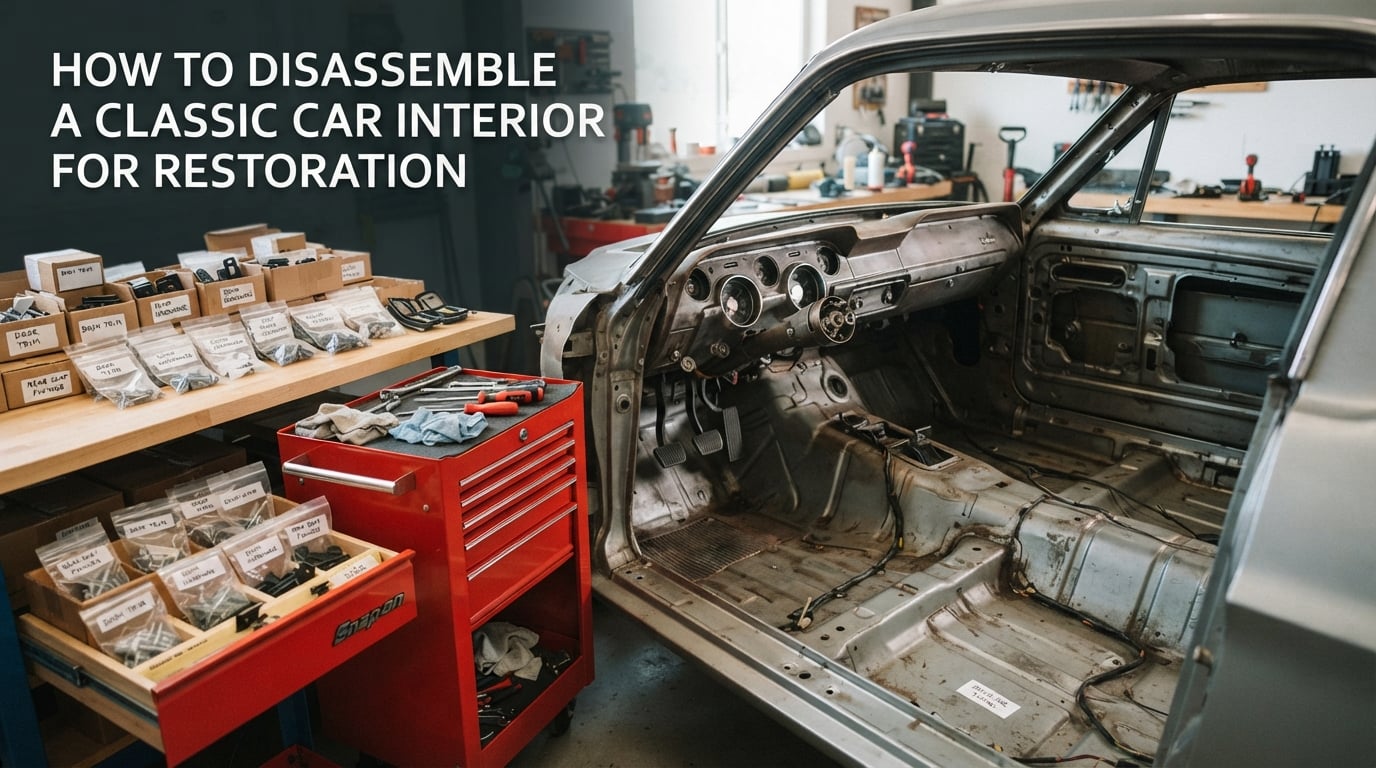
If you have ever pulled a door panel off a forty-year-old car and found a screw behind it that nobody mentioned in the manual, this guide is written for you. Learning how to disassemble a classic car interior for restoration is less about knowing which bolt holds the seat and more about the order you take things apart in. Get that order wrong and the carpet tears, the courtesy light lens cracks, and three screw holes strip out before you are a quarter of the way through.
We have watched a lot of teardowns go sideways, and almost every disaster traces back to one of three mistakes: pulling the battery last instead of first, levering trim out before the hidden fasteners behind it come off, and cutting the carpet around a pedal box you did not know was bolted through the floor. None of those are skill problems. They are planning problems, and planning is the part this guide handles first.
Below is the sequence we use, the tools that make it survivable, the fasteners that need replacing rather than reusing, and honest time estimates for each stage. It works for a full frame-off strip, for a rolling restoration where the car has to stay drivable on weekends, and for the narrower job of lifting a sagging headliner or pulling carpet to check the floor for rust.
One note on the trim itself: interior panels, headliners, and door cards on cars from the 1960s and 1970s are frequently fiberboard-backed, vinyl-wrapped, or molded from plastics that crack like glass once they flex. Nothing in the sequence below is difficult. It is simply unforgiving of force. That distinction is the whole job.
Table of Contents
- What Classic Car Interior Disassembly Actually Involves
- Before You Start: Tools, Safety, and Workspace Prep
- The Order of Operations Cheat Sheet
- How to Disassemble a Classic Car Interior for Restoration
- Step 1 – Photograph and Inventory Everything
- Step 2 – Remove Seats and Seat Belts
- Step 3 – Remove Door Panels and Window Regulators
- Step 4 – Remove the Dashboard and Center Console
- Step 5 – Remove the Carpet, Pedal Box, and Seat Rails
- Step 6 – Remove the Headliner and Pillar Trim
- Step 7 – Rear Compartment: Package Tray, Quarter Trim, C-Pillars
- Step 8 – Cables, Wiring, and Remaining Hardware
- Stripped Holes, Broken Clips, and Brittle Trim
- Moisture Barrier, Sound Deadening, and Rust Inspection
- Reassembly Order and Common Mistakes to Avoid
- What It Costs and When to Call a Shop
- Time Estimates for a Full Interior Strip
- Frequently Asked Questions
- Do I need to disconnect the battery before removing classic car seats?
- How many hours does it take to fully strip a classic car interior?
- Where are the hidden screws in classic car interior trim?
- How do I fix a stripped screw hole in a car interior panel?
- Why will my car carpet not come out?
- Should I replace the tar paper moisture barrier under the carpet?
- Conclusion
What Classic Car Interior Disassembly Actually Involves
A classic car interior disassembly takes a complete passenger cabin down to the bare metal shell: seats, seat belts, door panels, dashboard, center console, carpet, headliner, package tray, quarter trim, and the brightwork and moldings that hold it all together. Done properly, every part comes off intact, every fastener is catalogued, and you finish with a shell you can inspect for rust, treat, and later rebuild from your own photographs.
Restorers use two words to describe scope. Rolling restoration means the car stays together and roadworthy and you work in stages, often one weekend per system. Frame-off restoration means the body comes off the chassis and the interior comes apart in one long session with the shell on a rotisserie. The sequence is identical for both; only the pace and the storage requirements differ.
The trade name for the seat and interior trim portion of the work is saddlery work, borrowed from the upholstery trade. Shops that specialize in it exist in most classic-car communities, and knowing where that line sits between trimming and full structural repair is worth understanding before you start.
One structural fact shapes everything else. On many American cars of this era, interior panels are held with screws rather than one-time plastic fasteners. Forum restorers on the ClassicOldsmobile boards point this out as the single most reassuring thing about the era: a stripped hole in a steel panel is a five-minute repair, while a snapped stud in a molded plastic console is a parts hunt. The cars tell you how they come apart if you look at how each part is actually secured.
Before You Start: Tools, Safety, and Workspace Prep
Disconnect the battery before you touch anything electrical, and treat the airbag circuit as live until you have verified it is not. Seat removal on cars with seat-mounted airbags and pre-tensioner belts involves connectors designed to disconnect only once, and a plugged yellow connector can deploy a pyrotechnic pretensioner. Pull the negative cable, then pull the airbag fuse from the underhood box as a second step. Jaguar forum members doing X-Type interiors describe the battery disconnect plus fuse pull as the correct opening move, and it costs you thirty seconds.
Beyond that, the safety work is ordinary workshop discipline. Support the car properly. Do not work under a car resting on a jack. Wear eye protection when you are levering trim, because cracked fiberboard and brittle plastic fly.
The tool list
A full socket set, a good set of hollow-ground trim screwdrivers, and a set of no-marring plastic trim tools will handle the majority of a teardown. Everything else is a consumable or a workaround.
| Tool | What it does | Classic-car substitute |
|---|---|---|
| Trim screwdrivers (hollow ground) | Removes slotted, flat-head interior screws without slipping and chewing the slot | A new #2 Phillips bit or a quarter-inch nut driver with a bit of tape on the shaft for grip |
| No-marring plastic trim tools | Releases push-in clips and spring clips without gouging vinyl or brightwork | Wide flat plastic gift cards or a nylon pry bar |
| Panel pliers (Vise-Grip style) | Grips and removes U-clips and retainer tabs that fingers cannot reach | Long-nose pliers with tape on the jaws, used gently |
| Socket set, metric and SAE | Seat rail bolts, console fasteners, steering column hardware | None. Buy the set. |
| Work light and headlamp | Hidden fasteners live in footwells and under seats | A phone light plus a magnetic work lamp clamped to the sill |
| Labeling system | Masking tape, marker pen, and zip ties for wires; heavy-duty bags for hardware | Numbered painter’s tape rolls and a sharpie per step number |
| Camera with a wide lens | Reference photos of every connector and fastener location before removal | A modern phone camera; take more photos than feels necessary |
| Panel-forging pliers or screw puller | Saves a stud that has been driven in too deep | A long threaded rod and a nut, tightened slowly against the stud |
| Penetrating oil | Seized floor brackets and 50-year-old fasteners | Any quality penetrating oil; the trick is applying it early and often |
| Plastic bags, quart and gallon size | Separating hardware by step number | Ziplock freezer bags, doubled for brittle hardware |
Set up a hardware station before you start removing anything. A folding chair with a labelled bag per step beats a pile of screws in a coffee can every time, because the pile is the reason a car goes back together with two screws short and three in the wrong holes.
The Order of Operations Cheat Sheet
This is the dependency order. The reason for the sequence is physical: each item is blocked by the one before it.
- Disconnect the battery, then pull the airbag fuse.
- Photograph and inventory the entire cabin before anything moves.
- Remove seats and seat belt hardware, including retractors.
- Remove sill plates, then door panels, then window regulators.
- Remove the dashboard, instrument cluster, and center console.
- Remove the steering column covers and any knee bolsters.
- Remove the pedal box and seat rails from the floor pan.
- Cut the carpet at the firewall and pull it out over the rails.
- Remove the headliner, A, B, and C pillar molding, and dome light.
- Remove the package tray, quarter trim, and remaining rear hardware.
Two entries on that list are the ones people get wrong. Pedal boxes and seat belt retractors are bolted through the floor and sit underneath the carpet, so they have to come out before the carpet does, not after. And trim end pieces have small ears that slot into the neighbouring part, so they are the final piece out of a run of brightwork, not the first.
How to Disassemble a Classic Car Interior for Restoration
Below is the teardown in eight steps, in the order above, with the blocking dependency called out at the top of each. Work top-down and outside-in, finish each step before starting the next, and resist the urge to pull two systems at once.
Step 1 – Photograph and Inventory Everything
Photograph everything before you unbolt a single fastener, because the photographs are your only reassembly reference once the cabin is bare. Start with wide reference shots of the whole interior from each door opening, then close in on every electrical connection before it is unplugged.
Label each connector at both ends with a strip of masking tape carrying the same number, and photograph the label and the socket in the same frame. Tie a zip tie around the wire next to each label so it stays with the harness rather than migrating into a hole in the footwell.
Build a parts inventory as you go, not at the end. For each removed panel, note whether it is reusable, needs repair, or is a candidate for reproduction. Condition grading during disassembly is far cheaper than sorting through a pile of unidentified trim in a corner of the shop six weeks later.
Step 2 – Remove Seats and Seat Belts
Seats come out first because the seat rails block the sill plates and the door panel fasteners on most cars. With the battery disconnected and the airbag fuse pulled, unplug the seat heater or occupancy sensor connectors, then unbolt the seat rail bolts at the four corners.
On cars with separate belt retractors mounted beside the seat, the retractor bodies are bolted to the floor or B-pillar and they are a separate item from the seat. Pull them, bag the bolts by pillar position, and note whether the belt passes through a molded loop on the quarter trim, because that constrains the order of the rear trim work.
For the electrical side, treat every seat connector on a 1990s-and-newer car as a one-shot disconnect. Do not wiggle a connector that resists; classic-oldsmobile forum members working through a ’66 Toronado interior describe the courtesy light connectors as stiff and crack-prone rather than tight, which is the more common failure on vintage cars.
Step 3 – Remove Door Panels and Window Regulators
Door panels come off after the seats because the lower fasteners of the panel are usually reached from inside the cabin, and on many cars the seat and sill plate sit right on top of them. Start at the armrest, remove the screws and the pull handle or window crank, then work down.
The window regulator on a manual-window car comes out with the panel, but on many 1980s models the regulator is bolted to the inner door skin behind the panel and the glass must come down first. Lower the glass fully, remove the glass retaining screws or nuts, and lift the glass straight up out of the channel before you unbolt the regulator.
Watch the trim end pieces at the front and rear edges of the panel. They have tabs that slot into the windscreen or rear quarter trim, and pulling them at the wrong moment is what cracks them. Remove the panel screws first, separate the panel from the door skin, and only then work the end pieces free.
Step 4 – Remove the Dashboard and Center Console
The dashboard comes out from the front, after the door panels and glass cranks are out of the way, because the windscreen and header trim are usually captured by the top edge of the dash pad. Take the instrument cluster or bezel off first, photograph the wiring behind it, then work outward from the centre.
Unscrew the centre console before you pull the shifter, not after, because the console is usually captured at the front by the shifter bezel. Disconnect the shifter linkage or cable at the transmission end so the console can lift without being levered against a hard-mounted lever. The VIN plate on the driver-side dash or door jamb is riveted in most cases: drill the rivets rather than trying to unbolt them, and keep the plate.
Knee bolsters and lower trim under the column come out at this stage too, along with the column shroud if the wheel is being removed.
Step 5 – Remove the Carpet, Pedal Box, and Seat Rails
The pedal box and seat rails come out before the carpet, and this is the dependency that catches first-time restorers. The accelerator and brake pedal assemblies are bolted through the floor pan, so the carpet is manufactured as one continuous piece that has to be cut and levered over the pedal bases. Jaguar forum guides for X-Type interiors describe exactly this: the gas pedal base blocks carpet removal, and the carpet has to be levered over it with a clip-removal tool.
Order within the step: disconnect the parking brake cable and any harness clips under the carpet, unbolt the pedal box, unbolt the seat rails, then pull the carpet. Cut at the firewall rather than trying to preserve an edge that was never meant to be seen, and cut in a location you are willing to accept on the new carpet. Seal the cut edge with seam tape so it cannot wick water into the padding.
The moment the carpet is up, photograph the bare floor pan before you cover it in anything. This is your rust inspection window and it does not come back until the new carpet goes down.
Step 6 – Remove the Headliner and Pillar Trim
The headliner comes off from the front edge, working rearward, and on a sagging car you will be removing the most fragile material in the cabin. Pull the dome light first, then the retainers along the headliner bow, and support each section as it comes free rather than letting it hang by one corner.
Sagging headliners are usually held by degraded foam and stretched fabric, not by fasteners. Peel rather than pull, keep the board supported with both hands, and if the material must be cut out in sections, cut from the rear so the front edge stays intact while you work. Cardboard or fiberboard insulation pads behind the headliner often shrink and delaminate; treat any that crumble as a replaceable item, not a keeper.
Pillar molding along the A, B, and C pillars comes off next, working from the bottom up, and the windscreen and rear window trim usually release with it. Note the order any trim end pieces interlock in, because that is the sequence for reassembly.
Step 7 – Rear Compartment: Package Tray, Quarter Trim, C-Pillars
The rear compartment is where hidden fasteners do the most damage, because the fasteners are the last thing you find. On a ’66 Toronado rear panel, forum documentation describes a sequence: screws come out of the bottom of the rear armrests, you push the armrests to the side, and only then can you reach the panel screws. A second screw hides behind the courtesy light panel, and the lens over it is brittle plastic that cracks if you lever against it.
Follow that pattern on any car: remove the armrest fasteners, slide the armrest aside, remove the courtesy light panel screws, then unclip the lens itself rather than pulling on it. Take the lens off at its lowest point of retention and work upward.
The package tray lifts out once the rear seat, armrests, and C-pillar trim are clear, and it is often where a speaker or a rear courtesy light harness is still attached underneath. Quarter trim panels on coupes and hardtops follow the same rule as the door panel: end pieces last, main screws first.
Step 8 – Cables, Wiring, and Remaining Hardware
What remains is the layer nobody photographs: shift cables, the parking brake assembly, remaining harness runs, and the door striker plates and weatherstripping attachment points. Disconnect shift cables at both ends if the transmission is out of the car, or at the transmission end only, and mark the detent position so the linkage can be reindexed.
Pull weatherstripping only if it is being replaced, because loaded weatherstrip channels tear easily and old seals are often the best available. If you do remove one, note its orientation and which direction it faced, because a seal installed backwards will not seat.
Finally, sort the hardware. Reuse only the fasteners that came out clean and undamaged. Anything rusted, bent, stripped, or brittle goes into a separate discard bag, and its replacement needs to be on the list before reassembly starts.
Stripped Holes, Broken Clips, and Brittle Trim
Stripped screw holes are the single most common problem on these cars, and they are usually caused by flat-head screws that were driven in hard by a previous owner. The forum consensus on repair is to install a J/U speed nut, a small stamped nut with a free-spinning washer face, and drive the new screw into the assembly so the washer face grips. A longer high-torque screw threaded into untapped material behind the hole is the second option.
Broken push-in clips are the opposite problem. Most are single-use, and reuse is a gamble that will fail later, in traffic, with the panel rattling. Options in order of preference: an OEM or NOS clip, a quality reproduction, or in a non-visible location a heat-shrink sleeve over the panel hole with a self-tapping screw. If you replace the factory production holes and drainage openings with silicone, you need to say so on the car history sheet, because it is a modification a judge will notice.
Hidden fasteners follow a consistent logic. Remove every visible screw first, then slide, push, or swing the adjacent piece to expose the screws behind it. That single habit solves the courtesy light panel problem, the rear armrest problem, and most sail panel and quarter trim surprises.
Brittle trim deserves its own rule: if the panel needs more than a firm steady pull, stop and look for the fastener you have not found. Vintage plastics, fiberboard-backed door cards, and bright trim that wraps a curved corner are all replaced-once, damaged-once parts. No-marring plastic tools and patience beat force in every case.
Moisture Barrier, Sound Deadening, and Rust Inspection
Many GM cars of this era use a factory tar paper moisture barrier across the floor, and it is one of the best upgrade opportunities a teardown creates. With the carpet already off, the barrier can be cut out and replaced properly, because nothing else gives you access to that surface again.
One restorer documented on the ClassicOldsmobile boards replaced the factory tar paper with heavy clear sheeting and added closed-cell foam sound deadening while the panels were already off, and reported a noticeably quieter car. The same window lets you seal the exposed floor with cavity wax and an underbody coating that would be impossible to reach once the carpet is down.
Use the bare-shell window for the rust inspection that should have happened earlier. Check the floor pan seams, the seat rail mounting points, the firewall, and the sill plates for perforation and for surface rust under any previous sound deadening. Check the drain holes and production holes for blockage, and note any that need new grommets. Photograph the bare shell from the same angles as the pre-teardown shots so the comparison is usable years later.
For the door shells, the same logic applies. With the door panels off you can inspect the inner skin, treat the water channel, and add deadening to the larger panel areas that are otherwise impossible to reach.
Reassembly Order and Common Mistakes to Avoid
Reassembly runs largely in reverse, but not exactly. The practical order is: bare shell work first, then moisture barrier and deadening, then the steering column and any under-dash components, then the dashboard and center console, then carpet, then seats and belts, then door panels, then the headliner and pillar trim, then the rear package tray and quarter trim, and finally the brightwork and windlace that visually cap everything.
Five mistakes account for most repeat work. The first is reassembling the headliner before the dome light wiring and pillar clips are confirmed to hold, because fixing a loose headliner later means redoing the rear trim. The second is driving a screw into a hole that is slightly oversized instead of fitting a speed nut, which turns a small problem into a large one. The third is reusing clips that felt fine at reassembly and rattle a thousand miles later.
The fourth is leaving the seat rail bolt holes aligned incorrectly and discovering the misalignment only when the seat sits crooked. Torque the rail bolts to spec and check the seat latch engages both positions. The fifth is reinstalling the interior before the paint and body work is finished, which is how a car gets repainted around an interior you installed twice.
For a rolling restoration, the discipline is to finish one complete system before starting the next, so the car is never in a half-stripped state you have to live with. If the project is a full frame-off, the discipline is to date and bag everything, because a six-month gap between teardown and rebuild is where hardware gets mixed up.
What It Costs and When to Call a Shop
Doing the teardown yourself is realistic on almost any car. The expensive part of an interior restoration is not taking things apart. It is the labor-intensive reassembly and the recreation of trim that cannot be reproduced: saddlery work, headliner board repair, wood veneer and brightwork restoration, and electrical rewiring behind the dash.
Call a trim shop when the diagnosis points to a shop job. Signals include a headliner board that has delaminated or rotted, seat frames that are structurally compromised, brightwork or wood veneer with delamination or missing sections, a dashboard pad that has hardened and cracked, or harness damage that requires new circuits rather than new connectors. Non-marring trim work, hidden fastener hunts, and fastener replacement are well within a competent DIY scope.
Get a quote before the teardown, not after, for those items. A shop quoting on a bare shell with parts still installed charges very differently from a shop quoting on a fully stripped car with a documented parts inventory and photographs.
Time Estimates for a Full Interior Strip
These are teardown times for a first full strip on an average car, assuming nothing is seized and working unhurried. Add generously for a car that has been sitting for decades.
| Step | Estimated hours | Difficulty (1-5) |
|---|---|---|
| Documentation, labeling, battery and airbag safety | 1.5-2 | 1 |
| Seats and seat belt hardware | 1-1.5 | 2 |
| Door panels and window regulators | 2-3 | 2 |
| Dashboard and center console | 2-3 | 3 |
| Pedal box, seat rails, and parking brake | 1-2 | 3 |
| Carpet removal and seam sealing | 1-1.5 | 2 |
| Headliner and pillar trim | 2-4 | 4 |
| Package tray, quarter trim, C-pillars | 2-3 | 4 |
| Cables, wiring, hardware sorting | 1-2 | 2 |
| Bare shell rust inspection and deadening | 2-4 | 3 |
Total working time is roughly 16 to 26 hours for a complete strip, before any paint, metal repair, or reassembly. Plan on at least two full days of uninterrupted time for a frame-off teardown, and more if the car has been sitting outside.
Frequently Asked Questions
Do I need to disconnect the battery before removing classic car seats?
Yes. Disconnect the negative battery cable first, then pull the airbag fuse from the underhood box as a second step. Seat connectors on cars with airbags and pretensioner belts are designed to disconnect once, and unplugging a live yellow connector can fire the pretensioner. Forum guides treat battery disconnect plus fuse pull as the standard opening move for any interior teardown.
How many hours does it take to fully strip a classic car interior?
Roughly 16 to 26 working hours for a complete teardown on an average car, assuming nothing is seized. Seats and belts take one to two hours, door panels two to three, the dashboard and console two to three, the headliner and pillar trim two to four, and the rear package tray and quarter trim two to three. Add four hours for bare shell rust inspection and sound deadening.
Where are the hidden screws in classic car interior trim?
Most are behind a piece that comes out first. Common locations include under the rear armrest, behind the courtesy light panel, under the sill plate at the door skin, behind the window crank plate, under the map pocket, and behind trim end pieces that slot into adjacent molding. The reliable method is to remove every visible screw first, then push or slide the neighbouring piece aside to expose what is behind it.
How do I fix a stripped screw hole in a car interior panel?
Install a J/U speed nut, the small stamped nut with a free-spinning washer face, and drive the new screw into the assembly so the washer face grips. The alternative is a longer high-torque screw that threads into untapped metal behind the hole. In a non-visible spot, a heat-shrink sleeve over the hole with a self-tapping screw also works. Do not simply drive a larger screw into a slightly oversized hole.
Why will my car carpet not come out?
Because something is bolted through it. The pedal box and the seat belt retractors sit underneath the carpet and are fastened to the floor pan, so those come out first. The carpet is also usually manufactured as one continuous piece, so it has to be cut at the firewall and levered over the pedal bases with a clip-removal tool. Remove the parking brake cable and any harness clips under the carpet before you pull.
Should I replace the tar paper moisture barrier under the carpet?
If the car is worth doing properly, yes, and the teardown is the only practical moment. Many cars from this era use a factory tar paper barrier that hardens and lets water sit against the floor pan. With the carpet off you can replace it with modern sheeting, add closed-cell foam sound deadening, seal the floor with cavity wax, and clear or re-grommet the factory drain and production holes.
Conclusion
Learning how to disassemble a classic car interior for restoration comes down to three habits: disconnect power first, work in dependency order, and document everything before it moves. Follow the sequence in this guide and the cabin comes apart in a day and a half without a single torn panel or cracked courtesy light lens.
The bare shell you finish with is worth as much as the parts you removed. Photograph the floor, treat the seams, replace the tar paper barrier while you have access, and add sound deadening you could never reach again. That work is the difference between an interior that goes back together and an interior that feels like new when it is finished.
If you are only tackling one job this season, start with the carpet. It is the single best diagnostic in the car, it takes under two hours once the pedal box and seat rails are out, and it tells you the truth about the body underneath.