
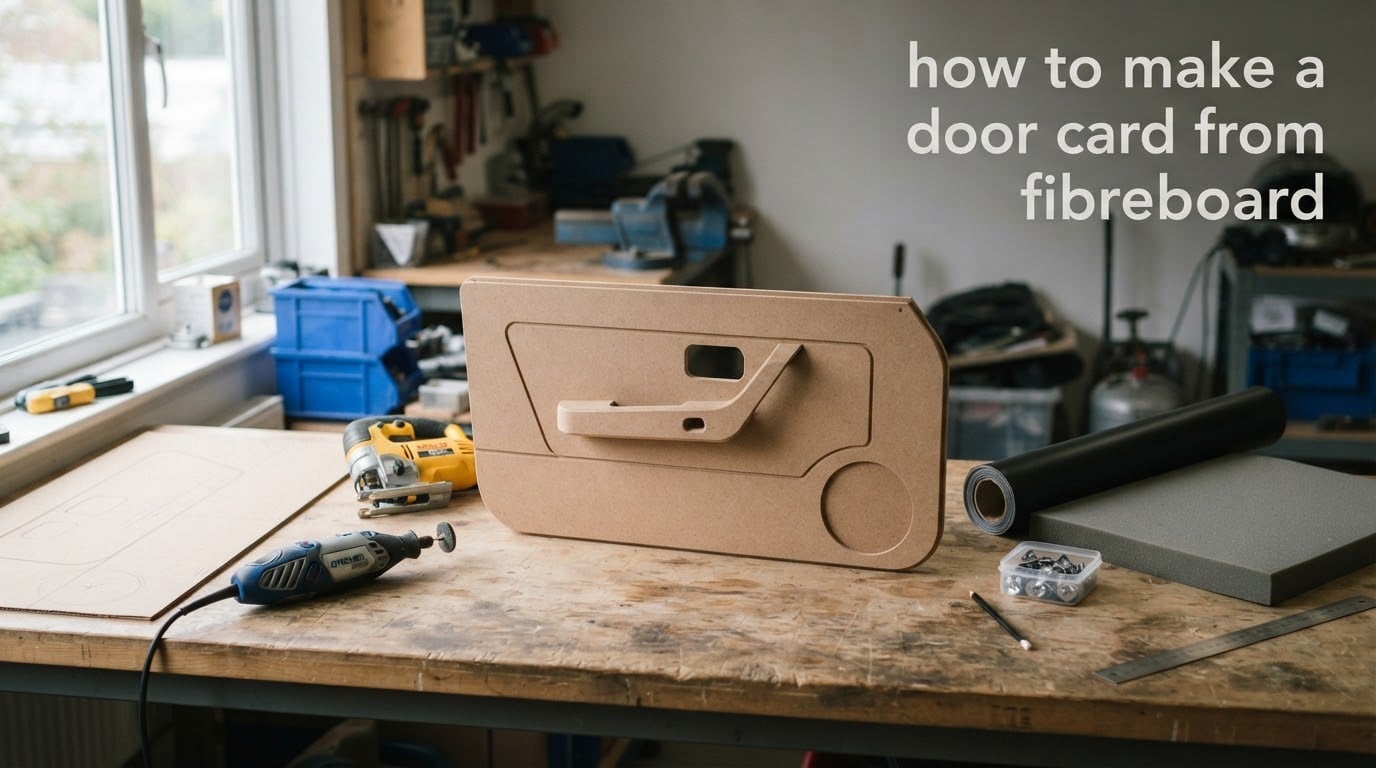
Building a custom door card from fibreboard is one of the most rewarding jobs in any interior restoration or custom build. The panels cover the inner workings of your door, the window winder hardware, the door handle and the insulation, then finish the cabin with the look you actually want. This guide walks you through how to make a door card from fibreboard, from picking the right board to upholstering and mounting the finished panel.
I have built door cards for classic restorations and custom interiors, and the steps below are the ones I keep coming back to. Whether you are replacing rotten original panels, repairing a damaged daily driver, or trimming out a track car, this process works on a standard home workshop setup.
An interior door card is the trim panel on the inside of a car door that hides the metal frame, the window regulator, the latch, and the speaker. It is typically cut from fibreboard and upholstered with vinyl, fabric or leather. It is the single biggest visual element inside the door, so getting it right matters.
Table of Contents
- What Materials Are Used to Make Door Cards?
- Choosing the Right Material: MDF vs Masonite vs Original Fibreboard
- Tools and Supplies You’ll Need
- How to Template a Door Card From the Original
- Cutting and Shaping the Fibreboard
- Upholstering Your DIY Door Card
- Installing Retaining Clips and Mounting the Panel
- Common Mistakes to Avoid
- Laser Cutting and Digital Design Alternative
- Frequently Asked Questions
- What material to make door cards out of?
- What is an interior door card?
- What thickness of MDF or Masonite is best for door cards?
- How do I prevent the panel from warping in hot climates?
- What adhesive is best for upholstering a door card?
- Can I use PVC or election signs instead of MDF?
- How do I attach the panel to the door frame?
- Conclusion
What Materials Are Used to Make Door Cards?
The most common materials for DIY door cards are 1/8 inch MDF, Masonite hardboard, and original factory fibreboard. Each behaves differently in the workshop, and the right pick depends on your vehicle, your climate, and the finish you want.
- MDF (medium density fibreboard) – Cuts cleanly, holds vinyl adhesive well, and is widely available at hardware stores. The go-to for laser-cut panels.
- Masonite hardboard – Tougher and more resistant to moisture than MDF. Preferred by experienced fabricators for long-term durability.
- Original factory fibreboard – The same type your car shipped with. Fine for repairs but degrades over time in humid climates.
- PVC and composite sheets – Sometimes used for race or show panels, but usually too thick to fit under stock trim.
If you are building a show car that needs crisp stitch lines, MDF is your friend. If you are building something that lives outside or in a humid garage, Masonite will outlast it.
Choosing the Right Material: MDF vs Masonite vs Original Fibreboard
Before you cut anything, take a few minutes to compare your material options. This table shows how the three main board types behave during fabrication and over years of use.
| Property | MDF (1/8 in) | Masonite Hardboard | Original Fibreboard |
|---|---|---|---|
| Cutting feel | Smooth, laser-friendly | Denser, requires sharp bits | Crumbly if aged |
| Weight | Medium | Slightly heavier | Lightest |
| Moisture resistance | Low – swells if soaked | Good – oil-tempered | Poor when old |
| Vinyl glue bond | Excellent | Excellent | Weak on aged panels |
| Best use | Custom interiors, laser cut | Daily drivers, restorations | OEM-style repairs |
| Common thickness | 1/8 in | 1/8 in | 1/8 in |
For most door card projects, Masonite hardboard is the safe choice. It cuts cleanly, holds clips tightly, and resists the moisture that destroys original fibreboard over time.
MDF is the better choice when you plan to laser cut complex shapes or run deep stitch lines. If you are restoring a numbers-matching classic, original-style fibreboard keeps the look period correct.
Tools and Supplies You’ll Need
You do not need a full workshop to build a door card, but a few specific tools save hours of frustration. Here is the kit I lay out before starting a panel build.
- Dremel rotary tool or drywall router for retainer clip cutouts
- Jigsaw with a fine-tooth blade for the outer profile
- Sharp utility knife and metal straightedge for scoring
- Cardboard or corflute for templating
- Pencil, marking scribe, and a tape measure
- 3M spray adhesive (or equivalent high-tack contact adhesive)
- 1/8 in foam padding, quilt batting, and vinyl or fabric for upholstery
- Retaining clips, pop rivets, and a pop rivet gun
- Heat gun for stretching vinyl around curves
- Sandpaper (120, 220 grit) for smoothing edges
Skip the cheap consumables here. A dull jigsaw blade will chip the panel edge and bleed through thin vinyl. A tacky spray adhesive with a 30 minute open time gives you repositioning room during fitting.
How to Template a Door Card From the Original
A good template is the difference between a panel that fits first time and a panel you keep trimming for the rest of the weekend. Always template before you cut the real board.
- Remove the original door card and lay it flat on a sheet of thick cardboard or corflute. Cardboard is cheap and forgiving for first attempts.
- Trace the outer perimeter, every hole, every clip location, and the door handle aperture with a fine marker.
- Cut out the cardboard template with a fresh utility knife. Use multiple light passes rather than one heavy pass to keep the edges clean.
- Test fit the template on the door frame. The outer edge should sit flush without forcing, and the window winder cutout should line up with the regulator.
- Adjust the template as needed. Filing the cardboard is much safer than filing a finished panel.
- Mark the final template with the orientation (top, bottom, front, rear) so you do not flip it on the new board.
If your original door card is missing or completely destroyed, you can build a template from scratch. Measure the door frame at multiple points and sketch the panel outline on cardboard, then cut and test fit as above.
Forum builders on the classic car sites consistently report that the old panel is the most accurate template you will ever find. Use it whenever you can.
Cutting and Shaping the Fibreboard
Once your template fits cleanly, you are ready to cut the real board. Move slowly and check fit often.
- Lay the template on the 1/8 in fibreboard and trace it with a sharp pencil or scribe. Tape the template down to stop it sliding while you mark.
- Cut the outer profile with a jigsaw. Use a fine-tooth blade and support the board on a flat surface so it does not flex or chip on the edge.
- Sand the outer edge with 120 then 220 grit paper. A slight bevel helps the vinyl wrap over the edge without cutting through.
- Mark the centre of each cutout – window winder, door handle, retaining clips, speakers – by measuring from the template.
- Drill a small pilot hole inside each cutout, then complete the opening with a jigsaw for round shapes or a Dremel for tight rectangles.
- Dry fit the panel on the door frame. Confirm every clip hole lines up with its mating point before you move to upholstery.
A Dremel or drywall router is the right tool for the rectangle cutouts that house retaining clips. A jigsaw tends to overshoot those corners.
Upholstering Your DIY Door Card
Upholstery is where the panel goes from functional to show-quality. Take your time here and let the adhesive do its job.
- Lay the cut panel face up on a clean, flat surface. Wipe it down to remove sawdust – dust kills adhesive bonds.
- Cut a piece of 1/8 in foam padding slightly larger than the panel. Apply contact adhesive to both the panel back and the foam, let it tack off for the time listed on the can (usually 2 to 5 minutes), then bond them together.
- Trim the foam flush with the panel edge using a sharp utility knife.
- Optional but recommended: add a layer of quilt batting over the foam. It gives the panel a softer look and hides minor fabric imperfections.
- Cut your vinyl or fabric 2 inches oversized on every side. Spray adhesive on the foam side and the back of the vinyl, wait, then stretch and bond.
- Wrap the vinyl around the back side of the panel and staple or spray-tack the edges. A heat gun makes the vinyl stretch cleanly around curved areas.
- Re-cut the openings for the door handle, winder, and clips from the front once the vinyl is bonded.
The 3M spray adhesive with a roughly 30 minute open time is popular with DIY builders because it lets you reposition without losing bond. Multiple light coats beat a single heavy coat every time.
For a stitched look, sew quilted squares into the vinyl before bonding it to the panel. Die pressing produces sharper squares but requires tools most home builders do not own.
Installing Retaining Clips and Mounting the Panel
A well upholstered panel is wasted if the clips pop out at the first speed bump. Take an extra 10 minutes here.
- Insert the retaining clips into the rectangular cutouts you routed earlier. Each clip should press-fit snugly.
- For steel door frames, drill through the panel where extra screws are needed and secure with short pop rivets from the back.
- Offer the panel up to the door frame, starting with the top edge. Align each clip with its hole on the door before pressing any of them home.
- Press the clips in by hand with even pressure. If a clip does not seat, stop and check the hole – forcing the clip will crack the panel.
- Reinstall the door handle, window winder, and any trim pieces you removed before starting.
Pop riveting steel sections to Masonite or MDF works well for both retaining clips and structural mount points. Use aluminium rivets to avoid rust streaks down the panel face.
Common Mistakes to Avoid
These are the issues I have seen (and made) most often on door card projects. Each one costs you hours if you do not catch it early.
- Cutting without testing the template. A cardboard template takes 20 minutes and saves a $40 board.
- Spraying adhesive on a dusty panel. Sawdust is a bond-breaker. Wipe the board before each glue step.
- Stretching vinyl cold. It looks fine until the first warm day, then the creases return. Use a heat gun.
- Cutting clip holes too loose. A wobbly clip will work its way out and scratch the door frame. Aim for a press fit.
- Skipping the dry fit. Upholstering a panel that does not fit is the most expensive mistake in the whole build.
- Forgetting moisture protection. MDF and original fibreboard both hate water. Seal the back of the panel if your door ever sees rain.
One experienced builder on a Mopar forum reported Masonite panels holding up eight years without warping, while an original fibreboard panel in the same car crumbled at five. Material choice matters more than most guides admit.
Laser Cutting and Digital Design Alternative
If you have access to a laser cutter or a maker space, you can skip the jigsaw entirely and produce far cleaner panels. A Reddit user on r/projectcar showed how to measure the door frame, design the panel in CAD, and laser cut it from 1/8 in MDF with all cutouts and clip holes in a single pass. The result was a panel with edges and corners no jigsaw could match.
The laser cut workflow looks like this:
- Measure every edge of the door frame with a tape measure and note the position of each clip and hardware hole.
- Translate the measurements into a CAD file, drawing the panel outline and all cutouts as separate paths.
- Send the file to a laser cutter with 1/8 in MDF loaded. The same machine can score stitch lines if you change the cut to a light pass.
- Lightly sand the cut edges to remove laser soot, then proceed with foam, batting, and vinyl as in the standard workflow.
Laser cutting is faster and more accurate than jigsaw work, but it requires access to the hardware. Most home builders still use the jigsaw and Dremel method – it works perfectly well when you go slowly.
Frequently Asked Questions
What material to make door cards out of?
Most DIY door cards are built from 1/8 inch MDF, Masonite hardboard, or original factory fibreboard. Masonite is the most durable, MDF cuts and lasers the cleanest, and original fibreboard is the choice for period-correct restorations.
What is an interior door card?
An interior door card is the trim panel on the inside of a car door. It covers the metal frame, window regulator, latch, and speaker, and is typically upholstered in vinyl, fabric, or leather to match the rest of the cabin.
What thickness of MDF or Masonite is best for door cards?
1/8 inch is the standard recommendation across classic car forums. It is thick enough to hold retaining clips and vinyl tension without adding noticeable weight or standing proud of the trim line.
How do I prevent the panel from warping in hot climates?
Seal the back of the panel with a moisture-resistant coating, use Masonite instead of MDF, avoid direct sunlight on the stored panel, and let adhesive fully cure before installing. Backing the vinyl with quilt batting also hides minor warping.
What adhesive is best for upholstering a door card?
3M spray adhesive with a roughly 30 minute open time is the most popular choice. Apply light coats to both surfaces, let it tack off until dry to the touch, then bond. Contact cement also works for higher volume builds.
Can I use PVC or election signs instead of MDF?
PVC and corflute election signs have been used by hobbyists, but most report they are too thick to fit under stock trim. Stick with 1/8 in MDF or Masonite unless your build allows for a thicker panel.
How do I attach the panel to the door frame?
Most door cards mount with a combination of plastic retaining clips pressed into routed cutouts and short pop rivets into the steel frame. Press clips in by hand evenly, and never force a clip or it will crack the panel.
Conclusion
Learning how to make a door card from fibreboard is a skill that pays off on every project you touch. Pick the right board – Masonite for daily use, MDF for stitch work and laser cuts, original fibreboard for show correctness – then template carefully, cut slowly, and bond your vinyl with patience.
Test fit the bare panel before you ever pick up the spray adhesive, and you will save yourself the most expensive mistake in the build. Once the panel is mounted with seated clips and the trim is back in place, you will have a finished door that looks factory and fits the way it should.
Start with one door. Get the template right on a scrap of cardboard. The second door always goes twice as fast.