
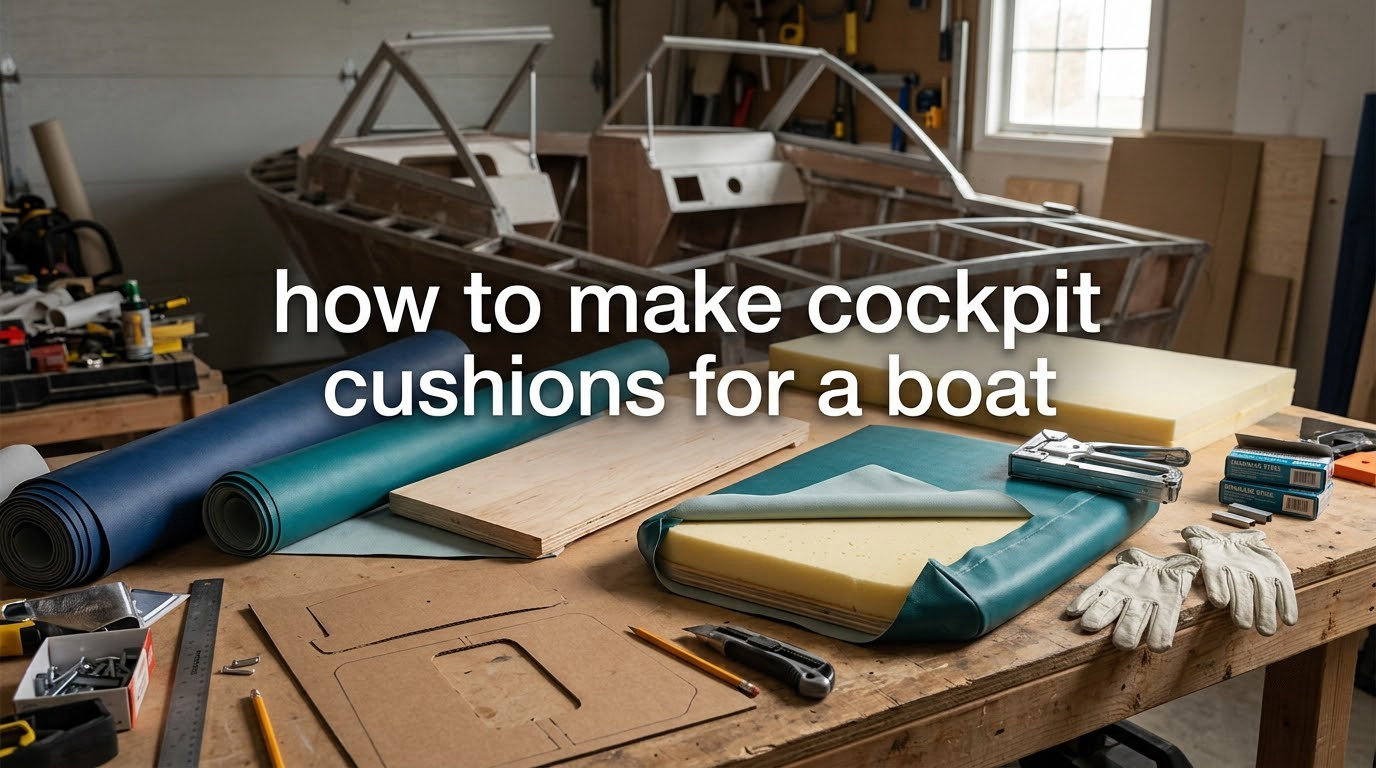
A cockpit cushion is a marine-grade foam core wrapped in an UV- and salt-resistant fabric cover, finished with welt piping and a zipper, then fastened to the bench or helm seat so it does not slide when the boat heels. Building your own takes four things: a template, reticulated or closed-cell foam, a solution-dyed cover, and a way to hold the finished cushion down.
Most failed boat cushion projects share the same two causes. The first is ordinary furniture foam, which drinks salt water through the seam needle holes and grows mold inside a season. The second is patio-grade fabric that fades and wicks water at the seams. Get the foam and fabric right and the rest of the build is straightforward sewing.
On our boat, the factory settee cushions went soft, took on water and started sliding into the footwell every time we heeled past 20 degrees. Rebuilding them took a weekend, and the approach below is the one we would use again. Sailors on r/sailing ask about this constantly, and the recurring theme in those threads is that the hardest part is not the sewing, it is the foam and fabric decision made in the first hour.
Here is the full process: what to buy, how to choose foam and fabric, the 10-step build, how to attach the cushions so they stay put, and how long each stage should take.
Table of Contents
- What a cockpit cushion is actually made of
- What you need before you start: materials and tools checklist
- Choosing your foam: open-cell vs closed-cell vs reticulated
- Choosing your fabric: acrylic, vinyl and mesh compared
- How to make cockpit cushions for a boat: the 10-step build
- Choosing a cushion style: flat pad, box, folding or backer board
- Stopping cushions from sliding on a heeling boat
- Reupholstering existing cushions instead of replacing them
- Handling curved and tapered cockpit benches
- Common mistakes that ruin a first cushion build
- How long each cushion takes and when to hire an upholsterer
- Care and off-season storage
- Frequently Asked Questions
- How do I make a DIY foam seat cushion?
- How to make a boat seat cushion?
- What is the best fabric for boat cushions?
- What is the best material for boat cushions?
- What foam to use for boat cushions?
- What thickness foam for seat cushion?
- Is there a difference between marine foam and regular foam?
- Can I reupholster my boat seats myself?
- How do I make my own boat cushions?
- How do I make my own seat cushions?
- Conclusion
What a cockpit cushion is actually made of
Every cockpit cushion, whether it is a flat bench pad or a full box cushion, is the same four components stacked in a specific order. Knowing the order before you start saves you from sewing a panel that has to come apart again.
- The core. A block of reticulated or closed-cell foam, usually 2 to 3 inches thick for cockpit use. Reticulated foam has an open structure that lets water pass through it and dry out again.
- The wrap. A thin layer of batting or foam wrap that goes around the core. Without it you feel every edge and seam of the foam through the cover.
- The cover. Solution-dyed acrylic canvas, marine vinyl, or a mesh-backed fabric. This is the part that takes the sun, salt spray and years of sitting on.
- The finish. Welt cord around the perimeter, a zipper for turning the cover right-side out, and a fastening system underneath: snaps, screws, webbing or hook-and-loop.
That order matters. Foam goes in the wrap, the wrapped core goes in the cover, and the cover gets finished with piping before the foam goes in, because the welt is far easier to sew on flat panels than around a stuffed cushion.
What you need before you start: materials and tools checklist
Gather everything before the first cut. The list is short, and the two items people most often forget are the welt cord and the batting wrap.
Materials
- Marine foam, 2 to 3 inch thickness, cut slightly undersize to your finished cover dimensions
- Marine cover fabric, solution-dyed acrylic, marine vinyl or mesh-backed cloth
- Polyester batting or foam wrap
- Welt cord (piping), 6 to 8 mm, in a matching or contrasting colour
- Zipper, closed-coil marine type, with a matching slider
- UV-resistant thread such as V-69 or a PTFE-coated bonded thread
- Tapered upholstery needles, plus a sharp 100/12 for basting
- Stainless fasteners, snaps or screws, and webbing or hook-and-loop tape
- Patterning material, paper or tyvek, for the template
Tools
- Heavy-duty or walking-foot sewing machine. A standard home machine will sew a single layer of acrylic, but multi-layer seams and vinyl will stall it.
- Hot knife for sealing cut fabric edges so they do not fray
- Basting tape, which replaces pins on heavy panels and is described as a game changer in the Sailrite customer build notes
- Electric carving knife or a long serrated blade for cutting foam
- Electric razor or scalpel for trimming the batting flush
- Measuring tape, chalk or silver marking pencil, and a ruler long enough to span the bench
If you are starting from scratch on sewing skills, a helm seat bag or a simple flat pad is a much better first project than a full box cushion. Liveaboard sailors report moving from small items to saloon cushions that way, and it is the reason the small projects come first in most build logs.
Choosing your foam: open-cell vs closed-cell vs reticulated
Use reticulated marine foam for cockpit cushions, 2 to 3 inches thick. Open-cell furniture foam is the wrong choice because it absorbs water and holds it, and closed-cell vinyl-wrapped foam works but feels harder and does not drain.
Marine foam is not a mystery material. The difference between it and regular foam is structural, and it explains every advantage you have heard claimed for it.
| Foam type | Water behaviour | Mold risk | Comfort | Best use |
|---|---|---|---|---|
| Open-cell polyurethane | Absorbs water and holds it | High, often within one season | Soft initially, then sags | Indoor or covered areas only |
| Closed-cell (vinyl-wrapped) | Does not absorb, but does not drain either | Low, water sits on top | Firm, springy feel | Bilge areas, non-exposed pads |
| Reticulated marine foam | Drains through the cell structure, dries fast | Very low | Firm with good compression recovery | Cockpit benches, helm seats, sundeck cushions |
Reticulated foam is made with a larger cell structure, which is why it drains rather than holding water. On a cockpit bench that gets soaked in a rain squall and then sits in sun for an hour, that difference decides whether you have a cushion or a sponge.
On thickness, 2 to 3 inches is the working range for cockpit use. The Ericson archive build log for a set of cockpit cushions used 3 inch foam, and helm seat pads often go slightly thinner so the helm can see the horizon over the coaming. Below 2 inches you lose the support that matters on a heeling boat.
Cut the foam undersize relative to the finished cover. A common rule is half an inch of total shortfall across width and length, split so the cover pulls over without straining the seam.
Choosing your fabric: acrylic, vinyl and mesh compared
Use solution-dyed acrylic canvas for most cockpit cushions. It is the marine standard because the colour is in the fibre rather than on the surface, so it fades slowly and resists UV, salt and mildew. Vinyl is tougher and easier to wipe down, and mesh-backed cloth is the right answer for a cushion that lives in wet shoes.
| Fabric | UV and fade | Water | Comfort in heat | Best cockpit use |
|---|---|---|---|---|
| Solution-dyed acrylic (Sunbrella) | Excellent, colour is in the fibre | Water-resistant, sheds rain | Breathable, stays cool | Standard cockpit benches and settees |
| Marine vinyl (Naugahyde, Mobern style) | Very good, surface coated | Wipe-clean, sealed surface | Hot in direct sun | Helm seats, high-abrasion areas, kids and dogs |
| Mesh-backed cloth (Phifertex style) | Good | Drains straight through | Cool, dries fastest | Bottom panels and cushions that stay wet |
| Textilene style vinyl mesh | Good | Perforated, drains both sides | Cool | Companionway and folding cushions |
A mixed build is common and works well: acrylic on the top and sides, Phifertex on the underside where the cushion meets the deck and collects water. That is the combination described in the Ericson build log alongside piping, webbing and snaps.
Two fabric warnings. Marine fabric frays at cut edges, so run a hot knife along every raw edge or the seam will pull apart mid-stitch. And a multi-layer seam in thick vinyl will stall a lighter home machine, so test a scrap of the exact stack before you commit to the panel.
How to make cockpit cushions for a boat: the 10-step build
These ten steps cover a standard box or pillow cushion. For a flat pad, skip the welt at the corners and treat steps 5 to 7 as a single top-and-bottom panel.
Step 1: Make the template
Trace the existing cushion if you still have it, which is what most owners do first. If the foam is spent but the cover survives, unpick the old cover and use its panels directly as your pattern. If there is no cushion at all, measure the bench at three points along its length and the width at the front and back edge, then draw the true shape on patterning material. Curved and tapered benches are where this step pays off, so measure rather than assume a rectangle.
Step 2: Cut the foam
Transfer the template to the foam, mark it, then cut with an electric carving knife or a long serrated blade in one continuous stroke. A serrated blade is the standard advice from the sailboatowner forum threads, where cutting foam in short choppy motions is the usual culprit on a rough edge. Cut the foam 1/4 inch undersize on every side relative to the cover panel.
Step 3: Cut the fabric panels
Cut the cover pieces from your template plus a seam allowance of 1/2 inch, and add the welt allowance if you are piping. Cut the top, bottom and four side panels separately, adding a few extra inches of length to the panel that carries the zipper opening so the zipper can be set in cleanly. Seal every raw edge with the hot knife as you go.
Step 4: Wrap the core
Wrap the foam in batting and trim it flush with an electric razor. The wrap softens the edge where the foam meets the seam and it makes the cover pull on without puckering. Compress the wrapped core slightly with a strap or tape while you work, so the foam stays compressed and the cover goes on evenly.
Step 5: Sew the welt to the panels
Attach the welt cord to the edge of one panel with the cord seam allowance pre-set so the finished welt edge sits proud of the seam. Use a short stitch length and a tapered needle, and work around the whole perimeter in one pass rather than stopping at corners. On a square corner, take the welt around in a single continuous fold, then trim and clip the excess so it miters neatly instead of bunching.
Step 6: Sew the panels together
Join the welted panel to the second panel, then sew the remaining side panels around the core. Basting tape holds the heavy layers in place of pins. Backstitch at every seam end, because the pull of a seated cushion works hardest at the seam ends.
Step 7: Install the zipper
Sew the zipper into the opening on the plain panel before the final seam is closed, leaving the bottom third of the seam open for turning. Once the cover is closed except for that gap, turn it right-side out, stuff the wrapped core through the opening, ease the fabric into the corners, and stitch the gap closed.
Step 8: Shape and square the corners
Work the cover into shape with your hands, pulling fabric into the corners from the centre outwards. Steam or warm-press stubborn spots, and massage the foam with your palms until the cushion holds its shape when you set it down. This step is what separates a cushion that looks manufactured from one that looks homemade.
Step 9: Fit and attach
Set the cushion in place, check the gap at the companionway and locker hatches, and then fasten it down using the method that suits your cockpit. The options are covered in detail below.
Step 10: Inspect before you call it done
Walk around the cushion and check the welt for gaps, the seams for thread breaks, and the zipper for a smooth run. Then open a locker and look for daylight at the cushion edge, because a small clearance there saves you from having to pull the whole cushion out next time you need the stowage.
Choosing a cushion style: flat pad, box, folding or backer board
The style you build depends on the shape of the space and how the cushion is used. Flat pads suit a straight cockpit bench, box cushions give a proper sitting height and can double as backrests, folding cushions solve the companionway problem, and a backer board fixes cushions to a helm seat frame.
- Flat pad. Two panels and a welt around the edge. Fastest build, no boxing, and it is the right choice for a narrow bench where nobody leans back on it.
- Box cushion. A centre panel band between the top and bottom panels, which gives a firm edge you can sit against and a backrest surface. This is the classic cockpit settee cushion.
- Folding or hinged cushion. Built as two pads joined by a strip of fabric, so the top half folds over the bottom half at the companionway. The fold strip is the extra step here: interface the hinge before boxing, and reinforce it with a second layer of fabric so the crease does not crack.
- Backer board pad. Glue a plywood or sealed board to the underside of the finished cushion so it sits flat and can be screwed down to a helm seat frame. A good alternative on a helm seat is the slatted frame approach, where oak rails and trim slats form the seat and the cushion sits on top of them.
The slatted helm seat takes about an hour in the shop and half an hour on the boat, according to the Good Old Boat project note, and it solves a problem cushions cannot: a rigid frame does not slide when the boat is on a beam reach.
Stopping cushions from sliding on a heeling boat
Attach your cushions with a positive fastener. Hook-and-loop strips work for light cushions, but a cushion that carries a crewmember across a heeling cockpit needs something that will not peel apart. Sliding cushions into the footwell is one of the most repeated complaints in the r/sailing Newb Question threads, and it is a safety issue before it is a comfort issue.
- Snaps. Marine-grade snap studs and cap studs, installed through the cushion underside and the deck or bench. Quick to remove for storage and easy to replace.
- Webbing. Polypropylene or polyester webbing tacky-barred across the cushion underside, screwed or bonded to the deck. This is the most secure option for a large settee and it spreads the load.
- Screws through a backer board. Stainless screws into a plywood base on a helm seat. Nothing moves, and the board keeps the cushion from curling.
- Hook-and-loop tape. Fine for a folding cushion or a small pad that you lift out every time you use the locker below.
Whatever you use, the countersink matters. Set every fastener flush and bed it in a dab of sealant, because a proud fastener head wears through the cover and lets water in from above.
Reupholstering existing cushions instead of replacing them
Yes, you can reupholster boat seats yourself, and reusing the existing foam is a reasonable choice when the foam is closed-cell or reticulated, still holds its shape, and the cover is the only thing that failed. Sponge-like or crumbling foam is not worth recovering.
To re-cover rather than rebuild, remove the cover, note how the panels were oriented, cut new panels from a traced template using the old cover as your pattern, and rebuild the cover alone. The welt can be unpicked and reused if it is still flexible, which saves one fiddly job.
Two things to weigh before you keep the old core. Any foam that has absorbed water holds salt in the cell structure, and no amount of cleaning gets it out. And a flattened core will not recover its original loft, so a reused cushion often sits lower than a new one, which can change how the companionway closes.
Handling curved and tapered cockpit benches
Curved benches are where a rectangle fails and a template earns its keep. The approach is to split the cushion into enough panels that the curve is approximated rather than fought.
Mark the bench at 4 to 6 inch intervals along its length, measure the width at each mark, and transfer those measurements onto a full-size paper pattern. If the curve is gentle, add a centre gusset panel instead of forcing one flat panel to bend. If the curve is strong, split the cushion into two or three sections and treat each as its own box panel joined by a seam.
Foam follows the same logic: cut it in sections and butt the pieces together with adhesive, or use a single piece and carve the curve with a carving knife in several passes. Lay the pattern on the bench and check it before you cut anything, because a curve is much cheaper to redraw than to re-cut.
Common mistakes that ruin a first cushion build
These are the errors that send a first build back to the start. None of them are hard to avoid once you know they matter.
- Using furniture foam. Open-cell foam in a cockpit takes on water and grows mold within a season. Reticulated or closed-cell only.
- Cutting fabric edges without sealing them. Marine fabric frays, and a frayed seam fails under load. Use a hot knife on every raw edge.
- Ignoring the seam allowance in the template. Your template is the finished cushion, not the cut panel. Add 1/2 inch before you cut fabric.
- Sewing thick multi-layer vinyl on a machine that cannot take it. Test the exact fabric stack on a scrap first. A walking-foot machine handles what a lighter domestic machine stalls on.
- Forcing the cover over an uncompressed core. Compress the wrapped foam while you sew, or the panels will pucker and the seams will sit unevenly.
- Using pins on heavy panels. Basting tape holds the layers without the pin holes and the shifting that comes with them.
Fabricakraft makes the same point in general terms: the difference between a marine cushion and a cheap one is structural, and it shows up in exactly these places.
How long each cushion takes and when to hire an upholsterer
Budget a full weekend for a full cockpit set, not a couple of evenings. The time splits roughly into an hour for measuring and templating, an hour for cutting foam and panels, three to four hours at the machine, and about an hour per cushion for turning, shaping and attaching. A single helm seat pad on a rigid frame is an hour and a half, shop and boat combined, which is the fastest project in this list.
Hire an upholsterer when the work involves a curved enclosure, a large helm enclosure or a run of saloon and salon cushions at once. Professionals price by labour rather than materials, so a marine shop quoting for a curved panel is not padding the number, they are charging for the hours of pattern work that make the curve fit. Everything on the straight-bench list above is well within reach of a home machine and a weekend.
It is also reasonable to split the job. Buy the foam and cut it to size yourself, then hand the sewing to a shop, which is the path several owners describe on forums.sailboatowners.com, where cutting the foam is the enjoyable part and the upholstery is the part that needs the machine.
Care and off-season storage
Salt spray and UV exposure do most of the damage, and both are manageable. Rinse the cushions with fresh water after a day on salt water, set them where air moves across both faces, and let them dry fully before they go back on the bench. Never store a damp cushion in a closed locker over the winter, because trapped moisture in the foam is exactly what mold needs.
For off-season storage, take the cushions off the boat, stand them on edge rather than stacking them flat, and cover them with something breathable. Stacking flat for months compresses the core and leaves a permanent dip where the pile sat. If you are covering them on the boat instead, use a loose breathable cover rather than a sealed plastic shell, which traps condensation against the cover fabric.
Frequently Asked Questions
How do I make a DIY foam seat cushion?
Cut a marine-grade reticulated foam core 1/4 inch undersize on each side, wrap it in polyester batting and trim flush, then cut cover panels from a paper template plus a 1/2 inch seam allowance. Sew welt cord to the perimeter, join the panels, set in a zipper, then turn the cover and stuff the wrapped core through the opening.
How to make a boat seat cushion?
The build is five things: make a template from the old cushion or by measuring the bench, cut the foam undersize, cut the fabric panels with seam allowance, sew a cover with welt and a zipper, then turn it right-side out and insert the wrapped foam. A flat pad skips the boxing panel; a full box cushion adds it.
What is the best fabric for boat cushions?
Solution-dyed acrylic canvas such as Sunbrella is the standard choice for cockpit benches because the colour sits in the fibre, so it fades slowly and resists UV, salt and mildew. Marine vinyl is tougher and wipes clean but runs hot in direct sun, and Phifertex-style mesh-backed cloth is the pick for undersides and cushions that stay wet.
What is the best material for boat cushions?
The best material is a reticulated marine foam core under a solution-dyed acrylic cover. Reticulated foam drains instead of holding salt water, and solution-dyed acrylic resists fading and mildew. Common mixed builds put acrylic on the top and sides and mesh-backed cloth on the underside, where water collects against the deck.
What foam to use for boat cushions?
Use reticulated marine foam, 2 to 3 inches thick for a cockpit bench. It drains through its cell structure and dries fast, so a soaked cushion does not stay wet inside the cover. Open-cell furniture foam absorbs water and molds within a season, and closed-cell foam does not drain even though it will not absorb.
What thickness foam for seat cushion?
Two to three inches is the working range for a cockpit bench or helm seat. Thinner pads lose the support that matters when the boat is heeling, and thicker ones raise the sitting height enough to block sightlines at the helm. Cut the core 1/4 inch undersize on each side so the cover pulls over without straining the seam.
Is there a difference between marine foam and regular foam?
Yes, and the difference is structural. Reticulated marine foam has larger open cells, so water drains through it and it dries out. Open-cell furniture foam absorbs water and holds it, which is what leads to mold inside a cushion within one season. Closed-cell foam will not absorb but it will not drain either, so water sits on the surface.
Can I reupholster my boat seats myself?
Yes, if the old foam is reticulated or closed-cell and still holds its shape. Unpick the old cover, keep its panels as the pattern, cut new panels, and rebuild the cover with welt and a zipper. Replace the core if it is crumbling, smells sour, or has visibly flattened, because salt held in the cell structure cannot be cleaned out.
How do I make my own boat cushions?
Plan on a weekend for a full cockpit set. Roughly an hour to measure and template, an hour to cut foam and fabric, three to four hours at the machine, and about an hour per cushion for turning, shaping and fastening. Attach the finished cushions with marine snaps, webbing or a screwed-on backer board so they do not slide when the boat heels.
How do I make my own seat cushions?
Choose a cushion style first: a flat pad for a straight bench, a box cushion for a settee you lean against, a hinged cushion for a companionway, or a pad on a backer board for a helm seat. Then follow the same ten steps, template, cut foam, cut panels, wrap, add welt, sew, set the zipper, insert the foam, shape the corners and fasten it in place.
Conclusion
To make cockpit cushions for a boat, the decision that matters most is the foam: reticulated marine foam at 2 to 3 inches, wrapped in batting, under a solution-dyed acrylic cover finished with welt and a zipper. The build itself is templating, cutting, sewing, inserting and fastening, and the ten steps above take that in order.
Start with a single flat pad to learn your machine on the fabric you chose, then work through the set. Measure your bench properly, and the cushions will fit, stay put, and outlast the ones they replaced.