
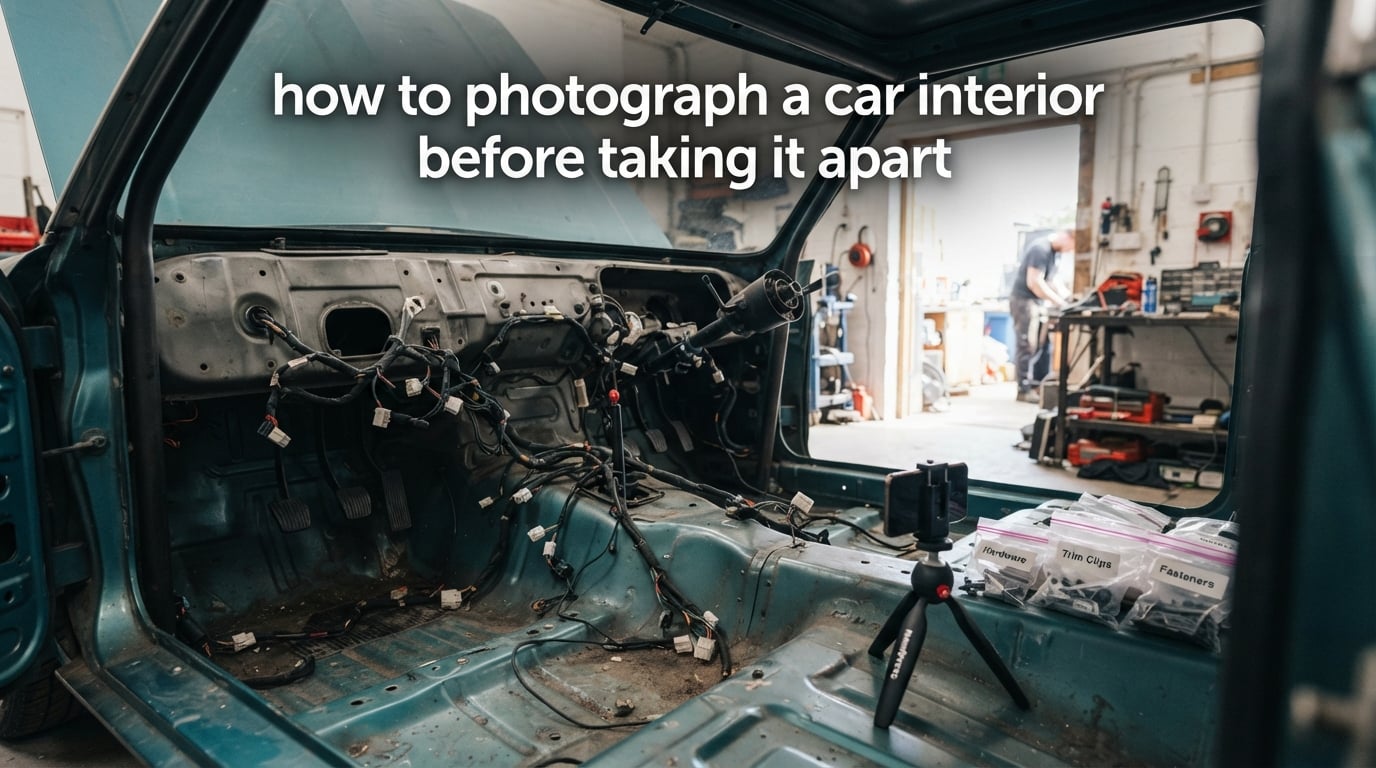
To photograph a car interior before taking it apart, work methodically around the cabin in the same order you intend to strip it. Take one wide orientation shot of each zone, then mid-range views, then tight frames of every fastener, clip, connector and wire route. Label each part with masking tape as it comes off, bag it, and shoot the bag. The result is a reassembly reference, not a set of showroom pictures.
Most advice on photographing car interiors is written for selling a finished car or showing one at a rally. This page is for the opposite job: the week before the dash comes out, when the only photos that will still matter are the ones that let you, or the trimmer, put it back together correctly.
Build-thread communities repeat one maxim more than any other, and it is the whole reason this page exists: take pictures before you take it apart. Once trim, carpet and dashboard are off, the evidence simply is not recoverable.
Table of Contents
- Before You Touch a Screw: The Pre-Strip Essentials
- How to Photograph a Car Interior Before Taking It Apart: The Master Shot List
- Detail Shots: Fasteners, Clips, Connectors and Wiring Routes
- Document Wear, Damage and Originality Before You Strip
- Labelling and Part Bags: Tagging Parts as They Come Off
- Phone, Mirrorless or DSLR: Pick the Setup That Suits You
- Light and Reflections in a Dark Garage
- File Naming, Backup and Sending the Set to a Trimmer
- What If You Skipped It: The Six Things Restorers Regret
- Frequently Asked Questions
- How many photos should I take before taking a car apart?
- How to photograph car wiring before removing the dashboard
- Why should I photograph a car before taking it apart?
- Can I just use my phone to document a car teardown?
- How do you label parts when stripping a car?
- Should I take photos before removing car seats?
- How to send interior photos to a car trimmer
- What are the most common mistakes when documenting a teardown?
- Conclusion
Before You Touch a Screw: The Pre-Strip Essentials
Four preparations decide whether your photo set will be usable in six weeks. Do them before you lift a tool.
- Plan your strip order, then follow it in the shoot. Shooting in the same sequence you will dismantle means each frame sits next to the task it documents. Reversing the two turns a set of photos into a puzzle.
- Clean nothing, remove nothing, yet. Vacuuming and degreasing destroys the wear patterns, stains and underseal texture that prove what condition the car was in. Photograph first, clean after.
- Fix your settings and do not touch them again. Decide resolution, flash and focus behaviour in the first two shots, then hold them constant so frames taken weeks apart are directly comparable.
- Set up the naming scheme before the first photo. Decide the folder structure now, because renaming 600 files on a phone at midnight is a miserable job.
Last reviewed for 2026.
How to Photograph a Car Interior Before Taking It Apart: The Master Shot List
Pre-disassembly documentation means a complete, ordered visual record of the cabin while it is still assembled: every trim panel, wire route, connector, fastener and sign of wear, captured well enough to rebuild from. It is not a listing photo, not a beauty shot and not a walkaround video. If a frame does not tell a stranger how something came off, it does not belong in the set.
Here is what to photograph, area by area, and why each one matters once the car is bare.
| Area | What to capture | Why it matters |
|---|---|---|
| Dashboard | Full-width shot, then the binnacle, the centre stack, the glovebox area and the demister ducting behind the dash | The demister hoses are colour-coded and the routing is not guessable once the panel is on a bench |
| Steering column | Column shroud fixings, the stalks and their sockets, the earth strap, the combination switch plug | Switch orientation and the earth strap position are the two most commonly refitted incorrectly |
| Centre console | Handbrake and gear lever gaiters, the console-to-carpet fixings, the ashtray and any switch blanking plates | Trim plates, cappings and blanking caps are usually unique to the car and rarely sold separately |
| Door cards | Each card as fitted, the window regulator fixings, the speaker and its wiring, the door handle and locking rod | Cards crack at the window regulator clips and the rods must go back through the same guide positions |
| Seats | Each seat in position, the runner rails and their mounting points, the belt anchors and pretensioner cables | Belt anchor and pretensioner routing is safety critical and cannot be inferred from a bare floor |
| Carpet and floor | Carpet edges, the sound deadening, underseal, drain holes, the grommets and cable pass-throughs | Water paths are visible here and nowhere else; a reassembled floor that leaks usually failed at a missed grommet |
| Headliner and screen | Headliner bow positions, the screen seal and clips, the aerial and any trim above the screen | Headliner tension and screen seating are fiddly and a distorted seal causes wind noise on the road |
Work through those rows in the order you will strip. For each area, take three distances: a wide frame that shows context, a mid-range frame that shows the component in its surroundings, and a tight frame on every fixing. That three-distance habit is the single biggest difference between a useful record and a folder of close-ups with no orientation.
Detail Shots: Fasteners, Clips, Connectors and Wiring Routes
Fasteners are where teardowns go wrong. A trim retainer that snaps out of its hole, a screw that was ground to a different length, a stud that lives in a captive nut behind a bracket: none of it can be reconstructed from an empty hole.
- Trim retainers and clips. Photograph the clip still in place, then the empty hole. The hole shape tells you which retainer fits it six months later.
- Witness marks. Where two panels meet, shoot the joint so the paint line, gasket and any witness mark are visible. Alignment on reassembly comes from these frames.
- Connector and plug. Shoot the plug in the socket, then unplugged, then the empty socket. Record the lock tab position in the frame, not in your memory.
- Wiring loom routing. Follow the loom along its whole path and take a frame every 150 mm or so, including every cable tie and P-clip. Photograph car wiring before removing the dashboard and you will never have to guess where a bulkhead loom passed.
- Screws of different lengths. Bag and mark them by length, then include one close frame of the assortment with the ruler in shot.
Where a loom is being moved out of the way rather than removed, put a fresh cable tie around it and photograph the tie, the loom it holds and the surrounding structure in one frame. That is your reference for where the loom belongs.
Document Wear, Damage and Originality Before You Strip
Restoration photo documentation does two jobs at once: it records wear so you can see what has changed, and it records originality so you can prove what was there before anyone touched it. Both only work if the evidence is captured while the car is intact.
Shoot the obvious first: sun damage and worn vinyl on the dash top, tears in the seat cloth, perished foam, stains in the footwells, a rattle source. Then shoot the things you are about to lose sight of: corrosion under the carpet edge, underseal bubbling, a sill with a mismatched panel, filled holes where a badge used to sit, and any bodgers’ work such as a previous repair in the door card or an amateur loom splice under the dash.
Put a ruler or a coin in frame for each of these so the scale is on the record. A close frame of a 2 mm crack tells an insurer what a wide shot cannot.
Keep this set separate from the build pictures, and never retouch or brighten the damage frames. A record that has been adjusted is not evidence.
Labelling and Part Bags: Tagging Parts as They Come Off
A photo of an unlabelled heap of screws is a photo of nothing. Label the parts and the images, together, as you go.
- Write on masking tape with a permanent marker. Tape the part as it comes off, not on the bench later.
- Use a scheme you can read in a photo. Vehicle or area first, then a sequential number: LHD-DASH-07, DOOR-RH-03. Area codes beat generic numbers when six bags are on the floor at once.
- Photograph every part in place before it moves. One frame with the tape visible in the cabin, one frame of the part in your hand or on the bench.
- Photograph the finished bag, sealed and labelled. This is your index shot: match the ID on the bag to the ID in the file name and you can find both in a year.
- Bag one small group per bag, not one bag per area. Thin card, cappings and fixings in separate labelled bags. Mixed fixings are the classic reason a rebuild stalls in month three.
Write the bag ID on masking tape and press it flat into the frame, next to the part. Nothing else in the picture needs explaining.
Phone, Mirrorless or DSLR: Pick the Setup That Suits You
Most people starting a teardown are shooting on a phone, and that is genuinely fine. A current phone at full resolution gives you frames that hold up for a wiring harness or a clip location, and the main limit is stabilisation, not pixels.
Phone. Best for most owners, because it is the device already in your pocket and it cannot be left in the garage. Turn on the grid, use the volume key or a two-second timer rather than the on-screen shutter, shoot in the highest resolution, and disable any automatic HDR if it blends a dark footwell into the door card. What a phone cannot do: hold a consistent wide angle down a dark footwell without motion blur, and zoom into a small clip without softening. Brace the phone against the door frame, the sill or a stack of trim panels.
Mirrorless or DSLR with a wide lens. Worth it when you are shooting the whole cabin in one frame and want the exposure held steady across 300 shots. A 14-20mm equivalent wide lens covers a door aperture and both front seats from outside the car. The cost is file volume and a camera you have to keep dry and charged.
A macro or the phone’s close mode. Needed for connector pins, clip types and corrosion. On a phone, use the dedicated close-up setting rather than digital zoom, and hold the lens square to the surface to keep the frame flat.
Whatever you use, one rule beats the rest: one device for the whole set. Mixing a phone and a camera mid-project gives you two different colour profiles, and the set stops reading as one record.
Light and Reflections in a Dark Garage
Car interiors are hard because the light source is behind you and the surfaces face back at it. Glass, chrome trim, faux wood veneer and glossy vinyl all mirror your own shape back into the frame.
- Use the door aperture. Open all doors and the boot, park the car facing an open gate or a wall, and shoot on an overcast day. Diffused daylight through the apertures beats any single lamp.
- Add a portable LED work light for the footwells, behind the seats and inside the boot. Bounce it off a white panel rather than pointing it straight down the barrel of the lens.
- Move the car if you can. A car photographed outside at 90 degrees to the sun kills most of the glass reflection for free. No filter needed.
- Use a polarising filter for what remains. A CPL on the lens, or a clip-on one for a phone, cuts reflections on the windscreen, the instrument glass and the vinyl. Note that it costs roughly two stops of light, so re-check your shutter speed.
- Stabilise everything. A small tripod, a beanbag on the sill, a clamp on the steering column. Every frame in a cabin is a slow, close, hand-held frame at the worst moment.
Reviewers and photographers working in this space consistently name glass, faux wood and glossy plastics as the hardest surfaces to shoot, which is why a polariser and a portable LED are the standard answers.
File Naming, Backup and Sending the Set to a Trimmer
A photo set you cannot find in twelve months did not get taken. Spend five minutes on the file name and five minutes on the backup, both at the end of the shoot.
Name files so they sort usefully. Use CARMODEL_YEAR_AREA_ZONE_DESCRIPTION_SEQ, for example MGB1974_DASH_COL-01_LOOM_012.jpg. The date sits in the folder name rather than the file name, and the sequence number always comes last so your camera roll sorts in shooting order.
Keep two copies in two places. The camera or phone is one copy. Move the files to a computer or drive the same evening and leave a cloud copy running. Phones get dropped, wiped and stolen mid-project, and the loss is usually silent.
Do not send the master set through a chat app. Messaging apps compress and resize on the way through, so a connector that was clear in the frame arrives as a smudge. Send a transfer link or a cloud folder, then paste individual frames into a message only for discussion.
Know what a trimmer wants first. Specialists work from a wide overview of each area, then the detail frames for the parts they are quoting. Send one folder per area rather than one dump, keep the original file names, and lead the email with the car and the job.
Progress photos during the rebuild are the natural companion to the before set. Shoot the same zones in the same order and the two sets line up frame for frame, which makes any change you made visible at a glance.
What If You Skipped It: The Six Things Restorers Regret
Almost every unfinished rebuild in the hobby shares the same handful of regrets.
- Undocumented loom routing. The single most common failure. Once the dash is on a bench the path behind it cannot be recreated, and the loom gets routed somewhere that chafes a wire against a bracket.
- Connector positions nobody photographed. Two identical grey plugs, one of them reversed, and the fault only appears on the road.
- Clip and retainer orientation. A retainer fitted upside down looks correct and holds nothing.
- Pre-existing damage discovered late. Rust, a previous bodgers’ repair or a mismatched panel found six weeks into the strip, with no before evidence to argue from.
- Unlabelled fixings. Two bags of similar-looking screws and a rebuild that stops until the trimmer remembers.
- Shots with no scale and no context. A close frame of a crack, a bolt or a hole means little without a ruler in shot and a wide frame showing where it sits.
If you have already missed the shoot, the honest recovery is partial: photograph every remaining area now before it comes apart, and treat the stripped zones as lost. The record is worth most at the start, and the habit is worth keeping for the next car.
Frequently Asked Questions
How many photos should I take before taking a car apart?
For a full interior strip, expect 250 to 400 frames. That is roughly one wide, one mid-range and two to four detail shots per zone across the dash, steering column, console, both door cards, both front seats, rear seats, carpet, boot and headliner. Add 20 to 30 frames for damage and originality evidence before you start dismantling, and one index shot of every labelled part bag. Quality matters more than quantity, so delete the blurred ones the same evening rather than storing them for a year.
How to photograph car wiring before removing the dashboard
Follow the loom in one continuous direction and take a frame every 150 mm or so, from the bulkhead to the far end of the centre console. Include every cable tie, P-clip and grommet, and shoot each connector twice: plugged into its socket, then unplugged and empty, with the lock tab visible. Photograph the demister hoses behind the dash by colour and destination. Add a fresh cable tie wherever you move a loom aside, and photograph the tie in place.
Why should I photograph a car before taking it apart?
Because wire routing, clip orientation, fastener positions, the condition of the trim and the car’s originality evidence all stop being observable the moment the interior comes apart. Without a record, reassembly depends on memory, parts get fitted wrongly or damaged, and rust or a bodgers’ repair found mid-strip cannot be proved to a buyer, insurer or trimmer. A photo set turns a strip into a documented job that can be handed to someone else.
Can I just use my phone to document a car teardown?
Yes, for most cars and most people. A current phone at full resolution holds enough detail for clip locations, connector shapes and corrosion. Turn on the grid, use the timer or volume-key shutter instead of the screen button, disable automatic HDR, and brace the phone on the door frame or sill for close frames. Phone photos soften when you digital-zoom, so use the native close-up mode and hold the lens square to the surface. Use one device for the whole set so colour stays consistent.
How do you label parts when stripping a car?
Write on masking tape with a permanent marker and stick the tape to the part as it comes off, not later on the bench. Use an area-plus-sequence code such as LHD-DASH-07 or DOOR-RH-03, so the label reads correctly in a photograph and sorts sensibly in a folder. Bag one small group per bag, thin card and cappings separated, then photograph the sealed bag with its ID flat in frame. That index shot is what lets you match a bag to its file six months later.
Should I take photos before removing car seats?
Yes, and more than most owners expect. Photograph the seat in position, the runner rails and their mounting points, and every cable or vacuum hose running to the seat. Also record the belt anchors, the pretensioner cables and the buckle routing, because belt geometry is safety critical and cannot be read from a bare floor. A close frame of each rail fixing with a ruler in shot settles any dispute about which bolt goes where when the new rails or carpet go back in.
How to send interior photos to a car trimmer
Send one folder per area rather than a single dump, keep the original file names, and lead the email with the car and the job you want quoting. Put the files on a transfer link or cloud folder and never send the master set through a messaging app, because those compress and resize in transit. Specialists read a wide overview of each area first and then the detail frames of the parts being quoted, so send the overview shots in the body of the email and the full set as the attachment.
What are the most common mistakes when documenting a teardown?
The recurring mistakes are shooting detail frames with no wide frame for context, leaving a ruler or scale object out of damage shots, photographing in different light from one zone to the next, and skipping connectors and cable ties in favour of the looms themselves. Storage mistakes are just as common: no naming convention, one copy kept on the phone, and sending the set through a chat app that compresses it. All of these are cheap to avoid at the start and expensive to fix later.
Conclusion
To photograph a car interior before taking it apart, work in strip order, shoot three distances per zone, capture every fastener, clip, connector and loom path in close detail, and record wear and originality while the car is still whole. Label and bag parts as they come off, and match each bag to a file name.
Do the whole set in one afternoon before the first screw comes out. It costs a few hours and it is the only version of this information the car will ever give you.