
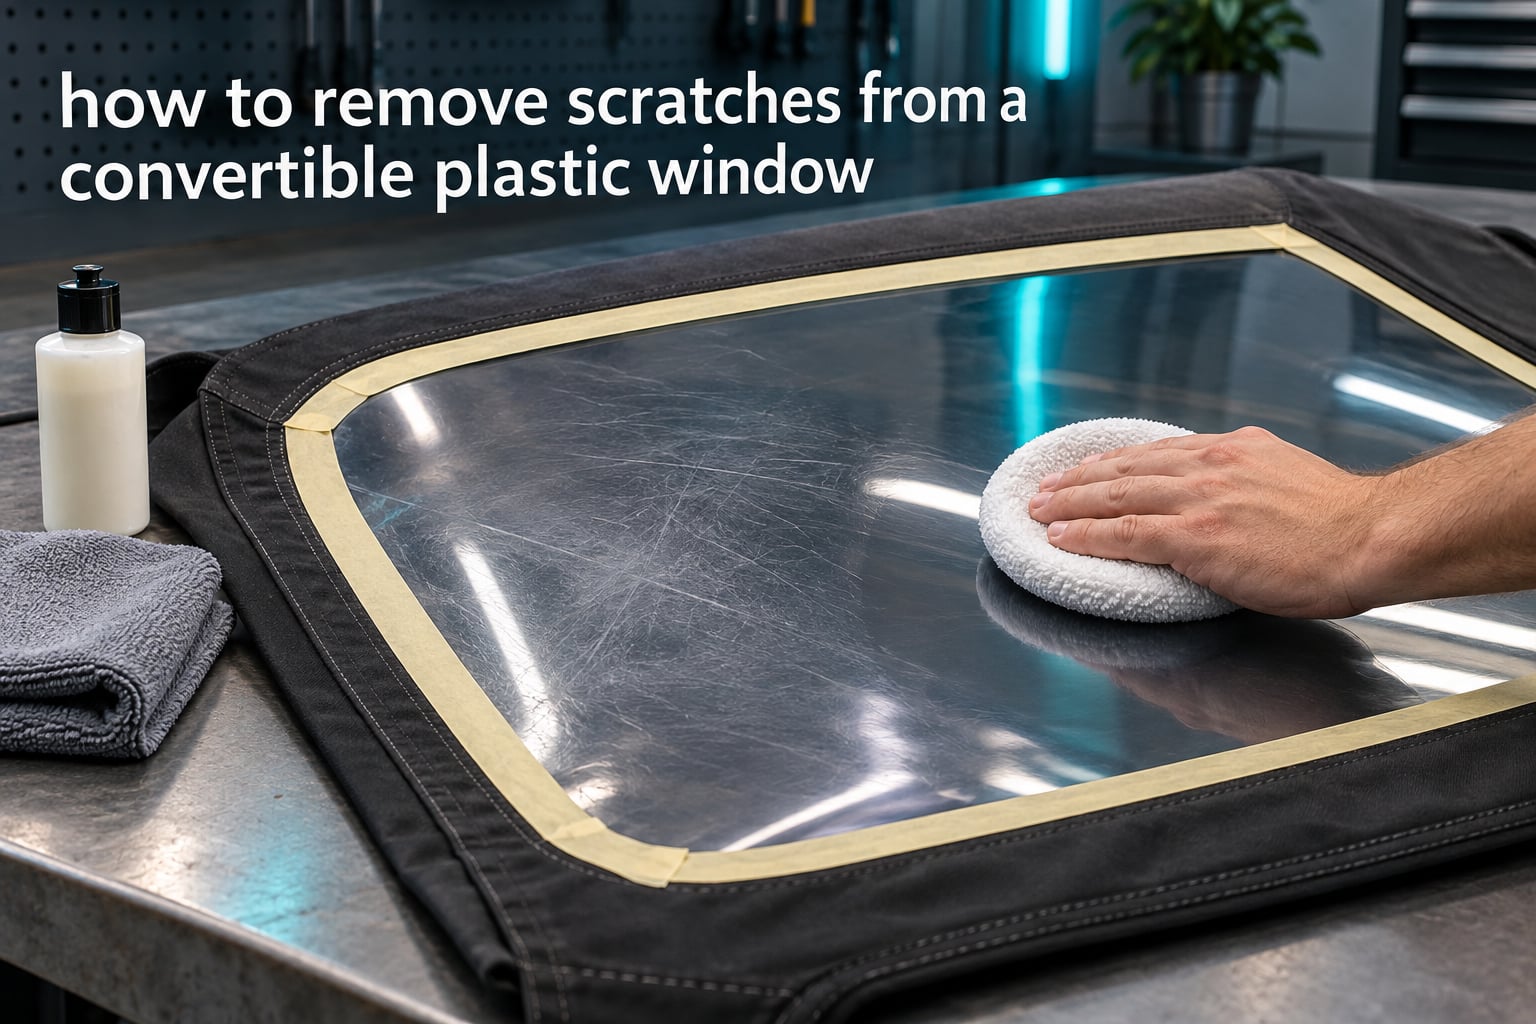
Yes. Light to moderate scratches come out of a convertible plastic window with a plastic-specific polish, worked by hand or by machine. Deep grooves and tears do not, and no product on the shelf will change that.
Scratch removal on clear plastic is not a filling exercise. It is a levelling one. A mild abrasive suspended in a plastic polish micro-abrades the raised plastic around a scratch until the surrounding surface sits level with the bottom of the groove, at which point light simply disappears under the reflection. The same polish then fills and optically blends whatever fine marks remain.
Understanding how to remove scratches from a convertible plastic window matters more than it does for glass. The plastic rear window on a soft top is thin, flexible and unforgiving: it hazes, yellows and stretches far more readily than a windscreen, and it picks up a new scratch every time the top is folded over grit. Fixing damage early with the right polish takes an afternoon. Waiting means a permanently wavy or crazed pane that no amount of careful work will bring back.
This guide covers the whole job, from deciding whether your scratch is even polishable, through the step-by-step method for a window that is still installed on the car, to the products that work and the household chemicals that will ruin the plastic. Everything here is written for the flexible window most people actually own, not the rigid removable acrylic panes that most published guides assume.
Table of Contents
- What Kind of Plastic Is Your Convertible Window?
- Assessing the Damage Before You Touch It
- How to Remove Scratches from a Convertible Plastic Window
- Choosing the Right Polish
- Hand Polishing vs Machine Polishing
- Fixing Haze, Oxidation and Yellowing
- What NOT to Use on a Plastic Window
- Working on a Window That Is Still on the Car
- When to Stop and Replace the Window Instead
- Preventing Future Scratches
- Frequently Asked Questions
- Can you polish out scratches in plastic?
- What is the best plastic polish for removing scratches?
- Can I remove scratches from clear plastic using polish?
- Can you use Meguiar’s polish on plastic?
- What takes scratches out of plastic windows?
- Does WD-40 really remove scratches?
- Can you use Windex on Jeep plastic windows?
- Can you use Dawn dish soap on vinyl windows?
- How do you make cloudy plastic windows clear again?
- How long will the result last before the scratches come back?
- Conclusion
What Kind of Plastic Is Your Convertible Window?
The method changes depending on the material, and using the wrong approach on the wrong plastic is how people end up with a milky window that is worse than the one they started with.
Flexible PVC is the standard on modern convertibles. It is soft, slightly stretchable and forgiving of gentle abrasion. This is the easiest material to work on and the one most polish guides are written for. Owners of Boxsters, Miatas, Mustangs and Wranglers fall into this group.
Lexan or polycarbonate appears on many older and European cars, and it is the hardest case. Detailers consistently describe Lexan as “always a challenge”. It scratches more readily than PVC, it is more prone to stress-whitening, and it tolerates far less heat before it turns permanently cloudy. If your car came with Lexan, work in smaller sections, keep the surface wet and cool, and expect less improvement for more effort.
Acrylic is rarer on convertibles but common on motorhome habitation panes, boat windows and some vintage screens. It polishes well, but it has one unforgiving weakness: it reacts chemically with solvents, which is how crazing starts.
Why flexible plastic behaves differently from glass. Glass is hard and thick, so a scratch can be ground out without removing much depth. A convertible window is a thin membrane held in tension. Every pass of your hand, every revolution of a polisher pad, presses on a surface that can move. Press too hard and you stretch it. Let friction build and it warps. The skill is not in pressing harder, it is in staying cool and light.
Assessing the Damage Before You Touch It
Not every mark on a plastic window is a scratch, and not every scratch is one you can polish out. Spend five minutes with the window in good light before you open a bottle, because the outcome below decides whether the job is worth starting.
| Severity | What it looks like | Can it be polished? | Method | Realistic result | Effort |
|---|---|---|---|---|---|
| Surface haze and oxidation | Whole window milky, dull, uneven; not visible in a scratch, only in the glare | Yes, fully | Polish and buff, no masking needed | Near-full clarity restored | 1-2 hours |
| Light scratch | Visible at an angle or under a bright light, no depth in a fingernail | Yes, fully | One pass of a plastic polish by hand, second pass with a machine if you have one | Invisible at normal viewing angles | 1-2 hours |
| Moderate score | Catches a fingernail slightly, obvious in daylight, still translucent | Partially | Two or three passes, machine assisted, work in small panels | Much fainter, a ghost remains in hard light | Half a day |
| Deep groove | Catches a fingernail firmly, feels like a trench, often from a branch or a key | No, not fully | You can soften the edges, nothing more | Reduced visibility of the line, the groove stays | Several hours for limited gain |
| Tear, split or hole | Open gap in the material, often radiating from an impact point | No | Stop. Tape it closed for the drive home if you must | None, the pane needs replacing | Replacement |
| Crazing | Network of fine hairline cracks, often after solvent contact or years of UV | No | Do not try. Polishing spreads the stress | None, the pane needs replacing | Replacement |
Two quick tests help. Run a fingernail across the mark: if it catches hard, you are looking at a groove rather than a surface defect, and the best realistic outcome is a much fainter line. Then look at the window in low light from a shallow angle with a bright light source behind your head; genuine scratches pop out at that angle while haze stays uniform.
How to Remove Scratches from a Convertible Plastic Window
This is the full method for a flexible window still fitted to the car, working from assessment to finished result.
- Drop the top only if the window is clean. Grit trapped in the fold will be dragged straight across the plastic as the top closes, which is how most scratches happen in the first place.
- Wash the window with warm water, pH-neutral car shampoo and a clean microfiber mitt or cloth. Rinse grit away before it touches the surface.
- Dry thoroughly with a clean microfiber towel and chamois. Any remaining grit under the pad becomes an abrasive you did not intend.
- Tape off the surrounding fabric, trim, moldings and bow. White polish splattered into a dark woven top is close to impossible to lift out afterwards.
- Work in panels no larger than a dinner plate, starting at the top edge. Small panels give you control and stop heat building across the whole window.
- Apply a thin ribbon of plastic-specific polish along the panel and spread it with a clean microfiber applicator before it starts to dry.
- Polish with light pressure using straight lines and firm hand speed. Keep the surface cool to the touch, and stop for a minute if it warms.
- Buff off the dry residue with a clean microfiber towel, then repeat on the inside face, which is usually hazier than the outside.
Work both sides. The inner face of a soft top window spends its life in shade and picks up more oxidation than the outside, so it is often the hazier of the two. A window that still looks cloudy from the cabin after a perfect outside job has simply not been finished on the inside.
Choosing the Right Polish
The best scratch remover for plastic is a clear-plastic-specific polish, and the consensus among owners and professional detailers is narrower than the shelf suggests. Meguiar’s PlastX and Plexus draw the most repeat, specific endorsements; 3M’s plastic polish and Novus follow closely. Brass polish is a genuine fallback for stubborn marks on thick rigid plastic, but it is harsher than you want on a flexible window.
| Product | Cut level | Best for | Caution |
|---|---|---|---|
| Meguiar’s PlastX | Mild, micro-abrasive | Light scratches, haze and general maintenance on PVC and Lexan | Multiple passes needed on moderate scores; keep it moving |
| Meguiar’s Clear Plastic Polish | Mild | Oxidation, yellowing and cloudiness on sun-faded plastic | Not strong enough for a fingernail-catch score on its own |
| Plexus | Mild to moderate | All-round work and long-term protection after the repair | Availability is patchy in some regions; check a motorcycle shop |
| Novus plastic polish | Mild, graded system | Fine scratches and haze, and maintenance afterwards | The heavier scratch-removal grade is more than a flexible window needs |
| 3M plastic cleaner and polish | Mild | Restoring clarity to a dull, oxidised window | Pair the cleaner step before the polish step for best results |
| Brass polish | Aggressive | Deep marks on thick, rigid plastic or small boat and RV panes | Risks stretching and permanently hazing a flexible window; use sparingly |
The practical rule most detailers use is simple: start with the mildest plastic polish and only step up if the scratch is still there afterwards. Going straight to a compound on a soft PVC window is the fastest way to a milky result, because you are removing material faster than a thin, tensioned membrane can take it.
On durability, owners report results that last. One Boxster owner describes 20 years of regular Plexus use with the rear window still looking new, and a Rennlist owner reports a single Plexus application, finished in one stroke with a microfiber, that kept the window scratch-free for three years. On a perishable plastic surface, that is a strong argument for finishing with a polish that also seals.
Hand Polishing vs Machine Polishing
Machine polishing gives a better result because a hand cannot duplicate the action of an electric motor that never gets tired. That is the view of a professional detailer whose advice on soft plastic windows is widely quoted, and in practice it holds. The trade-off is heat and pressure, both of which are the enemies of a flexible pane.
| Method | Speed | Control | Warping risk | Best for |
|---|---|---|---|---|
| Hand, microfiber applicator | Slow | Total | Very low | First-timers, light scratches, tight curves near the trim |
| Dual-action polisher with foam pad | Fast | Good | Moderate if pressure is high | Moderate scores and haze on a full window |
| Cordless drill with foam mop | Fastest | Poor, needs practice | High if allowed to run dry | Experienced users working large, rigid panes |
Never let the window get hot. Friction heat is what turns a repairable haze into permanent cloudiness and what stretches a taut window into a ripple you cannot pull out. If you cannot keep your palm comfortably on the surface, you are working too hard or too long on one spot.
For the drill method, pre-spin the foam mop with water so the pad is loaded, add polish to the centre of the pad, and keep an atomising bottle to hand to mist the panel as you work. The mist is a coolant and a lubricant at the same time. Run the drill on its slowest setting, use the lightest pressure that still moves product, and stop the moment the compound dries to a white haze and starts smearing rather than spreading.
If you are new to this, start by hand. A window that takes four patient passes to clear is a better outcome than one that took four aggressive machine passes and never cleared at all.
Fixing Haze, Oxidation and Yellowing
Most convertible owners who complain about their rear window are not looking at a scratch at all. They are looking at oxidation: the surface of the plastic has degraded under UV exposure and light, turning the whole panel milky and yellow. This is easier to fix than a scratch and far more common.
- Wash and dry the window as above, on both sides.
- Work a plastic cleaner into the dull areas and let it sit briefly to break down the oxidised layer.
- Apply a clear plastic polish or plastic restorer to the panel.
- Polish by hand or machine with light pressure, keeping the surface cool throughout.
- Buff with a clean microfiber towel, then repeat inside and out until the glare is even.
After every polish, treat the window with a plastic UV protectant. A freshly polished surface is more vulnerable to UV than the weathered one you started with, and sealing it slows the next round of degradation.
What NOT to Use on a Plastic Window
These are the products owners reach for most often, and the reasons they cause damage. Three of the most-searched questions on this topic are about glass cleaner, dish soap and WD-40 specifically.
| Product | Why it fails | What happens to the plastic |
|---|---|---|
| Windex and ammonia glass cleaner | Ammonia attacks polycarbonate and many flexible plastics | Crazing, stress whitening, permanent cloudiness |
| Dawn dish soap | Alkaline surfactants and additives are not designed for polymer surfaces | Cloudiness, a sticky film, rapid hazing in sun |
| WD-40 and similar oils | A lubricant, not a polish. It fills a scratch optically and traps dust | Temporary fake clarity that looks worse in dust, plus stained plastic |
| Rubbing alcohol and methylated spirits | Solvents cause chemical crazing, which cannot be cured | Hairline cracking across the whole panel |
| Toothpaste | An abrasive compound with no control of grit size and no cooling | Deep swirls and uneven haze, the worst of both problems |
| Glass polish and cerium compounds | Formulated for a hard, thick, stable surface. A flexible window is none of those | Warping, stretch marks, micro-cracking |
| Paper towels and old t-shirts | Lint and fibres snag on the surface as you work | New fine scratches, swirled finish |
| Pressure washer | Concentrated water drives grit into the surface at force | Pitted haze, immediate new scratching |
Two habits replace all of the above. Wash with a pH-neutral shampoo and a clean microfiber mitt, and keep a plastic-safe protectant on the window between washes.
Working on a Window That Is Still on the Car
You do not need to remove the window for any of this work, and trying to remove one is a common way to tear it.
Support the top from below with a second person or a padded stand so you are polishing against a stable surface rather than pressing into a membrane. On a taut top, work the panel in sections and use a hand pressure low enough that the plastic does not visibly move under your palm. On a slack top, support the area behind the panel with clean folded towels so the polish pressure goes into the towels rather than stretching the window.
Cleanliness matters more than technique. A drop cloth under the work area catches splatter, and a plastic drop cloth protects the paint below. Nobody wants to find white polish in the weave of a black fabric top, because that stain is effectively permanent.
When to Stop and Replace the Window Instead
Some damage is past the reach of any polish, and knowing this saves a wasted weekend.
Replace the window if it is torn or split, if a deep groove runs edge to edge, if the surface shows crazing, or if a previous attempt left permanent ripples and stretch distortion. A window damaged by a tree branch or a key that gouged to the backing material will never be fully clear, and a heavily worked window can end up worse than the one you started with.
The same applies to a flexed window. If the plastic no longer lies flat and pulls taut when the top is up, it has been stretched, and no amount of polishing will restore the tension. At that point replacement is the honest answer.
Preventing Future Scratches
Most damage to a convertible plastic window is not caused by one accident. It is a repeating cycle of grit, folding and abrasion, and the habits below break it.
- Wash the top thoroughly before you ever drop it. Grit trapped in the fold is the single most common cause of rear window scratches.
- Hose or rinse loose grit off the plastic before a mitt ever touches it, so you are not grinding dirt across the surface.
- Keep two or three microfiber towels dedicated to glass work, and never drop back to paper towels for speed.
- Apply a plastic protectant after every polish to slow UV degradation of the freshly exposed surface.
- Keep the top clean while parked, and never use cling film, sticker residue or solvent cleaners on the window.
Frequently Asked Questions
Can you polish out scratches in plastic?
Yes, when the scratch is light to moderate. Plastic polish works by levelling: a mild abrasive removes the raised plastic around the mark until the surface is flat again, so the scratch becomes invisible. A groove you can feel with a fingernail can be softened but never fully removed, and tears or crazing cannot be polished at all.
What is the best plastic polish for removing scratches?
Meguiar’s PlastX and Plexus are the two most widely recommended, with 3M plastic polish and Novus close behind. Start with a mild plastic-specific polish rather than a compound. If the scratch is still visible after two passes, repeat before stepping up, because a soft PVC window hazes quickly under aggressive abrasion.
Can I remove scratches from clear plastic using polish?
That is exactly what clear plastic polish is for. Apply it in small panels, spread it with a clean microfiber applicator, work it with light pressure in straight lines, and keep the surface cool to the touch. Buff the dry residue off with a clean towel. Both sides of a convertible window should be finished.
Can you use Meguiar’s polish on plastic?
Yes, but only the plastic-specific products. Meguiar’s PlastX and Clear Plastic Polish are formulated for clear plastic and are safe on PVC and Lexan rear windows. Traditional automotive paint compounds and metal polishes are not, and will haze or distort a flexible window.
What takes scratches out of plastic windows?
A clear-plastic polish containing a fine micro-abrasive, worked with light pressure and plenty of patience. Machine assistance speeds it up, but a hand applicator and a clean microfiber towel will remove light scratches perfectly well. Nothing else, including household cleaners, will shift a scratch in plastic.
Does WD-40 really remove scratches?
No. WD-40 is a lubricant that fills a scratch optically and traps dust in it, which makes the window look worse, not better. It can also stain the plastic. The same applies to oily products of any kind: they give a temporary illusion of clarity that disappears the moment the surface is dirty.
Can you use Windex on Jeep plastic windows?
No. Ammonia-based glass cleaners react with polycarbonate and many flexible plastics, which starts crazing and stress whitening. The damage is chemical and cannot be polished out. Use warm water with pH-neutral car shampoo and a microfiber mitt instead, and follow it with a plastic protectant.
Can you use Dawn dish soap on vinyl windows?
It is not recommended. Alkaline surfactants and additives are not designed for polymer surfaces and leave a film that turns the window cloudy and sticky in sun. A pH-neutral car shampoo washes plastic safely, and plastic-specific polish removes the haze that plain washing cannot.
How do you make cloudy plastic windows clear again?
Wash and dry first, then work a plastic cleaner into the dull areas to break down the oxidised layer. Follow with a clear plastic polish or plastic restorer, polish with light pressure until the surface stays cool, and buff with a clean microfiber towel. Finish both sides and apply a UV protectant to slow the next round.
How long will the result last before the scratches come back?
With a protected surface and a clean top before every fold, results have lasted years in owner reports. One owner describes a single Plexus application that kept a rear window scratch-free for three years, and another reports 20 years of regular Plexus maintenance with a window still looking new. Washing grit out of the top before dropping it matters more than any product choice.
Conclusion
Put simply, how to remove scratches from a convertible plastic window comes down to three things: judge the severity honestly, start with a mild plastic-specific polish rather than a compound, and keep the surface cool and lightly pressed while you work. Light scratches disappear entirely, moderate scores fade to a ghost, and deep grooves, tears and crazing are replacement jobs, not polishing jobs.
Start by washing the top and the window properly and dropping it with a clean microfiber towel. That single habit prevents more rear window scratches than any product ever will, and it costs nothing.