
Which glue to use for car headliner fabric comes down to three core choices: a high-temperature aerosol spray like 3M 38808 for fast DIY repairs, a brush-on contact cement such as Weldwood Landau Top for permanent professional results, or a dedicated headliner adhesive like Permatex 27828 when you need a balance of convenience and heat resistance. The wrong adhesive is the single most common reason a headliner sags again within 6 to 12 months, so matching the product to your climate, fabric type, and skill level matters more than the brand name on the can.
I’ve spent the last several months pulling sagging headliners out of daily drivers, project cars, and a couple of older restorations, and I want to share what actually holds up versus what fails on the first hot afternoon. Below you’ll find a quick decision guide, a full step-by-step application walkthrough, and a brand-by-brand comparison so you can stop guessing and pick the right tube or can before you start.
Table of Contents
- Quick Picks: Best Glue for Car Headliner Fabric by Use Case
- Understanding Headliner Adhesive Types
- Step-by-Step Application Guide for Headliner Fabric
- Temperature and Climate Considerations
- Brand Comparison: 3M vs Permatex vs Weldwood
- Common Mistakes to Avoid When Gluing Headliner Fabric
- Frequently Asked Questions
- Final Verdict on Which Glue to Use for Car Headliner Fabric
Quick Picks: Best Glue for Car Headliner Fabric by Use Case
If you only have time to scan this guide, here are the three recommendations I make most often to friends, customers, and forum readers asking which glue to use for car headliner fabric.
Best DIY aerosol: 3M Super 77 or 3M 38808. These high-temperature aerosol adhesives are what I reach for when someone wants a one-can solution, no spray gun, and a result that lasts more than one summer. The lace-spray pattern lays a thin, even coat that resists soak-through on most headliner fabrics.
Best professional brush-on: Weldwood Landau Top & Trim Adhesive. When the headliner board has to come out of the car and the customer wants a 5 to 10 year fix, this is what professional trimmers use. It’s a contact cement you brush onto both surfaces, let flash off, and press together for an immediate permanent bond.
Best for hot climates: Permatex Headliner Adhesive (27828) or Weldwood. Standard craft sprays start failing once cabin temps cross 150°F on a sun-soaked dash. Permatex’s headliner-specific formula and Weldwood’s high-temperature formulation are both rated for the worst summer days in Phoenix, Las Vegas, or anywhere the car bakes.
Understanding Headliner Adhesive Types
There are three families of headliner adhesive and each behaves very differently once the sun heats up your roof. Picking the right type is the difference between a headliner that stays tight for years and one that drapes over your passengers by August.
Aerosol spray adhesive (3M Super 77, 3M 38808, 3M 74). Aerosols are the most convenient option. You shake the can, spray both surfaces, wait a few minutes for tack, then press the fabric to the board. The upside is speed and a thin, even coat. The downside is temperature sensitivity — most general-purpose aerosols start to soften above 120°F, and a parked car in the sun can hit 170°F on the headliner panel.
Brush-on contact cement (Weldwood Landau, 3M Contact Adhesive 847). This is the professional gold standard. You brush a coat onto the headliner board and another onto the back of the fabric, let both flash off until tacky, then mate the surfaces. Contact cement forms a heat-resistant, flexible bond rated well above automotive cabin temperatures, which is why trim shops almost never use anything else for full headliner replacement.
Dedicated headliner adhesive (Permatex 27828, 3M Headliner & Fabric Adhesive 38810). These are products formulated specifically for automotive headliner fabric. They typically bridge the gap between consumer-friendly aerosols and professional contact cements, often with higher temperature ratings than general-purpose spray adhesives and easier application than brush-on cements.
A fourth category worth mentioning is super glue and craft glues. Don’t use them. Regular super glue, hot glue, and white craft glue all fail on headliner fabric within weeks because they can’t flex with the foam backing and they soften under heat.
Step-by-Step Application Guide for Headliner Fabric
Below is the exact process I follow whether the headliner is sagging slightly or coming down in sheets. The steps look long, but each one prevents a specific failure mode I’d otherwise be repairing in six months.
Step 1: Remove the headliner board from the vehicle. Spot repairs look tempting but almost always fail. Drop the visors, remove the dome light, unbolt any assist handles, and gently lower the board through a door opening. Lay it face-down on a clean, flat surface.
Step 2: Strip the old fabric and foam. Old foam backing is the most common cause of re-sagging. Peel the fabric back and use a stiff putty knife or wire brush to remove every trace of deteriorated foam. What remains should be the bare headliner board, either cardboard composite or molded fiberglass.
Step 3: Clean and lightly sand the board surface. Wipe with a lint-free cloth and a small amount of isopropyl alcohol to remove dust and oils. A light scuff with 220-grit sandpaper gives the adhesive something to bite into, especially on smooth fiberglass boards.
Step 4: Cut and dry-fit the new fabric. Lay the new headliner material over the board with at least two inches of overhang on every side. Trim once, not repeatedly — each pass can stretch the fabric unevenly. Make relief cuts at corners so the material lays flat without wrinkles.
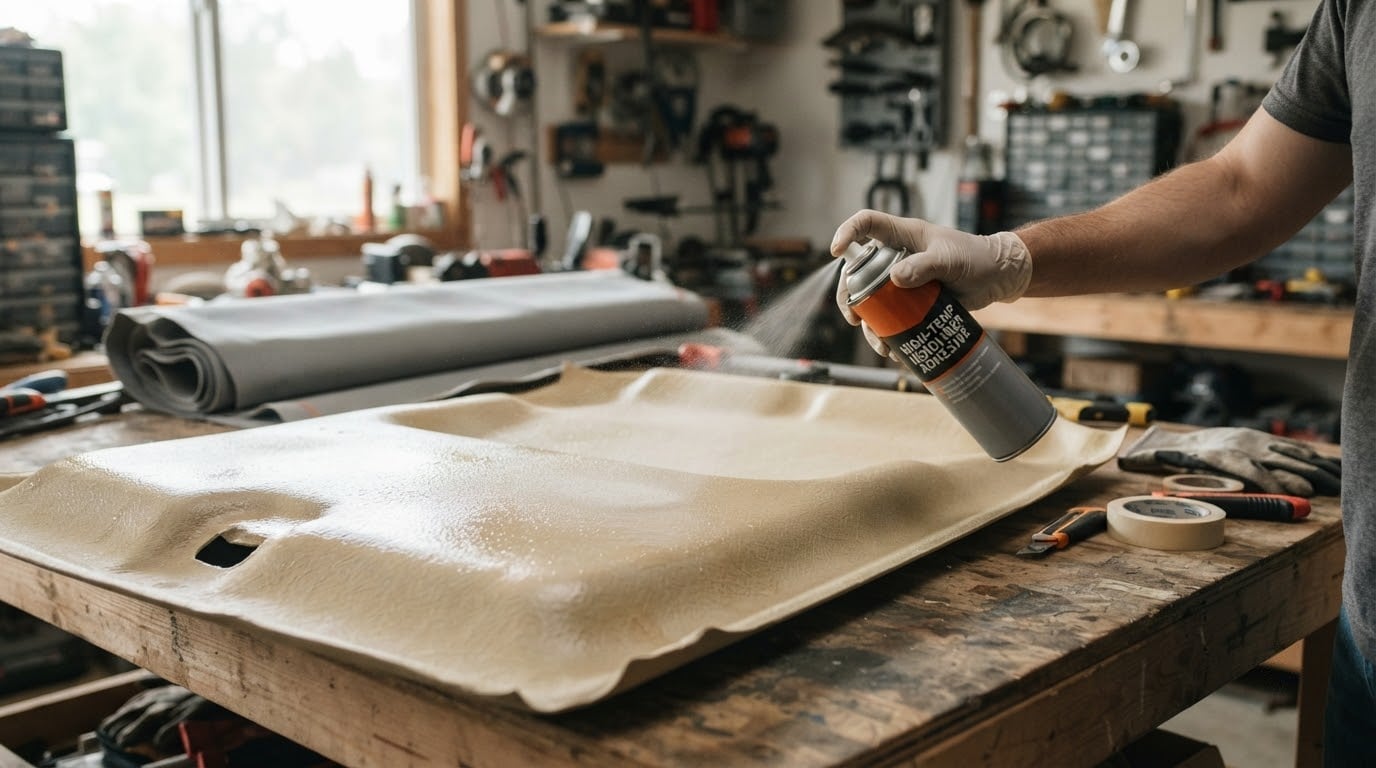
Step 5: Apply adhesive to both surfaces. For aerosols, hold the can 6 to 8 inches away and apply a medium coat to the board and a lighter coat to the fabric. For contact cement, brush an even coat on both surfaces. Too thick causes soak-through; too thin causes weak spots.
Step 6: Let it flash off until tacky. Wait 3 to 5 minutes for aerosols and 5 to 10 minutes for brush-on contact cement. The surface should feel tacky like a sticky note, not wet. If you press a fingertip in and it strings, give it more time.
Step 7: Bond the fabric to the board. Start at one end and work across using a plastic smoothing tool or the back of a clean spoon. Press firmly and move slowly to avoid trapping air. Work from the center outward on the final pass to push air pockets to the edges.
Step 8: Trim the edges and reinstall. Once the fabric is bonded, trim the overhang with a sharp utility knife. Reinstall the headliner board in reverse order of removal. Avoid slamming doors for 24 hours while the adhesive reaches full bond strength.
Temperature and Climate Considerations
Cabin temperature is the silent killer of headliner repairs. A car parked in summer sun can run 40°F hotter at the roof than the outside air, which puts the headliner board in direct contact with temperatures that melt cheap adhesives.
Hot climates (Phoenix, Las Vegas, Miami, Houston, anywhere summer highs exceed 95°F). Use a high-temp rated adhesive and avoid general-purpose craft sprays. Weldwood Landau Top is rated above 200°F. Permatex 27828 is rated above 180°F. Standard 3M Super 77 starts to soften around 130°F and will sag by mid-summer.
Moderate climates (most of the US, Pacific Northwest, Northern Europe). A quality aerosol like 3M 38808 or 3M Super 77 will perform well for 3 to 5 years. The lace-spray pattern on the 38808 is specifically designed to prevent soak-through, which makes it the most forgiving choice for first-time DIYers.
Cold climates (Alaska, northern Canada, mountain regions). Flexibility matters more than peak heat resistance because cold makes adhesive brittle. Brush-on contact cement stays flexible through freeze-thaw cycles better than most aerosols. Always apply adhesives above 60°F even if the car lives in a cold garage.
One more climate tip: if you can, do the re-glue in a garage or shaded area below 80°F. Most aerosol adhesives require ambient temperatures under 75°F during application. Even a great product can fail to bond if you spray it on a 100°F headliner board in direct sun.
Brand Comparison: 3M vs Permatex vs Weldwood
Below is a side-by-side look at the three brands that come up most often when people ask me which glue to use for car headliner fabric. Each has a clear best-use case.
3M Super 77 Spray Adhesive. The classic DIY choice. Lightweight, web spray pattern, fast tack in 1 to 3 minutes, and widely available. Works well on foam-backed fabric and light trim. Temperature ceiling is around 130°F, so it’s best for moderate climates and short-term repairs.
3M 38808 Headliner & Fabric Spray. Specifically formulated for automotive headliners. The lace-spray pattern is the key upgrade over Super 77 — it lays a thin, even coat that does not soak through fabric the way heavier sprays do. Higher temperature rating around 170°F and stronger bond strength than Super 77.
3M 74 Foam Fastbond Contact Adhesive. The shop-grade favorite for foam-to-fabric bonding. Used by professional upholstery shops. Requires a spray gun for proper application, so it’s not the right pick for a single DIY repair.
Permatex 27828 Headliner Adhesive. A dedicated headliner adhesive in an aerosol can. Higher temperature tolerance than 3M Super 77 (rated around 180°F) and stronger initial grab. The trade-off is a thicker spray that can soak through very thin fabrics if applied too heavily.
Weldwood Landau Top & Trim Adhesive. The professional trimmer’s choice for permanent headliner replacement. Brush-on contact cement that forms a heat-resistant, flexible bond rated above 200°F. Requires more setup — brushes, solvent cleanup, and longer flash time — but the result lasts 5 to 10 years even in hot climates.
For a one-time DIY repair on a daily driver, 3M 38808 strikes the best balance of price, ease, and durability. For a long-term restoration or a hot-climate car, Weldwood is worth the extra effort.
Common Mistakes to Avoid When Gluing Headliner Fabric
Most failed headliner repairs trace back to one of a handful of recurring issues. If you avoid these, you’ll be ahead of the majority of DIY attempts.
Not removing old foam backing. This is the number-one reason headliners re-sag. New adhesive will only bond to what’s beneath it, and deteriorated foam turns to dust within months.
Applying adhesive too thick. Reviewers report that heavy coats soak through thin fabric, leaving visible dark spots on the headliner surface that cannot be cleaned off. Multiple light coats always beat one heavy coat.
Skipping the flash-off time. Pressing surfaces together while the adhesive is still wet traps solvents, prevents a proper bond, and almost guarantees a sag within weeks. Wait for tack.
Working in direct sun or high heat. Aerosol adhesives behave poorly above 80°F ambient. The spray dries too fast to flow, and the cabin heat during application weakens the bond before it forms.
Stretching the fabric during installation. Fabric that is stretched tight at install will relax over time and pull away from the edges. Lay it flat and let the adhesive do the work.
Using the wrong glue entirely. Super glue, hot glue, white craft glue, and construction adhesive all fail on headliner fabric. Stick with contact cement or high-temp aerosol designed for automotive trim.
Frequently Asked Questions
Which is better for car headliner adhesive, 3M or Permatex?
For most DIY repairs, 3M 38808 is the better choice because its lace-spray pattern resists soak-through on thin fabric. Permatex 27828 has a slightly higher temperature rating and stronger initial grab, but its heavier spray can soak through delicate headliner material. Both are good; pick 3M for ease and Permatex for hot climates.
What is the best glue for fixing car roof lining?
The best glue for fixing a car roof lining is a high-temperature contact adhesive. For DIY, use 3M 38808 or Permatex 27828 aerosol. For professional permanent repair, brush-on Weldwood Landau Top u0026amp; Trim Adhesive is the strongest option and is rated above 200F.
How to glue headliner fabric back on?
Remove the headliner board from the car, strip all old foam backing, clean and lightly sand the board, dry-fit the new fabric with overhang, apply adhesive to both surfaces, let it flash off for 3 to 10 minutes until tacky, then press the fabric to the board working from the center outward to push out air pockets.
What type of glue should I use to stick car roof lining?
Use a high-temperature contact adhesive rated for automotive interiors. Aerosol options like 3M Super 77, 3M 38808, or Permatex 27828 work for DIY. Professional brush-on contact cement like Weldwood Landau Top is the gold standard for permanent repair. Avoid super glue, hot glue, and standard craft glue as they fail under cabin heat.
Final Verdict on Which Glue to Use for Car Headliner Fabric
When deciding which glue to use for car headliner fabric, the answer is almost always a high-temperature contact adhesive. For most DIY repairs, 3M 38808 hits the right balance of price, ease, and durability. For hot-climate daily drivers or full restorations, Weldwood Landau Top is the professional choice and the one I recommend when the headliner has to last the life of the car.
Whichever glue you pick, take the time to strip old foam, let the adhesive flash off properly, and work below direct sun. That preparation is what separates a headliner repair that lasts a decade from one that sags again before your next oil change. If you want help choosing fabric to match, browse the rest of our guides at Segal Motor Trimmings for project walkthroughs, color matches, and material specs.