
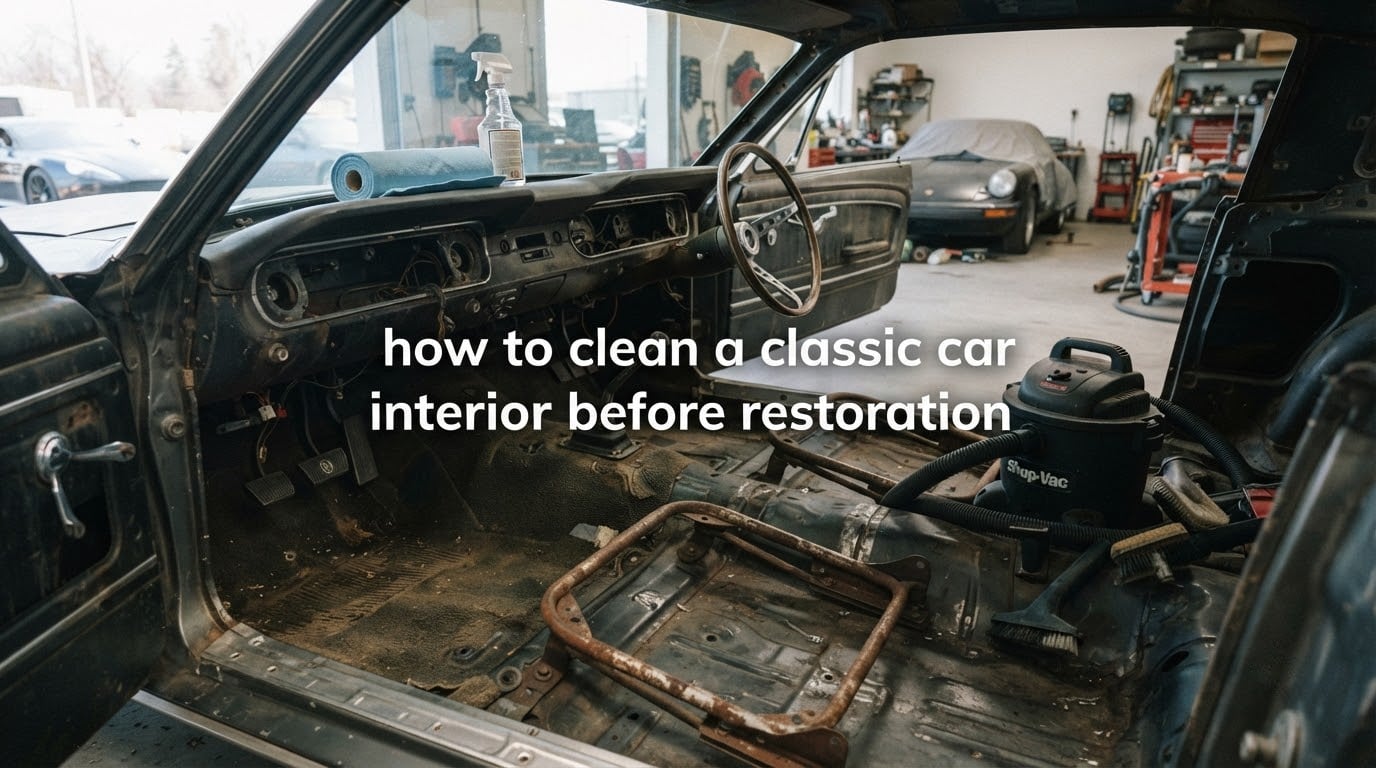
To clean a classic car interior before restoration, work dry first, then wet. Blow out and vacuum every surface while the trim is still installed, clean each material with a matching cleaner, extract the moisture, treat any mold chemically, then dry and dehumidify the cabin completely before a single fastener comes off.
That order matters more than any product you buy. Grit left in the seams acts like sandpaper the moment you add water, and moisture trapped under a seat or behind a headliner is exactly what turns a dusty barn find into a rusted, musty, permanently stained project. Our team has worked through enough stored classics at the trim bench to know that the interiors which survive a year of teardown are the ones that were cleaned in place first, not gutted first.
Cleaning before restoration is also an assessment tool. Grime hides rot, and rot hides under grime. Once the seats are out and the carpet is lifted, you can see the floor pans, the seat frames, and the padding underneath. Our workshop does this for customers across the country, and the same sequence works in a home garage with hand tools.
Table of Contents
- Why Clean Before You Restore
- What to Gather First
- How to Clean a Classic Car Interior Before Restoration: The 10-Step Sequence
- Cleaning by Surface Type
- Under the Carpet: Deadener, Padding, Seat Frames and Floor Pans
- Mold, Mildew and Odor Treatment
- What NOT to Use on Original Interior Materials
- Drying and Dehumidifying After Cleaning
- When to Call a Professional
- Frequently Asked Questions
- Can I use Dawn dish soap to deep clean my car interior?
- How do I remove mold and mildew from a car interior?
- What kills mold on fabric car seats?
- Will vinegar kill mold in car carpet?
- What do professional detailers use to clean the inside of cars?
- Should I clean the interior before removing the seats?
- How long does it take to deep clean a classic car interior?
- What are the most common car restoration mistakes during an interior clean?
- Conclusion
Why Clean Before You Restore
Clean the car you are keeping, and strip only what you are replacing. That one decision removes most of the wasted weekends people report on classic car forums, where a weekend goes into deep cleaning a headliner or a set of door panels that ends up in a pile for the trash two months later.
Three things go wrong when you gut first. Debris and mouse nests get redistributed into the body as parts move in and out. Water-based cleaning runs into seams and metal you cannot reach once the seats and carpet are out. And you lose your only chance to tell a salvageable original apart from a piece that was never worth saving.
Grime and trapped moisture also accelerate damage while the car sits between cleanings. Under-seat foam holds water against the floor pan, sound deadener traps grit against steel, and headliner foam holds a musty smell no amount of surface cleaning removes. The exception: any piece already scheduled for refinishing gets the aggressive treatment, not the gentle one.
What to Gather First
Professional detailers use a short, specific list, and you can build the same list in three tiers depending on how much of the job you intend to take on. Gather everything before you start, because interrupting a wet-clean halfway to find a crevice tool is how moisture gets left sitting in a seam.
Basic tier. A shop vacuum with a crevice tool and soft bristle brush, a spray bottle and microfiber towels, a vent brush, nitrile gloves, a respirator, plastic sheeting and painter’s tape, and a pH-neutral upholstery cleaner.
Serious tier. Everything above, plus a wet and dry vacuum or hot water extractor, a dedicated leather cleaner, a detail brush set, a handheld blower or compressed air with a nozzle, an enzymatic odor neutralizer, a vinyl and plastic protectant, a leather conditioner, and a spotter for local stains.
Shop tier. Everything in the serious tier, plus an ozone generator for smoke odor, a HEPA vacuum for fine dust, LED work lights, bins and a label maker for bagging hardware, and white vinegar as a mild rinse for non-original carpet only.
A note on protective gear. A car that sat in storage can hold mold spores, rodent droppings, and fifty-year-old dust. Gloves and a respirator are not optional when you blow out a headliner cavity or pull up wet carpet padding.
How to Clean a Classic Car Interior Before Restoration: The 10-Step Sequence
Here is the full sequence. Each step depends on the one before it, which is why the order is not negotiable.
- Photograph everything first. Take wide shots of the full interior plus close-ups of every fastener, clip, and trim board. You are building a reassembly map, not a photo album.
- Clear it out completely. Remove all loose belongings, trim caps, coins, and floor mats. Shake the mats and mats’ liners outside, not inside the car.
- Open the car up and air it out. Doors, windows, and trunk open, overnight if you can. Airflow first makes every later step easier.
- Dry-vacuum in layers. Vacuum the top surfaces before you go low, so falling debris does not end up back on a clean floor.
- Blow out the crevices. Use a canister of compressed air or a handheld blower to clear the under-seat rails, seat frames, dash underside, air vents, door pockets, the headliner edges, and the area behind the glove box. Vacuum immediately after blowing.
- Mask and protect. Tape and sheet off painted surfaces, the windshield surrounds, the speedometer faces, any radio face, and the underside of the headliner before wet work begins.
- Clean top-down by surface type. Dash and hard plastics, then door panels and trim boards, then seats, then carpet. Work from the least dirty area to the dirtiest.
- Extract or wet-vac the moisture. Every wet-cleaned carpet and fabric seat gets a pass with a wet and dry vacuum or an extractor. Moisture you leave behind becomes mold in a warm cabin.
- Test and treat mold chemically. Work mold and odor treatment into every porous surface and leave the required dwell time before extraction.
- Dry, dehumidify, then reassess. Doors open, fans running, dehumidifier or dry air moving through the cabin for a full day or more. Only then do you start stripping.
Cleaning by Surface Type
Every surface in a classic cabin is a different material with a different tolerance. Match the cleaner to the material, and know the never-use item for each.
Leather
Original leather needs a pH-neutral cleaner and a soft bristle brush worked along the grain. Dampen, do not soak, and wipe with a clean microfiber towel before the surface dries. Follow with a leather conditioner once the leather is dry to the touch.
Never use bleach, alcohol, or steam. Vintage leather is thin and already stressed, and a breached dye layer on a hide you cannot replace will never come back.
Vinyl and Leatherette
Vinyl is more forgiving than leather but not forgiving of solvents. Use a heavily diluted mild dish soap or a pH-neutral interior cleaner with a soft brush, and rinse with a lightly damp towel rather than a soaking cloth. A bentonite or clay bar in hand works on grime a brush will not lift.
On a For B Bodies Only interior restoration thread, owners describe using Zep degreaser, Scotch-Brite pads, steel wool, and xylene with elbow grease, then spraying SEM Color Coat. That workflow produces a good refinished part. On a part you intend to keep original, it destroys the surfaces you are trying to preserve.
Cloth and Original Fabrics
Period-correct cloth is the most fragile material in the car, usually a viscose or cotton blend over stretched foam. Spray a pH-neutral upholstery cleaner into a cloth rather than onto the fabric, let it dwell as directed, then blot. Do not scrub, do not saturate, and keep extractor pressure low. Test an inconspicuous seam first.
Carpet and Padding
Remove and shake the carpet outside the car, then vacuum both sides, then clean the floor pan and the padding beneath separately. For period carpet, keep extraction pressure modest and pull the nozzle slowly.
Never use bleach. It attacks wool and viscose and leaves a permanent weak spot. On carpet with a glued rubber backing, high-pressure extraction can lift the backing and wrinkle the mat.
Headliner
The headliner is glued fabric over foam in nearly every classic. Clean it with a soft bristle brush and a barely damp microfiber towel, dabbing rather than scrubbing.
Never steam, never saturate, and never pull the headliner down hard. Water softens the adhesive, foam takes on weight, and the headliner sags away from the bows. A sagging original is a part you will have to hunt for, and most owners would rather keep the tired one.
Dashboard and Hard Plastics
Dash pads on older cars are padded vinyl over steel that flakes at the edges the moment you scrub. Use a soft brush with a mild cleaner, keep moisture off chrome bezels and gauge faces, and tape any plated trim before you start.
For yellowed and oxidized interior plastics, the r/MechanicAdvice recommendation is that Meguiar’s PlastX works well on oxidized clear interior plastics. Use it sparingly on a hidden area first and expect a shinier result than original. On unrestored parts, a matte plastic interior trim product keeps the factory appearance instead of creating a wet look that was never there.
Chrome and Plated Trim
Clean with a soft cloth and a mild cleaner, dry immediately, and use a metal polish only on chrome you have decided to keep bright. Plating is microns thick, and Scotch-Brite, steel wool, and aggressive degreaser will take it off permanently.
Glass and Brightwork
Clean glass last, with a glass-specific cleaner and a fresh microfiber towel. Skip the household ammonia glass cleaner on interior plastics, and keep overspray off speedometer lenses and radio faces, which fog permanently when chemical gets behind them.
Under the Carpet: Deadener, Padding, Seat Frames and Floor Pans
This is where a classic car is won or lost, and it is the part almost every competitor skips. Factory sound deadener from the period is a tar-like, asphalt-based mat that traps grit against the floor pan and holds moisture underneath.
Pull the carpet and any deadener in manageable sections rather than trying to strip it all in one pass. A plastic scraper and heat can loosen it, though a dedicated undercoat tool is safer. Mask off the underside of the inner panels and any painted surface with aluminum foil tape or plastic sheeting while you work, because debris will find every opening you leave.
Once the floor is bare, look for rust. Poke the floor pan seams, the drain holes, and the areas under the seats with a screwdriver. Any floor pan that is soft, perforated, or flaking is a structural problem that no amount of interior cleaning will fix, and it should be addressed before trim work continues. Vacuum and degrease the seat frames and rails, and check foam for firmness. Foam that crushes to a hard shell will never recover.
Mold, Mildew and Odor Treatment
Mold and mildew in a stored car interior is a problem you can solve on porous surfaces if you treat it chemically before you try to vacuum it away. Vacuuming mold spores first spreads them and re-infects the surface you just cleaned.
- Identify porous versus non-porous. Carpet, headliner, cloth, foam, and padding are porous and hold spores deep in the material. Hard plastic, vinyl, chrome, and glass are non-porous and only need wiping.
- Remove bulk debris dry. Vacuum and blow out before any liquid, working from the outside in so spores travel away from treated areas.
- Apply an anti-fungal treatment. Use a mold and mildew killer labeled for automotive interiors, applied to a towel rather than saturating the surface.
- Respect dwell time. The product has to stay wet and undisturbed for the full time printed on the label. Rushing this step is why the smell returns within a week.
- Extract or wet-vac. Pull the treatment and the moisture out in one pass.
- Dry completely. Follow the drying section below before closing the car up again.
For smoke odor the principle is the same: you cannot neutralize what you have not physically removed. Clean first, then treat. Enzymatic odor neutralizers, and for stubborn cases an ozone generator run in an empty sealed cabin for several hours, handle what cleaning alone cannot. Ozone is effective on smoke molecules but does nothing for resin baked into foam, and a saturated cushion is the one part that frequently has to be replaced outright.
On Facebook ScaleSurvivors, threads about removing mildew and mold from a ’72 Camaro interior recur constantly, and the advice matches what we see at the shop: treat the foam and the underlay, not just the visible seat surfaces, and expect the return if the car is closed up damp.
What NOT to Use on Original Interior Materials
Answering the most-searched question directly: no, you should not use Dawn dish soap to deep clean a classic car interior. It is a surfactant, and surfactants leave a residue that attracts dust into original vinyl grain and cloth weave, which is the opposite of what a storage car needs. On vinyl and painted surfaces it can also cause a faint haze.
For mold, vinegar does not kill it. White vinegar is a mild acid with a low pH, and many mold spores tolerate an acidic environment well. It may knock down surface growth on non-porous hard surfaces, but on carpet and foam it can feed a bloom that returns within days. Use a labeled antifungal product and give it its full dwell time.
Here is the full never-use list, with the reason each one fails on this car specifically:
- Bleach. Attacks wool, viscose, and period-correct cloth fibers, and leaves permanent weak spots in carpet that show up years later as holes.
- Dish soap. Leaves an attracting residue in grain and weave. Fine for a shop rag, wrong for a stored cabin you want to stay clean.
- Isopropyl alcohol. Dries and cracks original leather, fades vinyl, and crazes acrylic gauge lenses.
- Xylene, toluene, and heavy solvent degreasers. Appropriate for a part headed to the refinishing bench. Fatal to a padded dash and to leather you intend to keep.
- Steam. The heat softens headliner adhesive and pushes moisture into foam where it cannot dry, guaranteeing sag and odor.
- Abrasive pads and steel wool. Destroy vinyl grain, headliner fabric, and plating. These are refinishing tools, not cleaning tools.
- Silicone-based dressings. Leave a film that traps dust, yellows unevenly, and has to come off before the surface is ever refinished.
- High-pressure extraction on original cloth or a glued carpet back. Over-wets the backing, lifts the bond, and wrinkles the mat.
Drying and Dehumidifying After Cleaning
Moisture you leave behind is the reason a freshly cleaned classic goes musty again within a month. Drying is not a step you finish. It is a condition you hold until you are ready to close the car up.
Leave all doors, windows, and the trunk open, run a box fan to move air across every carpeted and upholstered surface, and use a dehumidifier or a heated air mover if you have one. Avoid parking the car in direct sun. Hold the doors open for at least a full day, longer after a hot water extraction, and confirm the carpet feels dry to the touch on the underside, not just the top.
Dry the headliner cavity and the area under the seats specifically. Those two places hide moisture from airflow and are the most common source of a musty smell that returns. Once everything is dry, condition the leather, protect the vinyl, and store the car with windows cracked if the climate allows.
When to Call a Professional
Time runs from an afternoon for light surface grime to several sessions across days for a car that has been stored open to the elements with mold and smoke. If you are seeing heavy black mold, rodent contamination, smoke resin baked into foam, or structurally soft floor pans, a full extraction with proper equipment will be faster than a weekend of renting one.
Get a shop involved when the car is structurally weak enough that pulling trim risks tearing body metal, when the headliner is already sagging and you want it saved rather than replaced, or when the interior is the highest-value part of the vehicle and a missed step would be expensive to undo.
Frequently Asked Questions
Can I use Dawn dish soap to deep clean my car interior?
Not on a classic interior you plan to keep. Dawn is a surfactant, and the residue it leaves behind attracts dust into original vinyl grain and cloth weave. Use a pH-neutral upholstery or interior cleaner instead, and on vinyl a heavily diluted mild dish soap with a barely damp towel is acceptable for spot work only.
How do I remove mold and mildew from a car interior?
Vacuum and blow out the debris first, then apply a mold and mildew treatment labeled for vehicle interiors to carpet, cloth, foam, and padding, dabbing it on with a towel rather than soaking. Let it dwell for the full time on the label, then extract or wet-vac the moisture and dry the cabin completely before closing it up.
What kills mold on fabric car seats?
A dedicated antifungal or mold-and-mildew treatment formulated for automotive fabric. It has to reach the spores inside the foam, not just the surface, and it needs its full label dwell time. Bleach, vinegar, and alcohol do not reliably kill mold in car upholstery, and scrubbing a spot spreads spores into the surrounding fabric.
Will vinegar kill mold in car carpet?
No. White vinegar is a mild acid, and many mold spores tolerate acidic conditions. It will not clear an established bloom in carpet or foam, and it can return within days. Use a labeled antifungal product on porous surfaces, and reserve vinegar for a mild rinse on non-original carpet only.
What do professional detailers use to clean the inside of cars?
A vacuum with crevice and brush tools, a handheld blower or compressed air, soft bristle brushes, a wet and dry vacuum or hot water extractor, a pH-neutral interior cleaner, a dedicated leather cleaner, an enzymatic odor neutralizer, and microfiber towels. For persistent smoke they add an ozone generator, and for mold they add a labeled antifungal treatment with proper dwell time.
Should I clean the interior before removing the seats?
Yes, as a vacuum and blow-out pass, because grime under and behind the seats lands on surfaces you have already cleaned and moisture runs into seams you will not be able to reach afterward. Full wet cleaning, however, is best done with the seats still in place if you intend to keep them, and only the pieces you are replacing should be pulled first.
How long does it take to deep clean a classic car interior?
An afternoon for light grime on an otherwise sound interior, a full day for a moderate job with mold or odor treatment, and several sessions across days for a long-term stored car. A separate full day of air movement and dehumidification is needed afterward before the car is closed up, and that drying time is not optional.
What are the most common car restoration mistakes during an interior clean?
Cleaning aggressively before deciding what to keep, which destroys original materials you meant to preserve. Wetting the headliner. Using bleach or Dawn on original cloth and carpet. Using a wet and dry vacuum instead of an extractor to knock dust into the cracks. And closing the car up damp, which guarantees the musty smell returns.
Conclusion
To clean a classic car interior before restoration, follow the sequence rather than the shopping list. Photograph, clear out, air out, dry-vacuum, blow out the crevices, mask the paint, clean each surface with a cleaner matched to its material, extract the moisture, treat mold with dwell time, then dry and dehumidify for a full day before you turn a single nut.
Clean what you are keeping and strip only what you are replacing. That decision protects the irreplaceable pieces, saves you the weekend, and turns the cleaning pass into a genuine assessment of the car underneath.
Start with the dry work this weekend. It is free of chemicals, it tells you what the interior is actually made of, and it is the step that makes every later step safer.