
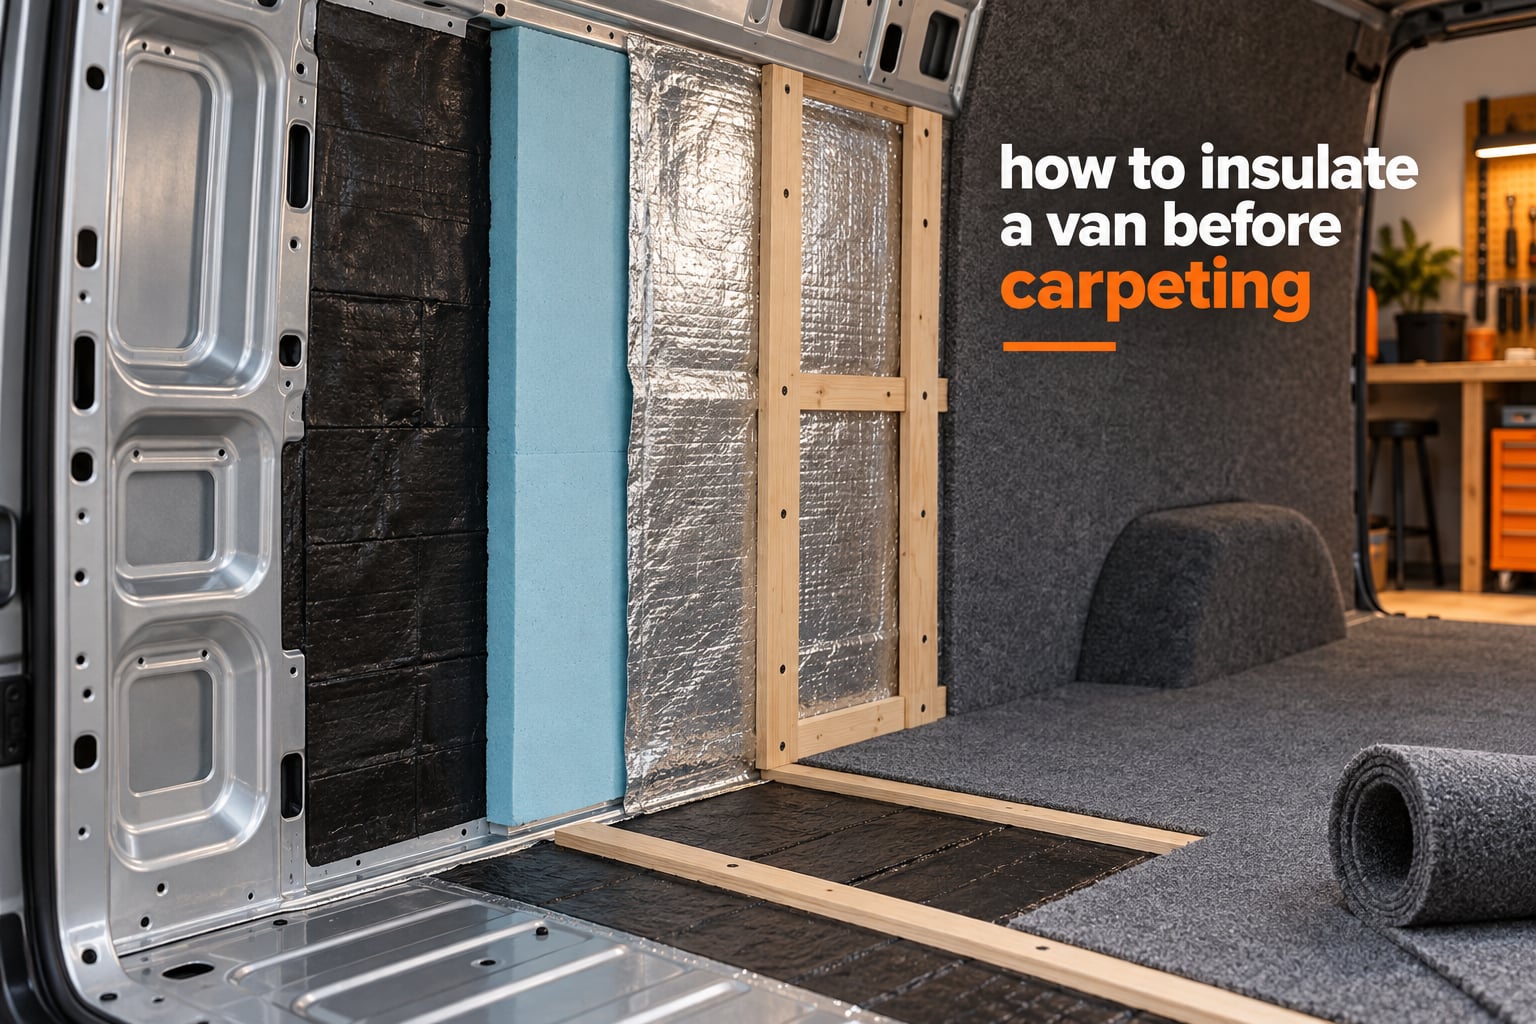
Every layer you hide under carpet is a one-way decision. The moment that carpet is stretched and stapled down, you will not see, reach, or fix anything underneath it without tearing the whole thing out. That is why learning how to insulate a van before carpeting matters more than it looks: the order you work in decides whether the finished floor feels solid or spongy, whether the walls are warm or just quiet, and whether you find mold a year later.
In our trim shop we watch the same sequence mistake play out over and over. A builder carpets first, because carpeting bare metal looks like progress, then discovers he cannot get adhesive to hold on a dusty ribbed panel, cannot get a staple into a curved flange, and cannot get the insulation behind the carpet without cutting the carpet back off. Every van that has to be re-opened starts the same way.
So here is the honest version, written for a cargo van, panel van, or camper conversion in 2026. We will cover the layer stack, the correct order, what each material actually does, where the condensation risk lives, and the sequence errors that are expensive to undo. Material suggestions are decision guidance, not a shopping list, so you can match what you find at the supply house to the build you are doing.
Table of Contents
- Do You Even Need to Insulate?
- What Is Actually Going Under the Carpet?
- The Correct Order: How to Insulate a Van Before Carpeting
- Step 1 – Strip the Van Bare
- Step 2 – Add Sound Deadening First
- Step 3 – Fill the Floor Ribs and Factory Holes
- Step 4 – Install Wall and Ceiling Insulation
- Step 5 – Add the Vapor Barrier
- Step 6 – Add Furring Strips or a Subfloor for the Carpet
- Step 7 – Select and Install the Carpet
- Floor vs Walls vs Ceiling: Where to Spend Your Material Budget
- Material Cheat Sheet
- Condensation and Mold: The Risk Nobody Mentions
- Rodents, Pests, and Foam
- Weight, Headroom, and the Payload Budget
- Tools and Materials Checklist
- What Goes Wrong (and the Fix for Each)
- Platform Notes – Sprinter, Transit, and ProMaster
- When to Call a Trim Shop Instead
- Frequently Asked Questions
- What is the best thing to insulate a van with?
- Should you carpet before or after insulating a van?
- What is the cheapest way to insulate a van?
- What is the best way to insulate the floor of a van?
- How thick should van floor insulation be?
- Does the foil side of insulation go in or out?
- Do you need a vapor barrier over mineral wool insulation?
- Can you glue carpet directly to foam insulation?
- Do mice chew through rockwool insulation?
- What is the best material to use for a van subfloor?
- Conclusion: Get the Stack Right Before the Carpet Goes Down
Do You Even Need to Insulate?
Sometimes you do not, and saying so up front saves you a weekend and a good chunk of the build budget. Insulation slows heat moving through the shell, but on most vans the windows and the sliding door leak far more heat than the metal panels do, and no amount of foil-faced board changes that.
Skip the insulation layer when the van is a weekend day-tripper with no heater, when it lives in a mild climate, or when the build has hit its payload limit and every pound has to go somewhere else. A cargo van that only carries pallets does not need a bedroom.
Insulate when you are running a heater or a diesel stove, sleeping in the van, working in it in winter, or living in a place where night temperatures drop well below freezing. Add sound deadening regardless of the climate. Road noise comes through the shell as vibration, and vibration is the one thing insulation barely touches.
One camper on r/VanLife put it plainly: insulation delays heat flow but does not stop it, and the glass is the real leak. Treat insulation as one lever, not the whole answer.
What Is Actually Going Under the Carpet?
Four layers, in this order: sound deadening on bare metal, insulation, a vapor barrier, and a flat substrate (furring strips or plywood) for the carpet to attach to. Each layer has one job, and skipping a layer hands its job to the layer above it.
Here is the short answer to the question that comes up most often. The best general-purpose van insulation is 1 to 1.5 inches of rigid closed-cell board (XPS or polyisocyanurate) on the floor, with 1 to 2 inches of closed-cell spray foam or 3 to 4 inches of polyester batting in the walls and ceiling. Cheapest that still works: 8 mm carpet underlay in the floor ribs plus a bonded foil-faced bubble blanket in the walls. The floor is where the rigid board earns its place, because it takes foot traffic.
Sound deadening goes on first because it bonds to clean metal and it wants a flat, bare surface. Insulation goes on second because it is bulky and awkward to fit once the van is full of trim. The vapor barrier goes on third because it is a continuous sheet that must lap over the insulation. The furring strips or subfloor go on last-but-one because they are the only layer the carpet physically touches.
R-value is a measure of how long a material resists heat flow. In a van the shell matters more than the volume, because the shell is the boundary with the outside. That is also why ribs, holes, and pillars are such a problem: every bare metal bridge across the insulated layer is a highway for heat, which is what builders mean by thermal bridging.
The Correct Order: How to Insulate a Van Before Carpeting
Insulation goes in before carpet. Always. The finished carpet is the last layer you install, and nothing goes back behind it. The full sequence is:
- Strip the van of factory carpet, trim, plastic liners, and styrofoam fillers.
- Clean and degrease every bare metal surface you plan to treat.
- Apply sound deadening to the floor, walls, and ceiling panels.
- Fill the floor corrugations and factory holes with rigid foam offcuts or spray foam.
- Install floor insulation, cut around wheel wells and door openings.
- Install wall and ceiling insulation, working in small sections so the material stays manageable.
- Run the vapor barrier over the insulation, taping or sealing every seam and lap joint.
- Add furring strips or lay a plywood subfloor so the carpet has something solid to attach to.
- Fit and stretch the carpet, then trim the edges and thresholds.
The exception is fibrous batting in the walls and ceiling of a van where you intend to cover the metal in carpet anyway. A highly-regarded T6Forum answer advises carpeting the metalwork first, then running the fibrous insulation over it, so the batting never picks up glue. That works, and it is a legitimate choice for a van that will get loose-fill or batting in the cavities. It does not work for the floor, and it does not work if you plan to use a furring strip, because the strips need a flat metal substrate to fasten into.
Our default: rigid board first, carpet last, furring strips in between on anything you can reach with a fastener.
Step 1 – Strip the Van Bare
Pull out everything, including the pieces you think are part of the van. Factory carpet, kick panels, the plastic threshold covers, the styrofoam blocks behind the trim, and any recycled insulation a previous owner stuffed into the cavities.
Fill every factory drilling plug hole left behind. Push in body plugs or seal them with a plug and a dab of seam sealer. Every one of those holes is a direct path from outside air to inside air, and each one will show up as a draft or a condensation stain later.
You will also find water-stained or crumbling insulation in used vans. Take it all out. Contaminated batting against a carpeted surface is a mold source you cannot see once the carpet is down.
Budget two to three hours for a full strip and wash on a standard-length cargo van.
Step 2 – Add Sound Deadening First
Sound deadening goes on before insulation, always, because it needs bare metal to bond to. It is a thin, heavy, damped layer that turns panel vibration back into heat instead of letting it ring.
Mass-loaded vinyl is the heavy-duty option and works best on the floor and on the lower walls. A quality automotive butyl sheet is the sensible default for a van, applied in patches with gaps between them rather than a solid sheet. Coverage does not need to be perfect; many builders do the floor and the rear doors and stop there.
Skip this step only if the van is a pure budget shell. The one thing you should not do is put deadening over insulation, because it will not bond and it does nothing structural.
This is a one-person job with a roller. Allow a full day to do the floor and walls properly.
Step 3 – Fill the Floor Ribs and Factory Holes
The ribbed steel floor is the reason most van floor insulation performs worse than people expect. The corrugations run the full length of the floor, they are open at both ends, and they act as chimneys for cold air and heat. Fill them before you add anything on top.
Two methods work. The fast method is spray foam: shoot each rib channel with closed-cell spray foam, let it rise, and cut it flush with a long blade. The controlled method is to cut rigid foam strips to the depth of the rib and friction-fit them, or to drill small holes in the channel and inject expanding foam.
One camper reported that floor rib insulation tops out around the equivalent of R-6 no matter what filler you use, which is why thicker and thicker floor fill stops paying off. Fill the ribs properly, then move on to the flat floor rather than chasing more R-value in the corrugations.
Do not casually drill into the floor. Brake lines, fuel lines, and wiring harnesses run under the floor pan on several platforms, and nobody wants to find them the expensive way. Probe with a non-marring tool and map the routing first.
Step 4 – Install Wall and Ceiling Insulation
For walls and ceiling, closed-cell spray foam gives the best R-value per inch and fills irregular cavities, but it needs a pro rig and it is the single most expensive line item in a build. Rigid board is the DIY compromise, and polyester batting is the budget option that also adds a little sound absorption.
Work in sections roughly the size of one wall bay. Cut rigid board with a utility knife and a straightedge, notch it around the ribs, and spray-adhesive it to bare metal. Batting gets stuffed into the cavities and stapled or taped so it cannot sag away from the panel over a summer.
The B-pillar and the roof corners are where people give up. Fill the pillar voids with strips cut to fit and treat the corners as a separate small job, because those are the places that decide whether the interior feels drafty. Plan a full day per wall bay on a first attempt.
Step 5 – Add the Vapor Barrier
A vapor barrier is a continuous sheet on the warm, interior side of the insulation. Its job is to keep warm, moist cabin air out of the insulation, where it would condense and turn the cavity into a mold farm.
The foil side goes toward the interior, facing the people and the carpet. On foil-faced insulation the shiny side is the vapor barrier, so the foil always faces the inside of the van. The kraft or paper back goes against the cold metal. If you are using plain plastic sheeting or a dedicated vapor barrier film, orientation by face does not matter, but it still goes on the interior side of the insulation.
Over mineral wool, rockwool, fiberglass, or polyester batting, a vapor barrier is not optional. Those materials are open to air and they will hold moisture indefinitely if you trap cabin humidity inside them. Over closed-cell XPS, polyisocyanurate, or spray foam, the foam itself is already a vapor retarder and a full barrier is less critical, though it is still cheap insurance at lap joints.
Lap every seam generously and tape or seal it. A barrier with a nine-inch gap between panels is a barrier with a nine-inch hole in it.
Step 6 – Add Furring Strips or a Subfloor for the Carpet
This is the layer most first-time builders forget, and it is the reason a lot of DIY van carpeting looks bad. Carpet is a fabric, not a flooring system. It drapes, it follows contours, and it shows every dent and rib in the substrate. Furring strips give it a flat, solid, straight line to attach to.
Two options. Furring strips are 1×2 or 1×3 lumber screwed or rivnuted to the metal, set at roughly 16 inch centers, giving the carpet a straight edge everywhere. A plywood subfloor is Baltic birch, spruce, or the factory Delignit-style engineered floor, screwed down for a solid, quiet, level surface that also protects the insulation from foot traffic.
Our recommendation: furring strips on the walls and ceiling where the metal is curved and hard to level, and a proper subfloor on the floor where people actually walk. If you are gluing carpet directly to rigid foam, the foam’s compressive strength and face flatness become the limiting factors, and a lot of carpet adhesive does not bond well to the smooth skin of XPS.
For glue-down work over foam, roll the carpet in a consistent direction, use an adhesive approved for the substrate, and keep the seam out of the wheel track. Do not test an unapproved glue on a scrap of foam and assume the seam will behave like the field.
Step 7 – Select and Install the Carpet
Automotive carpet is the default for a reason. It is thin, stretches cleanly over curves, cuts without fraying because it is backed with a woven layer, and it hides transitions. RV carpet is heavier and tougher for a work surface. Marine woven vinyl will wipe clean and outlast everything, but it behaves like flooring rather than carpet and takes more skill at the seams.
Loop pile is easier to cut and hides seams better. Cut pile looks better initially and wears to a flat nap in a year. Whatever you choose, buy a few extra inches, because the van is never square and the last piece always needs a little more length than the plan allowed.
Stretched-and-stapled installation along the walls and glued seams along the floor is the standard. Work from the center outward, keep tension even, and finish the edges with proper trim or binding, not raw cut edges tucked under a furring strip.
Floor vs Walls vs Ceiling: Where to Spend Your Material Budget
Put your best material on the floor, and be honest about the ceiling. The floor is where you stand, kneel, and load gear, and it is the surface you will feel through your boots every day.
| Zone | Recommended thickness | Why | Difficulty | Priority |
|---|---|---|---|---|
| Floor ribs | Fill to flush with the ribs | Stops the corrugations acting as chimneys | Medium | High |
| Floor pan | 1 to 1.5 inch rigid board | Foot traffic, cargo load, and the biggest exposed metal area | Low | Highest |
| Lower walls | 2 to 4 inch batting or closed-cell spray foam | Largest wall surface, most heat loss after glass | Medium | High |
| Upper walls and roof | 1 to 2 inch rigid or spray foam | Heat rises, but less usable surface | High | Medium |
| Ceiling | 1 inch minimum | Hard to reach, low benefit in most climates | High | Lowest |
Read that last row as permission, not a rule. In a cold-climate build the roof is a major heat loss, but a lot of builders still do the ceiling last and sometimes skip it. Weight and headroom often decide it.
Material Cheat Sheet
These are the materials you will be choosing between, with typical values for planning. R-value is per inch of thickness. Weight is approximate per square foot per inch of thickness. Cost is a relative scale, since regional pricing swings hard.
| Material | R-value per inch | Weight lb/sq ft per inch | Relative cost | Moisture behavior | Carpet directly over it? | Best use |
|---|---|---|---|---|---|---|
| Polyisocyanurate (polyiso) | 5.6 to 6.0 | about 1.0 | Medium | Closed cell, shrugs off water | Adhesive only, or use a light furring grid | Floor and ceiling |
| XPS rigid foam | about 5.0 | about 1.1 | Low | Closed cell, does not absorb | Yes, with a foam-rated adhesive | Floor, rib fill |
| EPS foam board | 3.6 to 4.2 | about 0.7 | Lowest | Closed cell, minimal absorbency | Yes, with care | Budget floor and rib fill |
| Closed-cell spray foam | 5.5 to 7.0 | about 1.4 | Highest | Closed cell, fills voids | Yes, once cured and trimmed | Walls, pillars, irregular cavities |
| Mineral wool / rockwool | 3.0 to 3.3 | 1.0 to 1.5 | Medium | Open cell, holds water, needs a full vapor barrier | No, needs a solid substrate | Walls and ceiling, best sound and fire behavior |
| Fiberglass batt | 3.1 to 3.8 | about 0.6 | Low | Open cell, holds water | No, needs a solid substrate | Budget wall cavities |
| Polyester batting | 2.8 to 3.7 | about 0.3 | Low | Open cell, holds water, needs a vapor barrier | No, needs a solid substrate | Lightweight wall and ceiling |
| Reflective foil bubble blanket | 1.0 to 2.0 with an air gap | about 0.2 | Low | Does not absorb, blocks radiant heat only | No, needs a solid substrate | Desert builds, window areas |
| Mass-loaded vinyl | Not insulation | about 0.2 | Medium | Impermeable | No, it is the bottom layer | Sound deadening |
| Carpet underlay 8 mm | about 0.8 | about 0.5 | Low | Open cell | Carpet goes over it | Cheapest floor comfort layer |
The pattern is clear from the table. Closed-cell rigid products are the only common materials you can carpet directly over with adhesive, and even then the glue has to be right for the foam. Everything open-cell needs a solid substrate and a full vapor barrier.
Condensation and Mold: The Risk Nobody Mentions
Insulating a van and then carpeting it can trap moisture inside the wall cavity, and that is the most common long-term failure in the whole project. The mechanism is simple: warm indoor air carries water vapor, the vapor reaches a cold surface inside the insulation, and it condenses. In a closed van with no ventilation, that water has nowhere to go.
The fix is the vapor barrier on the interior side, continuous and sealed, with the interior kept ventilated. In a cold climate the barrier belongs on the inside of the insulation, which is the warm side in winter. In a hot, humid climate, or if the van spends months in air conditioning, the same logic applies in reverse: the barrier still goes on the interior side, because that is where the moisture-laden air is.
Watch for the warning signs. Dark mottled staining on the plywood or subfloor, a musty smell within days of closing up the van, carpet that stays damp at the edges, and black spotting on the back of the carpet if you ever lift a corner. Any of those mean water got past the barrier and the cavity needs to be opened, dried, and re-addressed.
One more trap: gluing carpet directly to closed-cell foam traps whatever moisture was in the slab and the substrate. A floor cavity you cannot inspect or dry is a floor cavity you should not seal.
Rodents, Pests, and Foam
Yes, mice will chew through insulation, and they prefer fiberglass and mineral wool because it can be shredded into nesting material. Closed-cell foam is far less appealing to them, but the real risk is not the chewing. It is the void itself.
A van with exposed insulation in the cavities is an invitation. Before you close anything up, block entry points: metal mesh or expanded metal over gaps larger than a quarter inch at the rocker panels, behind the B-pillar, around wiring pass-throughs, and at the rear door sill. Stuff the gaps with copper mesh and seal with sealant where rodents cannot reach the sealant.
Exposed mineral wool in a van also carries a fire rating consideration. If the van is a commercial or fleet vehicle, or if a shop is inspecting the build, use a material with a documented flame rating and keep the certificate with your records.
Weight, Headroom, and the Payload Budget
The stack adds up fast. On a standard-length cargo van, 1.5 inches of rigid board over roughly 70 square feet of floor runs about 120 pounds before the plywood and the carpet. Add closed-cell spray foam in the walls and you can put 60 to 80 pounds into a van that already carries tools and cargo, and the rear axle rating is not a suggestion.
Headroom is the other constraint. A low-roof van has perhaps 55 inches of interior height at the center. Rigid board, a subfloor, and carpet can eat a quarter inch to half an inch of that, which sounds trivial until you are a six-foot-two builder trying to stand in a galley.
Where the budget is tight, the trim weight from rigid board to polyester batting in the walls and keep the rigid board on the floor, where the compressive strength actually earns something. That is also why a factory Delignit-style floor, if yours came with one and it is undamaged, is worth keeping. Veterans in the van build communities consistently say the factory floor is better material than anything from a big-box store.
Tools and Materials Checklist
Assemble everything before you start, because an interrupted build with adhesive curing is worse than a delayed one.
- Degreaser, scuff pads, and shop towels for the metal prep.
- Notching tool, putty knife, and a roller for sound deadening.
- Utility knife, extra blades, straightedge, and a foam saw for cutting rigid board.
- Closed-cell spray foam gun and cans, or pre-cut foam strips for the ribs.
- Foil-faced or plain vapor barrier sheeting, plus foil tape or vapor-sealing tape.
- 1×2 or 1×3 lumber for furring strips, or Baltic birch or spruce plywood for a subfloor.
- Rivnut tool and rivnuts, or self-tapping screws appropriate for the panel.
- Carpet adhesive rated for your substrate, a notched trowel, and a stapler with outdoor-grade staples.
- Carpet trim, threshold pieces, and binding for the edges.
- Headlamp, knee pads, and a dust mask. The B-pillar work is uncomfortable and dusty.
A realistic schedule for a standard-length van with rigid board on the floor and batting in the walls: one day to strip and clean, one day for sound deadening, one to two days for rib fill and floor insulation, two days for walls and ceiling, one day for the vapor barrier, one to two days for furring strips or subfloor, and two to three days for the carpet itself. Plan two weekends and a Saturday, and do not let a single step get rushed.
What Goes Wrong (and the Fix for Each)
These are the sequence errors we see sent back for rework, in the order we most often find them.
- Carpeting the metal first, then trying to insulate behind it. The fix: pull the carpet. Install insulation and furring strips first. If you genuinely want batting over carpet, commit to that plan from the start and skip the furring strips entirely.
- Glue failing on closed-cell foam. The fix: use an adhesive formulated for foam, test a small patch and let it cure fully for 24 hours, and roughen the foam skin or use a primer if the label calls for one.
- Skipping the rib fill. The fix: fill every corrugation and every factory hole before the flat floor goes down. This is the cheapest performance gain in the whole project.
- Leaving a discontinuous vapor barrier. The fix: lap the seams generously, tape them, and run the barrier past the edges onto a surface you can seal.
- Carpeting over a squishy or uneven floor. The fix: add a solid substrate, or a denser furring grid. Carpet over compressed foam bounces, bunches at the seams, and wears out early.
- Installing the carpet before the wiring and trim were run. The fix: finish every electrical and vent job first. Carpet is the last thing in the van, not the first.
- Ignoring the weight until the doors will not close properly. The fix: weigh the van before and after, and if the rear springs are riding at stock height with a load in the van, move material out of the walls before you add anything else.
Platform Notes – Sprinter, Transit, and ProMaster
Full-size vans give you a lot of flat surface, which makes the build easier and makes the mistakes more expensive. Transit and ProMaster floors have long corrugations with open ends, so rib fill matters more. The Sprinter’s floor and the rear door openings are relatively smooth by comparison, but the B-pillar between the front doors and the body is a deep void that is worth filling properly rather than stuffing loosely.
On the ProMaster and Transit, check behind the rear wheel wells for wiring before you fasten anything, and expect the wheel arch to be the hardest place to get a clean cut. On the Sprinter, the ribs under the rear floor are deep and frequently run over brake and electrical lines, so probe before any drilling.
For all three, the roof corners and the area above the rear doors are the worst finishing surfaces in the vehicle. Treat them as their own small job with extra time budgeted, and do not let the carpet tension pull in the corner and create a visible pucker.
When to Call a Trim Shop Instead
Call a professional when spray foam is on the list and you do not own the rig, when the van is under a fleet or commercial upfit schedule with a fire rating to document, or when the carpet must look like a factory job with no visible seams. Adhesive and airflow tools make the carpet itself a two-week skill curve, but a bad first attempt shows for years.
It is also worth a shop visit if the van has a factory Delignit-style floor you want to preserve and reuse, since a professional can tell quickly whether it is sound or has water damage underneath. And if the van is high-roof with a rooftop vent or a fan to be cut in after the carpet, get the cutout framed in plywood before anything is glued down. Cutting through carpeted metal after the fact is how people end up redoing a whole wall panel.
Frequently Asked Questions
What is the best thing to insulate a van with?
For most builds, 1 to 1.5 inches of rigid closed-cell board such as XPS or polyisocyanurate on the floor, combined with 1 to 2 inches of closed-cell spray foam or 3 to 4 inches of polyester batting in the walls and ceiling. Rigid board on the floor because it carries foot traffic and cargo weight; fibrous material in the cavities because it is light and easy to cut. Add a vapor barrier on the interior side and furring strips or a subfloor before carpeting.
Should you carpet before or after insulating a van?
After. Carpeting is a one-way operation and hides everything behind it, so insulation, the vapor barrier, and the furring strips or subfloor all have to be in place first. The only documented exception is running fibrous insulation over carpeted metalwork in the walls, which avoids glue on the batting, but that approach cannot be combined with furring strips and is not suitable for the floor.
What is the cheapest way to insulate a van?
Use 8 mm carpet underlay in the floor ribs, which is itself an insulator and costs very little, and a bonded foil-faced bubble blanket in the walls and ceiling for radiant heat. Add sound deadening to the floor if noise is your main complaint. This will not match the performance of rigid board, but it costs a fraction as much and installs in a weekend.
What is the best way to insulate the floor of a van?
Fill the floor corrugations first with closed-cell spray foam cut flush or rigid foam strips friction-fit to depth. Then lay 1 to 1.5 inches of XPS or polyisocyanurate board on the flat floor pan, cut around wheel wells and door openings. Follow with a subfloor or a furring grid before the carpet so the floor feels solid under foot traffic.
How thick should van floor insulation be?
One to one and a half inches of rigid closed-cell board on the flat floor pan is the practical target, with the ribs filled flush to the surrounding surface. Builders report the rib area tops out around the equivalent of R-6 regardless of filler, so thicker and thicker floor fill stops paying off. Choose thickness based on payload and headroom rather than R-value alone.
Does the foil side of insulation go in or out?
The foil side goes toward the interior, facing the cabin and the carpet. The foil is the vapor barrier, and the vapor barrier belongs on the warm side of the insulation, which in a van is always the inside. The paper or kraft back goes against the cold metal shell.
Do you need a vapor barrier over mineral wool insulation?
Yes. Mineral wool, fiberglass, and polyester batting are open-cell materials that absorb and hold moisture, so a continuous vapor barrier on the interior side is required to keep warm cabin air out of the cavity. Closed-cell foam is itself a vapor retarder, so a full barrier is less critical there, though sealed laps still help.
Can you glue carpet directly to foam insulation?
Only with an adhesive formulated for that foam, and only if the foam is rigid enough to hold foot traffic without compressing. The smooth skin on XPS and polyisocyanurate can defeat ordinary carpet adhesive, so test a small patch and let it cure for a full 24 hours before committing a seam. A furring grid or a plywood subfloor over the foam is the safer option.
Do mice chew through rockwool insulation?
They will, and shredded fiberglass and mineral wool is ideal nesting material. Closed-cell foam is far less appealing, but the bigger problem is the void itself. Before closing the van, block entry points with metal mesh or copper mesh at the rocker panels, behind the B-pillar, and at wiring pass-throughs, and seal the gaps with sealant.
What is the best material to use for a van subfloor?
Baltic birch plywood is the best all-around choice for strength-to-weight, and spruce plywood works well and is easier to find. If the van already has a factory Delignit-style engineered floor and it is undamaged, keep it. Builders consistently rate the factory floor as better material than anything available from a big-box store, and it saves the most weight and time.
Conclusion: Get the Stack Right Before the Carpet Goes Down
To insulate a van before carpeting, the order is the whole answer: strip the van, deaden the metal, fill the ribs, install insulation, seal the vapor barrier on the interior side, add furring strips or a subfloor, and carpet last. Put rigid board on the floor, fibrous material in the walls, and your remaining effort wherever your heater and your headroom can afford it.
Before you glue anything down, weigh the finished van, block the rodent entry points, and confirm your vapor barrier is continuous. Those three checks take an afternoon and they decide whether the build still looks good in five years. Updated for October 2026.