
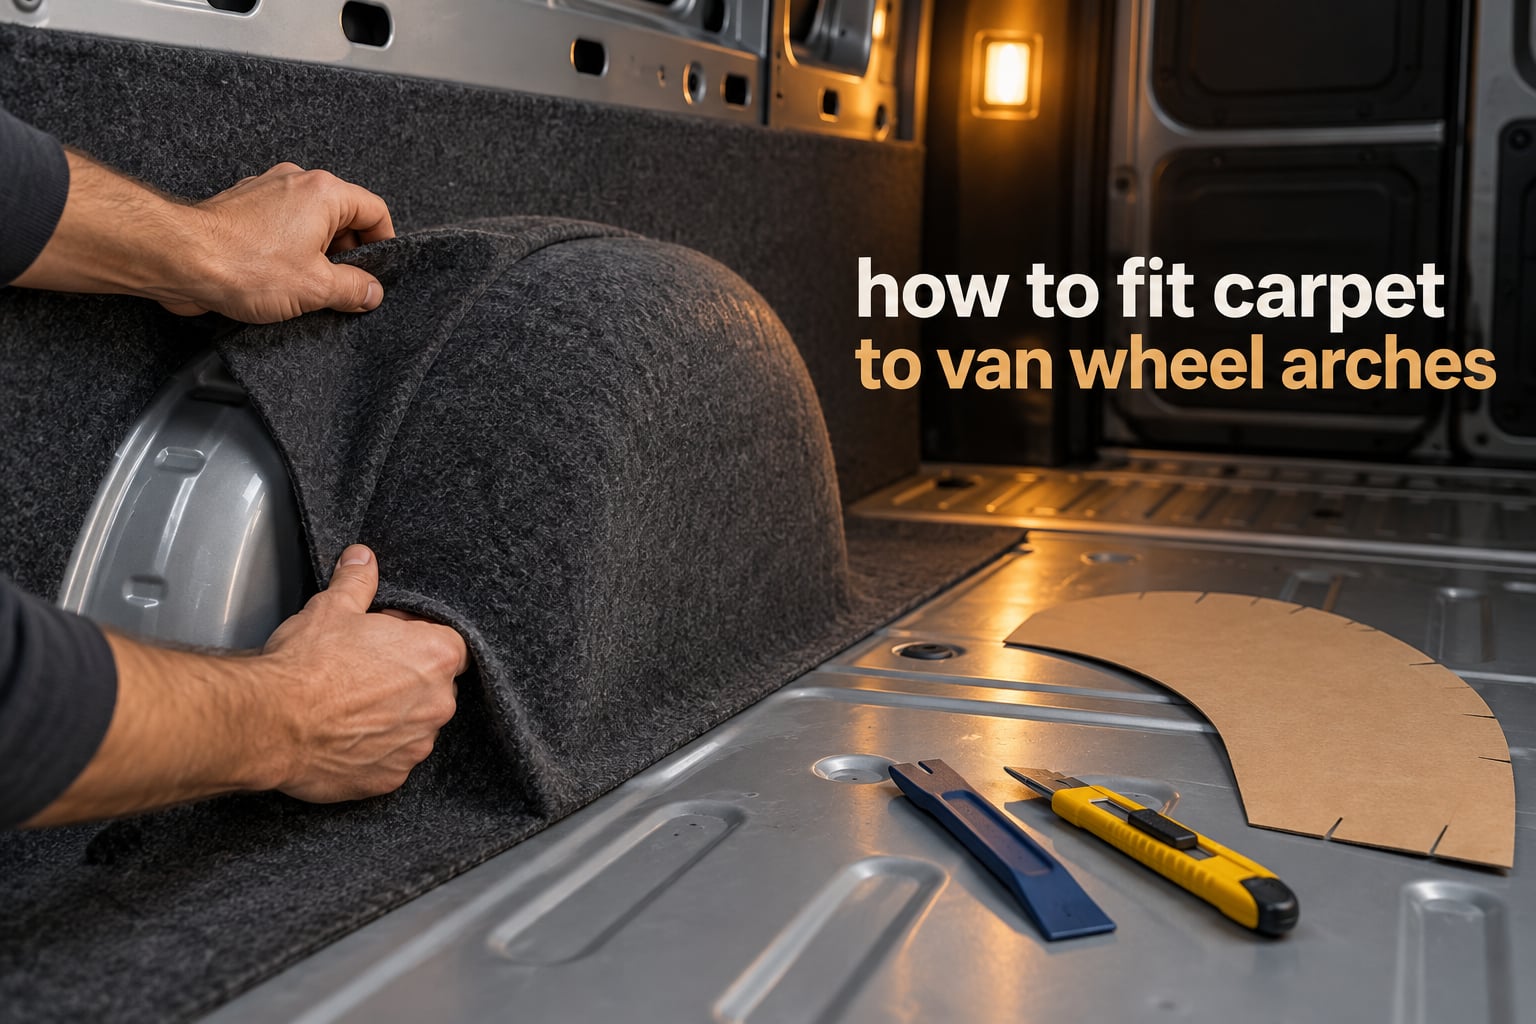
Fitting carpet to van wheel arches means gluing and stretching van lining carpet around the curved steel arch, starting at the top, working down and around in short sections, and keeping constant tension so the pile moulds into the curve without creases. You then trim the edge with a Stanley blade and hide it under the refitted arch trim. It is the fiddliest part of any lining job, and almost every mistake happens within the first two feet of the arch.
The wheel arch is simply the curved metal box that covers the wheel and its suspension. On a panel van it is the tightest, most awkward curve in the whole interior, and it is also the part every passenger sees first.
The material that makes this job possible is 4-way stretch carpet. Unlike ordinary tufted wool or nylon carpet, which is woven flat and frays when you pull it, 4-way stretch carpet is knitted so it stretches in four directions and can be moulded permanently around a curve. It is the standard choice for camper van lining, and it is what converters call “stretch carpet” or “van lining carpet”.
This guide covers the full method, with the arch itself treated as the main event rather than an afterthought.
Table of Contents
- What You Need to Fit Carpet to a Van Wheel Arch
- Why the Wheel Arch Is the Hardest Part of a Lining Job
- Preparing the Arch: Cleaning, Sound Deadening and Insulation
- Trim and Panel Removal
- Measuring and Overlap Rules for a Van Lining
- Adhesive Technique: Spray Both Surfaces, Then Flash Off
- How to Fit Carpet to Van Wheel Arches
- Making a Difficult Arch Easier: Templates, Heat and Arch Types
- Trimming the Arch Edge and Hiding the Join
- Common Wheel Arch Mistakes and How to Fix Them
- How Much Carpet to Buy and How Long the Job Takes
- Clean-Up and Refitting Trim
- Frequently Asked Questions
- Conclusion
What You Need to Fit Carpet to a Van Wheel Arch
You do not need much, but each item below solves a specific problem on the arch.
- 4-way stretch van lining carpet — buy the length and width that lets you run the pile in one direction down the whole side of the van, with enough width at the arch to stretch both above and below the curve.
- High-temperature contact spray adhesive — a contact adhesive rated for the temperature a parked van reaches in summer, not a general purpose craft glue.
- Overlap allowance — measure before you cut. You need roughly 5 to 10cm extra at the headliner rail and around 20cm under the plastic trim, and you leave everything long until the final trim stage.
- Stanley knife with plenty of spare blades — dull blades tear the backing and cause the creases that haunt beginners.
- Trim tools — a plastic pry tool, a pick tool and a plastic scraper for pressing pile into body grooves and channels.
- Stretcher or knee kicker — a long aluminium bar with a hooked end that hooks under trim and pulls carpet tight. A knee kicker is the cheaper single-tool version for tight radii.
- Hair dryer or heat gun on low — to relax the pile on a tight curve. Heat is the trick almost no written guide mentions, and forum posters rely on it constantly.
- Cardboard or kraft paper — for a template of a complicated arch shape.
- Brake cleaner and microfiber cloths — for removing adhesive overspray and fingerprints from paint and glass.
- Respirator, goggles and gloves — spray adhesive in an enclosed van is genuinely unpleasant to breathe.
- Wheel arch plastic trim or a wheel arch cover — the finishing option that hides a cut edge instead of asking you to make it invisible.
Most of this list is available from van trimming suppliers or camper conversion shops. Buy the adhesive and the carpet together if you can, so you can confirm the adhesive is compatible with the carpet backing.
Why the Wheel Arch Is the Hardest Part of a Lining Job
The arch is hard because you are asking one flat piece of material to become a compound curve while it is stuck to a surface you cannot see behind. Everywhere else in a van you are gluing to a flat panel; the arch demands stretch in two directions at once.
Three things work against you there. The radius is tighter than anything else in the body, the arch lip is an edge you have to turn the carpet around, and the pile has to be pushed into the grooves and stiffening ribs without leaving a crease.
Forum posters consistently describe the arch as the hardest part of the job. On the VWT4 Forum, advice is to do the wheel arches as a separate piece rather than attempt a whole side in one continuous run, precisely because the arch fights you. Get that wrong and the whole side panel has to come off again.
Preparing the Arch: Cleaning, Sound Deadening and Insulation
Never lay carpet straight onto a dirty or bare arch. Preparation here is what makes the difference between a lining that looks factory and one that looks rushed.
Clean the metal first
Wipe the arch down with brake cleaner and a microfiber cloth until bare paint or primed metal is showing. Adhesive does not bond to wax, dust, oil or a chalky layer of old coating, and a failure on the arch will show as a lifted edge weeks later.
Apply sound deadening before insulation
Sound deadening goes on the floor, the back panels, the tailgate, the sliding door and the outside of the wheel arches. T6Forum posters treat arch deadening as standard practice rather than an optional extra, because an untreated arch is the loudest surface in the cabin.
Roll or press it firmly into the arch curve so it follows the radius instead of bridging it, then trim it back about 20mm from the arch lip so the carpet has clean metal to stick to at the edge.
Insulation, but keep the arch clear
Foil-backed or foam insulation can go on the flat panels. Keep it away from the arch lip and the sliding door tracks, where it will stop the carpet sitting flat and leave an untidy edge later.
Trim and Panel Removal
Take off everything that will cover the carpet later: side trims, seat bases, the bulkhead trim and the door cards you need access to. Anything you leave on is a place you cannot get the carpet behind.
Put every fixing into a labelled tray as you go. Trim screws, plastic clips and trim caps look identical and losing them costs you a whole afternoon.
On the sliding-door side, start at the back of the van rather than at the protruding frame near the door. Forum advice is consistent on this: working from the back means the join falls where the sliding door track and the trim will hide it.
Measuring and Overlap Rules for a Van Lining
Measure generously and cut once. Carpet is cheap compared with redoing a whole side.
- At the headliner rail — leave 5 to 10cm of extra length so the carpet can be tucked up under the rail and the headlining trim covers the join.
- Under plastic trim — leave about 20cm running along the bottom of the side panel and around the arch lip. This is hidden-edge finishing: the trim goes back on and covers the cut line completely.
- At windows — never glue carpet to glass. Cut the carpet up to the glass, mould it into the frame channel, and tuck the edge in with plastic tools.
- At the floor — leave a few centimetres of overlap under the floor covering so the floor edge tucks over it.
- Across the arch — leave the carpet long at the bottom of the arch until you are sure of the final line, because you cannot add length once it is trimmed.
One honest note from the forums: on dark carpet over dark paint, rough edges are effectively invisible. On a white or light-coloured van, every cut line shows, so take extra care with the trim stage.
Adhesive Technique: Spray Both Surfaces, Then Flash Off
Contact spray adhesive works by touching two dry, tacky surfaces together. That is why both surfaces get sprayed and why the timing matters.
- Work in roughly 1m sections. Do not try to glue a whole side in one pass. Small sections stay manageable and the adhesive does not skin over before you reach it.
- Spray the metal and the carpet backing. Both surfaces. One-sided application is the single most common reason carpet lifts later.
- Flash off for 10 to 20 seconds. Let the solvent evaporate until the spray goes from wet to tacky. If you can see a wet line, it is not ready.
- Lay it down and press with a scraper. Push from the middle outwards to move trapped air toward the edges.
- Do not soak the area. Over-application causes runs and drips that show through the pile and are close to impossible to remove. Poster after poster on the TSSC Forum says the common aerosol adhesives disappoint, and over-spraying is the usual reason.
Keep the van doors open while you work and wear the respirator. A parked van in warm weather is a poor place to spray solvent adhesive.
How to Fit Carpet to Van Wheel Arches
This is the sequence that works. The principle is simple: start where the curve is shallowest, glue that area, then work down and around the arch in short sections while keeping tension on the carpet you have already laid.
- Template a complex arch first. Hold a piece of cardboard or kraft paper against the arch, mark the curve, cut it out and use it to check your cut line. Do this for a boxed or squared-off arch, a flared arch, or any arch with a captive wheel. It takes five minutes and saves a torn sheet.
- Start at the top of the arch. The top of the arch is the flattest point and where the carpet is easiest to square up. Make this the anchor of the whole section. Everything else is pulled into place relative to it.
- Spray and flash off a section about 10cm deep. Work in roughly 10cm sections around the curve. Larger sections lock up before you can adjust them.
- Lay the carpet on at the top and press it into the body grooves. Use a plastic trim tool to push the pile into every channel and stiffening rib. The carpet will not sit flat if the pile is left standing on a rib.
- Work down and around the arch. Keep the carpet stretched as you go, following the curve rather than pushing straight into it. Push the material into the arch slowly and let the stretch do the work.
- Maintain tension the whole way round. The carpet is stretch material, so it can be pulled into shape. Constant tension is what produces a moulded fit instead of a baggy one. Where you need more pull, hook a stretcher or knee kicker under an already-fixed edge and lean on it.
- Use heat on tight radii. When the pile resists on the tightest part of the curve, work a haird dryer along it at a distance. The heat relaxes the fibres so they mould instead of springing back. Keep the dryer moving and stay well clear of the paint.
- Trim the edge and tuck or cover it. Cut along your template line with a fresh Stanley blade, then tuck the edge under the plastic trim or cover it with the arch plastic trim. Finish at the floor line and seal the seam.
Expect creases. They build up around the arch radius far faster than on a flat panel, and a few small ones while you are working are normal. The fix is always the same: peel the carpet back a few centimetres, re-stretch it, and lay it down again.
Making a Difficult Arch Easier: Templates, Heat and Arch Types
Not every arch behaves the same, and knowing which one you are dealing with saves a lot of trial and error.
Boxed or squared-off steel arch
Straight sides and a defined corner, usually on a van with a captive or smaller wheel. This is the easiest type to line in one continuous run, but the corners buckle if you stretch both directions at once. Template the corners, tack the flat of each face first, then work the corner with a trim tool.
Flared arch
A wider, gentler curve. Flared arches stretch further than a boxed arch and reward the one-piece approach, provided you leave generous extra width at the arch when you cut. The pile has more room to move, so creases are easier to push out.
Plastic-trimmed arch
If the van already carries a plastic arch liner, you are in the easiest position of all. Carpet up to the trim, then the trim covers the cut line. Use this whenever it is available.
When heat helps and when it does not
Use a haird dryer for relaxing fibres on a tight curve. A heat gun on low gives more reach but needs more care: keep it moving, keep it well away from the paint and trim, and never leave it parked on one spot while you work elsewhere.
Heat will not fix a starved adhesive joint. If the carpet is lifting rather than creasing, the problem is glue coverage, not fibre tension, and more heat just makes it worse.
Trimming the Arch Edge and Hiding the Join
Trimming is where a good arch job is won or lost. Two techniques do most of the work.
Overlap and cut through both layers
For a matching join between two pieces, lay the top piece over the side piece, mark the line, then cut straight through both layers with a scalpel or fresh Stanley blade. The T6Forum thread on a first-time carpeting job describes exactly this: overlaying the pieces and cutting through both so the edges match up. The result reads as one continuous run.
Tuck under the trim, or cover it
The alternative to a perfect visible edge is a hidden one. Cut slightly long, tuck the excess under the plastic side trim or the arch liner, and refit the trim. Where there is no plastic trim, fit a wheel arch cover over the arch — it hides the edge entirely and removes the last crease from view.
Cutting flush and leaving the edge exposed only works on a dark scheme, and even then only on a straight, untensioned run. The arch is the wrong place to try it.
Common Wheel Arch Mistakes and How to Fix Them
None of these are terminal. Every one of them can be corrected without stripping the van back to bare metal, as long as you catch it early.
| Mistake | Cause | Fix |
|---|---|---|
| Lifted arch edge or carpet peeling away later | Adhesive sprayed on one surface only, or applied too thinly | Lift the edge back, clean both surfaces with brake cleaner, re-spray both sides and flash off before re-laying |
| Adhesive drips and stiff patches through the pile | Over-application, spraying too close | Trim the stiff fibres away, or cut the section out and re-lay it with lighter passes |
| Persistent creases around the radius | Laid without tension, or stretched unevenly across the curve | Peel back 5 to 10cm, re-stretch, and lay again with the stretcher or knee kicker holding tension |
| Buckles at the top corners of a boxed arch | Stretching both faces of a corner at the same time | Cut the corner out, refit each face flat, then re-form the corner with a trim tool |
| Torn carpet on a tight curve | Dull blade, or forcing the pile into a groove | Patch from behind with offcuts, or cut the section out and re-lay with a fresh blade and light passes |
| Arch looks fine in the morning and slack by afternoon | Stretching the sun-side arch without allowing for expansion | Relax the section back to neutral, leave slightly slack on the sun side, and re-tack |
| Carpet will not lie in the body grooves | Grimy or dusty channel, pile standing on a rib | Clean the channel, press with a plastic scraper, and use a pick tool for the tight channels |
| Adhesive stuck to paint or glass | Overspray during the arch run | Wipe immediately with brake cleaner on a microfiber cloth before it cures |
The sun-side point catches people out. Metal expands in heat, so an arch stretched dead tight on a warm afternoon will be visibly slack on a cold morning. Leave a little give on that side.
How Much Carpet to Buy and How Long the Job Takes
For a short-wheelbase panel van, most builders buy in the region of a full roll length plus one spare roll, because you lose a fair amount to the 20cm overlaps, the arch templates and any mistakes you have to cut out. Measure your arch templates and add them to your running total rather than guessing.
Our rule of thumb for planning: a full lining takes a competent weekend and a half for a first-timer, longer for a high-roof or long-wheelbase. The arches are what turn a tidy two-day job into an all-weekend one, and doing them as separate pieces with plenty of extra width will slow you down at the start but save you redoing a whole side at the end.
If you have a deadline, a hidden-archive van or a floor, roof or bed to build, the sensible trade is to have the lining done professionally and keep your build time for the parts you are building. If the van is going to be used as a work van rather than converted, a serviceable lining is a weekend job and a perfect one is not necessary.
Clean-Up and Refitting Trim
Work in reverse order of removal. Before any trim goes back, clean every adhesive trace and overspray from the paint, trim and glass with brake cleaner and a microfiber cloth.
Refit the plastic trim last, pressing it home until the clips click. Every hidden edge you tucked under disappears as that trim goes back on, which is the whole point of leaving a 20cm overlap.
Finally, walk the van with a torch at a raking angle. Raking light reveals buckles, bubbles and missed areas that look fine under a bulb, and it is far easier to peel back and re-lay a section now than after the trim is on.
Frequently Asked Questions
Is it easy to carpet a van?
A panel van lining is a moderate DIY job. Flat side panels are straightforward: clean, spray both surfaces, flash off for 10 to 20 seconds, press on and trim under the plastic trim. The wheel arches are the hard part, because you are moulding a flat sheet around a tight compound curve while keeping tension on it. Budget a full weekend and a half for your first attempt.
How much does it cost to carpet line a van?
It depends on your van length, roof height, whether trim and seats are already removed, and whether you supply your own carpet. A short-wheelbase panel van lined in stretch carpet costs less to have done than a high-roof conversion because there is less surface area and fewer awkward shapes. Get two or three quotes and ask whether arch trims and hidden-edge finishing are included.
How long does it take to carpet line a van?
Allow a full weekend and a half for a first-timer working through a complete van. Preparation and sound deadening take a day on their own. A professional trimming shop will do a standard panel van in a day or two, assuming the interior is already stripped. Long-wheelbase and high-roof vans take proportionally longer on both sides.
Is there a way to stretch carpet without a stretcher?
Yes. A knee kicker is the cheapest substitute, and on a wheel arch you can often get by without any bar at all. Most of the shaping is done by hand pressure, a plastic trim tool pressing the pile into body grooves, and a haird dryer relaxing the fibres on tight curves. A stretcher with a hooked end is still worth borrowing if you want a tighter finish, because it pulls the edge while you press.
How do I apply 4 way stretch carpet?
Work in sections of about 1m, spray adhesive on both the metal and the carpet backing, and allow a 10 to 20 second flash-off until the spray turns tacky. Start at the top of the arch, work down and around in roughly 10cm sections, press the pile into grooves with a plastic tool, and keep constant tension as you go. Trim the finished edge with a fresh Stanley blade and tuck or cover it with the arch trim.
Can you fit carpet to a wheel arch in separate pieces?
You can, and many builders do. Forum advice on the VWT4 Forum is to run the arches as separate pieces rather than attempt one continuous side, because the arch is the hardest curve in the van and is far easier to correct on its own. If you do, overlap the pieces generously and cut through both layers with a scalpel so the join reads as a single continuous run.
Conclusion
How to fit carpet to van wheel arches comes down to four things: start at the top of the arch, glue both surfaces, work down and around in short sections with constant tension, and finish the edge somewhere it cannot be seen.
Tack a template onto a complicated arch before you cut, and keep a haird dryer within reach for the tightest part of the curve. If the carpet lifts, it is an adhesive problem rather than a tension problem, and if it creases, it is a tension problem rather than an adhesive problem.
Next step: strip the trim, get the sound deadening on, and do the nearside arch on its own first. Once you are happy with the method, the rest of the van is flat panels.