
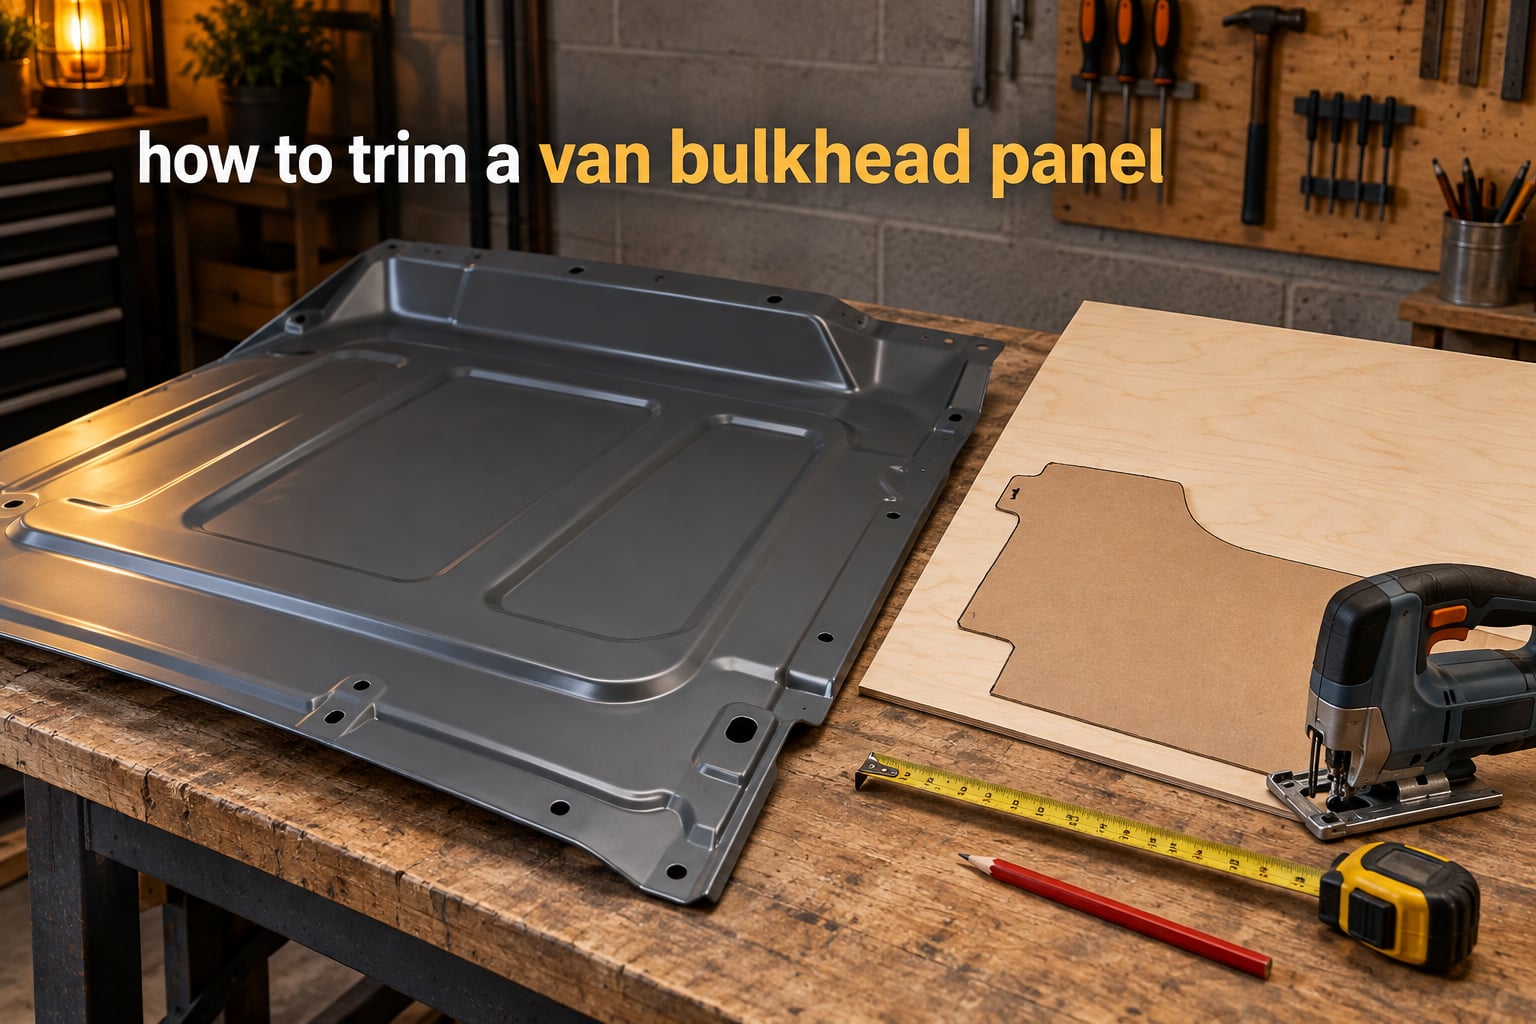
A van bulkhead is the steel partition between the cab and the load space, and on most factory panel vans it is raked backwards so the front seats can travel as far as possible before they hit it. That raked profile is the reason the panel is awkward to work with: it is curved, it is welded as well as bolted, and it never sits flat against anything. Learning how to trim a van bulkhead panel gives you a square, flat divide you can cut a window through, line with ply, or open up completely for a walkthrough.
This guide covers the full sequence, from deciding what you are changing through to sealing the edges and refitting the trim. It assumes you want to keep the van reversible, so nothing here depends on grinding the van’s sheet metal down to nothing. If your goal is a flat vertical divide rather than a shaped one, jump to the section on flattening a raked bulkhead, which uses the batons-and-ply method builders have discussed on the T6 forum for years.
One piece of advice shaped everything below. On the vansairforce RV-4 panel thread, a builder who had already made the panel twice states plainly that the actual cutting of the new panel, including the holes for the instruments, is the easy part. The fitting is where projects go wrong. Everything here is organised around the fitting, not the sawing.
Table of Contents
- What Is a Van Bulkhead Panel?
- What You’ll Need – Tools and Materials
- How to Trim a Van Bulkhead Panel – Step by Step
- Step 1 – Assess the panel and decide what you are changing
- Step 2 – Remove the trim, seat backs and adjacent ply lining
- Step 3 – Make a full-size template before you cut anything
- Step 4 – Strip the bulkhead down to bare metal
- Step 5 – Transfer the template and cut the gross shape
- Step 6 – Cut the view aperture and service cut-outs
- Step 7 – Test fit, adjust, and refit
- Step 8 – Trim and finish the exposed edges
- Step 9 – Refit the trim and lining and kill the rattles
- Tools Compared for Cutting a Bulkhead Panel
- Choosing Plywood for a Trimmed Bulkhead Panel
- Van Model Differences – T25/T4, T5, T6, Transit Custom and Sprinter
- How to Flatten Off a Raked Bulkhead
- Where the Hard Part Actually Is
- Fixing Bulkhead Trim Squeaks and Rattles
- Common Mistakes and How to Avoid Them
- Legal and Safety Considerations – Is It Illegal to Remove a Bulkhead?
- Frequently Asked Questions
- Conclusion
What Is a Van Bulkhead Panel?
A van bulkhead panel is the steel or plywood partition between the cab and the load space, and on most factory panel vans it is raked backwards to give the front seats maximum travel before they hit it.
Beyond that basic definition, there are two very different panels you might be dealing with. A full-height steel bulkhead is the pressed or folded panel on a panel van, usually bonded or spot welded to the B-post, the floor and the roof, with a factory trim strip covering the edges. A half-height bulkhead is the lower partition common in Kombi and some panel vans, sitting at roughly seat-back height and leaving the upper load space open into the cab.
Builders on the Club 80-90 forum describe the factory half-height panel as spot welded and welded to the B-post, and warn that pulling it out with force grinds into the van and leaves the surrounding sheet metal too thin. That is the single most common failure in bulkhead work, and it is entirely avoidable.
Why the rake exists matters for trimming. The panel is angled so a driver’s seat can slide back to full stretch before the bulkhead stops it. Flattening it or squaring it up therefore does not free extra seat travel, it takes some away. Trim it only if you need a flat surface, a longer load bay, or a better place to line the van.
What You’ll Need – Tools and Materials
This is the list we work from for a trim job, roughly in the order you will reach for each item. You can get through the job with the core set and add the finishing tools if you want a result that looks factory rather than repaired.
Tools
- A cordless jigsaw with a fine-tooth wood blade for the gross cuts and the aperture
- An oscillating multi-tool with a plunge-cut blade for trim, lining edges and flush cuts against the pillars
- A router with a trim bit if you are forming a rebate or a window frame
- A cordless drill/driver plus a step drill or hole saw set for vent and filler cap cut-outs
- An angle grinder with a thin cutting disc for spot welds, plus a spot weld punch and ball-peen hammer
- A file, a sanding block and 120 and 240 grit paper
- A tape measure, a straightedge or square, a pencil and a marker
- Clamps, a sacrificial cutting surface, safety glasses and ear defenders
Materials
- Large corrugated card or 6mm foam board for the full-size template
- 9mm to 12mm birch plywood for the replacement or added panel
- PVA or polyurethane wood glue, a staple gun or screws for the template
- Polyurethane or acrylic edge sealer and a brush or roller to apply it
- Primer, paint and a fine brush for the exposed ply edges
- Foam or rubber edge trim, plus cable ties or trim clips for the lining
- Foil-backed insulation and a vapor barrier if you are lining the divide
Consumables worth having spare
Take a couple of spare jigsaw blades, extra drill bits and a spare set of trim clips before you start. The blades are consumables, and the trim clips are the ones that snap when you pry a trim piece off in the cold. A spare pack costs nothing and saves a second strip-out.
How to Trim a Van Bulkhead Panel – Step by Step
Trimming a van bulkhead panel means removing the surrounding trim, making a full-size template of the shape you want, transferring that shape onto plywood, cutting the window aperture and any service cut-outs, test fitting, then sealing the edges and refitting the trim. Here is that sequence in the order it works.
Step 1 – Assess the panel and decide what you are changing
Start by deciding whether you are cutting, rebuilding or removing. A trim job means reshaping the existing panel or adding ply to it while keeping it reversible. A rebuild means a new panel covering the old one, which is easier and far less risky if the old one is bent or rusted.
Measure the gap between the back of the front seats and the panel with the seat fully back. This tells you how much you can actually take out of the profile before the seats hit it. Push the panel, look for rust bloom at the bottom edge and at the B-post joint, and check the window aperture for corrosion along the bottom rail.
Step 2 – Remove the trim, seat backs and adjacent ply lining
Run a plastic trim tool or a flat blade along the joint where the plastic bulkhead trim meets the panel before you pull anything. Builders recommend cutting a caulking line first so the trim peels without taking paint with it, and it costs you two minutes.
Remove the side trims first, then the top trim, working from the ends inwards so the long pieces stay intact. Then take out the seat backs or at least release them from the floor, and strip the ply lining from the adjacent B-post panels. You need about 100mm of clear panel on each side to see what you are working with and to get a straight edge in later.
Step 3 – Make a full-size template before you cut anything
Never mark straight onto the panel or the plywood. Mark onto a full-size card template, then transfer it. The template is cheap, it is forgiving, and it lets you make a mistake that costs a sheet of card instead of a panel.
How to make a full-size template – four sub-steps
- Hold the card in place and mark the fixed points. Notch the template where the panel meets the roof, the B-post and the floor. These three lines never move, and they are what you align the new panel on later.
- Trace the edge you are keeping. Follow the factory edge, the pillar line or the seat clearance line with a marker or a pencil held square to the surface. Add 3mm of extra material to everything you are cutting away.
- Mark the aperture and the service cut-outs. Set out the view window, the filler cap, the vent and the instrument cluster now, on the flat template, where the shapes are easy to correct.
- Cut the template out and label both faces. Make the template from two thicknesses of card taped together, or one layer of card with a thin ply offcut, so it stays rigid. Label it with the van model and side before it goes anywhere near the van.
Step 4 – Strip the bulkhead down to bare metal
If the panel is steel, the existing trim is off and the lining is out, grind the spot welds with a thin disc and punch or twist each one. Work along the top edge, then the B-post, then the floor. Builders repeatedly warn against brute force, because the panel is also welded to the B-post and any of that joint that tears leaves you repairing structural metal instead of trimming a panel.
Support the panel as the last fasteners go so it does not drop and buckle. If it is bonded as well as welded, slide a plastic trim wedge under the seam and work the bond rather than pulling. Where you intend to keep the panel, cut it free and leave a clean, consistent edge to work from.
Step 5 – Transfer the template and cut the gross shape
Lay the template on the plywood, tape it flat and transfer every line with a pencil and a straightedge, including the notch marks from step 3. Extend the lines across the full width of the sheet before you commit to any cut.
Make the rough cuts with a jigsaw, taking the line in short strokes and supporting the offcut so it does not tear the ply edge as it separates. Cut a little long and sand back to the line. A jigsaw that is pushed hard into a curve will pull the sheet away from your bench and wander off the mark, so support the sheet fully and keep the base flat.
Step 6 – Cut the view aperture and service cut-outs
Drill a pilot hole inside each corner of the aperture, run the jigsaw blade down one side and around, and finish on a straight side where possible. Drilling the corners is what stops a jigsaw throwing a long splinter out of the top edge, which is the usual way these panels get ruined.
Cut the filler cap, vent and instrument cluster openings with a step drill or hole saw. The instrument cluster is the one to take slowly: drill from the back face in stages, backing the wood with a scrap board, because a hole saw that breaks through the visible face leaves a tear-out ring you cannot hide. Test each opening against the part that passes through it before you move on.
Step 7 – Test fit, adjust, and refit
Offer the panel up dry, with no fasteners, and check the three fixed points first. The top edge should sit tight against the headlining line, the B-post edge should run parallel, and the bottom should sit on the floor without rocking.
Now check the things people miss. Close the cab doors and listen for binding. Slide the seat fully back and forward. Sit in the seat with the belt on and check your knees and your head. If the panel fouls the door, the handle or the seat rail, mark it now rather than after the lining goes back on.
Step 8 – Trim and finish the exposed edges
Sand the cut edges through 120 and 240 grit, then run a file or a sanding block along the grain on the top edge, where the most obvious damage shows. A radius on the exposed top edge takes the sharp look off a raw cut and stops the edge marking anything that leans on the panel.
Seal every exposed ply edge. Unsealed edge grain drinks moisture and the ply delaminates in layers within a year, and this is the single most common fault we see in panels that have been trimmed in place. Apply a thin coat of polyurethane or acrylic edge sealer, let it dry, sand the beads back flush with the face, and then prime and paint. Cut edges are the part people see, so treat them like a finished edge, not a hidden one.
Step 9 – Refit the trim and lining and kill the rattles
Attach the ply lining to a new panel with screws into the cabinet strips rather than adhesive alone, so it can be removed later. Start at the top centre, work outwards in a light star pattern and do not overtighten.
Use foam or rubber edge trim along every hard edge that meets metal or trim, and follow the advice below to stop the squeaks that come back a few months later. Refit the plastic trim, then the seat backs, and only then put the lining back on the B-posts.
Tools Compared for Cutting a Bulkhead Panel
Most people reach for a jigsaw by default. It is a reasonable choice, but it is not the only one, and the right tool depends on whether you are cutting a free sheet, working against a pillar, or following a line on the van itself.
Cordless jigsaw
Best for: gross cuts in plywood and the view aperture on a free sheet. Main weakness: it wanders on a tight curve and splinters the top edge if the corners are not drilled. Skill level: beginner to intermediate. Control and dust: good control, moderate dust on a bench.
Oscillating multi-tool
Best for: flush cuts against pillars, removing trim and cutting the panel in situ. Main weakness: slow on long straight runs and easily overloaded. Skill level: beginner. Control and dust: very good in tight spaces, dusty at the nose.
Router with a trim bit
Best for: forming a rebate, a window frame or a finished edge profile. Main weakness: it needs a steady hand and accurate template support. Skill level: intermediate to advanced. Control and dust: the best edge finish of the group, but it needs dust extraction.
Round or circular saw with a fine blade
Best for: long straight trimming cuts across a full sheet. Main weakness: no curves, and a new jigsaw blade is cheaper than a good saw blade. Skill level: intermediate. Control and dust: good on straight lines, dust needs managing.
Reciprocating saw
Best for: spot welds and freeing a panel that is welded rather than bolted. Main weakness: very little control, and it risks scoring the pillar. Skill level: intermediate. Control and dust: poor; use outdoors or with extraction.
Our own preference for a first trim is a jigsaw for the sheet and an oscillating multi-tool for anything against the van. That combination covers most jobs without a router and keeps the tool count down. If you expect to trim more than one panel, the router becomes worth learning because the finished edge is the part you see every day.
Choosing Plywood for a Trimmed Bulkhead Panel
Use 9mm to 12mm birch plywood for a trimmed bulkhead panel. That range holds its shape across a wide panel, resists the flexing a load bay puts through a partition, and takes a screw from a lining fix without splitting. Below 9mm the panel will bow, and above 12mm you are adding weight in exactly the place the seat is trying to travel.
Birch plywood, 9mm to 12mm
Moisture resistance is good once the edges are sealed, the weight is moderate, and it is the standard choice for van lining and bulkhead work.
Marine plywood, 9mm to 12mm
Very good moisture resistance at moderate weight. It is overkill for a cab divide, but worth it near a door or a wheel arch.
MDF, 6mm to 9mm
Poor moisture resistance, so it needs sealing on every face, and it is heavy. Easy to cut and smooth, but it will not take a screw in an edge.
OSB or chipboard faced sheet, 15mm
Poor moisture resistance at low weight. Fine for a hidden backing panel, but not for a lining or a cut edge.
Run the grain of the panel front to back across the van, so the long dimension follows the load bay. Seal the sheet before you cut it, not after, because a sealed sheet cuts cleaner and does not absorb moisture through the cut line while the saw is passing through.
Van Model Differences – T25/T4, T5, T6, Transit Custom and Sprinter
The sequence is the same everywhere, but the fixing method and the shape of the factory profile change enough between generations to be worth knowing before you commit.
- T25/T4 (1986-2003). Older vans often have a steel panel spot welded and bonded with a plastic trim strip, and the corrosion around the B-post joint is the main reason to rebuild rather than trim. Treat the metal as fragile and support the panel as the last welds go.
- T5 (2003-2015). A common camper base with a raked steel bulkhead and a glazed view aperture. The raked profile is shallow, so trimming the top corner down is usually a modest job with a template.
- T6 (2015 onwards). The raked profile is deeper and the panel is more strongly curved. Flattening it off is the common request on the T6 forum, and the batons-and-ply method below is the standard answer.
- Transit Custom (2013 onwards). Frequently fitted with a half-height panel and a separate upper trim, and the squeak from that upper trim is a very common complaint on newer vans. The panel itself is usually a clean steel pressing, which makes a template straightforward.
- Sprinter (2006 onwards). A deep rake and a tall panel, with the seat mounting position set well back. Any trim that reduces the gap behind the seat has to be checked against the seat rail travel before you cut.
On a late-model Transit L42, the squeak owners describe most is not the panel itself but the plastic upper trim piece refitted too tightly or with no foam behind it. If that is your only problem, you do not need any of the tools above.
How to Flatten Off a Raked Bulkhead
To flatten off a raked van bulkhead, build a ply batten frame that stands vertical inside the raked panel and skin it with a single sheet of plywood. You are not cutting the factory profile away, you are building a flat face in front of it.
This is the approach discussed on the T6 forum, where a builder considering a vertical bulkhead in a panel van describes running batons around the opening and sheathing with a sheet of wood. The practical sequence is straightforward. Mark a vertical line on the floor and on the roof directly behind the seat, fix a vertical batten to the roof and floor line, then add horizontal rails top and bottom and one midway. Skin the frame with one sheet, lap the joints where the sheet is too small, and finish the exposed edges as described in step 8.
Two refinements come straight from that discussion and from standard practice. Leave a lower opening under the flat panel, because the space beneath a bed platform is otherwise lost. And run insulation behind the flat face if you are lining it, so sound does not simply reflect off the factory steel behind it.
Where the Hard Part Actually Is
The hard part of trimming a van bulkhead panel is fitting it, not cutting it. The builder on the vansairforce RV-4 panel thread who made the panel twice says exactly this: cutting the panel and the instrument holes is the easy part, and matching the shape to the existing trim and structure is what goes wrong.
So budget your time accordingly. Give the template a full day of measuring and marking, and give yourself a week for the refit. Builders who made the panel twice both describe a first attempt that simply did not fit, and in both cases the error was in the template rather than the saw.
The three things that cause most failed fits are: marking the template off a curved section instead of a straight one, forgetting to allow for the thickness of the ply lining, and not accounting for the trim that goes back over the edge afterwards. Allow for the lining, and remember that the finished panel is trim plus panel plus lining, not panel.
Fixing Bulkhead Trim Squeaks and Rattles
A squeaking bulkhead trim is a trim problem, not a panel problem, and it is worth ruling out before you cut anything. On a late-model Transit L42 the usual culprit is the upper plastic trim piece, which people ask about constantly because nobody has written down how it comes off.
To fix it, pry the trim out with a plastic tool working from one end, and lift the end out of its clip first rather than pulling the whole length sideways. Look at the back of the trim and the clip channel on the panel, and check for a broken clip. Then refit it with a thin bead of non-acidic silicone or double-sided foam tape in the channel, and do not overtighten the screws or the housing flexes and squeaks against the panel.
Where the rattle comes from the panel flexing rather than the trim, a strip of closed-cell foam between the panel and the lining fixes it permanently. Do not use general-purpose sealant between trim and panel, because it can creep and stain the plastic.
Common Mistakes and How to Avoid Them
- Forcing the panel off and grinding the van’s sheet metal thin. The most repeated warning in the forum record. Work the spot welds one at a time with a punch, and support the panel so it never hangs off a single fastener.
- Marking straight onto the panel instead of using a template. A marker line on a raked steel panel is the least accurate line you will ever work from. Card first, always.
- Not drilling the aperture corners. A jigsaw turning in plywood throws a long splinter out of the top edge. Drill a pilot in each corner and go round in short strokes.
- Leaving exposed ply edges unsealed. Unsealed edge grain delaminates within a year and looks worse each season. Seal, sand the beads back, prime and paint.
- Forgetting the lining and trim in the thickness calculation. The finished assembly is trim, panel and lining. The template is the panel only.
- Taking out more than the seat travel allows. Measure with the seat fully back before and after, not from memory.
- Cutting the panel in situ when it could come out whole. Support the panel on trestles and cut it on a bench where you have room and light.
- Using MDF and then trying to screw into an edge. It splits and there is no fixing. Birch ply holds a screw anywhere.
Legal and Safety Considerations – Is It Illegal to Remove a Bulkhead?
It is not automatically illegal to remove a bulkhead from a van. The legal question is about what happens to the load and the passengers, not about the panel itself.
For a van used to carry goods, a full bulkhead is part of how the load is restrained, and removing it can change the vehicle’s load-carrying characteristics and its payload rating. Any change that affects certified payload, load restraint or the body structure should be discussed with your vehicle inspection service or the manufacturer before you cut, and a commercial operator may need the change recorded in the vehicle’s documentation.
For a campervan or a passenger-carrying conversion, the position is more straightforward in practice: a full bulkhead that separates the passenger compartment from the load space is generally recommended to remain, because the luggage bay behind a seat needs restraint. Whether a particular converted van passes its inspection is a decision for an independent examiner, not a rule you can read here. A half-height panel is a much simpler case, and removing or trimming it rarely affects certification.
The safety side of the equation is short. A bulkhead is a structural element welded to the B-post, so treat any work on it as structural work. Wear eye protection when grinding spot welds, support the panel the moment the last fastener goes, and never let a cut-off piece of ply fall loose inside the cab. Check the van’s cooling and ventilation ducts on the cab side before you add insulation, because sealing a duct has no effect other than reducing the airflow it was designed to provide.
Frequently Asked Questions
Is it illegal to remove the bulkhead from a van?
Not automatically. The legal issue is whether the change affects the load-carrying capability, payload rating or passenger restraint. On a goods van, talk to your inspection service or the manufacturer before removing a full bulkhead. A half-height panel is usually a much simpler case. For a passenger conversion, a full bulkhead separating the cab from the load space is generally recommended to stay.
Does a van need a bulkhead?
A goods van is designed around a full bulkhead because it restrains the load and forms part of the certified load-carrying setup. A passenger conversion is usually recommended to keep a full bulkhead behind the seats, since the luggage area still needs restraint. A half-height bulkhead is a common factory fit and is not usually required for certification.
How to remove a van bulkhead?
Remove the side and top plastic trim with a trim tool, release the seat backs and strip the adjacent ply lining. Support the panel, then grind or punch the spot welds working along the top edge, B-post and floor in turn. The panel is often welded to the B-post as well as spot welded, so work the joint slowly and never pull the panel off by force.
How to attach ply lining to a van?
Fix battens or cabinet strips to the panel first, then screw the ply to them every 150mm or so rather than relying on adhesive alone. Start at the top centre and work outwards in a light star pattern. Seal every exposed edge, leave a small expansion gap at the floor, and use screws so the lining can be removed later.
What thickness plywood for camper van walls?
9mm to 12mm birch plywood is the standard choice. It holds its shape across a wide panel, takes a screw into an edge without splitting and stays light. Below 9mm a lining will bow, and above 12mm you add weight. Seal the sheet before cutting and seal every cut edge after.
Can you remove bulkhead from transit custom?
Yes, on most Transit Custom models the panel is bolted or spot welded and comes out in a morning once the trims, seat backs and adjacent lining are removed. Check whether your van has a half-height or full panel, and expect the factory plastic upper trim to be the fiddly part. Squeaks from that upper trim are a separate and very common issue on recent models.
Can a bulkhead be removed?
It can, provided you account for what it does. The panel is a structural element welded to the B-post, so it comes out in a set order: trim, seat backs, lining, then spot welds from the top edge down. Take the panel off whole if you can, so you have the option of refitting it, and get advice before changing anything that affects the certified payload.
Conclusion
To trim a van bulkhead panel properly, make a full-size card template before you touch the panel, transfer it to 9mm to 12mm birch plywood, cut the gross shape and the view aperture with drilled corners, and test fit dry against the roof, B-post and floor before any fastener goes in. Seal the cut edges, then refit the trim on foam so it does not come back squeaking.
Work at your own pace and keep the van reversible. If your real goal is a flat vertical divide, build the batons-and-ply frame rather than cutting away the factory raked profile, and leave a lower opening so the space under the bed platform stays usable.