
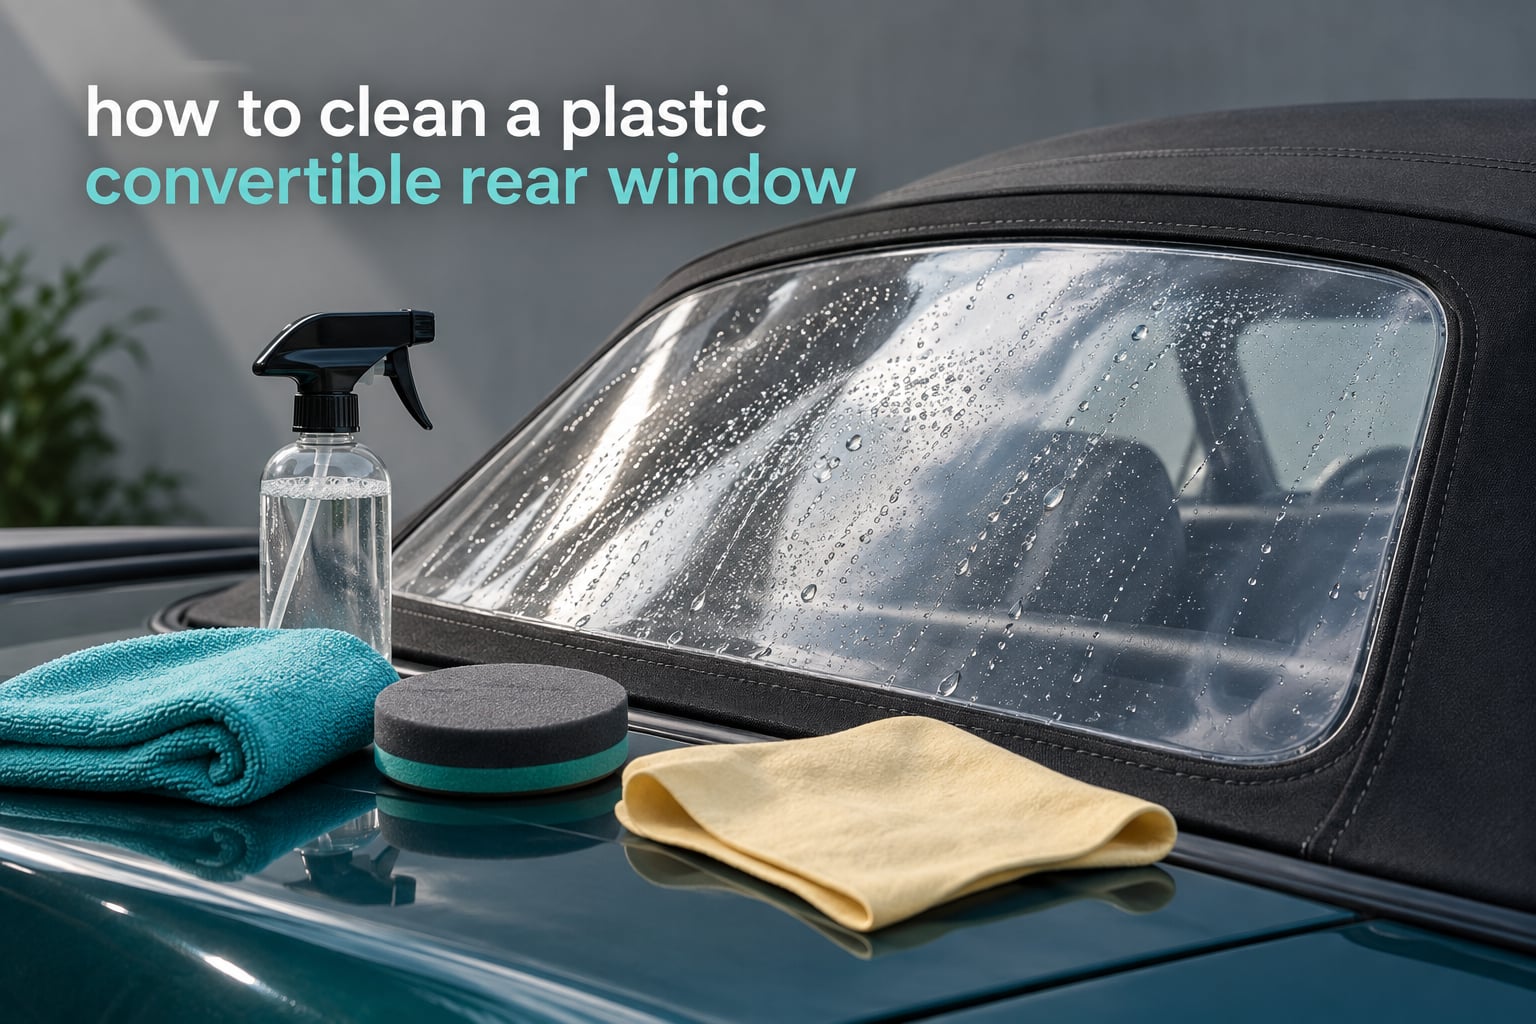
A plastic convertible rear window looks like glass until you try to clean it, and that gap between expectation and reality is where most damage happens. The panel is a thin, flexible sheet of clear plastic — usually PVC or polycarbonate — that oxidises, yellows and scratches far more readily than the laminated glass it imitates. If you have never cleaned one before, the sensible order is the same every time: rinse, wash gently, dry, polish only if it is actually hazy, then protect. Updated for 2026, that is the method below, along with the short list of products that will ruin the window if you use them by mistake.
I have cleaned more of these windows than any other job on a soft top, and the pattern is consistent. Owners come in asking for a miracle cure for cloudiness, and the honest answer is that most haze is just aged surface oxidation that a plastic polish removes in an afternoon. A smaller group come in with a window they have already etched with an abrasive cleaner, and that one needs a much longer conversation.
The reason this matters is not cosmetic. Clouded plastic cuts rearward visibility in exactly the conditions where you need it most, and a yellowed window is the single fastest way to make an otherwise straight convertible look neglected. The good news is that none of the work below requires folding the top or removing the window.
Table of Contents
- How to clean a plastic convertible rear window
- What you’ll need
- Step-by-step method
- What never to use on a plastic rear window
- Choosing a plastic polish and protectant
- Restoring a cloudy or yellowed plastic rear window
- Common mistakes and troubleshooting
- How often to clean and how to store the window
- When to stop cleaning and consider replacing the window
- Frequently Asked Questions
- Conclusion
How to clean a plastic convertible rear window
Rinse it with clean running water, wash it with mild dish soap and a clean microfiber cloth, dry it with a synthetic chamois or microfiber towel, then polish and protect only if it is hazy. Keep the surface wet, work one small section at a time, and never use glass cleaner, ammonia or a paper towel on flexible clear plastic.
That is the whole method. The details below explain each stage, why it matters, and where owners most often go wrong.
What you’ll need
None of this is specialist equipment, and you can do the entire job in the driveway with a hose.
- Clean running water — a hose with a nozzle, not a bucket of reused wash water, because grit in a bucket is exactly what scratches plastic.
- Mild dish soap — the plain, unscented kind. Dilute roughly one teaspoon per bucket.
- Two microfiber cloths — one for washing, one for drying and buffing. Keep them separate so you are not dragging grit back across the surface.
- A synthetic chamois or waffle-weave microfiber towel — the safest drying surface for flexible plastic.
- A plastic polish — an abrasive-free polish formulated for soft plastics, not a general metal polish. Only needed if the window is hazy.
- A plastic protectant — a UV-blocking dressing that slows future oxidation and helps water bead.
- A soft foam polishing pad — optional, for polish application by hand.
- A soft nylon brush — optional, for the mould and grit that collects in the seams and the window channel.
Two habits from the detailing forums are worth adopting before you start. Keep the surface wet under a stream of running water the entire time you are working on it, and never so much as touch the plastic dry. One Corvette owner described the rule better than any product guide: never touch that window unless it has a stream of running water over it.
The 30-second rule: if the window has been sitting in sun and has gone dry, cool it down and re-wet it before a cloth goes anywhere near it. Dry flexible plastic scratches almost instantly, and scratches polish out slowly at best.
Step-by-step method
Set the car in the shade if you can. Direct sun warms the plastic, evaporates your soap film and dries the section you are working on before you finish it.
- Rinse first, always. Sluice the whole window with clean running water before any cloth touches it. This carries off grit, dust and dried bugs that would otherwise be dragged across the surface and turned into fine scratches.
- Wash with mild dish soap. Mix a few drops of mild dish soap into a bucket, wet the window again, and work the solution over the plastic with a clean microfiber cloth in light circular motions. The window should feel slippery when it is genuinely clean.
- Pay attention to the edges. The window channel, the seam and the corners trap grit and mould that a flat cloth never reaches. Use a soft nylon brush dipped in the same soapy water, then rinse those areas again.
- Dry with a chamois or microfiber towel. Pat and sweep front to back in one even motion. Blotting is safer than rubbing, and give the lower edge and channel a separate pass so no water is trapped in the seam.
- Polish, but only if it is hazy. If the window is already clear, skip this stage. If it is dull, apply a small amount of plastic polish to a soft foam pad and work one section the size of your hand at a time, keeping the surface wet with a spray bottle.
- Buff each section before moving on. Wipe the polish off with a clean, dry microfiber cloth before the product dries to a haze of its own. Product that cures on the surface is far harder to remove than product wiped off while still damp. Several light passes beat one heavy pass.
- Protect and inspect. Once the plastic is fully clear and dry, apply a thin coat of plastic protectant, let it haze, and buff it off. Then check the window in daylight against a dark background — that is where remaining haze and fine scratches show up most clearly.
Cleaning the inside of the window vs the outside
Both faces can need work, and owners routinely confuse the two. The inside face collects condensation, smoke haze and mould, and it is the side most often blamed for a window that looks foggy on a cool morning. The outside face takes the UV damage, the bugs, the road film and the water spots.
Inside is lower risk and lower reward. A damp cloth with mild soapy water and a light scrub is usually enough, and the same product rules apply. If the inside surface feels greasy or has a fine white film that returns within days, that film is condensation residue and mildew, not oxidation, and a plastic polish is the wrong tool — clean it instead, then protect it.
Outside is where the polish belongs. Oxidation is a surface condition on the UV-facing side, so a window that is cloudy from outside and clear from inside needs polish, while a window that is cloudy on both sides is usually just dirty.
Working in small sections and why it matters
Small sections are the single most repeated piece of advice in owner threads about this job, and it is the easiest step to skip when you are in a hurry. The plastic is far more thermally sensitive than paint or glass, and it holds water in the layer you are working far longer than you would expect.
Keeping the section small means the product is still wet and still workable when you come back to buff it. A section the size of a dinner plate, kept damp with a spray bottle, is a good working unit. Keep a second clean cloth within reach at all times, because product left to dry on the plastic is the fastest route to the swirl marks and hazing that you were trying to remove in the first place.
What never to use on a plastic rear window
Flexible clear plastic is not glass. It scratches more easily, reacts with solvents, and crazes permanently when it is stressed by the wrong chemical. These are the products and habits that cause most of the damage we see.
| Product or habit | Verdict | Why |
|---|---|---|
| Glass cleaner, Windex, ammonia-based sprays | Never | Ammonia and the solvents in standard glass cleaners attack flexible plastic, leaving permanent haze, crazing or a dull film that polish will not remove. |
| Concentrated or grease-cutting dish soap | Avoid | Heavy degreasers contain solvents. Plain mild dish soap diluted in water is fine for dirt; the strong version is not. |
| Paper towels, newspaper, shop towels | Never | They leave fibres and scratch flexible plastic permanently. Use a microfiber cloth or a synthetic chamois. |
| Abrasive cleaners, scouring powder, T-Cut, toothpaste | Never | Owner after owner reports trying these with no result. They sand the surface unevenly and make the haze look worse, not better. |
| Silicone-heavy dressings and protectants | Avoid | They leave an oily film that smears, attracts dust and makes the window hazy in bright light. |
| Automatic car washes with spinning brushes | Never | The brush spins against plastic with no way to keep it lubricated. The window will not survive it. |
| Machine polishing, rotary buffers, clay bars | Expert only | They work, but the margin for error on a thin flexible panel is tiny. Hand application is the safe route. |
| Convertible top cleaner and vinyl top dressings | Not on the window | Top cleaners are formulated for fabric and vinyl with solvents. Keep them off the plastic panel. |
Dawn-style dish soap deserves its own note because it is the most common question. Diluted, mild dish soap is one of the safest things you can put on the window. Used straight from the bottle, or in a form built to cut grease, it carries solvents that will haze the plastic. Dilute it and you are fine.
Choosing a plastic polish and protectant
Plastic polish, plastic cleaner and plastic protectant are three different products, and confusing them is the most common reason a restoration stalls. The polish is mildly abrasive and removes oxidation. The cleaner is mildly abrasive or enzymatic and removes grime. The protectant is a UV-blocking dressing that does nothing to the plastic you have already damaged.
| Product | Type | What it fixes | Cautions |
|---|---|---|---|
| Meguiar’s PlastX | Plastic polish | Mild haze, water spotting, general dullness on soft plastics. The most frequently named polish in owner threads for rear windows. | Slow. It needs several sessions and repeated light passes rather than one aggressive application. |
| Meguiar’s #10 and #16 polish | Polish and finer polish | Two-stage correction for hazier, more weathered plastic. Users pairing these work one small section at a time. | Not a single-step fix on a badly oxidised window. Use the finer polish only after the coarser one has worked. |
| Plexus | Plastic polish and cleaner | General plastic clarity, often paired with 303 to protect afterwards. | Use sparingly. Overworking a thin panel removes plastic faster than it removes haze. |
| 303 Protectant | Protectant and cleaner | UV protection and water beading. Often left to soak in before being wiped off. | It does not remove existing haze. Clean and polish first, then protect. |
| Novus plastic polish | Plastic polish | Mild haze and fine scratches on clear plastic. | Very gentle, so it will not shift heavy oxidation on its own. |
| Sprayway Plastic Cleaner | Plastic cleaner | Dirt and grime without abrasion, useful as a first pass on a dusty window. | Cleaning only. It will not touch oxidation or yellowing. |
On the question of whether Meguiar’s PlastX is any good for this job: owners name it unprompted more than any other option, and the reason is that it is gentle enough for a thin panel and effective enough to earn repeated sessions. Use it the way one owner described — apply in light circles, let it dry, then wipe it off in circles with a clean cloth. If a single session leaves the window no clearer, stop and reassess rather than escalating straight to a machine.
Restoring a cloudy or yellowed plastic rear window
Cloudy plastic is a surface condition, not a structural one, which is good news. The layer that causes it sits on the outside of the panel and can be worked off gently in stages.
- Wash and clay the surface first. The consensus order from detailing communities is wash, then clay, then polish. Claying removes bonded particles that would otherwise be ground into the plastic by the pad.
- Try a plastic polish by hand. One section at a time, kept wet, with a soft foam pad. Expect several sessions rather than one dramatic transformation.
- Step down to a finer polish if haze remains but the surface is already smooth to the touch.
- Protect the result immediately. Bare plastic oxidises faster than a protected surface, and protection is what stops the cycle restarting.
The four words owners use interchangeably are not the same problem. Haze is a dull surface and polishes away. Yellowing is UV degradation through the thickness of the panel, which polish can improve at the margins but not reverse. Hard water spots are mineral etching and respond slowly to plastic polish. Crazing is a network of micro-cracks in the plastic itself, and no product will fix it — that window is finished.
Common mistakes and troubleshooting
| Symptom | Likely cause | Fix |
|---|---|---|
| Fine swirl marks and light scratching | Working dry, or a dirty cloth being reused across the panel | Stop, wet the surface, and use a plastic polish with a soft foam pad to work the marks out over several passes |
| Streaky or smeared finish | Polish dried on before it was buffed off | Re-wet and re-wash, then polish a smaller section and buff it while it is still damp |
| Haze that returns within days | Cleaning a dirty surface, or using a product that leaves a film | Full re-wash with mild dish soap, then polish, then protect with a non-silicone dressing |
| Yellowing that polish will not shift | UV degradation through the panel thickness | Reduce it as far as it will go, protect the surface, and expect replacement eventually |
| Mould returning in the corners and seams | Trapped water and debris in the window channel | Brush the channel with soapy water, rinse hard, and dry the seam completely with the top down |
| New scratches after washing | Dried grit, or a cloth that touched the ground | Always rinse before contact, keep a dedicated cloth, and never reuse a cloth that has been dropped |
| A window that squeaks when the top folds | Dried residue in the channel | Clean the channel thoroughly and treat the plastic with a plastic protectant only |
How often to clean and how to store the window
A monthly rinse and a mild soapy wash is enough for a car driven regularly, and it does far more for the life of the plastic than any product. Owners running a seasonally stored car can step up to a full clean, polish and protect before the top goes down for winter, which is the single most useful moment to do it because the window is easy to access.
Always clean the window before folding the top, and dry the seam completely. Water trapped in the channel freezes, and repeated freeze-thaw cycles are what turn cloudy plastic into crazed plastic. If the car sits outside in winter, keep the top down on a dry day rather than folding it up wet.
Protecting the window is what stretches the interval between full restorations. A protectant that blocks UV and helps water bead keeps dirt from bonding to the surface, which means the next wash is a wash rather than a correction.
When to stop cleaning and consider replacing the window
Cleaning has a limit, and knowing it saves both time and plastic. If the window is crazed, if the yellowing is severe enough that a polish barely changes it, or if the haze is back within a week of a full polish and protect cycle, the panel has reached the end of its service life.
Other signals that the job is finished: scratches a plastic polish will not take out, or a panel that is physically brittle when the top is folded. There is no technique that reverses crazing in flexible plastic.
Before you replace it, weigh the two options honestly. Cleaning takes an afternoon and costs nothing but time. Replacement restores factory clarity and visibility, and it is the only answer for crazing. If you are buying the car rather than owning it, a yellowed window is often the cheapest negotiating point you will ever get.
Frequently Asked Questions
Can you use Windex on a plastic convertible window?
No. Windex and standard glass cleaners contain ammonia and solvents that haze, craze or permanently dull flexible clear plastic, and the damage cannot be polished out. Use plain mild dish soap diluted in water for routine washing, and a polish formulated for soft plastics when the window needs more than that.
Can you use Dawn dish soap on vinyl windows?
Diluted, yes. A small amount of plain mild dish soap in a bucket of water is one of the safest cleaners you can use on a plastic rear window. Straight from the bottle or in a concentrated grease-cutting formula, it carries solvents that will haze the plastic, so mix it down and keep the surface wet.
What is the best cleaner for plastic windows?
For routine cleaning, mild dish soap and water with a clean microfiber cloth, rinsed thoroughly. For restoring clarity, a plastic-specific polish such as Meguiar’s PlastX, Plexus or Novus, applied by hand in small wet sections. For prevention, a plastic protectant such as 303 applied after the plastic is fully clear and dry.
How do you make cloudy plastic windows clear again?
Wash the window, clay the surface to remove bonded grit, then polish with a plastic-specific product one small section at a time, keeping the surface wet and buffing each section before it dries. Several gentle sessions work better than one aggressive one, and protecting the window afterwards is what stops the haze returning quickly.
How do I clean the inside of a plastic convertible rear window?
Use a damp microfiber cloth with mild soapy water, and a soft nylon brush for the channel and corners where condensation and mould collect. Inside haze is usually condensation residue and mildew rather than oxidation, so clean it thoroughly and protect it rather than reaching for a polish that will not help.
What cleans plastic without damaging it?
Mild dish soap and water, a clean microfiber cloth, and plenty of running water. The key rule is that the surface must stay wet the whole time you work on it, and you should use one cloth for washing and a separate one for drying. Never touch dry plastic, and never use a paper towel or an abrasive cleaner.
Conclusion
Knowing how to clean a plastic convertible rear window comes down to three rules: keep the plastic wet, work one small section at a time, and keep glass cleaners away from it. Wash it monthly, polish it only when it is genuinely hazy, and protect it every time. Done that way, a plastic rear window stays clear for years and you never have to think about replacement. The method works in place, needs no specialist equipment, and takes an afternoon the first time and twenty minutes every time after that.