
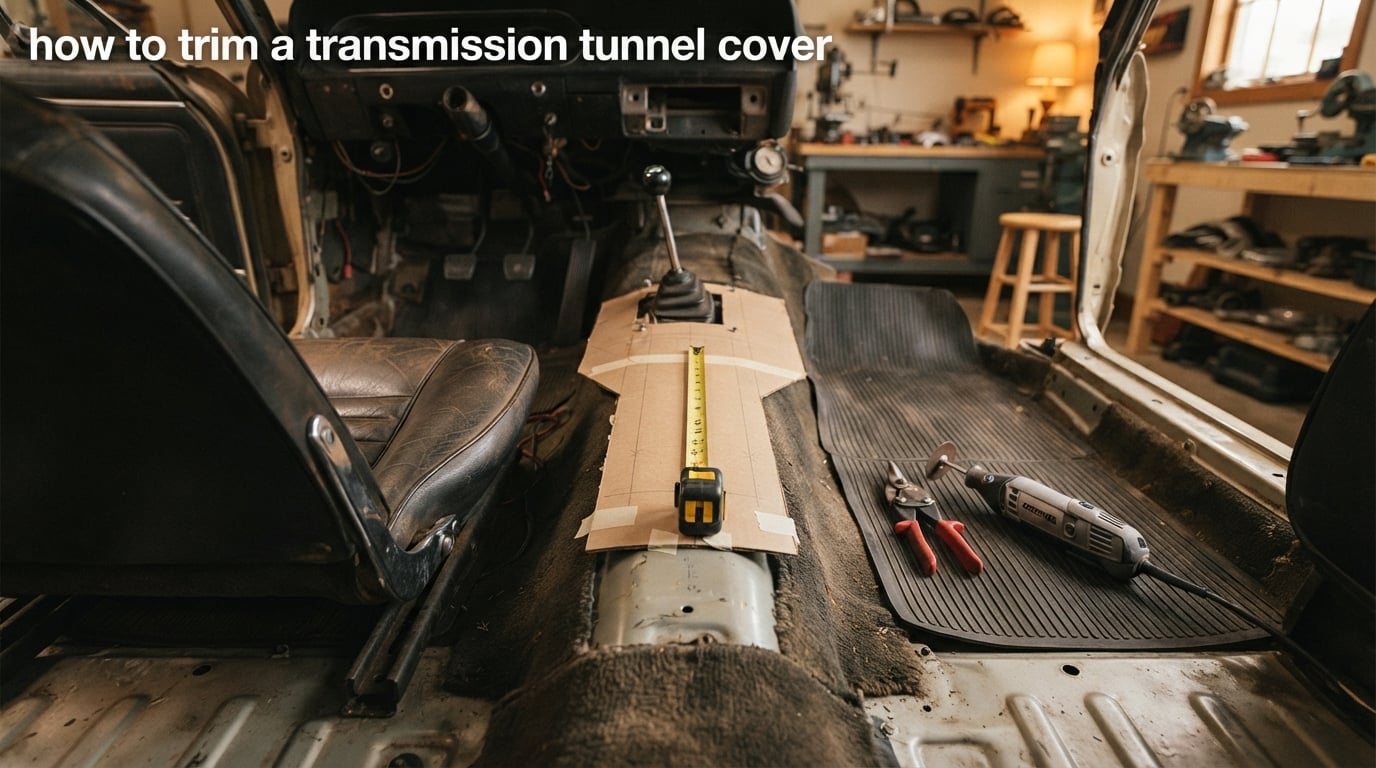
A transmission tunnel cover is the moulded carpet, vinyl, or trimmed panel that spans the raised centre tunnel between the front seats, covering the gear stick aperture and the handbrake area. It is trimmed to size when the tunnel has to change shape, usually for a gearbox swap, or to replace a worn or damaged original.
If you have ever looked down at a gear lever that leans too far back, or a hole in your carpet that will not line up with a new shifter, then learning how to trim a transmission tunnel cover will save you a lot of guesswork. Most people meet this job for one of four reasons.
- You have fitted a different or larger gearbox and the existing opening is now the wrong size or in the wrong place.
- You are converting an automatic tunnel to accept a manual gearbox and the factory cover no longer lines up.
- Your original cover is worn through, torn around the handbrake, or chewed by mice, and you are replacing it.
- You have bought a universal or reproduction cover and it needs trimming to suit your tunnel.
Whichever of those describes you, the job follows the same order every time: measure, template, mark, cut, dress, seal, refit. The single most important habit is making a paper or card template before you touch anything with a blade. Every source we studied, from specialist trimmers to project-car forums, marks out before cutting. Almost none of them use a template, which is why so many covers end up slightly wrong.
Below is the full method, the tools, the material-by-material technique, and the mistakes that cost people a second attempt.
Table of Contents
- What You Need Before You Start
- Trim the Cover or Cut the Tunnel?
- How to Trim a Transmission Tunnel Cover, Step by Step
- 1. Remove the console, scuff plates and trim screws
- 2. Remove the seats
- 3. Lift the cover and inspect the tunnel
- 4. Measure the opening you need
- 5. Make a card template
- 6. Transfer the template to the cover
- 7. Cut the opening
- 8. Dress and deburr the edge
- 9. Test fit, then seal bare metal
- 10. Refit and refasten
- Trimming Technique by Cover Material
- Clearance Checklist Before You Refit
- Common Mistakes to Avoid
- Safety Notes
- Time, Difficulty and Model Notes
- Frequently Asked Questions
- What is a transmission tunnel cover?
- Do I trim the tunnel cover or cut the floor pan?
- Do I need to remove the seats to trim a transmission tunnel cover?
- What tool should I use to cut a transmission tunnel cover?
- How do I make a template before cutting?
- How do I heat form a vinyl or carpet tunnel cover?
- What should I do about rust where I cut the tunnel?
- How do I stop a trimmed cover rattling after fitting?
- How much does a transmission tunnel cover trim cost to have done?
- Is a transmission the most expensive part of a car to replace?
- Conclusion
What You Need Before You Start
You do not need a workshop full of equipment. Most of this job is done with a handful of hand tools plus one power tool.
Core tools:
- Trim screwdrivers and a trim removal tool for the console, scuff plates and tunnel edge screws.
- Tape measure and a straightedge for measuring from the tunnel crease to the centre of the gear stick.
- Cardboard or heavy paper and a marker pen to make your template.
- Chalk, a grease pencil or a fine marker to transfer the cut line onto the cover.
- Sharp snips, shears or a craft knife for carpet and vinyl.
- Hammer and dolly to dress and flatten the cut edge of a steel or fibreglass panel.
- Files, a deburring tool and abrasive paper to remove sharp edges.
- Eye protection and gloves, non-negotiable on any grinding or cutting step.
One power tool does most of the heavy work. A rotary tool with a thin cutting disc is the most controllable for an aperture this shape. A reciprocating saw with a fine blade is faster and suits steel, but it vibrates and it will wander if you rush. An angle grinder is the fastest and the least forgiving.
Optional but useful: a nibbler for tight internal corners, tin snips for sheet metal, a step drill for the shifter hole, a heat gun for softening carpet and vinyl backing, a pop rivet gun, and a scissor jack with two blocks of timber for lifting the tunnel without pulling it out.
If this is a one-off job, hiring a rotary tool or a nibbler beats buying one. A specialist trimmings supplier will also tell you honestly when a job is beyond a competent DIYer, which is worth having on the record before you start.
Trim the Cover or Cut the Tunnel?
This is the decision that most online advice gets wrong, because most guides describe a different job. Trimming a cover is trimming a cover. Cutting the floor pan is a fabrication job. They are not interchangeable.
| Approach | Best when | Reversible | Main risk |
|---|---|---|---|
| Trim the cover only | The tunnel is the right shape and only the opening or the material is wrong | Yes, the original cover can go back | A gap at the scuff plate if you trim too tight |
| Cut the tunnel, fit a new cover | A larger gearbox sits higher or further forward, or an automatic tunnel is being converted to manual | No, the floor pan is cut | Exposed metal will rust, and you must dress the edge |
| Build a removable cover | Wiring or fuel lines run through the tunnel, or the floor may need repair later | Yes | More fixings to get right so it does not rattle |
Trim the cover when the tunnel itself is sound. If the top of the tunnel is in the right place and only the aperture is wrong, cutting a steel panel is a repair you did not need. Cut the tunnel only when the gearbox position has genuinely changed.
If you do cut the tunnel, dress the edge while it is still raw. A hammer and dolly flattens the pressed flange back into shape, and that flange is what stops the cover flexing and rattling afterwards. Skipping this step is why so many fitted covers buzz on every bump.
Build it removable if access matters. One owner on the Factory Five Racing Forum fastens a tunnel cover to the sides of the tunnel with black trim screws specifically so he can still reach wiring running through the tunnel. The same logic applies to a swap you might revisit.
How to Trim a Transmission Tunnel Cover, Step by Step
1. Remove the console, scuff plates and trim screws
Take the centre console off first, working from the front so you do not stretch the wiring behind the gear lever. Pull the scuff plates and any kick panel trim that clips over the tunnel edge. Bag the screws and note which hole each one came from, because trim screws of different lengths will not interchange.
2. Remove the seats
You usually need at least one seat out. On cars with fixed-back bucket seats, the rear section of the tunnel cannot be lifted between the seats at all. A Caterham and Lotus Seven Club thread describes exactly this, noting that Tillet seats must come out to lift the rear section of the tunnel between them. Bolts hidden under the seat base are the reason most people think the seat will not move; prise the plastic cap off with a flat blade before you reach for a spanner.
3. Lift the cover and inspect the tunnel
Free the cover from its edge fixings and peel it up slowly. Do not yank it, because the pile tears at the bolt holes long before the fixings release. Vacuum out the tunnel and look for the obvious things: surface rust, a mouse nest, damp carpet underlay, and a spot weld or two that will need cutting if the cover has been bonded down.
4. Measure the opening you need
Measure from the crease along the top of the tunnel to the centre of the gear lever, and record the width of the shifter throw. The crease is your fixed reference and it does not move, so it is far more reliable than measuring from the seat rails. Write the numbers down; you will refer to them when you mark the cover.
5. Make a card template
Cut a piece of cardboard roughly the size of the opening and mark the centre point from your measurement. Draw the aperture shape, including the space the shifter needs plus a few millimetres all round. Cut the template out with a craft knife, working slowly and rotating the blade rather than forcing it in a curve.
6. Transfer the template to the cover
Lay the cover face down on a flat surface, lay the template on top, and trace around it with a chalk line or grease pencil. Never mark with a ballpoint pen straight onto pile carpet, because the tip drags the fibres and the line stays visible after fitting. The chalk line is the reason cutting from the centre outward works better than cutting from the outside edge inward.
7. Cut the opening
Cut along the line with the tool that suits the material, and start from the traced edge nearest the tunnel crease. Follow the curve in small increments and let the tool do the work. For a bonded steel or fibreglass cover, cut through the metal with a thin disc and stay well clear of the fuel line or any loom that runs through the tunnel.
8. Dress and deburr the edge
This is the step that separates a cover that looks factory from one that looks homemade. Take a file across the raw edge, then a hammer and dolly to flatten the flange, working from the outside of the curve inward so you do not stretch the material. Finish with abrasive paper until nothing catches a fingertip.
9. Test fit, then seal bare metal
Drop the cover back over the tunnel and check the aperture against the gear lever. If the opening is tight, take it off and take another 2 to 3 mm rather than pushing and stretching the cover. Once you are happy, lift it again and treat any bare metal with rust converter or a zinc sealer, then an epoxy primer if the metal is left visible. Bare metal left untreated will be brown in a year.
10. Refit and refasten
Apply a bead of seam sealer or automotive silicone along the flange and lower the cover into place without smearing it. Fix it with trim screws where the cover is removable, or eight to ten evenly spaced 3.5 mm pop rivets where it is permanent. Work from the centre outward so tension stays even. Refit the shifter boot and make sure it grips the lever and the tunnel, then refit the console and seats.
Trimming Technique by Cover Material
| Material | Tool | Cut direction | Heat forming |
|---|---|---|---|
| Moulded carpet | Sharp snips or shears | Along the pile, from the crease outward | Helps a lot, 20 to 30 minutes in sun or a heat gun to recover shape |
| Heavy-duty vinyl | Craft knife, then nibbler for tight corners | Score first, cut second | Yes, softens the backing before the final trim |
| Leather or vinyl top | Knife with a fresh blade, shears for the bulk | Cut an X at bolt holes, never a round hole | No, but warm it slightly for a tight curve |
| Fibreglass | Fine reciprocating saw blade | Steady line, support both sides | No |
| Steel patch panel | Rotary tool, then hammer and dolly | Short cuts, let the disc cool | No |
Two habits pay off here. Cut an X rather than a circle at every bolt hole, because a round hole in pile carpet or leather turns into a tear the moment the fastener is tightened. And leave a little excess until the material has settled, because carpet and vinyl shrink as they cool.
Clearance Checklist Before You Refit
Run through this with the cover sitting in place, engine off, and the pedal box free. It takes two minutes and it is the difference between a finished job and a serious fault.
- Accelerator moves through its full travel with nothing touching it. This is the single most dangerous item on the list.
- Brake returns fully to the stop without the cover bunching under the pedal box.
- Handbrake lever moves freely and is not sitting on excess material.
- Gear lever throw clears the aperture in all gears, including reverse.
- Console and shifter boot sit square, with no daylight at the base of the boot.
- Seat rails and seat bolts clamp down on solid material with no pull-through.
- Scuff plate area still has material to grip, not a trimmed-away gap.
A specialist trimmings guide we studied warned that generic cut-to-fit material can bunch around the tunnel and catch the accelerator or brake, and called it a safety issue. Treat any material near the pedals as a fault until you have proved otherwise.
Common Mistakes to Avoid
- Cutting before you have a template. The template costs five minutes and a sheet of card. Cutting twice costs an afternoon and a new cover.
- Measuring from the seat rails instead of the tunnel crease. Seat positions move, the crease does not.
- Leaving no edge lip. Trim too close to the opening and the cover has nothing to grip, so it works loose and rattles.
- Trimming too early. Material that has not settled will leave a permanent gap at the scuff plate once it cools.
- Cutting the tunnel when you only needed the cover trimmed. Check which one is actually the wrong shape before a blade touches steel.
- Skipping rust protection. A sealed edge that was never primed will weep down the inside of the tunnel.
- Forgetting the bonding or sealant step. Fixings alone let noise and fumes straight into the cabin.
One mechanic on the r/MechanicAdvice forum described cutting repair panels from a floor repair kit to fit the opening, which is the template method in practice. Others on r/projectcar report that the tunnel is not the hard part of a conversion at all, because it is essentially a matter of cutting further up on top of the tunnel once everything is measured.
Safety Notes
- Wear eye protection for every cutting, drilling and grinding step. Offcuts from carpet backing and vinyl skin are small, sharp and fast.
- Wear hearing protection when using a rotary tool or a saw inside a closed cabin.
- Before any grinding or spark-producing work, move the fuel line, wiring looms and any plastic fuel tank out of the path of the disc.
- Support the tunnel before you prise it. A scissor jack and two blocks of timber gives you the clearance to work without pulling the whole tunnel out of the car, but never work under a car held only by a scissor jack.
- Use axle stands or proper ramps for anything involving wheels. A tunnel job should never end with a car on a jack.
- Treat every cut edge as sharp until it has been filed and deburred, and keep gloves on when you reach into the footwell.
- Re-check pedal clearance with the engine running and someone else operating the pedals, before you drive it.
Time, Difficulty and Model Notes
A cover trim on an intact tunnel takes a relaxed weekend, and most of that is the seats and the console. Allow about an hour to remove and refit the seats, an hour to template and mark, an hour to cut, and an hour to dress, seal and refit. Add a full day, and a good deal of care, if the tunnel itself is being cut for a bigger gearbox.
In difficulty this is a two out of five job for someone comfortable with trim removal and a rotary tool, and a four out of five job the first time you have dressed a steel flange.
- Ford and Chevrolet or GMC bulkhead-style covers often sit over a raised hump, so the aperture is not a flat plane. Take the measurement at three points, not one.
- GM four-wheel-drive high-hump covers are a trim-to-fit part, so expect to shorten rather than stretch.
- Mopar and Jeep tunnels vary widely across model years, so confirm the tunnel shape before ordering a pattern.
- Datsun and Nissan conversions are common, and a scissor jack plus timber blocks is a well-tried way to gain clearance without pulling the tunnel.
- Land Rover and Caterham or Lotus interiors use bonded or glued trim, so assume a cover has to come away in pieces and budget for replacement material.
Frequently Asked Questions
What is a transmission tunnel cover?
A transmission tunnel cover is the moulded carpet, vinyl, or trimmed panel that spans the raised centre tunnel between the front seats. It covers the gear stick aperture and the handbrake area, and seals heat and noise out of the cabin. It gets trimmed when the tunnel has to change shape, usually for a gearbox swap.
Do I trim the tunnel cover or cut the floor pan?
Trim the cover when the tunnel itself is the right shape and only the aperture or the material is wrong, because that job is reversible. Cut the floor pan only when a larger gearbox sits higher or further forward, or an automatic tunnel is being converted to manual. If you cut the pan, you must dress the edge and treat the bare metal against rust.
Do I need to remove the seats to trim a transmission tunnel cover?
Usually yes, or at least one of them. Fixed-back bucket seats have to come out entirely, because the rear section of the tunnel cannot be lifted out between them. Watch for seat bolts hidden under a plastic cap in the seat base, which is the usual reason people believe the seat is fixed.
What tool should I use to cut a transmission tunnel cover?
For carpet and vinyl, sharp snips or shears are cleanest. For steel and fibreglass, a rotary tool with a thin disc gives the most control, and a fine reciprocating saw is faster if you work in short bursts. An angle grinder is the quickest and least forgiving, so save it for edges you will dress afterwards.
How do I make a template before cutting?
Cut a piece of cardboard to the size of the opening, mark the gear stick centre from your measurement taken off the tunnel crease, and draw the shape with clearance around the lever. Cut the template with a craft knife, rotating the blade through curves. Lay it on the cover and trace with chalk or a grease pencil, never a pen on pile.
How do I heat form a vinyl or carpet tunnel cover?
Warm the material before its final trim using a heat gun held well back, or leave it in the sun for 20 to 30 minutes, so the backing softens and the cover recovers its factory moulded shape. Work from the centre of the tunnel outward and let it cool naturally. Heat applied to the backing first is safer than heat applied to the face.
What should I do about rust where I cut the tunnel?
Treat exposed metal before the cover goes back on. Clean the cut edge, apply a rust converter or zinc sealer, then an epoxy primer if the metal stays visible, and finish with a bead of seam sealer where the cover meets the flange. A sealed edge that was never primed will weep rust down the inside of the tunnel.
How do I stop a trimmed cover rattling after fitting?
Rattle almost always means the edge is not supported or is not sealed. Dress the flange with a hammer and dolly so the cover has a flat surface to sit on, leave a small edge lip for the fixings to pull against, and run a bead of seam sealer along the flange. Use eight to ten evenly spaced 3.5 mm pop rivets, working from the centre outward.
How much does a transmission tunnel cover trim cost to have done?
Costs vary with the material, the vehicle and how much of the tunnel metal is involved, so the sensible approach is to get a quote for your specific car before booking. A cover trim on an intact tunnel is straightforward trim work, while cutting a floor pan for a larger gearbox adds fabrication, welding and finishing time. Always ask whether the cover they supply is removable.
Is a transmission the most expensive part of a car to replace?
It is often close to it, which is exactly why so many owners trim tunnel covers rather than go near the gearbox itself. Most of these trim jobs happen after a swap, when the tunnel opening no longer matches the new lever position. The cover and the trim labour are a small part of the project compared with the transmission work.
Conclusion
To trim a transmission tunnel cover well, the order matters more than the tools. Remove the console and at least one seat, lift the cover, measure from the tunnel crease to the centre of the gear stick, and cut a card template before anything else. Mark with chalk, cut with the tool that suits the material, dress the edge with a hammer and dolly, treat bare metal, then seal and refit with trim screws or 3.5 mm pop rivets.
Take your time on the template and the clearance check around the pedals, and the rest is straightforward trimming work. Updated for 2026, this is the method we would use in our own shop.