
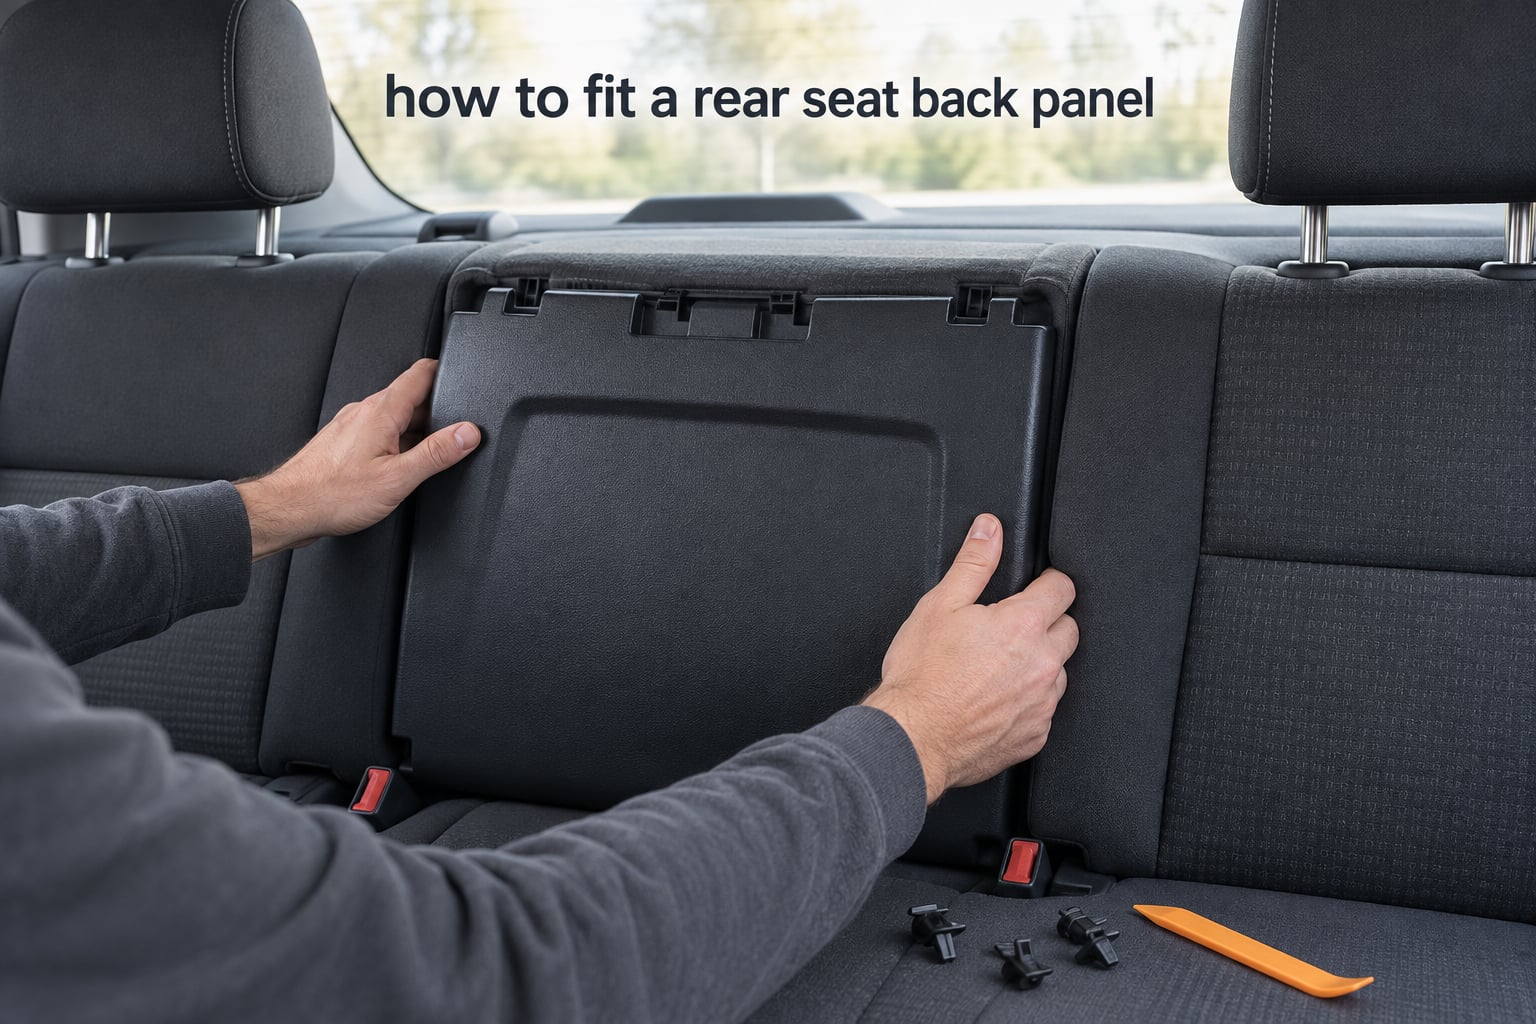
A rear seat back panel is held on one of four ways: push clips, hog rings, screws or push-pin rivets, or the two headrest posts. Find out which one yours uses before you touch a tool, then remove the panel top-down, refit it headrest posts first, and press until every clip clicks home. The whole job is 15 to 45 minutes and needs no specialist equipment.
Most guides jump straight to prying at the panel with a screwdriver. That is exactly how the tabs snap in the first place, and it is why a second visit is needed. We see the same failure repeatedly: a panel that looked fine until a child seat was levered into place, or a boot lid slammed shut, snapped the corner clip and left the panel hanging by one side.
This guide covers the full loop, removal through to a verified refit, and it is written for 2026 vehicles where trim clips are thinner and more brittle than they used to be. If your panel is already off, jump to the refit section. If it rattles, go to the rattle section first, because a rattle almost always means a clip is not engaged rather than a missing part.
Table of Contents
- What a rear seat back panel is and why it comes loose
- Short on time? The quick version
- How to fit a rear seat back panel: work out what is holding it on
- Tools and materials for fitting a rear seat back panel
- How to remove a rear seat back panel without breaking the clips
- How to refit a rear seat back panel
- Getting access: folding or removing the rear seat back
- Fixing broken clip tabs on a rear seat back panel
- Ordering a replacement rear seat back panel that actually fits
- Safety and clearance checks after fitting
- Getting rid of the rattle after fitting
- Final checks before you call the job done
- Frequently Asked Questions
- Can I drive with a broken seat back panel?
- What tool removes interior trim clips?
- How many clips does a rear seat back panel have?
- How do I remove plastic trim on my car without breaking the clips?
- Why does my car sound like plastic rattling?
- How can I remove rattle noises from my car interior?
- Is it hard to fit a rear seat back panel?
- What is a rear seat delete kit?
- Can I remove the rear seats from my car?
- How do I put the seat back after refitting the panel?
- Conclusion
What a rear seat back panel is and why it comes loose
You will see the same part called a rear seat back panel, a seat back panel, or simply a back panel. They are the same thing: the moulded plastic or vinyl-covered trim panel that covers the back of a rear seat backrest.
It does three jobs. It hides the seat frame, the wiring and the foam, it stops luggage and child seats from being levered directly against the structure, and it keeps rear passengers from contacting hard parts behind the seat.
Panels come loose for predictable reasons. A child seat is the single biggest cause, because the LATCH bars and the seat base wedge upward into the back of the seat. Dog claws, luggage, a sliding seat back and general trim work account for most of the rest.
A loose panel is not a cosmetic problem. It rattles at low speed over rough roads, it exposes broken clip tabs within reach of a rear passenger, and in a hard stop a panel that is only held on one corner can come off entirely.
Short on time? The quick version
If you just want the panel back on and quiet, this is the whole procedure in seven lines.
- Identify the retention type: clips, hog rings, screws, or headrest posts.
- Slide the front seats fully forward, then fold or remove the rear seat back.
- Remove the headrests if the panel slots around their posts.
- Release the panel top-down with a plastic trim tool, working out to the corners.
- Check every clip tab and hole for cracks before you refit anything.
- Line the headrest posts up with the panel slots, then push the top, sides and bottom in turn.
- Press-test each corner, refit the headrests, and road test for rattle.
If the panel will not hold, skip to fixing broken clip tabs before you order anything new.
How to fit a rear seat back panel: work out what is holding it on
This is the step every other guide skips, and it is the one that decides whether your job takes ten minutes or an afternoon. Get behind the seat and look before you pull.
On a Tesla Model Y, owners on r/TeslaModelY report that the panel is held on by the two headrest posts, with the metal rods in the headrest doing the work. The fix is to lift it back into place with no tools at all.
On a Toyota 4Runner, owners on toyota-4runner.org describe a plastic cover that has to be popped open first, with four tabs visible underneath. The panel itself is then held by plastic clips.
On older Mercedes models with vinyl-covered panels, benzworld.org threads show owners fitting the panels themselves and then asking for the trick to refit them. These panels are closer to trim than to a service part, and they are not treated as throwaway plastic.
Use the table below to identify your setup.
| Retention type | What it looks like | How to release it | How to refit it |
|---|---|---|---|
| Push clips / trim clips | Plastic tabs in a row along the top edge, sides and base; matching holes in the backrest frame | Insert a plastic trim tool under the tab lip and lift gently, working along the edge | Line each tab with its hole and press until the click, working top then sides then base |
| Hog rings | Staple-shaped steel rings pinching the upholstery to the seat frame, mostly on re-trimmed or vinyl-covered panels | Cut the ring with ring cutters, or open it with hog ring pliers | Hook a fresh ring and close it with hog ring pliers, pulling the panel skin square with no tension across the grain |
| Screws or push-pin rivets | Torx heads or headed pins around the perimeter, sometimes under small trim caps | Remove the Torx screws, or pull the push-pin rivets straight out with pliers | Push the rivets until they expand behind the hole, then refit the screws snug, not strained |
| Headrest posts | Two rods pass through slots in the panel, which then simply pushes onto the backrest | Nothing to release. The panel just pulls straight off the rods | Slide the panel over the rods and press it back onto the backrest until it sits flush |
A word on hog rings, because they are misunderstood. A hog ring is a single open ring that pinches two layers together. A panel held by hog rings is held because the rings pull the upholstery onto the frame, not because of any clip. If you can see metal staples around the perimeter with a fabric or vinyl layer pinched under them, that is what you are dealing with.
Tools and materials for fitting a rear seat back panel
What to buy first
A plastic trim removal tool is the one essential purchase. A flat blade screwdriver is the tool that causes most broken tabs, so if you own nothing else, buy the plastic one.
Hog ring pliers only matter on a re-trimmed or vinyl-covered panel. Everything else on this list is a nice-to-have that saves time rather than making the job possible.
| Tool or material | What it is for | Essential or optional |
|---|---|---|
| Plastic trim removal tool | Releasing push clips without snapping the tab lip | Essential |
| Flat blade screwdriver | Only for popping trim caps, never for levering a clip tab | Optional |
| Pry bar | Splitting a gap at a tight corner, used with a cloth so it cannot mark the plastic | Optional |
| Torx set | Removing perimeter screws on rivet-fitted panels | Optional, vehicle dependent |
| Hog ring pliers | Opening and closing hog rings on a re-trimmed or vinyl panel | Essential on hog ring panels only |
| Ring cutters | Cutting old rings that will not open | Optional |
| Heat gun or hair dryer | Softening a stiff tab, or reshaping a heat-staked repair | Optional |
| Zip ties, long | The fastest permanent repair for a broken clip tab | Essential for repairs |
| Drill with a stop collar | Pilot holes for a fresh fastener or a heat-stake repair | Essential for repairs |
| Anti-rattle foam tape | Damping the panel face and closing the gap that causes a buzz | Recommended |
| Double-sided foam tape | Holding a panel that clips but cannot be replaced | Recommended |
| Work gloves | Grip on the backrest while you press the panel home | Recommended |
Passportforums.com owners drilling pilot holes for seat back protectors used a Rotabroach with a 3/16 inch drill bit and a stop collar, and reported the job as straightforward. That combination is exactly right for a panel repair: the stop collar stops the bit going through into the seat frame.
How to remove a rear seat back panel without breaking the clips
Work top-down and out to the corners. The top edge is held by gravity and the least pressure, so it gives first. The base edge is the tightest and the most likely place to snap a tab.
- Clear the cabin. Slide the front seats fully forward, then fold or remove the rear seat back so you can reach the panel from the boot or the cabin.
- Remove the headrests if the panel slots around their posts, so nothing is trapped behind the panel when it comes off.
- Start at a top corner. Slide the plastic trim tool under the tab lip, not under the panel edge. A few millimetres is enough.
- Work along the top edge releasing one tab at a time. Do not pull the panel away from the backrest while the tool is in the clip, as the tab carries the load and snaps.
- Move down the sides to the next tab, alternating sides so the panel does not twist in the frame.
- Free the base last using the tool in the remaining holes rather than levering. The base tabs often carry the panel weight when the backrest is folded.
- Disconnect anything attached before the panel clears the frame. A seat back switch or a lamp connector can be clipped to the reverse of the panel.
- Lay the panel face down on a clean cloth and inspect every tab and every hole. This is the moment to count broken tabs, because it decides whether you are refitting or repairing.
Caution: never insert the trim tool at the bottom edge of the panel. This is not folklore. Tesla service documentation for second-row seat back panels gives the same instruction, because the base edge is where the panel meets the seat cushion and the tool can slice the trim, mark the plastic or damage an adjacent clip.
Caution: do not use a flat blade screwdriver as a lever. On a GM truck forum, bucket seat owners describe the release technique for a stubborn panel as a firm smack inward on the panel followed by a downward pull and a wiggle, rather than levering with steel. The same threads warn that prying with a screwdriver is what shatters the clip tabs in the first place.
If the panel is a hog ring panel, the sequence changes: remove the handle and the headrest, then cut or open the rings. Pull the skin away from the frame slowly and evenly so the foam does not tear.
How to refit a rear seat back panel
Refitting is not the reverse of removal. The order is deliberate, and getting it wrong leaves you with a panel that looks fitted and rattles anyway.
- Check the frame and the panel. Confirm each clip hole in the backrest frame is open and each tab on the panel is intact and flexible. Clear any debris out of the holes.
- Offer up the headrest posts first if the panel has post slots. The posts locate the panel in one plane, so they stop you fighting the tabs on the rest of the perimeter.
- Align the top edge. Match each top tab to its hole by eye before you push anything. The panel should sit proud by a few millimetres at this point.
- Engage the top clips one at a time, hand pressure only, until you feel or hear each click. Do not squeeze the whole top edge at once, as that can load the middle tabs and snap them.
- Work down the sides to the mid and lower tabs, alternating left and right so the panel is pulled square rather than twisted.
- Seat the base last with the backrest upright if possible. Press the base clips until they click. If a base tab will not enter, stop and check the hole rather than forcing it.
- Confirm every clip is fully engaged. Tesla service documentation treats this as a separate verification step on install, not as part of the press. Run a fingernail around each gap; nothing should feel springy.
- Refit the headrests, seat covers and any trim caps, then push the seat back into its upright position and check the seat belt and child seat anchor paths are clear.
If a clip will not click home, the tab is usually the wrong one for that hole, the hole is obstructed, or the panel is being pushed at an angle. Back it off and re-align rather than adding force.
Getting access: folding or removing the rear seat back
You cannot fit a rear seat back panel you cannot reach. The access route depends on your seat layout.
- 60/40 split bench: fold the 60 section forward and work from the boot, or remove the rear seat cushion entirely for full access from the cabin.
- 40/20/40 bench: fold the 20 centre section first, then either outer section, to reach the panel tabs at the top corners.
- Solid bench: usually has to be removed as a unit, so budget the extra time and keep all the bolts in labelled bags.
- Fixed backrest: the whole seat comes out. Take a photo before you start so the bolts go back where they came from.
- Headrest removal: releases vary. Some push a button, some use a pinhole release, some have a rotating cap or a clip under the upholstery, and on some vehicles the posts are simply drawn straight out of the headrest.
Do not obstruct the seat belt path or the child seat LATCH anchors while the back is folded or removed. A belt routed across a folded or removed seat will not restrain anyone, and the anchor bars are easy to cover with a loose panel.
A rear seat delete kit is a set of covers and hardware that closes off the empty space where a seat has been removed, so the area can be used for cargo and covered floor. Owners who delete a seat usually deal with an exposed back panel at the same time, which is why this comes up so often alongside panel questions.
Fixing broken clip tabs on a rear seat back panel
A broken tab is the most common reason people search for this job, and it does not automatically mean a new panel. Work up this list and stop when the panel holds.
Method 1: the zip tie
This is the fastest repair and the one experienced owners reach for first. On an Audi B7 A4 seat back repair, audizine.com posters describe clips already broken along the bottom edge and the fix being a long zip tie, ideally in a matching colour, plus a drill. Feed the zip tie through the tab and the nearest solid hole, pull it tight, trim the tail, and snip the flush end so nothing sharp is left facing the cabin.
Method 2: drill, then heat-stake
Drill a small pilot hole through the intact part of the tab using a stop collar so you cannot drill into the seat frame, feed a short zip tie or a plastic repair rivet through, then use a heat gun on a low setting to soften and reform the tab around the fastener. Work in short bursts so you do not warp the whole panel.
Method 3: the shim
A small piece of plastic card, or a length of split plastic conduit, slipped between the tab and the frame hole restores the lost tension. It is a repair you cannot see once the panel is up, which is exactly the point.
Method 4: foam tape
Double-sided foam tape along the panel face gives you a holding force with no mechanical fix at all. Use it when the holes in the backrest frame are already stripped and will not accept a clip, and keep the tape off any airbag seam.
Stop and replace the panel when the break runs across the mounting rail, when the plastic around the hole is white and stress-cracked, or when you need more than two repairs in the same area. At that point the part is structural and a new panel is the cheaper job.
Ordering a replacement rear seat back panel that actually fits
Replacement panels rarely arrive correct the first time. The failures are predictable, and all of them are avoidable at the order stage.
- Start with the part number, not the year. A model year covers several panel revisions, and the plastic changes shape between them.
- Match colour and grain. Grain direction is what makes a panel look wrong, and directional grain that runs against the neighbouring trim is immediately obvious once it is fitted.
- Confirm driver side versus passenger side. The two sides are not interchangeable on a bench, and the tab layout differs on split sections.
- Match the split configuration. A 60/40 bench needs two matching sections, and a 40/20/40 needs three. Ordering the wrong split is the most common mismatch.
- Check against the old panel before you order: clip hole count, headrest post slot spacing, and whether the panel has a carpeting flap or seat bib attached.
- Ask a trimmings supplier to confirm the fit against your vehicle’s trim level, because the same car can carry a basic and a premium back panel with different fixing points.
While you are ordering, it is worth considering a matching set. A panel plus a carpeting flap or seat bib plus headrest covers makes the back of the seat look like one finished job rather than three separate repairs.
Safety and clearance checks after fitting
A panel that clicks in is not automatically a safe panel. Run through these checks before the car goes back into service.
- Side airbag / SRS seam: if the backrest carries a side impact airbag seam, the panel must sit below and behind it with nothing pinched. A trapped seam can stop the bag deploying.
- Seat belt path: the belt must run free through its guides with the backrest upright, and the latch must fully click into the buckle.
- Headrest posts: confirm the headrest drops back in and locks, and that the post slots are not carrying load from a raised headrest.
- LATCH and ISOFIX anchors: both bars must be fully exposed and reachable with the seat back in place.
- Wiring: no harness pinched between the panel and the frame, and every connector re-seated with its lock closed.
- Edges: run a finger along the whole perimeter. No broken tab, cut zip tie tail or heat-warped plastic may face a passenger.
If you fitted trim, covers or a seat back protector over a side airbag seam, confirm the manufacturer states the product is side airbag compatible. If it does not, that piece comes off.
Getting rid of the rattle after fitting
A plastic rattle in the rear of a car is almost always the back panel, and it is almost always a clip that is not fully engaged rather than a broken part. Work through this in order.
- Push-test every clip in turn. Press the panel firmly at each tab and hold for a second, then release. If the panel moves at all, the clip is not home.
- Check the gap all the way round with a feeler or a thin card. An uneven gap at one corner tells you which clip is short.
- Add anti-rattle foam tape to the panel face where it touches the backrest foam, cutting around any airbag seam and any switch or connector.
- Close the base gap with a foam strip if the buzz comes from the bottom edge, which is the most common rattle location.
- Road test over the road surface that produced the noise. If it is still there, the noise is elsewhere and the panel is not your culprit.
| Symptom | Likely cause | Fix |
|---|---|---|
| Buzz over bumps, one corner only | One clip tab not engaged | Press that tab home until it clicks, then re-check with a fingernail |
| Rattle at low speed on rough roads | Panel face chafing against the backrest foam | Anti-rattle foam tape on the contact area |
| Noise from the bottom edge | Base clips short or the panel sits proud at the base | Refit the base tabs, then shim or tape the gap |
| Intermittent rattle that comes and goes | Panel flexing on one broken tab | Zip tie the broken tab, then press-test again |
| Rattle continues after all of the above | Noise is not the panel | Check the seat back hinge, headrest posts and trim caps above the backrest |
One more diagnostic worth knowing: if the noise disappears when you press the panel during a road test, it is the panel. If it does not change, keep looking.
Final checks before you call the job done
- Every clip is fully engaged and the panel is flush all the way round.
- No broken tab, cut zip tie tail or sharp edge is exposed to the cabin.
- The seat belt retracts and latches normally, and the LATCH bars are clear.
- No airbag seam is pinched, stretched or covered by an incompatible part.
- Headrests drop in and lock, and the seat back latches upright.
- There is no rattle over the road surface that used to produce it.
If all six pass, the panel is fitted correctly. Anything that fails is a clip, a repair or a clearance problem, and it is cheaper to sort now than after a full load of luggage goes in the boot.
Frequently Asked Questions
Can I drive with a broken seat back panel?
You can, but a panel held on by one corner can come off completely in a hard stop, and broken tab edges sit within reach of a rear passenger. Fit it properly, or tape it securely in the short term and do not carry loose cargo against it.
What tool removes interior trim clips?
A plastic trim removal tool is the correct choice. It lifts the tab lip without the leverage that snaps clips, and cheap multi-size packs cover most panel types. A flat blade screwdriver is for popping trim caps only, not for levering a clip tab.
How many clips does a rear seat back panel have?
It depends on the vehicle. A common count is one tab every 100 to 150 mm along the top edge, a few down each side, and two or three across the base, giving eight to twelve in total. A 60/40 bench has two panels, and a 40/20/40 has three.
How do I remove plastic trim on my car without breaking the clips?
Use a plastic trim tool, work from the top down, and lift each tab rather than pulling the panel away while the tool is engaged. Never insert the tool at the bottom edge of a seat back panel, and release tabs one at a time so no single tab carries the load.
Why does my car sound like plastic rattling?
A loose or partially engaged trim panel is the most common cause in the rear cabin. Press the panel firmly while someone drives on the road surface that produces the noise. If pressing it kills the noise, the panel is the source and the fix is a clip, a shim or anti-rattle tape.
How can I remove rattle noises from my car interior?
Work from the most accessible trim outwards. Push-test each clip, check the gap with a thin card, add anti-rattle foam tape at the contact point, and shim any clip that will not hold. If the noise survives all of that, move to the seat hinges, headrest posts and upper trim caps.
Is it hard to fit a rear seat back panel?
On a clip-fitted panel it is a moderate job of 15 to 30 minutes, and the difficulty is patience rather than strength. Hog ring panels and panels on a fixed backrest take longer because the seat comes out and the rings have to be replaced correctly.
What is a rear seat delete kit?
It is a set of covers and hardware that closes off the space where a rear seat has been removed, so the area can be used for cargo with a flat covered floor. Removing a seat often leaves the back panel exposed, so a delete kit job and a panel job usually overlap.
Can I remove the rear seats from my car?
Yes, on most vehicles, and it is straightforward. Fold or lift the backrest, or unbolt it if it is fixed, release the seat cushion bolts, and lift the assembly out. Keep the bolts bagged and labelled, and make sure the belt path and child seat anchors are not obstructed afterwards.
How do I put the seat back after refitting the panel?
Refit the headrests, then return the backrest to its upright position, guide the seat back latch into its striker, and pull the release handle to confirm it holds. Fold the backrest down again, check the panel is still seated at every tab, then stand the seat up for the final time.
Conclusion
Knowing how to fit a rear seat back panel comes down to one habit: identify how the panel is held on before you touch it. Push clips, hog rings, screws or push-pin rivets, and the headrest posts each need a different approach, and guessing is how tabs break.
From there the loop is straightforward. Remove the panel top-down with a plastic trim tool and never at the bottom edge, inspect every tab, repair what is broken with a zip tie or a shim before ordering anything, then refit headrest posts first and work top, sides, base until each clip clicks home.
Finish by checking the airbag seam, belt path and LATCH anchors, press-test each corner, and road test for rattle. If the panel still will not hold, or the job runs past a broken mounting rail, order a replacement matched on part number, grain, side and split configuration, and a trimmings supplier can confirm the fit before it ships to you.