
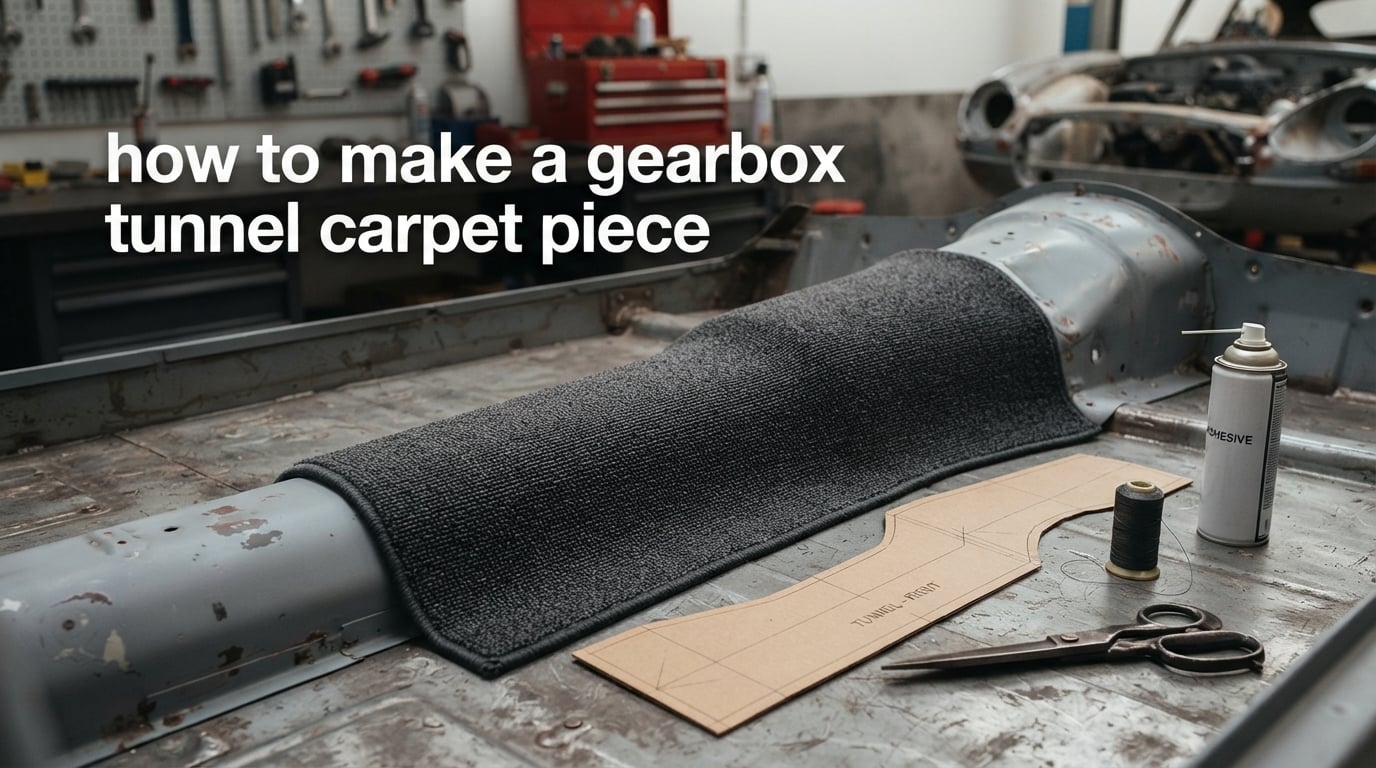
If you have never done trim work before, the honest answer is that the tunnel is the part most people hand to a professional. It is the highest ridge of metal in the front floor, it takes the most heat off the gearbox and exhaust, and any flat carpet you lay over it will wrinkle, lift or wear through unless it has been shaped properly. That is the whole reason a gearbox tunnel carpet piece exists, and the reason you make one rather than simply rolling carpet over the hump.
Everything below is the workshop method we use: template the tunnel, transfer that template onto non-backed automotive carpet, cut a T shape so a flat sheet can wrap the hump, then seam the raw edges on the reverse side before you ever fit it. I have updated this guide for October 2026 and kept it in plain workshop language, with the measurements and pitfalls that forum restorers actually ask about.
Table of Contents
- What a gearbox tunnel carpet piece actually is
- Quick answer – the short version
- Tools and materials you need
- Is the tunnel a separate piece on your car?
- Step 1 – Strip the interior and photograph everything
- Step 2 – Make a full-size template of the tunnel
- Step 3 – Transfer the template onto the carpet
- Step 4 – Cut the T shape
- Step 5 – Seam every cut edge on the reverse side
- Step 6 – Fit the piece starting at the peak
- Step 7 – Fasten the tunnel piece down
- Step 8 – Cut the apertures and do the final trim
- Heat shaping the tunnel instead of sewing
- Fixing a tunnel that sits too loose
- Troubleshooting: symptom, cause and fix
- Make it yourself, buy a moulded kit, or use a trimmer
- What else you can use instead of carpet
- Stop rust and noise before the piece goes down
- Repairing a torn original instead of replacing it
- Frequently Asked Questions
- What is a transmission tunnel?
- Do I need a tunnel piece separate from the main carpet?
- How do I make my own car carpet for a tunnel?
- What glue is used for automotive carpet?
- Is there a moldable carpet available for cars?
- What can I use instead of carpet in my car?
- How do I stop the tunnel carpet from moving or sitting too loose?
- Conclusion
What a gearbox tunnel carpet piece actually is
A transmission tunnel, also called a gearbox tunnel or transmission hump, is the raised ridge of pressed steel running down the centre of a car’s front floor, covering the gearbox, driveshaft and exhaust. A gearbox tunnel carpet piece is the shaped section of automotive carpet that covers that ridge, made either as part of a one-piece moulded front section or as a separate sewn part.
That distinction matters more than it sounds. If your car was built with a one-piece front carpet, you cannot sensibly bolt a separate tunnel piece into it, and the job is a heat-moulding exercise rather than a sewing exercise. Before you cut anything, work out which car you are dealing with.
Because the tunnel is the highest point of the floor, it is also where flat carpet fails first. Wrinkles start there, dust collects there, and your heel wears the pile flat there faster than anywhere else in the cabin. Getting this one piece right is what separates a factory-looking interior from an obviously DIY one.
Quick answer – the short version
If you want the procedure in five lines before the detail, here it is:
- Remove the old tunnel section and use it, or the bare floor pan, to make a full-size cardboard template of the hump.
- Lay the template on non-backed automotive carpet, weight it down, and mark around the whole outline plus a 12 mm seam allowance.
- Cut a long curve down the length of the tunnel hump, then a single perpendicular cut from that curve to the top edge of the carpet. Together these form the T shape cut.
- Fold the flat carpet up over the hump along the T and sew every raw edge on the reverse side with a heavy thread or a sewing machine.
- Fit the shaped piece starting at the peak of the hump and working outwards, then fasten it with high-temperature contact adhesive, staples and tacking where required.
The rest of this article explains why each of those steps exists and what goes wrong when you skip it.
Tools and materials you need
You do not need industrial moulding equipment, but you do need a proper cutting edge and a way to hold a curve. Most of this list is cheap and reusable across other trim jobs.
| Item | What it is for | Spec that matters |
|---|---|---|
| Non-backed automotive carpet | The material the tunnel piece is cut from | Unbacked, so it can be folded and sewn on the reverse side; supplied on a roll by the metre |
| Cardboard or thick paper | Full-size tunnel template | Two or three sheets taped together, not a single flimsy sheet |
| Marker or chalk | Marking the template and the pile direction | Anything that shows on the pile and comes off later |
| Heavy-duty shears and a utility knife | Cutting the outline and the T shape cut | A very sharp blade, snapped regularly, with plenty of spare blades |
| Needle and heavy thread, or a sewing machine | Reverse-side seaming of every cut edge | Polyester or bonded nylon thread, roughly 3 mm stitch length |
| Awl or punch pliers | Marking fixing points and pilot holes | Fine point, for piercing carpet and underlay at staples |
| High-temperature contact adhesive | Bonding carpet to the floor pan and tacking strip | Spray or brush, rated for a hot car, applied to both surfaces |
| Tacking strip, staples and a stapler | Mechanical fixing at sills and seams | 18 gauge staples, a long reach stapler for the tunnel sides |
| Heat gun | The no-sew alternative, and shaping tight radii | Adjustable, kept moving at all times |
| Underlay and jute padding | Filling a loose tunnel and killing noise | Thin, dense, and cut slightly undersized to the template |
One note on the adhesive. Standard craft glue will let go in a car that gets hot in the sun, so use a high-temperature contact adhesive rated for automotive interior work. That is the single most common cause of a tunnel piece lifting away within a year.
Is the tunnel a separate piece on your car?
Before you plan a weekend, confirm the shape of the job. A large share of modern and later classic cars use a one-piece moulded front section where the tunnel is formed in the same sheet as both footwells, while older cars and many separate-chassis classics were trimmed with a distinct tunnel part that clips, tacks or staples into place.
| Car type | How the tunnel is trimmed | What that means for you |
|---|---|---|
| Many 1960s to 1980s saloons and estates with a separate rear section | Tunnel is often its own piece, joining the front footwell carpet at a seam | The clean DIY job: template, cut, seam, fit |
| Open two-seaters and small classic roadsters | Tunnel frequently a separate short section between the seats | Easiest to pattern, easiest to replace |
| Cars with a one-piece moulded front section | Tunnel is moulded as part of the front floor carpet | Sewing a separate piece will not work; use heat shaping or a moulded kit |
| Heavily modified cars after a gearbox or console swap | Varies, because the floor may have been cut or plated | Template the floor pan itself, never trust the old part alone |
Forum restorers make this point constantly: floor pans changed within the same model range, so an original removed piece is a useful guide but not gospel. If the tunnel on your car was already cut short or reshaped by a previous owner, template the metal.
Step 1 – Strip the interior and photograph everything
Take the seats, console, sill plates, kick panels and trim off, and lay it all out in order. Photograph the carpet in place from several angles before the first cut, because you will want to know exactly how the original was tensioned and where it was fixed.
Mark every fixing point as you go with a paint pen on the body itself, not just on the trim. Lift the old carpet from one corner and peel it back gradually rather than yanking it, so you do not tear the sound deadening or scratch the floor pan underneath.
Inspect the floor pan while it is bare. Any surface rust gets treated now, not later, and we will come back to that.
Step 2 – Make a full-size template of the tunnel
This is the step people rush, and it is the step that decides whether the finished piece looks right.
Tape three or four sheets of cardboard together into something larger than the tunnel. Place it over the hump and hold or tape it down so it follows the metal exactly. Cut the outline with a knife, working around the ridge in short controlled passes rather than trying to follow the curve in one go.
Now cut the tunnel shape out of that cardboard, then take a second piece of cardboard and use the first as a guide to cut the flat piece with a 12 mm seam allowance added all the way around. That extra allowance is what you fold and sew, so it is not optional.
If the original carpet is still in reasonable condition, you can lay it face down on the cardboard and trace the seam lines instead, then add your allowance. If the original has shrunk or perished, discard it and work purely from the metal.
Two measurements worth taking and writing down: the tunnel base width where it meets the footwells, and the peak height from floor to top of the hump. Write them on the template. They take two minutes now and they are the numbers you will ask about later when something does not fit.
Step 3 – Transfer the template onto the carpet
Lay your carpet out pile side up in good light. If the carpet has a direction to the pile, that direction should run front to back, the same as the original, because it changes how the light reads across the tunnel.
Place the flat template on the carpet and weight it so it cannot shift. Mark the outline with your marker, then mark the seam allowance as a second line 12 mm outside it. Mark the peak of the tunnel and the two ends too, so you know which way the piece runs before the knife comes out.
Now mark the T. The horizontal bar of the T is the long cut that follows the tunnel ridge, and the vertical stem is the perpendicular cut from that ridge to the top edge of your carpet. Mark the stem at the centre of the tunnel length, not at either end.
Add one more mark while the template is still on: the apertures for the gear shifter, the handbrake if it passes through the tunnel, and any seat rail or seatbelt anchor slots. Marking them now is easier than hunting for them under tension later.
Step 4 – Cut the T shape
The T shape cut is the whole trick to shaping flat carpet over a hump, and it is usually only demonstrated in video rather than written down anywhere.
Make the long cut first. Follow the tunnel ridge line with your heavy shears in a smooth, continuous curve, keeping the shears perpendicular to the pile so you do not fray it. If the curve is tight near the peak, stop and finish that section with the utility knife instead of forcing the shears.
Then make the perpendicular cut from the ridge line to the top edge of the carpet, at the centre mark. That single cut is what allows the two halves of the sheet to swing up and over the hump. On a passenger car you normally want a T at both the front and the rear of the tunnel; on a truck or a short run you may only need one.
Keep the cut edges slightly long. Owners on the classic car forums report leaving the edges a little oversize, letting the piece sit for a couple of days to relax, and only then doing the final trim. It costs you nothing and saves the frustration of a piece that shrinks out of fit while you are sewing it.
Step 5 – Seam every cut edge on the reverse side
Every edge you cut will fray and every cut edge needs closing, which is why the T is cut in the first place: the seam becomes the tunnel ridge itself.
Turn the carpet face down on a clean board. Fold the seam allowance under along the ridge line and pin it so the fold is even all the way along. Stitch from one end to the other with heavy polyester or bonded nylon thread, roughly 3 mm stitch length, keeping tension firm but not puckering the pile.
A sewing machine makes this faster and neater if you have one that will take thick material; otherwise a leather needle and waxed thread will do. Work in short sessions from the middle outwards rather than one long pass, so a slight mismatch does not travel down the whole tunnel.
Do the same on the perpendicular seam, joining the two halves, and then along any aperture you cut. When you turn the piece over, the seams should sit on the underside, hidden by the tunnel ridge when it is fitted, and the visible face should be a single continuous run of pile with no stitching showing.
Step 6 – Fit the piece starting at the peak
Lay the shaped piece over the bare tunnel without any adhesive, which is the most important habit in the whole job. Start at the highest point, typically the peak of the tunnel, centre it there, and smooth the material outwards toward the footwells and the sills.
Anchor the peak first with a couple of temporary staples through carpet and into a sound spot in the metal. Then work outwards a few inches at a time, stapling as you go, and alternate from side to side so the piece is tensioned evenly rather than pulled over from one edge.
Keep the pile direction straight as you work. If the piece needs to be twisted to reach a sill, stop and re-cut the T, because tension applied across the pile is what produces the diagonal wrinkles everyone complains about.
Let the piece sit overnight before final trimming if you can. Carpet moves, and a piece fitted hot will relax into a different shape a day later.
Step 7 – Fasten the tunnel piece down
Use a high-temperature contact adhesive rated for automotive interiors, applied to both surfaces and allowed to become tacky before contact. Contact adhesive, not ordinary spray glue, is what holds a car carpet through a hot summer.
Experienced installers on the MG forum advise gluing the top of the sill first, then working from the rear of the car toward the footwell, so you are never trapped behind the carpet with the sill trim already in place.
For mechanical fixing, use tacking strip where a factory edge was folded and stapled, and long-reach staples where the carpet wraps down the tunnel sides. A Healeys List thread is blunt about the reality of this job: the tunnel piece requires a lot of cutting, sewing and manhandling, and it is the part most often sent to a trimmer.
Punch pilot holes with an awl where you intend to staple into a rib or a flange, so the carpet is not trying to absorb the blow. Do not staple into thin unsupported sheet metal, and never staple over a wiring run or a fuel line.
Step 8 – Cut the apertures and do the final trim
Once the piece is fixed, mark and cut the apertures. On the shifter hole there is a genuine choice: cutting slightly smaller than the floor opening deliberately leaves an overhang that hides the aperture edge, which is what many owners do; cutting it flush exposes the floor and looks unfinished.
Cut seat rail slots and seatbelt anchor slots as small as the hardware allows, and reinforce the edges of each with a few stitches on the reverse side so they do not fray when the seat is dropped back into place.
Trim the perimeter last, running your knife along the sill line and the kick panel line, and tuck the edges under the sill plates and kick panel trim. A heel pad or heel mat over the driver side tunnel peak protects the pile where it wears fastest.
Finally, refit the trim and check nothing is fouling: the seat rails, the seatbelt pretensioner, the heater box, the console and any pedal travel. A tunnel piece that is correct but trapped under trim is still a failed job.
Heat shaping the tunnel instead of sewing
There is a second method, and it is the one to reach for if your car has a one-piece moulded front section that you are unwilling to replace wholesale.
Work a heat gun over flat, non-backed carpet held in place, moving it constantly, and the pile will stretch rather than cut. Pull the material down over the hump as it warms, work it into the corners, and let it cool in position. Repeat in small areas; a few passes always beat one long blast.
This gives you shaping without a seam, which is why factory moulded carpet is made on a master die under heat and pressure rather than by hand. The trade-off is that heat-shaped carpet has no seam allowance to absorb error, so you need the fit to be closer to right on the first attempt. Sew a T and seam it when you want a forgiving, repairable piece; heat shape it when you want a moulded look on a car that never had one.
Fixing a tunnel that sits too loose
The most common complaint on the forums is not that the tunnel piece is too tight, but that it is far too loose, with the pile slouching over the hump and the carpet moving underfoot. This is common on cars where the original tunnel section has been replaced with flat material fitted to a very generous template.
The fix is padding, not re-cutting. Fit jute or dense underlay between the carpet and the floor pan, cut slightly undersized so it never buckles, and build it up in layers until the pile stands up on its own over the peak. Many owners on the classic forums describe exactly this approach when the tunnel reads as too loose.
Add an underlay across the rest of the floor at the same time. It kills drumming noise and gives the new carpet a flat, even base, and it is much easier to fit before the tunnel is stuck down than after.
Troubleshooting: symptom, cause and fix
Nearly every tunnel carpet problem has one of a handful of causes. Work down this table before you cut anything else off.
| Symptom | Likely cause | Fix |
|---|---|---|
| Carpet sits loose or slumps over the hump | Template made too generous, or no padding under the peak | Add jute or dense underlay in layers under the tunnel |
| Diagonal wrinkles radiating from the peak | Carpet tensioned across the pile instead of along it | Release, re-align with the pile direction, re-tack from the peak outwards |
| Seam ridge visible through the pile | Seam allowance uneven or tension too tight while stitching | Open the seam, press the allowance flat, restitch with less tension |
| Raw edges fray badly at the tunnel sides | Cut with a dull blade, or unbacked carpet cut against the pile | Re-trim with a fresh blade and bind the edge with reverse-side stitching |
| Carpet lifts after a few months | Craft glue used instead of automotive contact adhesive | Lift, clean both surfaces, re-bond with high-temperature contact adhesive |
| Floor looks exposed around the shifter hole | Aperture cut larger than the floor opening | Fit a bezel or trim ring, or re-cut slightly undersized |
| Musty smell or damp patches under the carpet | Floor pan rust or trapped water | Lift the carpet, treat the pan, lay sound deadening and underlay |
| Piece no longer matches the retained floor carpet | Original was a different dye lot or has faded in sunlight | Accept the difference or have a trimmer dye and blend the new piece |
Make it yourself, buy a moulded kit, or use a trimmer
Is there a mouldable carpet available for cars? Yes, but a moulded kit is pressed on a master die in a factory, which is precisely the process you cannot reproduce with a heat gun and a weekend. If the effort matters less than the result, buy the kit; if the effort is the point and the car has a separate tunnel, make it.
| Option | Best when | Skill and time | Result |
|---|---|---|---|
| Make the piece yourself | Your car has a separate tunnel section and you want to keep the existing floor carpet | Moderate skill, a weekend plus drying time | Factory-style seam on the ridge, repairable, matched to old carpet colour closely |
| Heat shape flat carpet | Your front section is one piece and you do not want to replace it | Low to moderate skill, a few hours | Moulded look, no seam to hide, very little margin for error |
| Buy a pre-moulded kit | You want the factory finish and the tunnel is part of the front section | Low skill, a day for fitting | Best cosmetic result, holes still have to be located and cut by you |
| Send it to a trimmer | The tunnel is a one-off shape, the car is rare, or you have already tried once | No skill required | Consistently the best finish, and the option most owners choose for the tunnel alone |
You can also mix approaches. Many restorers retain the original floor carpet, have a trimmer make only the tunnel piece, and marry the two at the seam. That gets a factory result on the hardest part while keeping the rest of a matching original.
What else you can use instead of carpet
If your car lives outside or sees a lot of wet, carpet may be the wrong material in the first place. A fitted vinyl or leather tunnel covering, moulded to the hump, is more wipeable and more hard-wearing on a car that is used in winter. Rubberised or textured vinyl can be heat formed onto the tunnel in the same way, and it hides small tears that would spread in a pile carpet.
Semi-custom bonded carpet and rubberised runners are other options, but they add thickness under the carpet, which means the tunnel piece has to be built up to match. Choose the material before you template, not after.
Stop rust and noise before the piece goes down
A new tunnel piece will hide a rusty floor pan for years, which is the worst possible outcome. Treat surface rust, prime it, and check for leaks from the windscreen or the cabin drains before the carpet goes down.
Then lay sound deadening on the flat pan areas and dense underlay on the tunnel. It adds perhaps an hour, and it is the difference between a carpet that stays taut and quiet and one that eventually bags and thumps over bumps.
Repairing a torn original instead of replacing it
If the original tunnel piece is faded but intact, a repair can be better than a replacement. Cut a patch from new carpet slightly larger than the tear, round off its corners, and slip it under the original from beneath. Stitch the patch to the old piece around three sides on the reverse side, leaving the fourth side open so the pile of the original sweeps over the patch edge and hides the join.
Match the pile direction and check the colour under daylight rather than in a garage, because carpet from a different dye lot under a warm interior light can look closer than it is. This is only worth doing while the rest of the original carpet is still in good condition.
Frequently Asked Questions
What is a transmission tunnel?
A transmission tunnel, also called a gearbox tunnel or transmission hump, is the raised ridge of pressed steel running down the centre of a car’s front floor, covering the gearbox, driveshaft and exhaust. It is the highest point of the front floor, which is why carpet wrinkles and wears there faster than anywhere else.
Do I need a tunnel piece separate from the main carpet?
Only on some cars. A large share of cars use a one-piece moulded front section where the tunnel is formed in the same sheet as both footwells, and a separate tunnel piece will not fit that layout. Cars trimmed with a distinct tunnel part between the front and rear sections are the ones where a separate piece is correct.
How do I make my own car carpet for a tunnel?
Template the tunnel shape onto cardboard, transfer it to non-backed automotive carpet with a 12 mm seam allowance, cut a long ridge line plus one perpendicular cut to form the T shape, fold the carpet up over the hump, then sew every cut edge on the reverse side before fitting the piece starting at the peak.
What glue is used for automotive carpet?
Use a high-temperature contact adhesive rated for automotive interiors, sprayed or brushed onto both the carpet back and the floor pan and allowed to become tacky before contact. Ordinary craft glue fails in a car that gets hot in the sun, which is the most common cause of a carpet lifting within a year.
Is there a moldable carpet available for cars?
Yes. Pre-moulded carpet kits are pressed under heat on a master die in a factory, which is how the tunnel contour is formed in a one-piece front section. You can approximate that at home with a heat gun on non-backed carpet, but a moulded kit gives a more consistent finish and the installer still has to locate and cut the holes for seats, shifter and seatbelts.
What can I use instead of carpet in my car?
Moulded vinyl or leather is the usual alternative, and rubberised vinyl can be heat formed onto the tunnel hump. These are more wipeable and hard-wearing in wet conditions, but they are thicker than pile carpet, so any replacement floor carpet or underlay has to be built up to match.
How do I stop the tunnel carpet from moving or sitting too loose?
Fit jute or dense underlay between the carpet and the floor pan in layers until the pile stands on its own over the peak, and cut the padding slightly undersized so it cannot buckle. Also check that you are tensioning the carpet along the pile direction from the peak outwards, since tension across the pile causes diagonal wrinkles.
Conclusion
To make a gearbox tunnel carpet piece properly, template the hump, cut a T shape in non-backed automotive carpet, sew every cut edge on the reverse side, then fit the piece from the peak outwards with high-temperature contact adhesive and staples. The seams you cannot see become the tunnel ridge, and that is what makes the finished job read as factory trim rather than a sheet of carpet stretched over a hump.
Check whether your car even uses a separate tunnel piece before you start, treat any floor pan rust while it is bare, and be honest about the sewing. If you only need the hump covered and your front carpet is one moulded piece, a heat gun or a pre-moulded kit will get you there faster.