
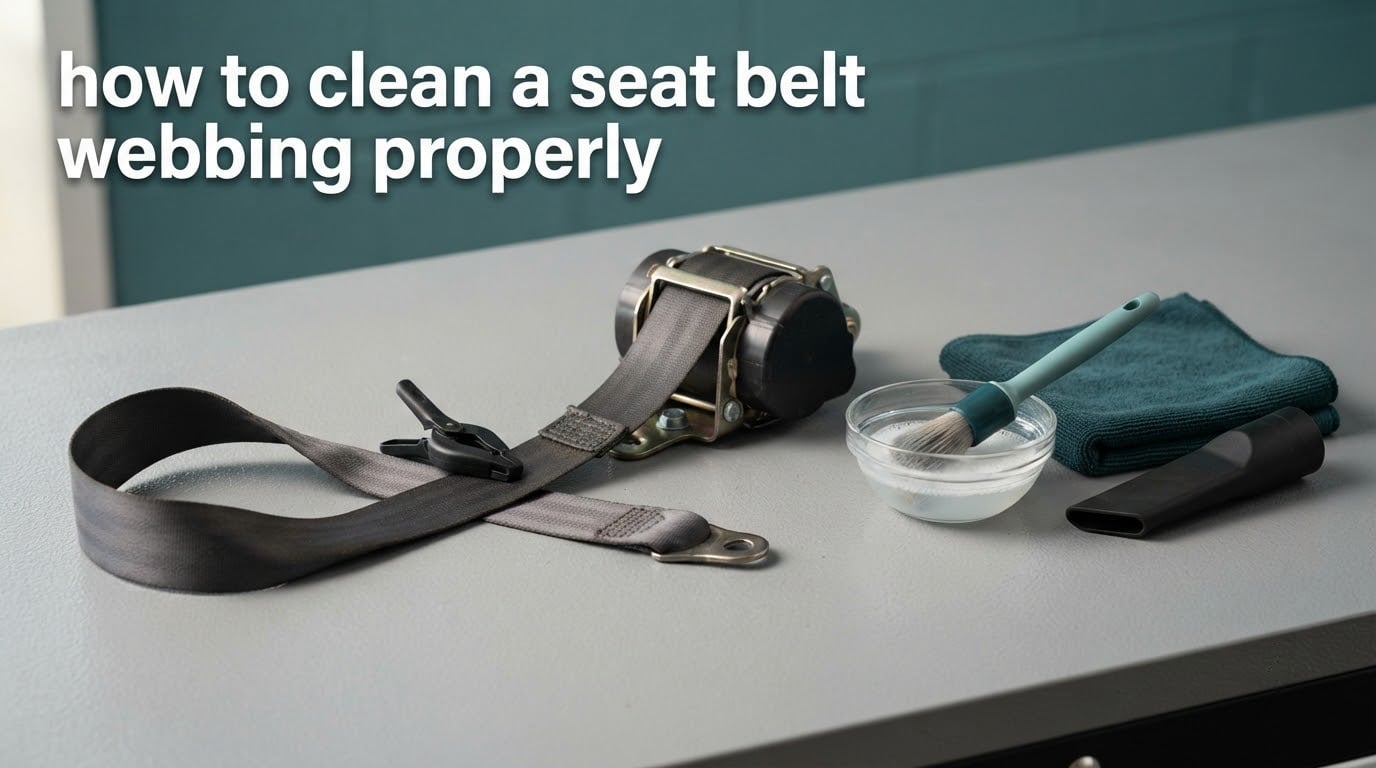
To clean a seat belt webbing properly, pull the belt fully out of the retractor, secure it with a clamp, vacuum off loose grit, work a mild soap solution into the fibres with a soft brush, wipe the residue away with a damp cloth, let the belt air dry completely with the retractor open, then test that it still retracts and locks correctly. That is the whole method, and it takes about an hour.
I have cleaned belts on everything from a muddy daily driver to a van that carries dogs and a toddler, and the same failure causes show up every single time. Too much water. Too much product. Too much heat. The belt looks better for a week and then the retractor starts to catch, or the webbing goes stiff and chalky, or the colour comes out uneven.
That happens because a seat belt is not a piece of fabric. It is a load-bearing safety component built from tightly woven synthetic fibres with a defined tensile strength, a controlled flexibility and a flame-retardant finish. Cleaning it is easy. Cleaning it in a way that keeps it doing its job takes a little discipline.
This guide walks through the whole process — the tools that are safe, the ones that quietly ruin webbing, the stain treatments that actually work, how to dry the belt so the retractor survives, and how to tell when a belt is finished and needs replacing rather than cleaning.
Table of Contents
- What Seat Belt Webbing Is and Why It Gets Filthy
- Why Cleaning Seat Belt Webbing Properly Matters
- Tools and Supplies: What Is Safe and What Is Not
- How to Clean a Seat Belt Webbing Properly, Step by Step
- Removing Specific Stains and Odours
- How to Dry Seat Belt Webbing Without Damaging It
- Testing the Belt After You Finish Cleaning
- Common Mistakes That Ruin Seat Belts
- How Often to Clean Seat Belts
- Child Car Seats, Rear Belts and Harnesses
- When to Replace Rather Than Clean
- Quick-Reference Cleaning Checklist
- Frequently Asked Questions
- What is the best cleaner for seat belts?
- Can I machine wash seat belts?
- Is it safe to use bleach on seat belts?
- What kills mould on seat belts?
- Why will my seat belt not retract after cleaning?
- How to fix a seat belt that is slow to retract?
- How often should I clean my car’s seat belts?
- How do I clean vomit off a seat belt?
- What is the safest way to dry a seat belt after cleaning?
- Can I clean a child car seat harness the same way as a seat belt?
- Conclusion
What Seat Belt Webbing Is and Why It Gets Filthy
Seat belt webbing is the flat woven strap that runs from the retractor, across your chest or hip, into the buckle tongue. It is usually made from polyester or nylon fibres woven very tightly, then finished with a protective coating that gives it its strength and its resistance to flame.
The retractor mechanism is the housing the belt spools into. Inside it there is a spring-loaded spool that pays webbing out when you pull and winds it back in when you let go. A locking pawl — a small pivoting arm — clicks into the spool and stops it dead during sudden deceleration, which is what holds you in place during a crash.
Because the belt spools through that housing, everything you put on the strap can end up inside the mechanism. That single fact drives most of the care advice in this guide.
Where the grime comes from
The webbing sits against skin for thousands of hours a year. Body oils, sweat and sunscreen work their way into the weave and oxidise, and that is the grey-brown shine you see on a driver-side belt.
Dirt, road film and fine grit grind into the fibres under tension. Food, coffee and pet hair add to it, and a vomit event in a family car adds an entirely different problem: smell that soaks into the fibres and the retractor foam.
In humid climates, the damp webbing rolled up inside the housing becomes a perfect surface for mould and mildew. The webbing is also a great surface for pet hair, which does not wash out easily because it hooks onto the raised fibre ends.
Why Cleaning Seat Belt Webbing Properly Matters
Three things are at stake when a belt gets dirty: how it looks, how it works, and what is living on it. Cleaning it properly protects all three. Cleaning it carelessly costs you one of them, usually the second one.
Function and safety
Webbing depends on a smooth, predictable surface. When grit, dried soap or detergent residue mats the fibres together, the belt drags as it spools out, and a draggy belt is a belt people start ignoring or unfastening over their shoulder. The pawl also needs a consistent feed to catch and release reliably.
Restraints are built to federal standards such as FMVSS 209 in the United States and ECE R16 in Europe. Those standards assume a belt built to specification. A belt that has been bleached, scorched or washed in a machine with an aggressive spin cycle is no longer something you can assume meets them, even if it still looks presentable.
Strength over time
Polyester and nylon fibres do not care for prolonged UV exposure, repeated wetting, and harsh alkaline or acidic chemistry. The finish that gives the webbing its hand and its flame resistance is also the first thing these attack. Once that finish breaks down, the fibres start to feel fuzzy and the edges begin to fray.
Fraying is not cosmetic. Frayed webbing is webbing with fewer intact fibres carrying the load.
Hygiene
A belt touches skin, hair and food. Grease and body oils hold odour, and odour means bacteria and mould have moved in. A belt that smells sour at the start of a journey is a belt people stop buckling properly — and a belt that is not buckled properly is not doing anything at all.
Tools and Supplies: What Is Safe and What Is Not
You need very little, and none of it is specialised. Most of the common cleaning disasters on forums come down to grabbing whatever was under the sink, so here is a straight look at what to use and what to leave alone.
Safe to use
- Warm water and mild dish soap — the workhorse. A drop or two in a bowl of lukewarm water is enough. More foam is not more cleaning.
- Baby shampoo — extremely gentle and it rinses out of tightly woven fibres cleanly, which plain dish soap can struggle to do.
- White vinegar, diluted — one part vinegar to roughly four parts water. Good for odour and light surface grime. Never neat, and never left to soak.
- Baking soda — useful for odour and as a gentle abrasive paste when mixed into a damp brush.
- Soft-bristled brush — a soft detailing brush, an old toothbrush or a soft interior brush. Nothing with stiff wire or metal.
- Microfiber cloth — for wiping the solution out of the weave and for drying.
- A seat belt clamp or a bulldog clip — to hold the webbing extended so the retractor cannot take it back up mid-clean. A large wooden clothes peg works in a pinch.
- Vacuum with a brush head or crevice tool — to lift grit before any water touches the belt.
Not safe to use
- Bleach, or chlorine wipes — they attack synthetic fibres and the flame-retardant finish, and on grey or beige belts they leave a permanent bleach mark. One forum user reported scrubbing a belt with chlorine wipes and hot water and still being left with the original smell and a duller strap.
- Spray upholstery cleaner applied directly to the belt — it runs straight off the webbing and into the retractor, where it attacks the spring and the pawl.
- Degreaser, mineral spirits or Varsol — these are regularly suggested on car forums and occasionally they do strip heavy grease, but they also swell and weaken some synthetics and leave an oily residue that traps fresh dirt. If you use one, use it on a scrap offcut from the same belt, not on the working length.
- Pressure washers or jets — the force drives water and detergent into the housing past the seals.
- Washing machines — advice to throw a belt in with towels on a hot cycle circulates constantly. The agitator snags and distorts webbing, hot water damages the finish, and the spin cycle puts a retractor that was never designed to be tumbled through a violent test. Several owners describe replacing belts rather than rescuing them afterwards.
- Hard nylon-bristle brushes, wire wool, scouring pads — they cut surface fibres.
- Hairdryers, heat guns, radiators, sunny dashboards — heat shrinks and distorts synthetic webbing and can warp the plastic in the retractor.
- Solvent-based interior cleaners, petrol, thinners, ammonia-based glass cleaner — unnecessary, and risky for both the belt and the person holding it.
A note on machine washing. Some people report good results from a washing machine on a cool, gentle cycle with the belt coiled in a pillowcase. That works for an old spare belt pulled from a donor car, in my view, and only if you accept the risk to the retractor and cut the wet length to a section with no mechanism in it. It is not something I would do to a belt currently fitted to a seat. Hand cleaning is slower and it is the only method I would rely on.
How to Clean a Seat Belt Webbing Properly, Step by Step
Seven steps, in this order. The order matters. Cleaning before vacuuming grinds dirt deeper into the fibres, and reattaching the belt before it has dried is how retractors seize.
Step 1: Pull the belt out and secure it
Feed the webbing out until you reach the very end, at the retractor, the anchor point or the seat mount. The tongue and buckle usually stay attached; most of the belt should be free and reachable.
Clamp the belt near the top of the B-pillar with a bulldog clip, a seat belt clamp or a strong clothes peg. The goal is to keep the retractor from spooling the belt back in while you work, and to keep the belt from retracting under its own spring tension.
Why the clamp matters: a retractor that slowly draws the webbing in while you scrub will fold the belt onto itself, and the areas that stay hidden never get cleaned.
Step 2: Vacuum first
Run a vacuum with a crevice tool or brush head along the full length of the webbing, from the retractor to the tongue. Work the belt a little at a time, pulling it through the clamp as you go.
This lifts grit, hair and dried flakes off the surface before you add any water. Skipping it means you are about to scrub dirt into the weave, and grit under a soft brush still cuts fibres.
Pet hair comes out well here. A rubber grooming glove or a seam ripper drawn along the webbing pulls hair off before the vacuum catches it.
Step 3: Mix your cleaner and test it
Mix lukewarm water with a drop of mild dish soap, or dilute a gentle fabric-safe cleaner per its own instructions. Give it a stir and leave it to stand for a minute. You want suds, not a foaming bath.
Before you go near the belt, dab a hidden section — the back side near the anchor point — with a damp cloth and wait a few minutes. If the dye lifts or the surface changes, dilute further or switch to plain lukewarm water.
Grey and beige belts show any chemical change immediately. This test takes a minute and saves you a permanent mark.
Step 4: Scrub gently along the weave
Dip a soft-bristled brush into the solution and work along the webbing in the direction of the fibres, in short strokes about 10 cm long.
Do not scrub across the weave and do not scrub hard. The goal is to flex the fibres so the solution reaches the dirt between them, not to abrade the surface. You should see discoloured suds coming off the belt. That is the dirt leaving.
Work in sections from the retractor outwards so you do not re-dirty a clean section. Keep the section you are working on damp, and keep the rest as dry as you can — that is the whole key to not getting water into the housing.
Step 5: Wipe the solution out
Take a clean microfiber cloth, damp it with plain water, and wipe along the webbing several times. This lifts the dirty suds out of the weave and takes the soap with them.
Change to a clean part of the cloth as you go. A cloth loaded with grey water is just spreading the dirt you just removed.
Then run a barely damp cloth over once more. Leftover detergent in the fibres is the single most common cause of a belt that feels stiff and catches after cleaning.
Step 6: Let it air dry fully
Shake the belt out, wipe it dry with the cloth, and leave it extended in a shaded, ventilated space. Do not put the retractor away until the webbing and the housing feel completely dry to the touch — that is several hours, often overnight.
More detail on this step below, because it is where most of the damage is done.
Step 7: Re-test before you drive
Release the clamp and let the belt retract. It should run in smoothly with no snagging, no grinding and no hesitation. Then pull it out quickly and let it lock. It should catch on the first sharp pull, as it should when you pull it during a hard stop.
If anything feels different, stop and sort it out now, not on the motorway. There is a full test routine further down.
The whole process in one line: pull out, clamp, vacuum, mild solution, gentle brush, wipe out, air dry, test.
Removing Specific Stains and Odours
The general method above handles most of it. These are the adjustments for the stubborn cases people actually ask about.
Food and drink: coffee, sauce, milk
Blot with a damp cloth first — never rub, which pushes the stain deeper. Then work the mild solution in with a soft brush, letting it sit for five minutes before scrubbing. Rinse by wiping with a cloth dampened with plain water, moving along the weave.
For a dried-on coffee mark, a paste of baking soda and a little water, applied to the belt for ten minutes before brushing, helps lift the colour. Rinse thoroughly and dry fully.
Sweat, skin oils and the grey shine
This is the most common complaint and mostly a build-up problem rather than a stain. Warm water with a drop of dish soap and a firm but gentle brush stroke will shift it. Ten minutes of contact time before scrubbing beats twenty minutes of hard scrubbing.
Diluted vinegar is excellent at cutting the greasy film that makes a belt look dark and dull. One part vinegar to four parts water, applied and given a few minutes before brushing, then rinsed.
Grease, oil and sunscreen
Sunscreen is oily and UV-reactive, so it darkens over time. Work a degreaser-diluted dish solution into the spot and let it sit for ten minutes before brushing. If the spot has already gone brown, the colour is usually in the finish rather than the fibre, and it will lighten but not fully lift.
For heavy grease, keep a scrap offcut test as the rule. It is better to accept a slightly greasy belt than a weakened one.
Pet hair and dander
Hair does not wash out of webbing easily because it hooks onto the raised ends of the fibres. Vacuum first, then use a rubber glove or a fabric roller along the length, then vacuum again, then treat it like any other dirty belt.
Vomit and other bodily fluids
This is a biohazard job, so wear gloves and work with ventilation. Remove solid matter with a damp cloth and a scraping motion, rinse, then apply a solution of one part white vinegar to four parts water along the whole length and let it sit for fifteen minutes.
Scrub thoroughly with a soft brush, because the smell lives in the fibres and in the retractor housing. Do not rinse with more water than necessary — you want the solution in the belt, not in the mechanism. Dry with the retractor mouth open, as described in the drying section.
For a stubborn smell, once the belt is fully dry, run it through a cycle of water and baking soda paste, dry it, and repeat. Where the smell is still there after two full treatments, the odour is almost certainly inside the retractor housing, and the only reliable fix is replacement of the assembly.
Mould and mildew
Mould needs more than a surface wipe; the hyphae sit down in the weave and the colour comes out of the fibre itself. If the webbing is blackened to the core, a clean result is not realistic, and replacement is the honest answer.
Where the discolouration is surface-level, dilute vinegar is the gentlest option that works. Some owners on car forums soak the belt in a bucket of soapy water and then pressure wash it, and I would not recommend either in a fitted vehicle. Any treatment that saturates a retractor risks water inside the housing, and water inside a housing is what leads to corrosion, stiffness and slow retraction.
Prevention matters more than treatment in humid climates. Keep the car aired out after wet weather, wipe condensation off the belt, and clean belts before the end of a humid season rather than at the start of the next one.
How to Dry Seat Belt Webbing Without Damaging It
Drying is where well-intentioned cleaning goes wrong. Heat is the enemy, and so is impatience.
Air dry only. Hang the belt extended, loosely draped, in a shaded and ventilated space. A garage, a covered porch or an open window is better than a warm interior. Direct sun, a heater, a tumble dryer, a hair dryer and a heated dashboard all cause synthetic webbing to shrink and lose its hand.
Open the retractor. With the clamp still on, keep the belt fully extended and leave the mouth of the housing facing the airflow. Trapped moisture inside the mechanism is the cause of most post-cleaning retraction problems.
Budget several hours. A long belt laid wet takes a good while, and thick webbing with water held in the weave longer than that can feel damp at the centre. If in doubt, leave it overnight.
Pat, do not rub. Blot the webbing with a dry microfiber cloth to remove the bulk of the water, then let the air do the rest. Twisting or wringing the strap stretches and distorts the weave.
Test before refitting. Run the fully dry belt out and back in. It should feel smooth and flexible, and it should not feel heavier or thicker than before cleaning.
Testing the Belt After You Finish Cleaning
A belt is a mechanism as much as a strap, so the cleaning is not finished until the mechanism behaves the way it should. Three checks take a couple of minutes.
Check 1: Smooth retraction
Let the belt retract on its own. It should spool in cleanly, without grabbing at a particular point, without a ratcheting feel and without stopping partway. Sticking at one spot almost always means debris or dried residue inside the housing.
Check 2: Proper locking
Pull the belt out with a sharp, quick tug, the way a hard stop tugs at it. It should lock immediately and stay locked until you press the release or let a small amount back in. A belt that keeps running when you yank it has a problem with the pawl or the ratchet teeth, and that is a replacement item, not a cleaning item.
Check 3: Feel and appearance
Run the webbing through your fingers. It should feel smooth and flexible, with no gritty patches, no stiff sections and no raised fuzzy areas. Look at the edges for fraying and at the surface for fading or bleach marks. Compare it with a belt you know has never been cleaned if you can.
Fixing a belt that is slow to retract
If the belt retracts slowly after cleaning, moisture and detergent residue inside the housing are the usual suspects. Leave the belt fully extended and undisturbed for 24 hours with airflow reaching the housing, then retest. If it is still slow, the spring or the pawl is affected and the retractor assembly should be replaced.
If the belt is slow to retract and you have not cleaned it, the cause is usually a bent or obstructed retractor rather than dirt. Check for a belt, bag strap or seat trim pinched inside the housing, and for a child seat or accessory routed through the mechanism in a way that jams it.
Common Mistakes That Ruin Seat Belts
Most of the damage I have seen on cleaned belts traces back to one of a handful of avoidable errors.
Soaking the whole belt. Immersing a fitted belt means the retractor sits in a bucket of soapy water, and water gets past the seals. Professional cleaners remove the retractor or clean the belt in sections; the equivalent for a DIY job is keeping the housing dry and working the length in manageable sections.
Using bleach. Chlorine attacks polyester and nylon and strips the flame-retardant finish permanently. On grey belts it also leaves a bleach mark that will not come out. If mould is the worry, vinegar and elbow grease beat chlorine every time.
Machine washing. The advice circulates because it works on a dead belt. It is the wrong answer for a belt you are going to drive with, because the agitator, the heat and the spin cycle all damage the fibres and stress a mechanism that was never designed to be tumbled.
Hard scrubbing. A stiff brush or a scouring pad cuts the surface fibres that give the webbing its strength. Soft, repeated strokes at a steady pressure clean better than one hard effort.
Heat drying. A hairdryer or a sunny dashboard can shrink webbing and distort the plastic spool housing. Air dry.
Leaving soap in. The most common cause of a belt that feels stiff and grabs after an otherwise good clean. Always finish with a plain-water wipe and a second pass with a clean part of the cloth.
Cleaning a belt that was in a collision. If a belt was loaded in a crash, it stretches internally whether or not the outside looks damaged. Cleaning it will not restore its strength. It gets replaced, along with any pretensioner and the anchor hardware that took the load.
Cleaning a belt with a fault in its mechanism. If the retractor locks up, does not lock, or is frayed inside the housing, cleaning is the wrong intervention entirely.
How Often to Clean Seat Belts
There is no official interval, because conditions vary too much. What you can do is match the schedule to how the belt is used.
- Daily driver, one or two belts — a full clean once a year, plus a wipe-down of the visible length every few months. Most people notice the problem only when the belt starts to slip, so put it in your spring clean routine.
- Family vehicle with children — twice a year, and immediately after any food or vomit incident. Children pull on belts with sticky hands and put things in their mouths.
- Vehicle with pets — twice a year, and vacuum the webbing monthly. Hair holds moisture against the fibres and drags grit in.
- Hot or humid climate — twice a year, timed for the end of the humid season, plus a monthly check for the first dark or musty spot. Mould appears fast in these conditions.
- Winter with salt and grime — a wipe-down with a damp cloth after salty trips, because road salt is abrasive and dries into the weave.
- Commercial or fleet vehicles — a documented quarterly schedule with a signed inspection record. Commercial operations are expected to keep restraint equipment in serviceable condition, and a written log is what proves it was checked. Inspect each belt for cuts, fraying and correct operation at the same time.
Child Car Seats, Rear Belts and Harnesses
Child seat harnesses are not the same as vehicle belts and should not be cleaned the same way. The harness is a restraint system with its own certification, and the same treatment that suits a vehicle belt can shorten its life.
Never machine wash a child seat harness, never use bleach and never immerse the buckle. Buckles contain a metal tongue or a chest clip component, and any fluid that gets inside can affect how the buckle releases.
For routine cleaning, remove the harness covers where the seat manufacturer allows it and wash those following the seat’s own care label. For the webbing itself, use a soft brush and lukewarm water with a small amount of mild soap, work along the weave, and wipe out with a damp cloth.
Dry every harness component completely and separately before reassembling. A seat that goes back together slightly damp will smell within days. Check the harness for fraying at the adjuster strap and at the shoulder pad slots, where abrasion is most common, and replace the harness if the webbing feels thin, fuzzy or flattened.
Rear seat belts get a full clean on the same schedule as front belts, but give the retractor a specific check. A child seat or booster routed through the belt can pinch the webbing or leave the retractor in a held-down position that slows retraction later.
Always follow the child seat manufacturer’s care instructions over any general advice, including this guide. Where a seat has been in a crash, the harness and the seat are both replaced.
When to Replace Rather Than Clean
Cleaning restores a belt that is dirty or stiff. It cannot restore a belt that is damaged. These are the signs that mean stop cleaning and start replacing.
- Fraying, cut or torn webbing — anywhere on the visible length, especially at the B-pillar guide, the retractor mouth and the anchor points, where abrasion is highest.
- Discolouration that has gone into the fibre — mould that has gone black through the weave, or bleach marks. The colour is in the fibre, not on it.
- Stiffness that survives cleaning — if the webbing still feels hard and board-like after a proper wash and a full dry, the fibres have been damaged, usually by heat or chemical attack.
- Any collision or significant impact — belts, pretensioners and anchor hardware that took a load are replaced as a set, regardless of visible damage.
- A retractor that will not lock, will not release or retracts unevenly — this is a mechanism fault. No amount of cleaning changes it.
- Webbing that feels thin, flattened or fuzzy to the touch — the surface fibres are gone, and the tensile strength went with them.
- Age and unknown history — a belt of unknown provenance, especially one from a breaker yard or an imported vehicle, is not something to trust with a restraint duty.
Belts in the United States are built to FMVSS 209 for the assembly and FMVSS 302 for flammability, with ECE R16 applying across most of Europe. A replacement belt should meet those standards for your market. Replacing the assembly through a specialist is the safest route when the retractor itself is faulty, since the retractor and the webbing are usually supplied as one unit.
Quick-Reference Cleaning Checklist
Print this, or keep it in the glove box for the next clean.
- Park on level ground, engine off, handbrake on.
- Pull the webbing fully out and clamp it near the top of the B-pillar.
- Keep the retractor mouth open and pointed away from any water.
- Vacuum the full length, top to bottom.
- Mix lukewarm water with a drop of mild soap. Skip the bleach.
- Test the solution on a hidden section and wait a few minutes.
- Brush along the weave in short strokes. Never across it, never hard.
- Work in sections from the retractor outwards.
- Wipe out with a damp microfiber cloth, changing to a clean area often.
- Final wipe with plain water to remove every trace of soap.
- Blot dry. Air dry in shade. Never use heat.
- Leave extended and fully retracting-free for several hours, ideally overnight.
- Re-test: smooth retraction, sharp pull locks, webbing feels smooth.
- Check for fraying, stiffness or fading. Any of those means replace, not clean.
- Record the date if the vehicle is in a fleet.
Frequently Asked Questions
What is the best cleaner for seat belts?
A small amount of mild dish soap in lukewarm water is the best everyday cleaner for seat belt webbing. For heavy grime or odour, dilute white vinegar at one part vinegar to four parts water. Baby shampoo is a good gentler alternative that rinses out of tightly woven fibres cleanly. Avoid bleach, chlorine wipes, solvent-based degreasers and any cleaner you would not use on a cotton shirt.
Can I machine wash seat belts?
Not on a belt that is still fitted to a seat. The agitator snags and distorts webbing, hot water damages the finish, and the spin cycle puts a retractor through a stress it was never designed for. A cold gentle cycle inside a pillowcase can rescue a removed spare belt with no mechanism in it, but for a working belt, hand cleaning is the only method we would rely on.
Is it safe to use bleach on seat belts?
No. Chlorine attacks polyester and nylon fibres and permanently strips the flame-retardant finish the webbing depends on. It also leaves a bleach mark on grey and beige belts that will not lift. Use diluted white vinegar and a soft brush instead, and give the area several minutes of contact time before scrubbing.
What kills mould on seat belts?
Diluted white vinegar and time. Apply one part vinegar to four parts water along the belt, leave it for fifteen minutes, then scrub along the weave with a soft brush and wipe out with a clean damp cloth. If the webbing is blackened through the fibres, the colour is inside the strand rather than on it, and no cleaner will remove it — that belt should be replaced. Keep humidity down and air the car out after wet weather to stop it returning.
Why will my seat belt not retract after cleaning?
Almost always moisture or detergent residue inside the retractor housing. Leave the belt fully extended, unclamped, in an airy spot for a full day, with airflow reaching the mouth of the housing, then retest. If it is still slow, the spring or the locking pawl has been affected and the retractor assembly should be replaced. Make sure you wiped out all soap before drying — residue is the most common cause.
How to fix a seat belt that is slow to retract?
If it was recently cleaned, dry it out completely first and retest. If it was never cleaned, check for a bag strap, seat trim or child seat accessory pinched inside the retractor, and check that the belt is not routed through an accessory that holds the spool in a partly open position. If nothing is obstructed and it is still slow or will not lock, that is a mechanical fault in the retractor, not a cleaning job.
How often should I clean my car’s seat belts?
Once a year for a daily driver, twice a year for a family vehicle, a vehicle used with pets, or one in a hot or humid climate. Vacuum the webbing every few months in between, and clean immediately after any food or vomit incident. Fleet and commercial vehicles are commonly put on a documented quarterly inspection schedule with a signed record.
How do I clean vomit off a seat belt?
Wear gloves and work with ventilation. Lift the solid matter off with a damp cloth, then apply one part white vinegar to four parts water along the whole length and leave it for fifteen minutes. Scrub with a soft brush and wipe out with a clean damp cloth, keeping water away from the retractor mouth. Dry fully with the housing open. If the smell survives two complete treatments, it is inside the retractor and the assembly needs replacing.
What is the safest way to dry a seat belt after cleaning?
Air dry, extended and loosely draped, in a shaded and ventilated space, with the retractor mouth open to the airflow. Blot the bulk of the water out with a dry cloth first. Allow several hours, ideally overnight, and test that it retracts smoothly before refitting. Never use a hair dryer, heater, tumble dryer or a hot dashboard — heat shrinks webbing and can distort the plastic in the retractor.
Can I clean a child car seat harness the same way as a seat belt?
Not quite. Never machine wash a harness, never immerse the buckle and never use bleach. Clean the harness webbing with a soft brush and lukewarm water with a small amount of mild soap, and wipe it out with a damp cloth. Wash any removable covers according to the seat manufacturer’s care label, dry every component completely before reassembling, and check the adjuster strap and shoulder pad slots for fraying.
Conclusion
Knowing how to clean a seat belt webbing properly comes down to restraint. Vacuum before you wet it, use a mild solution instead of a strong one, brush along the weave with a soft bristle, wipe every trace of soap out, air dry with the retractor open, and test that the belt still retracts and locks before anyone rides in the seat.
Start with one belt this month, note the date, and put the second one on your list. If the belt shows fraying, stiffness or a retractor fault, replace it rather than clean it — that is the one job on this list that is not worth saving.