
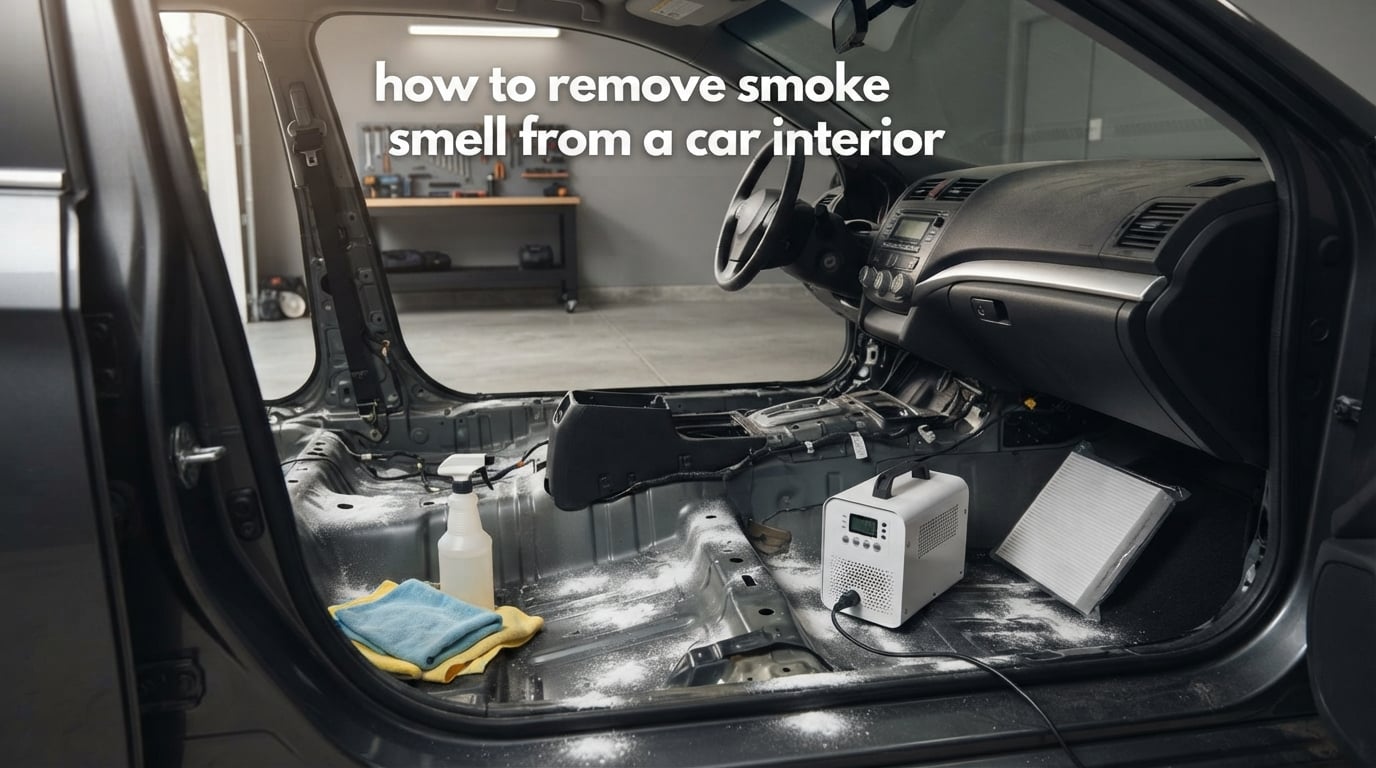
If you are searching for how to remove smoke smell from a car interior, you already know the awkward part: wiping the dashboard does almost nothing. The odor is not sitting on the seats. It has soaked into the foam, the carpet, and the headliner fabric, and it is parked inside the air conditioning unit where you cannot reach it with a cloth.
We have pulled together the process that detailers, dealer service departments, and weekend DIYers all converge on, and filled in the details that most short posts skip. The short version is that removing smoke smell means deep-cleaning soft surfaces, decontaminating the ventilation system, and then using absorption or gas treatment to reach what is left. Follow the five steps in order, and the difference between a car that smells faintly of an old camping trip and one that is genuinely fixed is enormous.
Last updated for October 2026.
Table of Contents
- Why Smoke Smell Is So Hard to Remove
- How to Remove Smoke Smell From a Car Interior: The 5-Step Plan
- Step 1 – Clear It Out and Vacuum Everything Down
- Step 2 – Deep Clean the Soft Surfaces
- Step 3 – Wipe Down Every Hard Surface
- Step 4 – Decontaminate the Ventilation and HVAC System
- Step 5 – Absorb, Neutralize, and Treat What Remains
- Removal Method Comparison Table
- Cloth, Leather, or Vinyl: Match the Method to the Material
- Different Kinds of Smoke and What Changes for Each
- Chlorine Dioxide Fogging as a One-Take Alternative to Ozone
- Deodorizing a Car Seat You Removed From the Vehicle
- How to Know When the Smoke Smell Is Actually Gone
- When to Replace Parts Instead of Cleaning Them
- What a Professional Smoke Treatment Should Include
- Safety Notes and What Not to Do
- If You Are Selling or Trading the Car
- Frequently Asked Questions
- Conclusion: Getting the Smoke Smell Out for Good
Why Smoke Smell Is So Hard to Remove
Smoke odor persists through two separate mechanisms, and if you do not treat both, the smell comes back within a week. Understanding the difference tells you where to aim your effort.
Vapor permeation is the first one. Hot smoke particles are small enough to penetrate porous material and bond chemically with it. Seat foam, headliner padding, carpet underlay, and the felt above the doors all act like a sponge. A damp sponge re-wets and releases what it absorbed. A seat cushion does the same thing every time the sun hits the car, which is why a car that smells fine in the morning can hit you like a wall when you get in at 5pm.
Contact transfer is the second. Residue lands on the previous owner’s hands, jacket, and skin, and transfers to the steering wheel, the driver’s door pull, the seat edge, and the gear knob. Wipe those five touch points and you have removed a surprising share of the problem, and almost no article tells you to do it.
Then there are the two areas people miss. Experienced users on the Grassroots Motorsports forum thread single out the headliner and the internals of the heating and ventilation system as the two most commonly skipped zones in odor abatement. That matches what we see: people shampoo the seats, vacuum the carpet, and still catch a whiff from the roof panel or from the vent when the fan starts.
Heat is the amplifier. Warm air makes bonded smoke chemicals off-gas faster, which is why heat amplifies the odor dramatically. A car closed up in summer sun can be several times stronger at the door than it was that morning.
How to Remove Smoke Smell From a Car Interior: The 5-Step Plan
Here is the whole process in order. Clear and vacuum everything, deep clean the soft surfaces, wipe down the hard surfaces, decontaminate the ventilation and HVAC system, then absorb and neutralize what remains. Read through the list once, then follow each section in full detail below.
- Clear and vacuum everything. Remove all floor mats, seat covers, loose items, and ash. Vacuum the carpet, seats, crevices, seat rails, and the trunk, working a crevice tool into the gaps where ash settles.
- Deep clean the soft surfaces. Shampoo cloth seats, carpet, and headliner with an upholstery cleaner or a rented hot water extractor. Wipe hard surfaces with a microfiber cloth dampened with a 1:1 white vinegar and water mix.
- Freshen the ventilation system. Replace the cabin air filter. Run the engine with the fan on high and the A/C on maximum, recirculation OFF, and spray an odor neutralizer into the outside air intake vents near the windshield wipers. Repeat on heat.
- Absorb lingering odors. Spread baking soda over carpets and seats, let it sit several hours, and vacuum it up. Leave an open box of baking soda or activated charcoal in the cabin overnight as well.
- Treat with ozone. Run a purpose-built ozone generator for 15 to 30 minutes with the doors and windows closed and the A/C on recirculate, then air the car out completely for several hours before anyone gets in.
Work through the steps in that sequence. Each one loosens or removes what the last one could not reach.
Step 1 – Clear It Out and Vacuum Everything Down
Remove the source of the debris before you wet anything. Take out both floor mats, any rubber inserts, the trunk liner, spare tire cover, and any seat covers or custom cushions.
Then clear the cabin completely. Every grocery bag, jacket, child seat, phone charger, and gym bag in the car has absorbed smoke and will re-release it after you clean. This step takes ten minutes and it is the one people skip, which is why their car still smells at the end of a long afternoon.
Vacuum in this order: the trunk, then the carpet under the seats and under the front seats, then the seat cushions and the gaps between the cushion and the backrest, then the door pockets, the seat rails, the seat belt buckles, and the trunk latch area. Use a crevice tool or a hose end in the seat rails; that is where loose ash hides and where the extractor cannot pull anything out either.
Look for physical evidence while you are in there. Sticky, tar-like residue on the window glass and inside the door glass is a nicotine film, and it needs scrubbing rather than vacuuming. Graffiti-style scratches on the headliner usually mean someone held a burning cigarette up there, which also means the headliner fabric needs a proper treatment in Step 2.
Step 2 – Deep Clean the Soft Surfaces
This is the longest step and the one that does the most work. Smoke residue on cloth seats and carpet is oily, and oily residue does not come out with a damp cloth.
Cloth seats and carpet with a machine
Rent a hot water extractor from a hardware store or home improvement center rather than buying one. Run it across the seat bases, backs, carpet, and door cards, working in overlapping passes and staying on the fabric long enough for the solution to break the residue up. Pay attention to the seam piping and the underside of the seat cushion, where residue collects and where a handheld wand will not reach.
A workable hand scrub if you have no machine
On a Grassroots Motorsports thread, one user laid out a full manual procedure that requires only a wet/dry vacuum, a stiff-bristle brush, and a free-and-clear laundry detergent. You spray an all-purpose degreaser on the fabric, let it dwell five to fifteen minutes, scrub the area with the stiff brush, then scrub again with detergent mixed in a bucket of hot water. Wet/dry vacuum the result out and repeat.
Two warnings on that method. First, test the degreaser on a hidden seam and let it sit the full dwell time before you commit; users consistently warn that heavy-duty degreasers bleach or discolor light-colored upholstery. Second, this process puts real water into seat foam. The single most common new problem people create is a mildew smell that shows up a week later because the foam never dried.
Getting the seats out is the underrated move
Removing the seats and putting them in direct sun for a few hours is repeatedly called an underrated step. Sunlight warms the foam so the bonded chemicals off-gas and drift away, which is something no spray achieves on a seat that stays installed and shaded. It costs you a socket wrench and an afternoon.
While the seats are out, do the floor and the carpet under them. That carpet is the single most neglected square meter in the car and it is directly beneath the hottest surface in the vehicle.
Treating the headliner
The headliner holds more smoke than most people assume. Shampooing it requires extreme gentleness, and for good reason: headliner fabric is stretched and glued to the roof bow, and a stiff brush or a saturated extractor head can distort the panel permanently.
Use a soft brush, minimal moisture, and a cleaner that is safe on headliner fabric. Work in small sections and keep the panel visibly damp rather than dripping. If the panel is sagging, stained, or brittle, cleaning is not the answer and replacement is the only fix.
Step 3 – Wipe Down Every Hard Surface
Hard surfaces are the fastest win in the whole process, and they matter more than their difficulty suggests because of contact transfer. The steering wheel alone can account for a large share of the smell in the driver’s zone.
Mix white vinegar and water in a 1:1 ratio in a spray bottle. Wipe down the dashboard, hard plastics, door panels, armrests, center console, seat belt housings, and the trim around every vent with a microfiber cloth. The same mix works on the headliner and the upper door cards if you are not shampooing them.
Pay specific attention to the five touch points a smoker touches every single drive: the steering wheel, the driver’s door pull and armrest, the gear shift knob, the handbrake, and the window switches. Degrease them rather than just wiping, because nicotine film is sticky and holds on to a damp cloth.
Clean the glass separately. Use a dedicated glass cleaner on the inside of the windshield and all four windows, and pay attention to the strip along the bottom of the door glass, where nicotine builds a visible amber film. Spray glass cleaner onto a microfiber cloth rather than straight onto the glass, then buff the fogging away.
For the vents themselves, run a small detailing brush through each louvre and finish with a lightly damp cloth. Residue inside the vent channels is exactly what blows back at you when the fan starts.
Step 4 – Decontaminate the Ventilation and HVAC System
This is the step that decides whether your work lasts. The heating and ventilation system constantly re-samples the air inside the cabin and blows it back, so any contaminated duct or evaporator keeps re-seeding the whole interior every time you turn the fan on.
Replace the cabin air filter first. The cabin air filter is a cheap part and it is often the reason a treated car still stinks. It sits directly in the airflow, downstream of the outside air intake, and it collects the residue the system has been pulling off the cabin air. A carbon or activated-charcoal cabin filter goes a step further by adsorbing odor molecules as air passes through.
Most filters are behind the glovebox or in a bay under the hood. Access is usually a few screws and a plastic cover, and the part itself is a common item at any parts counter. Replace it even if the old one looks reasonably clean, because you cannot see most of what it trapped.
Then run the two-pass ventilation treatment. Start the engine, set the fan to high, turn the A/C to maximum cold, and set recirculation to OFF so the system pulls fresh air from outside the vehicle. Spray an odor neutralizer into the outside air intake vents near the windshield wipers and let the system pull it through the evaporator and out the cabin vents. Run this for 10 to 15 minutes.
Repeat on heat. Set the temperature to maximum and the fan to high again. Running the hot pass matters because heat loosens residue from the evaporator and duct walls and carries it out of the cabin, whereas cold-only treatment can leave a film behind.
Two people on detailing forums describe a low-tech version of this that works: boil vinegar in an electric kettle inside the car with the engine running and the fan on full blast. The vinegar steam travels through the ductwork. You will reheat the kettle several times, and the car will smell like vinegar for a while afterward, which is a trade most people accept because a vinegar scent fades and smoke residue does not.
Step 5 – Absorb, Neutralize, and Treat What Remains
After cleaning and HVAC work, most cars smell dramatically better but not neutral. This step is what gets you the rest of the way.
Baking soda for absorption
Spread baking soda generously over the carpets, seat bases, and trunk carpet. Let it sit for at least several hours, ideally overnight, then vacuum it up thoroughly. On r/Detailing, the standard advice is to dump baking soda on the seats and carpets, let it sit for a day, vacuum it out, and repeat as necessary. Baking soda is safe to leave in a car overnight and is a genuinely useful tool here.
Charcoal for what baking soda misses
Activated charcoal and bamboo charcoal packets adsorb odor molecules rather than merely absorbing moisture, which is why they work in places where you cannot spread a powder. Place packets under the seats, inside the door pockets, around the cabin filter housing, and on the rear parcel shelf.
One Grassroots Motorsports user combined bamboo charcoal packets under the seats, an activated carbon cabin air filter, and an odor neutralizer spray on all soft surfaces, and reported about 90% of the smell out, with a final jasmine oil treatment on the floor mats finishing the last of it. That is a realistic result for a full effort, and it is a useful thing to know before you start: a faint trace can survive a genuinely good treatment.
Enzyme cleaners for organic residue
Enzyme-based odor neutralizers break down the organic compounds in smoke residue rather than coating them. Apply after cleaning, once surfaces are dry, and follow the label dwell time. They work best on surfaces you have already cleaned, so treat them as a finishing layer, not a first step.
Masking scents, and where they fit
No scent cancels out cigarette smoke. Every fragrance you add is a mask sitting on top of whatever is still there, and it only holds while the underlying odor is weak. The honest order is: remove the odor first, mask second, if you want to.
Among the most-used cover scents in car work, jasmine oil sprinkled on the floor mats finishes a treatment well and is notably less synthetic than a hanging air freshener. Pine, eucalyptus, lavender, and vanilla are the other common options. Whole bean coffee absorbs odor as well as it absorbs smell in a pantry, and it is cheap enough to use as a trial.
Ozone treatment
An ozone generator is the strongest single step for a heavily smoked-in car, because ozone is a gas. It reaches the molecules bound inside seat foam, into the ducts, and into the evaporator, which no liquid or powder can do. One user on a detailing forum ran a generator for two hours with no other cleaning at all and made a heavily smoked-in car nearly undetectable, judging that a second pass would finish it. Dealers use the same principle, applied in a sealed service bay overnight.
Operating details matter. Run it with the doors and windows closed and the A/C on recirculate so the ozone is pulled through the cabin and the system rather than escaping immediately. Fifteen to thirty minutes is a normal treatment for a passenger car, and two hours is a maximum dose for a badly affected vehicle.
Then air the car out completely. Ozone sits at ground level in a closed space and settles onto surfaces, so leave the doors wide open and the fan running for several hours before anyone, including pets, gets in. The safety detail in the AI Overview is the one to take seriously.
Removal Method Comparison Table
Here is how the methods compare on effort, working time, cost level, and what each one actually solves. No page-one competitor offers a table, and it is the fastest way to decide which tier fits your situation.
| Method | Effort | Time to work | Cost level | Best for |
|---|---|---|---|---|
| Baking soda and charcoal | Very low | 4 hours to overnight | Lowest | Light to moderate odor, first attempt, ongoing maintenance |
| Vinegar and water hard-surface wipe | Low | 1 hour | Lowest | Contact transfer on plastics, glass, and touch points |
| Boiling vinegar in the cabin | Low | 45 to 90 minutes | Low | Ductwork and evaporator without buying equipment |
| Upholstery shampoo or hot water extractor | High | 4 to 8 hours plus drying | Moderate | Cloth seats, carpet, and headliner on a serious smoke job |
| Enzyme neutralizer spray | Low | Per label dwell time | Moderate | Finishing layer on already-cleaned surfaces |
| Chlorine dioxide fogging | Low | 30 minutes sealed, then airing | Moderate | One-shot treatment when you do not own a generator |
| Ozone generator | Low | 15 minutes to 2 hours plus airing | Moderate to high | Reaching odor bound in foam, ducts, and the evaporator |
| Professional detailer | None | 1 to 3 days | Highest | Heavy smoker vehicles, resale prep, no time or equipment |
| Part replacement | High | Days of labor | Highest | Embedded odor in seat foam, headliner, or carpet that will not respond |
Read that table as an escalation path rather than a menu. Baking soda first, hard-surface cleaning alongside it, extractor shampoo if the odor survives, ozone or a professional once surface cleaning has done all it can, and replacement only when the foam itself is the source.
Cloth, Leather, or Vinyl: Match the Method to the Material
Google’s own overview of this query asks whether you have leather or cloth seats, so here is the split. Using the wrong chemistry on the wrong material is the fastest way to damage a car while trying to clean it.
| Surface | Recommended approach | Dwell time | Warning |
|---|---|---|---|
| Cloth seats | Hot water extraction, or degreaser dwell then brush scrub | 5 to 15 minutes for degreaser | Test for dye bleed first; fully dry the foam |
| Carpet | Extractor with overlapping passes, then baking soda overnight | Per machine | Do not leave detergent residue; it holds moisture in the pad |
| Leather and vinyl | Wipe with a 1:1 vinegar and water mix, then a leather cleaner and conditioner | 5 minutes, then buff | Condition leather after cleaning or it dries and cracks |
| Hard plastics | Degrease, then wipe with microfiber and 1:1 vinegar mix | 2 to 3 minutes | Heavy solvents can leave a dull, uneven finish |
| Headliner | Soft brush, minimal moisture, fabric-safe cleaner, small sections | Do not saturate | Over-wetting distorts the panel permanently |
| Glass | Dedicated glass cleaner sprayed onto the cloth, not the glass | Immediate buff | Amber nicotine film needs a second pass with a degreaser |
Leather is genuinely easier to save than cloth, because it does not absorb. Porous leather needs a conditioning step afterward so it does not dry out and crack, and perforated leather is a special case: liquid sprayed into the perforations can soak the foam beneath, which brings the mildew risk right back.
Different Kinds of Smoke and What Changes for Each
Not all smoke smells the same, and the residue behaves differently. Cigar and cigarillo smoke is far heavier in tar than cigarette smoke, so it leaves a thicker, oilier film and usually needs a longer dwell time and a second extractor pass.
Cannabis smoke is resinous and clings to glass and plastic harder than tobacco residue, and it often sits under a nicotine layer if the car also saw cigarettes. A degreaser pass before any odor treatment makes a real difference here.
Bonfire, campfire, fireplace, and wood-burning smoke is a different problem again. It is lighter, more particulate, and less chemically bonded, so it responds much better to air-out plus baking soda. A car that caught wood smoke on a trip may need nothing more than ventilation and absorption, which is why cheap and easy fixes sometimes work spectacularly on smoke that is not tobacco.
One variable changes all of these: how long the car sat with windows up. Odor that has had months to off-gas into foam is a different order of magnitude from residue that is a few weeks old. Set your expectations from the answer to how long the car was smoked in, not from the age of the car.
Chlorine Dioxide Fogging as a One-Take Alternative to Ozone
Chlorine dioxide, sold as a fogging product and often called a bio-bomb by the people who use it, is worth knowing about because it is the budget one-shot route. Where an ozone generator is equipment you own and reuse, a chlorine dioxide vapor treatment is a single sealed session in a bag or canister, then you air the car out.
Both gases work on the same principle, reaching odor molecules that liquids cannot. The practical difference is that chlorine dioxide fogging requires no power, no timing discipline, and no judgement about concentration, and it costs a fraction of a generator. The trade-off is that it is a one-time use and the smell can return, whereas a generator can be run again after the next heat wave.
This is the answer to a question that comes up repeatedly on r/AutoDetailing, where users ask whether chlorine dioxide or ozone is worth it for stale smoke. The honest summary from users is that both work, ozone is reusable and cheaper per session over time, and chlorine dioxide is simpler and cheaper to start with.
Deodorizing a Car Seat You Removed From the Vehicle
Removing a seat opens up an option you cannot have in the car: direct sun and direct airflow. This is the route for anyone who has already pulled a seat or seat cover out, or who has bought a used child seat, booster, or camping gear that came from a smoky car.
Start with a thorough vacuum, then shampoo or scrub the cover the same way you would in the car. Let the foam dry completely in open air before the cover goes back on, because a damp cover sealed over foam is the fastest route to mildew.
Give it hours of direct sun, which is far more effective than an afternoon in shade. For foam you cannot get into the sun, seal the cover in a large bag with baking soda or charcoal packets and leave it for several days, turning it once. When the cover is out, you can also treat the seat rails and the floor beneath it, which is exactly the hidden zone that makes used-car cabins smell even after detailing.
How to Know When the Smoke Smell Is Actually Gone
Judging by standing next to the car is not a test, because moving air disperses the odor. Here are three checks that work.
The closed-up test. Close all doors and windows, do not touch anything, and sit inside for ten minutes. The point is that your eyes and the airflow are not refreshing the cabin air. If you notice a smoke note at the ten-minute mark while sitting still, the odor is still in the cabin. Open the door and the outside air will mask it for the next hour, which is exactly why a showroom test means nothing.
The fan test. Start the car, set the fan to high, and switch between recirculate and fresh air. Any difference between the two modes means the residue is still in the ductwork, because recirculate samples cabin air while fresh air samples the outside intake.
The heat test. This is the honest one. Drive the car for twenty minutes until the cabin is fully warm, then park and re-enter after sitting closed up. Heat pulls bonded chemicals out of the foam faster than any other condition, so if the smell passes in heat, it is not gone. Test in the condition you actually drive in.
Run all three. Passing two out of three means there is still a job to do, and the fan test is usually the one that identifies where.
When to Replace Parts Instead of Cleaning Them
Cleaning has a ceiling. When the foam itself is the reservoir, no amount of surface work reaches the source, and the odor keeps returning no matter how many times you repeat the process. Four parts are worth knowing about.
Seat foam and seat cushions. Foam that has been permeated for years can emit a faint odor even when fully covered in a new upholstery cover. If the front seats smell at the foam and the backs and carpet do not, the foam is the culprit.
Headliner. This is the part most likely to need replacement and the part most owners never consider. A headliner stained brown along the roof seam, brittle, or sagging has nicotine tar permanently bonded into the fabric. Replacement is labor-intensive because the panel has to come down intact, which is why it is a detailing-shop job rather than a weekend project.
Carpet and underlay. If the carpet is thin, worn, or soaked with residue through to the pad, it can be cut out and replaced in a few hours. The foam pad under the carpet is the piece most often forgotten and it will outlast the new carpet above it if you leave it in place.
HVAC evaporator core. Rarely, and only in a badly affected car, residue saturates the evaporator beyond what a two-pass neutralizer treatment can move. A professional can flush or replace the evaporator core, and it is a significant job inside the dash.
Door speaker grilles and the plastic trim behind them trap residue in cavities you cannot wipe. Pulling the grilles out and cleaning behind them, or fogging the cavity, is often the difference between a car that passes the closed-up test and one that does not.
What a Professional Smoke Treatment Should Include
A dealer service department typically seals the car in the service bay, runs an ozone generator treatment overnight, and layers it on top of a full interior detail. Some shops add a chlorine dioxide vapor product. On the Grassroots Motorsports forum, a user whose truck was treated by a dealer reports the smell was completely eliminated, and a second user reports the same result on a dealership visit.
Before you pay, ask a specific question: was the cabin air filter replaced? That single part is where a surprising amount of residue survives a full detail, and it is the cheapest thing on the list. Also ask whether the headliner was treated and whether the technician addressed the seat foam rather than only the seat surfaces.
For a full interior detail on a car in this condition, published price references put a thorough clean in the low hundreds of dollars, with ozone and chlorine dioxide treatments as add-ons. If a quote comes in far below that range, find out what is being skipped, because on this job the skipped steps are exactly the steps that decide the outcome.
If you are selling or trading, a full professional treatment is the most cost-effective money in the transaction. Sellers consistently report that a car free of smoke odor moves faster and attracts more serious buyers, and a documented treatment also answers the disclosure question honestly rather than defensively.
Safety Notes and What Not to Do
Ozone needs ventilation before entry. Ozone is a respiratory irritant at working concentrations and it settles in an enclosed space. Run the generator with the car sealed, then open everything and run the fan for several hours before anyone gets in. Never enter immediately after a treatment and never leave pets, plants, or people inside a treated car.
Never mix bleach with vinegar or with ammonia. Both combinations produce toxic gas, and both are common in a panicked DIY session.
Test every cleaner first. Heavy-duty degreasers can discolor or bleach light-colored upholstery, and users warn each other about this repeatedly. Test on a hidden seam, let it sit for the full dwell time, then check.
Dry everything properly. The most common new problem after a big shampoo job is not smoke, it is mildew. Use a fan, open the doors wide, and give the interior at least a full day of airflow before closing it up. Never put seat covers back on damp foam.
Ventilate while you work. Use a respirator rated for organic vapors if you are spraying solvents, and work outdoors or with the garage door fully open.
Mind the sun and the plastics. Long ozone and chlorine dioxide exposures can dull interior plastics, and heat plus sun can fade and stress headliner fabric faster than cleaning does. Give the headliner shade when it is out for drying.
Be honest about the health angle. Thirdhand smoke is the residue left on surfaces and in dust after smoke has been inhaled and exhaled, and it is distinct from both firsthand and secondhand smoke. A car cabin is a small sealed space where that residue accumulates and where heat speeds its release. Benzene and other polycyclic aromatic hydrocarbons are part of tobacco smoke and they persist in fabric and dust. Getting the odor out is about the chemicals, not just the smell.
If You Are Selling or Trading the Car
Handle the disclosure and the treatment as two separate things. Legally and ethically, you tell the buyer the car was smoked in. What the treatment does is prevent the odor from costing you the difference between two offers.
In practice, work backwards from a hot car. A buyer who opens a door on a sun-warmed interior made a decision before they saw the paint. Run Steps 1 through 4 yourself, add ozone if you can borrow or rent a generator, and reserve a professional detail for the days just before the listing goes live rather than doing it weeks early.
One practical trick: keep the car aired and empty of personal items in the week before you list it, and avoid smoking in it yourself during the final stretch. A single cigarette in a freshly treated cabin undoes most of the work.
Frequently Asked Questions
What do car dealers use to remove smoke smell?
Dealers usually seal the car in the service bay and run an ozone generator overnight, often combined with a chlorine dioxide vapor product, on top of a full interior detail. Ask specifically whether the cabin air filter was replaced, because that is where residue often survives a detail and it is the cheapest part to change.
Will the smell of smoke eventually go away in a car?
Not on its own. Smoke chemicals bond into seat foam, carpet, and headliner fabric and release back into the air, faster in heat, so an untreated smoky interior can keep smelling for years. Active treatment is what removes it, and in a heavy vehicle the seat foam or headliner may ultimately need replacement.
What scent cancels out cigarette smoke?
No scent truly cancels smoke. Fragrance masks it, and the mask only holds while the underlying odor is weak, so the odor has to come out of the foam, ductwork, and cabin filter first. Jasmine oil on the floor mats, pine or eucalyptus fresheners, and whole bean coffee are the most-used cover options.
How long does it take to get smoke smell out of a car interior?
A light job with baking soda, charcoal, and a hard-surface wipe takes a weekend. A full deep clean of the seats, carpet, headliner, and HVAC system takes one to two days plus drying, and a badly affected car usually needs a second treatment or a professional pass. Test in a hot car before you call it done.
Does vinegar actually remove cigarette smell?
It helps a great deal on hard surfaces, and vinegar steam run through the ventilation system is a popular duct treatment. But vinegar only works as a mask, so a car can end up smelling like vinegar for a while with the smoke still underneath. Pair it with real odor removal rather than using it alone.
Is baking soda safe to leave in a car overnight?
Yes. Baking soda is safe to leave on carpets and seats overnight to absorb odor, then vacuum it out thoroughly. Spread it generously, give it several hours or a full day, and vacuum completely, because residue left behind is a white powder in your carpet.
Conclusion: Getting the Smoke Smell Out for Good
To remove smoke smell from a car interior properly, work outside in. Empty the car and vacuum it, deep clean the soft surfaces, degrease every hard surface, decontaminate the ventilation system and replace the cabin air filter, and only then use baking soda, charcoal, an enzyme neutralizer, or ozone for what remains.
The order matters more than any single product. Cleaning without treating the HVAC system guarantees a comeback, and a cover scent without removal just hides the problem until the next hot day. Test your work in a warm, closed-up car, and if the fan test shows a difference between recirculate and fresh air, there is still duct residue to deal with.
Give it a weekend, and it will not be in your car anymore.