
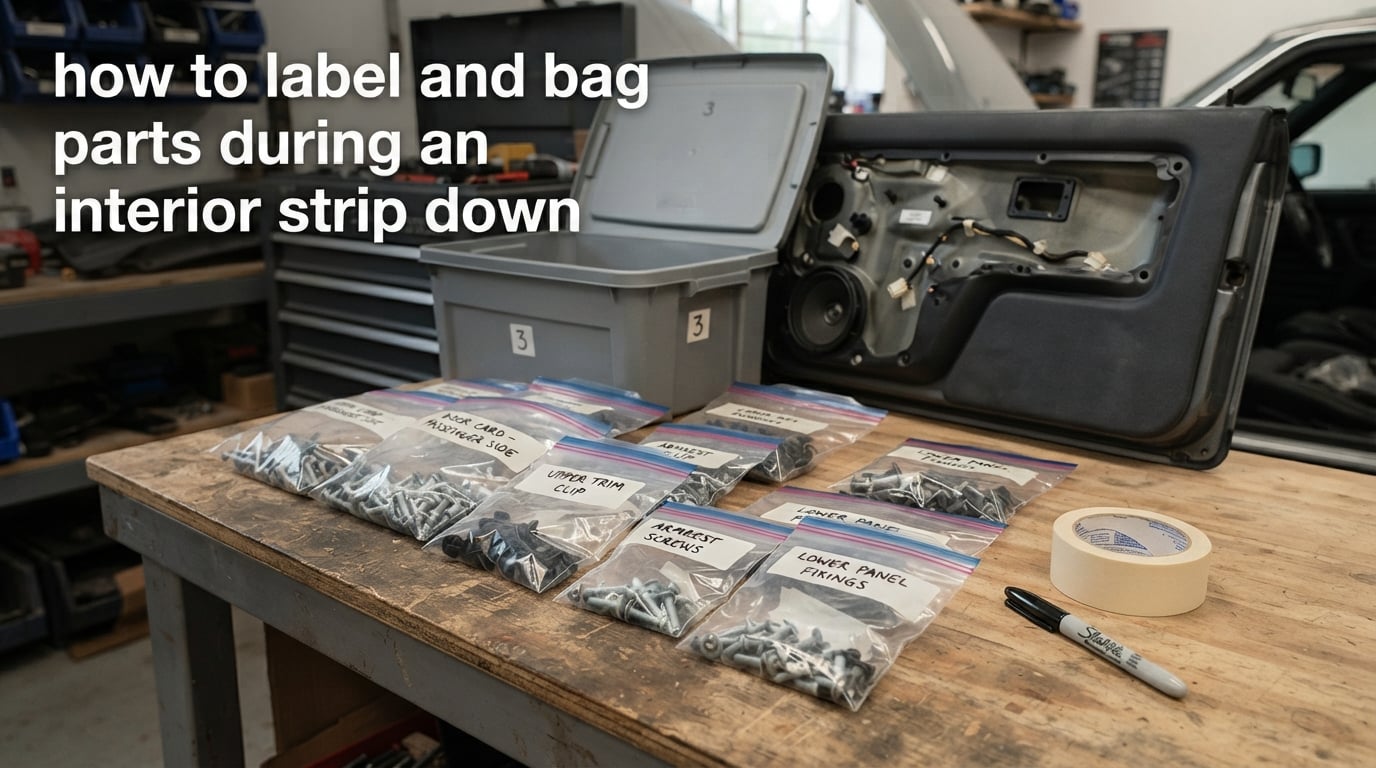
Labeling and bagging parts during an interior strip down means giving every piece of trim, hardware, and wiring an identity the moment it comes off the car: a name, a side, a location, a date, and a bag or bin it belongs to. Do it consistently and reassembly becomes a straight run in reverse. Skip it and you are left with three identical grey trim clips in your hand, wondering which of the fourteen holes they came from.
Most of the difficulty is not the labels themselves. It is that an interior is built from a few hundred near-identical plastic parts, several dozen look-alike electrical connectors, and left and right components that are mirror images of each other. A full strip-down also takes weeks of sessions, so anything you cannot read in month nine is as good as lost.
Below is the system our shop uses. It is a zone code, a side code, and a sequence number written on a label that goes both on the bag and on the part, plus one tote per removal zone and a fixed loop of photograph, remove, bag, label, store.
We have run more than a few full teardowns with this method, and the deciding factor is never the marker pen. It is whether you label the part itself and not only the container it happens to be sitting in.
Table of Contents
- Why labeling fails on an interior strip down
- The five-minute pre-strip setup
- The supplies checklist for bags, labels, bins, and markers
- What to label during an interior strip down
- What to write on every label
- A simple labeling convention for sides and locations
- Bagging rules: one bag per removal zone
- Bins and totes: number the base and the lid
- What not to bag or label: airbags and pretensioners
- The mistakes that cost the most time
- Turning the bags into a reassembly plan
- Photos and paperwork that go with the bags
- The 10-minute audit before reassembly begins
- Special cases: glued trim, brittle plastics, and woodgrain
- Storing the bags when the project pauses for months
- Frequently Asked Questions
- What should I write on a bag of car parts?
- How do you label wiring harness connectors on a teardown?
- What bag size should I use for trim clips and fasteners?
- Should the label go inside the bag, outside the bag, or on the part?
- How do I keep left and right interior trim from getting mixed up?
- Do I need to remove or bag the airbag module when stripping an interior?
- Conclusion
Why labeling fails on an interior strip down
Labeling fails on an interior strip down for one reason: memory does not survive a teardown. You will remember a part for about a day, and only while the trim is still in your head as part of the car.
Here is what actually goes wrong when you rely on memory instead of a system:
- Twenty identical trim clips. Door cards, kick panels, and rear quarters all use the same style of plastic fastener. Once they are in one pile, location information is gone permanently.
- Mirror-image panels. A left and right door card look identical until you hold them up side by side and see the mounting tab positions are flipped. The mistake shows up only at reassembly, when the screw holes no longer line up.
- Look-alike connectors. Interior harness plugs are frequently the same shape and colour. A swapped connector leads to a fault much later, sometimes months later, with no memory of the switch.
- Seats and rails. Seat rail bolts, console brackets, and seat riser hardware are generic. Nothing on them says which rail, which side, or which seat.
- Project pauses. A restoration that stalls for six months is normal. Labels fade, totes get moved, and a bin without a number becomes archaeology.
The cost is not just the missing part. It is a torn-down interior you have to strip again to find a wire you routed wrongly, or a trim panel that will not go back on because two mirrored pieces got swapped.
Enthusiasts have argued for years in restoration forums about whether to call a side left, driver, or inboard. There is no agreed answer, which is exactly why you need to pick one convention and write it down before the first fastener comes out.
The five-minute pre-strip setup
Before you touch a single screw, spend five minutes setting up the system. Everything afterwards is repetition, and repetition only works if the containers and labels are already waiting.
This guide was last checked in October 2026, and the method has not changed much since car restorers started trading labelling tricks on forums and in collision repair training videos. What has not changed is the rule: bag it and label it at the moment it comes off.
- Photograph everything while it is still assembled. Take a wide shot of the whole interior, then medium shots of each zone before you open it up. These become your as-found reference.
- Pre-label a stack of bags. Lay out 20 to 30 clear bags and write the zone code on the outside of each with a permanent marker before any work starts. Writing on an empty table is faster than writing on a full bag while holding a flashlight in your teeth.
- Set up one tote per removal zone. Common zones are driver door, passenger door, dash, centre console, driver seat, passenger seat, rear bench, carpet and underlay, and headliner. Each tote gets a number on both the base and the lid.
- Pre-write the label fields, not just the names. Have a sheet with your date and vehicle details at the top, so every label shares the same format from day one.
- Put the label supplies within arm’s reach of the work area. If the tape and markers live in another room, the labelling step is the first one to get skipped. Skipped once, it gets skipped all evening.
The supplies checklist for bags, labels, bins, and markers
You need a short, specific supply list, not a general-purpose packing kit. Grab these before the strip-down starts.
- Clear zip-lock bags in three sizes: quart for trim clips and small fasteners, gallon for console and carpet hardware, and 2-gallon for seat rail hardware and a seat frame or door card.
- Small moisture-proof plastic cable labels for wiring connectors. They stick to curved plastic and survive damp conditions better than paper.
- Larger cardboard inventory tags for big assemblies such as a full seat, a console, or a headliner.
- Masking or painter’s tape for panel positions, plus a permanent marker that writes on plastic, vinyl, and dirty surfaces.
- A silver or paint marker for writing on black plastic and dark carpet where black ink disappears.
- Numbered storage totes with lids, and a stack of paper labels for contents lists.
- An inventory sheet on a clipboard, one line per bag or tote.
Buy bags in bulk and buy them before you need them. A box of assorted sizes beats a roll of one size, because the correct bag for a job is usually not the size you predicted.
Skip bubble wrap and packing tape for the strip-down itself. Those belong to the shipping stage, when parts travel to a specialist. Your priorities are clear bags you can write on and labels that survive handling.
What to label during an interior strip down
Label anything you could not identify with certainty, and anything whose loss would cost you time or money. In practice that list is short and covers most of the interior.
- Every electrical connection at the dash, console, door, and seat. Label both the harness side and the component side, and note what the circuit does in plain words.
- All trim hardware: clips, screws, washers, and T-nuts, bagged by the panel they came from.
- Anything side- or position-specific such as door cards, quarter trims, seat rails, sills, and kick panels.
- Irreplaceable and hard-to-find parts: original trim clips in a discontinued pattern, mouldings, badges, and screws with a non-standard head.
- Reference parts kept for matching finish, colour, grain, or dimensions. Mark these clearly so nobody bins them as scrap later.
- Bags, totes, and their lids. A container without a label is a container that will be opened and reclosed four times.
There is one category you do not label as a normal part, and that is covered in its own section below.
What to write on every label
Write six fields on every label, in the same order, every time. The value is in the repeatability, not in any single field.
| Label field | What to write | Why it matters |
|---|---|---|
| Part name or number | Door card, LH, then any stamped or moulded part number | A part number beats a description when you are hunting a replacement months later |
| Side and position | Driver side, front, lower; or the code from your convention | Prevents the mirror-image swap, which is the most common reassembly failure |
| Orientation | Top forward, mounting tab up | Tells you how it goes back without re-deriving the geometry |
| Hardware count | 12 screws, 14 clips | A count is the cheapest possible check that nothing fell out of the bag |
| Status | Reuse, replace, save for reference | Keeps a reference part from being discarded and a dead clip from being reinstalled |
| Date removed | Month and year | Lets you find the matching reference photos later, and flag parts removed during a bad session |
Add a condition note where it matters: pre-existing scuff, faded dye, brittle mounting tab. You will not remember those in six months, and the same note protects you if a part is ever disputed.
Write on a clean, dry surface. Marker on a greasy panel beads up and slides off, and a pencil note on a dusty surface is gone after one wipe.
A simple labeling convention for sides and locations
The direct answer to what to call the sides: pick one set of words, use the vehicle’s own reference points, and never mix systems. Driver and passenger, front and rear, and a zone code will always beat a vague left or right, because driver side is unambiguous even when you are facing the car.
We use a three-part code: zone, position, sequence. Written as a single string it looks like DR-L-03.
| Field | Meaning | Example |
|---|---|---|
| Zone code | Two letters for the removal area | DR = driver door, PS = passenger side, CN = centre console, CH = carpet and headliner, SE = seats |
| Position | LH or RH, then F or R for front or rear | L = left-hand as you sit in the car, R = right-hand |
| Sequence | Two digits in removal order | 01 was the first part off that zone, 07 was the last |
So PS-R-04 reads: passenger side, right-hand position, fourth part removed in that zone. Write the full words underneath once on the build sheet so the codes stay readable months later.
Two rules make the codes stick. First, number parts in the order they come off, not in the order they go back on, because removal order is what you observe and reassembly order is what you infer. Second, if a part has no obvious side, use its location instead: dash lower, sill rear, seat riser inner.
For connectors, add a circuit name rather than a position: CN-LH-02 / HORN beats a code alone, because a note saying what the circuit does saves you matching shapes in a dim footwell.
Bagging rules: one bag per removal zone
One bag per removal zone is the rule that makes a full strip-down manageable. Instead of forty small bags of mystery, you have a handful of named bags you can pick up and read.
- Label the bag inside and outside. The outer label can tear off, get covered, or get swapped between similar bags. An inner label stays with the contents, which is why this advice comes up so often in restoration forum threads.
- Bag identical hardware together, by panel. All the clips from the driver door go in one quart bag, labelled for that door. Never mix clips from two panels in one bag.
- Tape the hardware bag to the panel it came from. This keeps the bag physically associated with the part while both are on the bench, which is where the association usually breaks.
- Give each part its own bag only if it is fragile or asymmetric. A full door card, a seat, or a headliner deserves a dedicated bag and a tag.
- Never bag loose metal against painted or finished surfaces. A screw in a bag with a headliner will chip the finish it took months to get right.
Match the bag to what is going in it:
| Bag size | What goes in it | Examples |
|---|---|---|
| Quart | Small, uniform hardware | Trim clips, panel screws, T-nuts, small brackets |
| Gallon | Mixed hardware from one zone | Console fasteners, carpet and underlay clips, kick panel hardware |
| 2-gallon | Larger or heavier assemblies | Seat rail bolts, riser hardware, a seat frame or subwoofer |
| Dedicated sleeve or bag | One large part | Door card, seat, headliner, moulding, console lid |
Fill the bag at the point of removal rather than collecting a pile and bagging later. A pile has no label and no order, which is where half of all teardown confusion begins.
Bins and totes: number the base and the lid
Number every tote on both the base and the lid with the same number, and put the contents on a separate paper label. This is the fix for the most annoying storage problem: a stack of identical lids that do not match their boxes.
Mark the number large enough to read from above with the lid on. Use a marker that will not lift on the moulded plastic, and write the same number on the base and the lid every single time, even when you are tired at the end of a session.
Stack totes in removal order, so the first zone you removed is on the bottom and the last is on top. You will pull parts in the sequence you need them, and the pile stays stable because the heavy items sit low.
What not to bag or label: airbags and pretensioners
Airbag modules, seat belt pretensioners, and the clock spring in the steering column are pyrotechnic components and must never be bagged with trim, put in a bin with general interior parts, or shipped alongside an interior shipment.
Handle them the way the service manual for your vehicle specifies, including battery disconnection and the correct wait time before you touch the column. Treat a pretensioner or a used module the way you would treat any other live safety device.
For the rest of the interior, ordinary practice is to leave a live restraint system in place, mounted and undamaged, unless the service manual directs otherwise. The point of this section is simple: no bag in your system is a reason to loosen or handle a pyrotechnic part.
The mistakes that cost the most time
These are the errors that turn a tidy strip-down into a second teardown. Every one of them is cheap to prevent at the moment of removal.
- Mixing mirrored sides. Do not put a left and right part in the same bag. Separate bags, separate labels, separate locations on the floor.
- Labeling the bag but not the part. Once the part and the bag are separated on a bench, the label means nothing. Write on the part or tape a flag to it.
- Losing trim clips until they are gone. Count them as they come off. If the panel has a hole and you have no clip, you will hunt for weeks.
- Pencil on a dusty or greasy surface. It smudges and lifts. Use a permanent marker, and a silver or paint marker on black plastic and dark carpet.
- Assuming identical connectors. Two same-shaped plugs on the same harness are usually not the same circuit. Label them before you unplug the second one.
- Unnumbered lids. A lid with no number is a bin you will open in the wrong order and put the wrong zone back in.
- Stopping the labelling on the last part of the evening. Fatigue is when the system fails. Pre-labeling the stack in step two of the setup exists for exactly this.
Turning the bags into a reassembly plan
Your bags are already a reassembly plan if you numbered them in removal order. Installation then runs in reverse: the last thing you removed is the first thing you refit.
Three habits make that work. First, keep each bag with its panel rather than pooling everything in a central tote, so a door card and its clips are handled together. Second, take an as-found photo of each bagged cluster while the parts are still grouped, showing the arrangement as it came out. Third, work one zone at a time to completion instead of crossing the whole interior for every fastener.
Before you start, read your sequence numbers aloud for a zone. If the numbers skip, you are missing a bag, and it is far cheaper to find that now than after the carpet is back down.
Photos and paperwork that go with the bags
Labels tell you where a part came from. Photos tell you what it looked like and how it was oriented. Together they cover almost every question you will have later.
- Create one folder per zone on your phone, named with the zone code, and take photos as each part comes off.
- Shoot each part in place before removal, then again in your hand if the part has an orientation that is not obvious.
- Photograph condition problems such as a cracked mounting tab or a sun-faded section while you are looking right at it.
- Keep one paper inventory sheet, one line per bag or tote, with the code, a short description, a count, and the date. This is the audit list you will use before reassembly.
- Photograph each connector before unplugging, and again after relabelling, so the labelling itself is verifiable.
The 10-minute audit before reassembly begins
Before the first trim clip goes back in, spend ten minutes matching the car against your own paperwork. This is the step that turns a bagging system into a guarantee.
- Count the totes against your zone list. Every zone should have a tote and a number.
- Read every bag label out loud against the inventory sheet, and confirm the hardware count matches what you wrote at removal.
- Check the mirrored pairs. Lay out every left and right part side by side and confirm each label matches its physical side.
- Verify every connector label against the photo taken at removal, circuit by circuit.
- Confirm reference parts are marked and set aside where they will not be swept up with parts you intend to discard.
- Look for loose hardware on the floor and in the footwells, and count it into the right bag before you close anything up.
If the audit balances, you have a parts list you can trust. If it does not, find the missing bag now, while the interior is still open and the car is still searchable.
Special cases: glued trim, brittle plastics, and woodgrain
Some parts need more than a bag, and they are the parts you cannot replace when they break.
- Glued or bonded trim needs a slow, even heat and a plastic spatula, then its own sleeve. Never lever against a painted edge.
- Brittle plastics from the 1980s often snap at the mounting tab. Bag them individually, pad them, and stop pulling the moment you feel resistance change.
- Woodgrain and piano-black panels need individual sleeves or clean cardboard, and no tape stuck directly on the finished surface. Put the tape on the backing, never the face.
- Original mouldings and brightwork get their own labelled sleeve and a flat storage spot, not a tote where they can scratch each other.
Storing the bags when the project pauses for months
Most real restorations pause, and a bagging system that only works in one long weekend is not much of a system. A few habits keep months-long gaps from destroying your labels.
- Store totes indoors, in a dry room out of direct sunlight, with the lids seated. Heat and damp are what kill label adhesive and warp interior plastics.
- Leave a desiccant pack in any tote that holds foam-backed or fabric trim.
- Check the stack monthly-ish for a long pause, and confirm the top tote number still matches its lid. It is the first thing that goes wrong when bins get moved.
- Refresh any label that has lifted, using the code and the date from the inventory sheet so the numbering sequence stays unbroken.
- Keep the inventory sheet in the tote with the first zone, not on a bench where it will be swept up.
Frequently Asked Questions
What should I write on a bag of car parts?
Write six fields in the same order every time: part name or part number, side and position, orientation, hardware count, status (reuse, replace, or save for reference), and the month and year it was removed. A short description of the location, such as dash lower or sill rear, beats a vague left or right. Write it on the bag and on the part itself, inside and outside the bag.
How do you label wiring harness connectors on a teardown?
Use small moisture-proof plastic cable labels on both the harness side and the component side of every connection. Write a plain-language circuit name such as horn, wiper, or seat heater alongside your zone and sequence code. Photograph each connector before you unplug it, because two same-shaped plugs on the same harness are often different circuits.
What bag size should I use for trim clips and fasteners?
Use quart bags for small uniform hardware such as trim clips, panel screws, and T-nuts. Use gallon bags for mixed hardware from one removal zone, like console or carpet fasteners. Use 2-gallon bags for seat rail bolts, riser hardware, and seat frames, and give a door card, seat, or headliner its own dedicated bag or sleeve.
Should the label go inside the bag, outside the bag, or on the part?
Do all three where it matters. An inner label stays with the contents if the outer one is torn or covered, and marking the part itself keeps the association alive once the part and bag are separated on a bench. For a large panel, also tape the hardware bag to the panel it came from.
How do I keep left and right interior trim from getting mixed up?
Never put mirrored parts in the same bag, and never rely on left or right alone. Use a code built from a zone, a side, and a sequence number, such as DR-L-03 for the third part removed from the driver door, left-hand position. Lay every mirrored pair out side by side and confirm each label matches its physical side before you start refitting.
Do I need to remove or bag the airbag module when stripping an interior?
Never bag or bin airbag modules, seat belt pretensioners, or a clock spring with general interior parts, and never ship them with trim. Disconnect the battery and follow the service manual for your vehicle, including the specified wait time before working around the steering column. If a restraint part does not need to come out for your job, the safest bagging decision is to leave it mounted.
Conclusion
How to label and bag parts during an interior strip down comes down to five habits: set up the totes and pre-labelled bags first, work in removal zones, repeat one loop of photograph, remove, bag, label, store, and mark the part as well as the container. Add a code of zone, side, and sequence, and count your hardware as it comes off.
Do the ten-minute audit before you refit anything, and the next stage of the project starts with a parts list instead of a search. The labels are the cheapest insurance in the whole teardown, and the car tells you exactly which side it is as soon as you ask.