
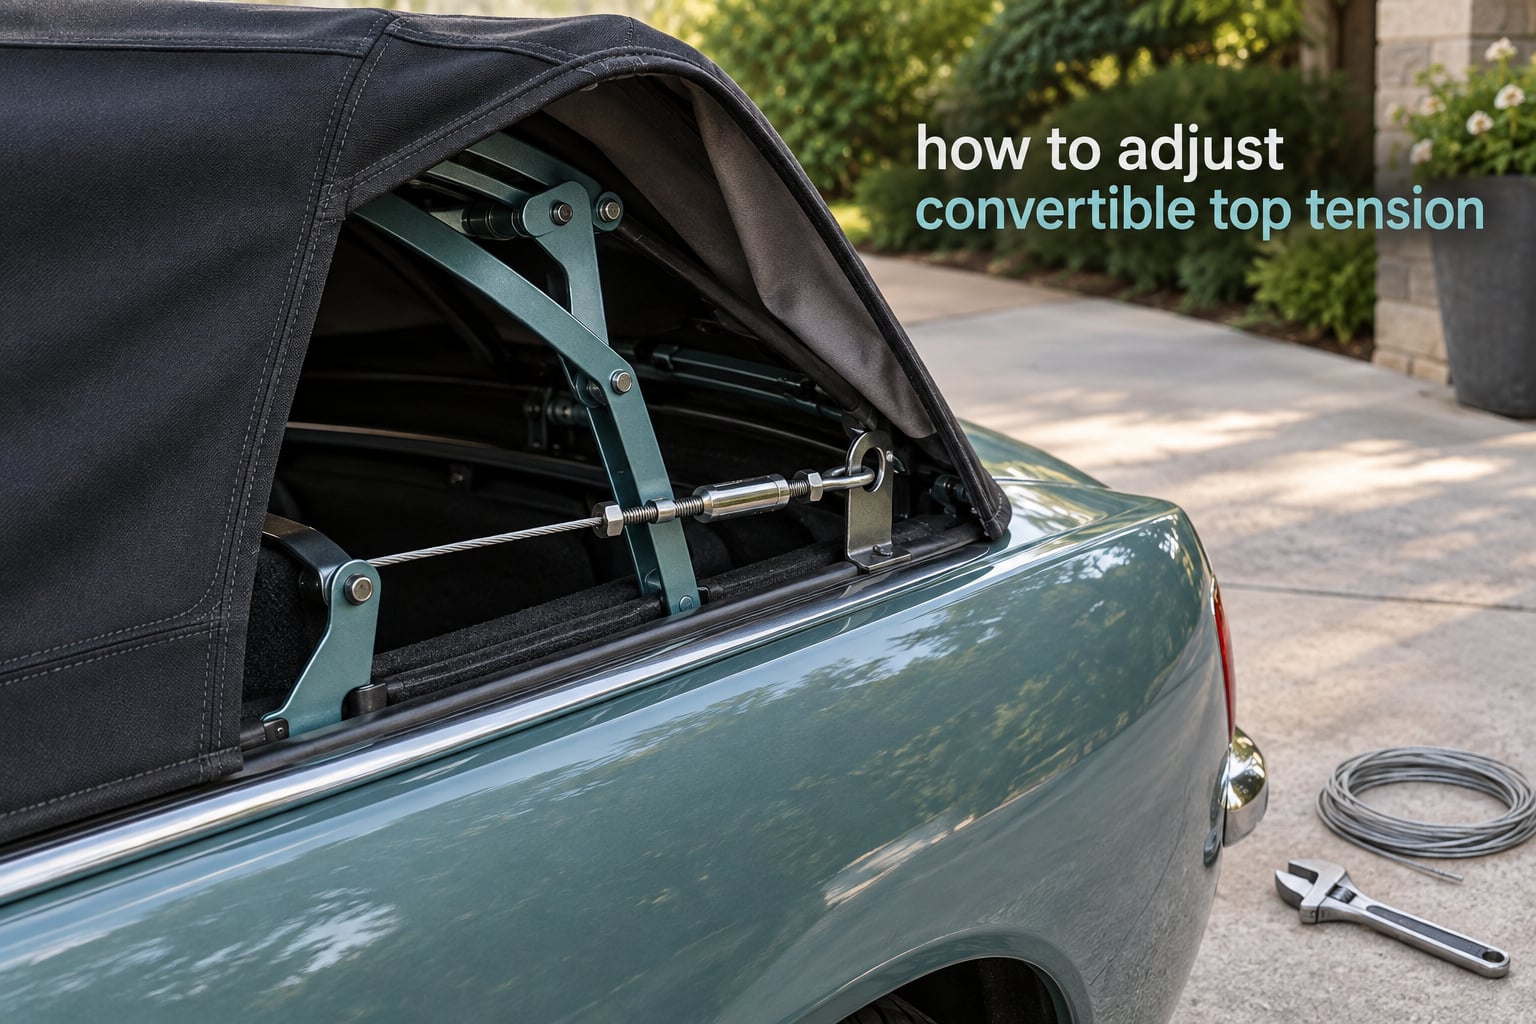
Convertible top tension is set by hand, not by the top motor. You adjust it at the cable tensioner blocks, the elastic hold-down straps or stud nuts, and the frame mounting bolts: loosen the fasteners a quarter turn, cycle the top so the fabric re-seats on the frame, then tighten in small increments working from the center outward. On a power-operated car the equivalent adjustment is a turnbuckle on the lift linkage.
That is the short answer. The long answer matters more, because most owners who get a bad result make one of two mistakes: they adjust a cold top that has been folded for months, or they tighten one corner hard and forget the opposite side.
This guide covers what the hardware actually does, how to tell a loose top from a tight one from an uneven one, the full adjustment procedure, and when the honest answer is that the top needs replacing rather than adjusting. I have pulled the hardware names, fastener sizes and failure patterns from owner write-ups and club articles, because the factory shop manuals for this job are locked inside PDF service literature that almost nobody outside a dealer has read.
Table of Contents
- What convertible top tension actually controls
- Diagnose the symptom first: loose, tight, or uneven
- Before you touch anything, let the fabric relax
- Tools and parts you will need
- How to adjust convertible top tension: step by step
- Cable tops, hold-down strip tops, and which adjustment applies
- Adjusting the frame mounting bolts when cable tension is not the answer
- Adjusting a power-operated top: the turnbuckle
- After the adjustment, run the water test
- Mistakes that ruin the job
- Re-tensioning schedule and seasonal maintenance
- When adjustment is the wrong fix
- Frequently Asked Questions
- How do I know if my convertible top is a tension problem or a motor problem?
- Why is my convertible top sagging?
- Why won’t my convertible top latch?
- How to reset a convertible top?
- Why won’t my convertible top go down?
- How do I remove wrinkles from a convertible soft top?
- How often should I tension my convertible top?
- What tools do I need to adjust a convertible top?
- How do I warm up a convertible soft top before adjusting it?
- Do I need to replace or adjust my convertible top?
- How do I adjust a power convertible top?
- How do I stop my soft top from leaking?
- Conclusion
What convertible top tension actually controls
Tension is the pull the frame applies to the fabric. Get it right and the top seals against the windshield header, the rear deck latches hold, and water runs off the side rails instead of channeling into the cabin.
Get it too loose and the fabric sags between the bows, flutters at speed, and pools water above the doors. Get it too tight and the seams stretch, the rear corners lift off the deck, the latches stop reaching, and the fabric, the stitching and the stud hardware all age faster than they should.
The important thing to understand is that the motor, the pump and the rams do not set tension. They only move the frame. Tension comes from six kinds of hardware, and each one lives in a different place on the car.
| Hardware | Where it lives | What it does |
|---|---|---|
| Cable tensioner | Bolted block on the side rail or frame bow | Anchors the 1/16 inch stainless cable that runs through the fabric edge; its nuts set the pull |
| Tensioning bow | Cross-member at the rear of the top | The member the fabric wraps over; sets the shape and rear deck fit |
| Stud nut | Rear side stud beside the deck | Lets you take tension out of the rear fabric edge without moving the frame |
| Tack strip or hold-down strip | Under the fabric edge along the rear and sides | Aluminium or rubber strip that pins the fabric to the frame or body with adhesive and rivets |
| Wire loop | Rear of the top | The loop the deck latch hook engages; if the latches stop reaching it, the frame has moved rather than the fabric relaxing |
| Turnbuckle | Power-top lift linkage, near the pivot | Sets how far the roof travels up or down on hydraulic and electric frames |
Two more pieces cause trouble often enough to name. The cam-action hinge behind the door moves the frame in and out as the top cycles, and when it rusts it jams silently. The chromed hinged tensioner bars swing on a scissor action, and that hinge will cut a hole in new fabric if you work near it with the fabric unsupported.
Diagnose the symptom first: loose, tight, or uneven
Most guides assume you have one problem. You probably have one of three, and each one points at different hardware. Take two minutes with the top fully up and latched, walk around the car, and match what you see.
| Symptom | Likely cause | Where to adjust |
|---|---|---|
| Fabric sags between bows, flutters at speed, gap visible along the rear edge | Overall tension loss from fabric stretch and age | Cable tensioner nuts and the rear hold-down screws |
| Rear deck latches will not reach their wire loops, deck sits proud of the body | Over-tension, or the frame has shifted on its mounting bolts | Back off a quarter turn, then reposition the frame bolts |
| Water channels over the doors and pools in the cabin | Uneven side-to-side tension, or a pinched header weatherstrip | Equalize one side against the other, then check the header seal |
| Wrinkles running diagonally from the front bow to the rear corners | Tension too high at the front, slack at the rear | Release tension along the rear fabric edge at the stud nuts or canvas holes |
| One side visibly tighter than the other, gap across the windshield is uneven | Uneven tension or unequal tensioner bar length | Level the tensioner bars, then equalize the cable tension |
| Wind noise that changes as the top moves up and down | Frame or motor, not fabric tension | Stop adjusting tension. This is a frame, hinge or hydraulic fault |
| Top will not lower, or stops part way | Limit switch, hydraulic pressure, motor, or a jammed cam-action hinge | Not a tension problem. Diagnose the lift system |
The pattern owners report most often is uneven rather than simply loose. One SaabWorld thread describes a top that had always been tight going slack only above the door windows, which points at the side attachment points rather than the rear. A Bimmerforums owner finished an install job with tension straps so tight the rear lifted and would not latch at all, the exact opposite error.
Before you touch anything, let the fabric relax
Do this even if you are in a hurry. A fabric top that has been folded for months, or stored in a cold garage all winter, holds memory. Adjusting it cold is the single most common way owners end up undoing their own work.
Park in direct sun with the top fully up and latched for two to three hours on a warm day. Then latch the rear and leave it under light tension for the rest of the day. On a CorvetteForum thread, two independent replies gave the same instruction: leave it in the sun, adjust nothing, let the fabric relax and the latches grab on their own.
Two cautions. Do not work in cold weather, because a stiff top will fool your judgment of tension. And do not work in extreme heat either, since fabric handled when hot can take a permanent set in your hands.
Tools and parts you will need
Nearly all of this is hand tools. Budget an hour for a routine re-tension and closer to three hours the first time, when you are also learning where the fasteners live.
- Flat-blade and Phillips screwdrivers, plus a set of bits
- 6 mm Allen wrench for frame hardware on many cars
- Open-end wrenches or sockets for the cable tensioner nuts
- Socket set for the frame mounting bolts, commonly 9/16 inch on older cars
- Needle-nose pliers for the cable end ferrules and wire loops
- An awl or small pick for feeding cable into a tensioner block
- Silicone spray or dry lubricant for the hinge pivots and latch strikers
- Painter’s tape or a thick card to shield fabric near the tensioner bars
- Replacement 1/16 inch stainless cable, ferrules and cable tensioners if yours are seized or rusted through
Two optional items earn their keep. A second pair of hands makes the frame bolt repositioning in the next-but-one section far easier, because someone has to hold the top while you snug the bolts. A cheap magnet tray keeps the small nuts from disappearing into the footwell.
How to adjust convertible top tension: step by step
Work on a warm, dry day with the top fully up, latched and relaxed. Never adjust a folded or half-open top.
- Open the top fully, latch both rear deck latches and confirm the wire loops are engaged.
- Walk the car and confirm your symptom is tension, using the table above.
- Find the cable tensioners on the side rails, or the stud nuts and rear attachment screws on your particular top.
- Mark the current position of every nut and screw with a paint pen or tape so you can return to it.
- Loosen every tensioner nut and rear attachment screw by one quarter turn, evenly around the car, never one corner at a time.
- Cycle the top down and back up slowly so the fabric unloads and re-seats on the frame bows.
- Re-tighten from the center of the rear strip outward, about three quarters of the way each, the sequence the Miata garage page recommends, and repeat the cycle until tension stops changing.
- Stop tightening the moment the fabric goes smooth and the deck latches without a fight, then run the water test below.
That is the whole cycle: loosen evenly, cycle, tighten evenly, verify. The single most important discipline is symmetry. Turning one tensioner nut a full quarter turn while ignoring the three on the other side is how tops end up tight on one side and slack on the other.
For a car with two distinct cable tension devices, one at the leading edge and one at the trailing edge as described on the Lotus Cars forum, both need attention in the same session. A single adjustment only ever solves half the problem on that layout.
Cable tops, hold-down strip tops, and which adjustment applies
Before you turn a nut, work out which top you have. The TEAE club article separates three architectures, and the difference decides your whole approach.
Cable tops have stainless cable laced through the fabric edge and anchored at tensioner blocks on the side rails. These are the easiest to adjust: loosen the block nuts, reset the cable, tighten. Most European soft tops fall here.
Hold-down strip or tack-strip tops pin the fabric edge to the frame and rear strip with an aluminium strip, adhesive and rivets, often backed by elastic straps. There is no cable to adjust. Tension changes by moving the fabric between the stud nuts, easing the attachment holes one hole at a time, or repositioning the strip.
Extra-bow tops add one more cross-member, which changes how tension distributes and generally resists sagging better.
El Alfa Romeo Forums thread on a soft top that would not latch gives the classic hold-down symptom and the correct response: release tension along the rear fabric edge by loosening the stud nuts or letting out the canvas holes. If your top has no visible cable at the side rail, this is your path, and prying the riveted weatherstrip holder strip to get at it will ruin the top.
Adjusting the frame mounting bolts when cable tension is not the answer
When the rear latches no longer reach their wire loops, turning the cable tensioner nuts achieves nothing. What has actually happened is that the frame has crept on its mounting bolts, and the fix is repositioning the frame, not re-tensioning fabric.
On older cars this is a set of large frame bolts, commonly four per side and 9/16 inch across the flats, which is exactly what a C1 or C2 Corvette owner found when he loosened all eight of them to chase the same problem. The same idea appears on a Spider S4 thread, where owners gained slack by moving the frame slightly on the bolts where the hood meets the B-pillars.
- Put the top fully up and latched, with the rear deck closed.
- Support the top so its weight is not on the frame bolts as you work.
- Mark the position of every mounting bolt before loosening anything.
- Loosen all of the frame bolts, moving the frame slightly to reposition it until the rear latches reach their wire loops with the fabric not yet tightened.
- Tighten the bolts working from the center out, about three quarters of the way each.
- Re-latch the rear and re-tension the cables in one eighth increments until the fit is right.
If the latches still will not reach after repositioning, the frame is bent or the body mounting points have shifted, and that is a workshop job with a jig. Stop there rather than forcing it.
Adjusting a power-operated top: the turnbuckle
On a car with a powered top, a different complaint has a different fix. When the roof does not lower or raise the full amount, the adjustment is a turnbuckle on the lift linkage, the threaded adjuster at the pivot that sets the travel of the whole assembly. The BMW project article on Pelican Parts describes exactly this adjustment, turning the turnbuckle to correct the amount the roof rises and falls.
The procedure is shorter. Cycle the top to its full up position, then a quarter turn on the turnbuckle and back down, repeating until the roof reaches its intended stop. Then check that the top still latches properly at the header, because changing travel alters where the fabric seats.
Keep the lift system distinct from fabric tension. If the roof stops part way, chatters, or takes a pump or motor fault, no amount of tension adjustment will help. And if the top will not lower at all, diagnose the limit switch, the fluid level and pressure, and the cam-action hinge behind the door before touching any fastener.
After the adjustment, run the water test
No forum thread in our research described this step, which is precisely why it is worth doing. Tension is judged by feel, and feel is unreliable on a car you have been staring at for an hour.
- Park on level ground with the top fully up and latched.
- Run a hose or a full watering can along the header, the front seam, the rear strip and both side rails, in that order.
- Watch the fabric rather than the ground. Water running down the outside into the drip rail is correct.
- Water tracking under the edge and down the inside of the door glass means channeling, and the channeling tells you which side to adjust.
- Note which side channeled first, back that side off by one eighth of a turn, and repeat.
Re-check after a drive and after a rain. Tension shifts slightly as the fabric takes its first full set under real use, so a second check a week later catches what the first one missed.
Mistakes that ruin the job
Adjusting a cold, long-folded top. Covered above, and still the number one way owners undo an afternoon of work.
Working unpadded near the chromed tensioner bars. Those bars hinge in a scissor action, and the TEAE article is emphatic that they will eat a hole in new fabric if you work near them. Tape or card over the hinge and support the fabric with a hand rather than letting it pinch.
Overtightening the stud nuts. The fabric edge crushes, the stud threads strip, and the rear corner lifts. Ease it back if the deck sits proud.
Prying the riveted weatherstrip holder strip. It is a delicate part and bending it usually ends the top’s life.
Tightening one corner at a time. Always work evenly around the car and from the center out.
Adjusting with the top folded or half open. The fabric has to be loaded onto the frame the way it sits in use or the reading is meaningless.
Assuming a sagging top is a tension problem when it is a frame problem. Rusted cam-action hinges stop the frame moving in and out, and a bent frame cannot be tensioned back into shape.
Re-tensioning schedule and seasonal maintenance
Nobody publishes an interval for this, and that absence is itself a problem. A healthy fabric top loses tension gradually rather than suddenly, which is why the sag is easy to live with until it starts pooling water.
- Check tension at the start of each top season, before the first warm drive
- Run the water test once a year, ideally before a long trip in rain
- Clean the side rails and the channel under the rear strip so water has somewhere to go
- Lubricate the latch strikers and hinge pivots with silicone spray each season
- Treat the fabric and the weatherstays with a protectant, and never use a solvent-based product
- Store a folded top dry and cool, never damp and never in direct sun for days
- Re-tension immediately after any top installation rather than waiting a season for it to settle
Expect to make a small adjustment every year or two on a frequently used car, and more often if the top lives folded in a garage.
When adjustment is the wrong fix
Some conditions are past adjusting, and pretending otherwise costs the owner a second teardown. Replace the top, or have a specialist strip and re-tension it, when any of these are true.
- The fabric has gone slack in the middle of a panel, not at an attachment point, which means the weave itself has lost memory
- The tack strip has pulled away from the fabric and the adhesive has failed
- Cable tensioners are seized, rusted through, or the cable is frayed inside the fabric edge where no adjustment can reach it
- The frame bolts have been repositioned as far as they will go and the latches still do not reach
- The top has been stored folded and damp for years and the seams are hardened and cracked through
On the material question: modern tops are built on a chloroprene or Stayfast-style coated fabric, and that coating is what sheds water and resists UV. Once the coating cracks, no amount of tensioning brings it back, and replacement is the only real fix. Original-equivalent top material is the specification worth asking a shop for when a replacement is on the table.
A useful rule of thumb: if the same symptom returns after two careful adjustments, the problem is in the fabric or the frame, not in the tension setting.
Frequently Asked Questions
How do I know if my convertible top is a tension problem or a motor problem?
Test the fabric with the top fully up. If the shape changes when you loosen a tensioner nut, it is tension. If the roof stops part way, chatters, or the pump runs without the frame moving, the fault is in the motor, hydraulics, limit switch or a jammed cam-action hinge behind the door, and no adjustment will fix it.
Why is my convertible top sagging?
Fabric stretches with age, heat and UV exposure, and elastic hold-down straps relax. The top loses pull between the bows, which is what causes sagging, fluttering at speed and water pooling. It is a normal maintenance item on a soft top and is corrected at the cable tensioners, stud nuts or rear attachment screws.
Why won’t my convertible top latch?
If the rear deck latches will not reach their wire loops, either the fabric is over-tensioned or the frame has shifted on its mounting bolts. Loosen the tensioner nuts a quarter turn and try again. If the latches still do not reach, loosen the frame bolts and reposition the frame before re-tightening.
How to reset a convertible top?
With the top fully up, latch the rear deck latches and then cycle the top down and back up on its normal control. The cycle re-seats the fabric on the frame bows and is the standard reset before and after any tension adjustment. If the reset does not restore normal latching, the fault is electrical, hydraulic or a latch striker alignment issue.
Why won’t my convertible top go down?
Common causes are a tripped or failed limit switch, low hydraulic fluid or low pressure, a failing motor, a jammed cam-action hinge behind the door, or a latch striker that is misaligned so the top believes it is still secured. Check the fuse and fluid level first, then verify both rear latches are fully engaged before operating the switch.
How do I remove wrinkles from a convertible soft top?
Wrinkles normally mean tension is uneven. Work from the center of the rear strip outward, tightening each fastener about three quarters of the way, then cycle the top down and up so the fabric re-seats, and repeat. Adjust the fabric only while the top is fully up and latched, never while it is folded.
How often should I tension my convertible top?
Check tension at the start of each top season and run a water test once a year. A frequently used car usually needs a small adjustment every year or two, while a car whose top lives folded in a garage needs checking more often. Re-tension immediately after any top installation rather than waiting for the fabric to settle.
What tools do I need to adjust a convertible top?
Flat-blade and Phillips screwdrivers, a 6 mm Allen wrench, open-end wrenches or sockets for the tensioner nuts, a socket set for the frame mounting bolts, needle-nose pliers and an awl. Silicone spray for the hinge pivots and latch strikers, plus tape or card to shield the fabric near the chromed tensioner bars.
How do I warm up a convertible soft top before adjusting it?
Park in direct sun with the top fully up and latched for two to three hours on a warm day, then leave it latched under light tension for the rest of the day. The fabric relaxes and the rear latches often grab on their own. Avoid cold weather and avoid handling the fabric in extreme heat.
Do I need to replace or adjust my convertible top?
Adjust if the problem is at an attachment point and responds to a quarter turn. Replace if the fabric is slack in the middle of a panel, the tack strip adhesive has failed, the cable is frayed inside the fabric edge, the tensioners are seized, or the frame bolts are at the end of their travel. If the same symptom returns after two careful adjustments, the fabric or frame is the cause.
How do I adjust a power convertible top?
On a power-operated top, the fabric tension is still set at the tensioners, but the roof travel is adjusted at the turnbuckle on the lift linkage. Cycle the top fully up, turn the turnbuckle a quarter turn, cycle it again and repeat until the roof reaches its intended stop. Confirm it still latches at the header afterwards.
How do I stop my soft top from leaking?
Most leaks above the doors are tension, not sealant. Equalize one side against the other at the cable tensioners or stud nuts, then run a hose along the header, front seam, rear strip and side rails to find where the water channels in. Adjust one side at a time in one eighth turns and retest. If the fabric coating is cracked, no adjustment will stop the leak.
Conclusion
To adjust convertible top tension properly, work on a warm day with the top fully up, loosen every tensioner evenly, cycle the top to re-seat the fabric, then tighten from the center outward in small increments. Mark every fastener before you start so you can always go back to where you were.
Diagnose before you turn a nut. A sagging top, a top that will not latch and a top that leaks above one door are three different problems pointing at three different pieces of hardware, and treating them all the same is how a good top gets ruined.
Run the water test afterwards, re-check a week later, and if the same symptom survives two careful adjustments, stop tuning and get a straight answer about whether the top or the frame is the real problem.
Our workshop notes on convertible roof hardware and trim fitting cover the adjacent jobs that come up alongside tension work, including latch striker alignment and header seal replacement.