
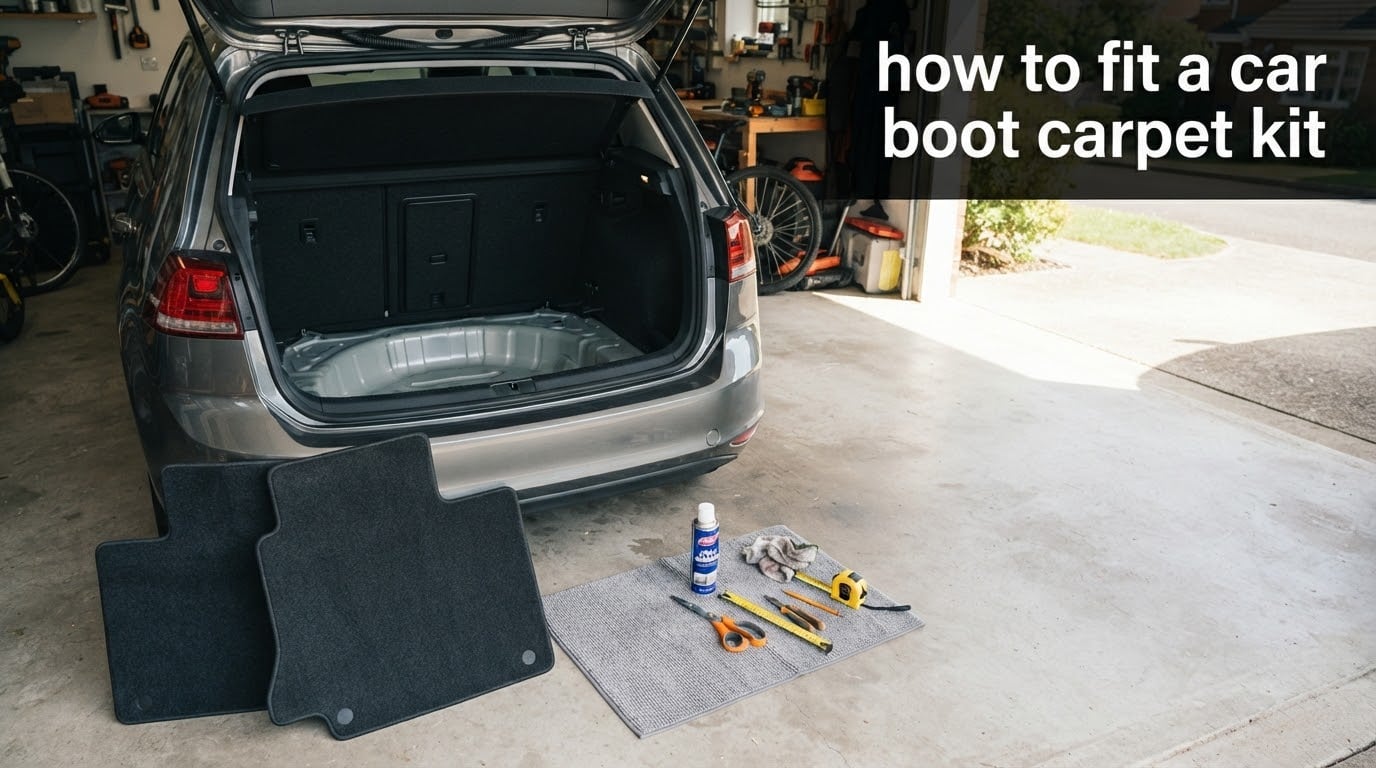
Fitting a car boot carpet kit transforms your vehicle’s cargo area from a worn, dirty surface into a clean, professional-looking space. Whether you’re restoring a classic car, protecting your daily driver from muddy dogs and sports equipment, or simply replacing damaged carpet, understanding how to fit a car boot carpet kit properly ensures a lasting result. This guide walks you through the entire process, from gathering tools to final installation, helping you avoid common mistakes that lead to bubbles, poor adhesion, or unsafe fitting.
Table of Contents
- What You’ll Need: Tools and Materials
- Preparation: Getting Your Boot Ready
- How to Fit a Car Boot Carpet Kit: Step-by-Step
- Adhesive Application Techniques
- Safety Considerations
- Common Mistakes to Avoid
- Vehicle-Specific Considerations
- Troubleshooting Common Problems
- Maintaining Your Boot Carpet
- Frequently Asked Questions
- Conclusion
What You’ll Need: Tools and Materials
Before starting any fitting job, having the right tools and materials ready saves time and prevents frustration mid-project. Most car boot carpet kits include the carpet piece itself and sometimes adhesive tabs, but you’ll need additional supplies depending on your specific kit and vehicle.
Essential Tools
Scissors or sharp utility knife — A quality pair of heavy-duty scissors works well for most carpet trimming tasks, while a utility knife with fresh blades handles thicker materials and precise cuts around contours. Keep both handy if you have them.
Straight edge or ruler — A metal straight edge helps create clean, straight cuts when trimming excess carpet, especially along edges that meet trim panels or sill plates.
Measuring tape — Essential for verifying dimensions and marking cut lines accurately, particularly when working with universal-fit kits that require custom trimming.
Marker or chalk — Use a washable marker or tailor’s chalk to mark cutting lines and positions on the carpet backing. Chalk marks brush off easily without leaving residue.
Adhesive Options
Spray adhesive — The most popular choice for boot carpet fitting, spray adhesive provides even coverage and strong bonding. Look for automotive-grade formulations designed for interior trim applications.
Aerosol adhesive — Similar to spray adhesive but often easier to control, aerosol adhesive works well for smaller areas or touch-up applications. Some carpet kits specifically recommend aerosol adhesive for their material.
Brush-on adhesive — Less common but useful for detailed work around wheel arches and complex contours, brush-on adhesive allows precise application in tight corners where spray might miss or over-apply.
Cleaning Supplies
Hoover with brush attachment — Thorough vacuuming removes loose dirt, debris, and old carpet fibres that would otherwise interfere with adhesive bonding.
Surface cleaner and lint-free cloths — Use an appropriate cleaner for your boot surface material, whether metal, plastic, or existing carpet. Avoid cleaners that leave residue.
Wire brush — Helpful for removing stubborn residue from old carpet adhesive if you’re replacing existing boot carpet.
Safety Equipment
Gloves — Protect your hands from adhesive chemicals and sharp carpet backing fibres during handling and trimming.
Safety glasses — Essential when using spray adhesives or cutting carpet overhead to prevent eye irritation and debris entry.
Ventilation — Work in a well-ventilated area or open all vehicle doors when using adhesive products to avoid inhaling fumes.
Preparation: Getting Your Boot Ready
Proper preparation makes the difference between a professional-looking fit and a frustrating, uneven result. Taking time to prepare thoroughly before you even unroll the carpet prevents problems that are difficult to fix later.
Removing Old Carpet
If your vehicle has existing boot carpet that needs replacing, start by removing it completely. Most factory carpet is held in place by clips, adhesive, or simply pressed into contours. Work from one corner, gently lifting the carpet and checking for attachment points as you go.
Clip-held carpet requires locating and releasing each clip before lifting. Use a trim removal tool or flat screwdriver wrapped in tape to avoid scratching surrounding surfaces. Adhered carpet may need careful scraping to detach without damaging the underlying surface.
Save the old carpet if it’s intact enough to use as a template. Laying old carpet over new material provides accurate cutout positions for wheel arches, tie-down points, and access panels.
Cleaning the Boot Floor
With old carpet removed and all debris cleared, thoroughly clean the boot floor. Hoover every corner, paying special attention to seams and edges where dirt accumulates. Use a brush attachment to agitate stubborn dirt from textured surfaces.
Wipe the entire surface with appropriate cleaner on a lint-free cloth. For metal boot floors, remove any surface rust and treat with rust converter if needed. For plastic or carpeted surfaces, ensure they’re completely dry before applying adhesive.
Check for moisture ingress points that could cause future problems. Address leaks before fitting new carpet, as trapped moisture leads to mould, unpleasant odours, and adhesive failure.
Letting the Carpet Relax
New carpet arrives rolled or folded, creating creases and curls that need time to relax. Unroll or unfold the carpet in a warm, dry area and leave it flat for at least one to two hours before fitting.
Many fitters recommend overnight relaxing for best results. The warmth helps the carpet fibres and backing return to their natural flat state, making positioning and adhesion much easier.
Never fit carpet immediately from packaging. Creases create bumps that prevent flat adhesion, and curled edges won’t sit flush against the boot floor regardless of adhesive strength.
Dry Fitting: The Essential Step
Dry fitting means positioning the carpet in the boot without adhesive to check fit and identify trimming needs. This step catches problems early when they’re easy to correct, preventing wasted adhesive and ruined carpet.
Place the carpet loosely in the boot and smooth it from the centre outward. Check how it fits around wheel arches, the bulkhead, and tailgate area. Mark any areas where carpet bunches, gaps appear, or excess material needs trimming.
For tailored carpet kits, the fit should be close with minimal trimming. Universal kits require more extensive trimming to match your specific boot shape. Work slowly, checking fit repeatedly as you trim small amounts.
Once satisfied with the dry fit, use chalk to mark the final position on both the carpet backing and boot floor. These reference marks help you reposition accurately after applying adhesive.
How to Fit a Car Boot Carpet Kit: Step-by-Step
With preparation complete and the carpet relaxed and dry-fitted, you’re ready for the actual fitting process. Work methodically through each step without rushing — a properly fitted boot carpet should last for years.
Step 1: Position the Carpet
Remove the carpet from the boot and set it aside on a clean surface. Ensure the boot floor is dry and free from any debris that could interfere with adhesion. Double-check your reference marks are still visible.
If using spray adhesive, shake the can thoroughly for at least one minute to ensure proper mixing. Test the spray pattern on a piece of cardboard or scrap material before applying to your boot floor.
Step 2: Apply Adhesive to the Boot Floor
Apply adhesive to the boot floor in sections, starting from the centre and working outward. Hold the spray can approximately 20-30cm from the surface and apply an even, light coat. Avoid heavy application that creates pools or runs.
Most automotive spray adhesives require a tack time of 10-20 minutes before positioning carpet. Check your specific adhesive instructions — applying carpet too wet leads to slipping and poor bonding, while waiting too long reduces adhesion strength.
For large boot areas, apply adhesive in manageable sections rather than coating the entire floor at once. This approach prevents adhesive from drying before you reach certain areas.
Step 3: Position and Press the Carpet
Working from your reference marks, carefully position the carpet starting at one end — typically the bulkhead or front edge nearest the seats. Align the carpet with your marks and press firmly into place.
Smooth the carpet from the centre outward, using firm, even pressure to eliminate air bubbles and ensure full contact with the adhesive-coated surface. Pay special attention to edges and corners where carpet tends to lift.
For wheel arch areas, press the carpet into the contours using your hands or a soft roller. Work slowly around curves, allowing the carpet to conform to the shape without creasing or bunching.
Step 4: Trim Excess Material
Once the carpet is positioned and smoothed, trim any excess material around the edges. Use sharp scissors or a utility knife, cutting carefully along trim panels, sill plates, and the tailgate edge.
Leave a slight overlap (2-3mm) rather than cutting exactly to the edge. This small excess tucks under trim for a neater finish and prevents visible gaps as carpet settles.
For intricate areas like wheel arches, make small relief cuts in the backing (not through the carpet fibres) to help the carpet conform to tight curves without bunching.
Step 5: Secure Edges and Allow to Set
Press all edges firmly and apply additional adhesive to any areas that seem loose. Some installers use weights or heavy objects to hold edges flat while the adhesive fully cures.
Most spray adhesives reach full bond strength within 24 hours, though light use is possible after 2-4 hours. Avoid placing heavy objects in the boot during this curing period.
Check your work after the adhesive sets. Press any lifting edges again with additional adhesive if needed. A properly fitted carpet should sit completely flat with no bubbles or lifting edges.
Adhesive Application Techniques
The adhesive you choose and how you apply it significantly affects your final result. Understanding different adhesive types and proper application technique helps you achieve a lasting, professional bond.
Understanding Adhesive Types
Spray adhesive offers the most even coverage for large areas. The fine mist penetrates carpet backing thoroughly while providing consistent coverage on the boot floor. Automotive spray adhesives typically bond well to metal, plastic, and carpet surfaces.
Aerosol adhesive provides similar benefits to spray adhesive but often with better control. Some formulations are specifically designed for automotive carpet and trim, offering higher temperature resistance and stronger bonding.
Brush-on adhesive works best for detailed work and small areas. It’s particularly useful for securing edges that have lifted or applying adhesive in tight corners where spray would waste material or create overspray.
How Much Adhesive to Use
The right amount of adhesive creates a strong bond without soaking through the carpet or leaving residue. Apply adhesive until the surface appears evenly coated with a light sheen, not wet and pooling.
Too little adhesive results in weak bonding, causing carpet to lift at edges and corners. Too much adhesive seeps through carpet backing, potentially staining visible fibres and creating an uneven surface.
Practice on a test piece if you’re unfamiliar with spray adhesive. Understanding the spray pattern and coverage rate helps prevent over-application on your actual project.
Drying and Working Time
Adhesive timing is crucial for proper bonding. Most spray adhesates have a tack time — the period between application and when the carpet should be positioned. This varies by product but typically ranges from 10 to 20 minutes.
Positioning carpet before the adhesive tacks properly causes it to slip and shift, making precise positioning difficult. Waiting too long past the tack time reduces bonding strength, as the adhesive begins to skin over.
Work in sections for large boots to maintain proper timing. Coat one section, let it tack, position that portion of carpet, then move to the next section. This methodical approach prevents racing against drying adhesive.
Safety Considerations
Working with adhesives and trimming tools presents several safety considerations that shouldn’t be overlooked. Taking proper precautions protects your health and prevents accidents during the fitting process.
Ventilation Is Critical
Most automotive spray adhesives contain solvents that release volatile organic compounds (VOCs) during application and curing. Always work in a well-ventilated area with multiple doors or windows open to provide airflow.
Working inside a closed vehicle with adhesive fumes accumulating can cause dizziness, headaches, and nausea. If you must work in a garage, keep the main door open and use a fan to circulate fresh air.
Never smoke near adhesive products — most are highly flammable until fully cured. Keep ignition sources well away from your work area.
Eye and Skin Protection
Spray adhesive overspray easily reaches your eyes, causing irritation and potential damage. Wear safety glasses throughout the adhesive application process, even if you think you’re working away from the spray pattern.
Gloves protect your hands from adhesive chemicals that can cause skin irritation and make carpet handling difficult. Sticky adhesive on your fingers transfers to carpet fibres and creates visible marks that are hard to remove.
Avoiding Pedal Obstruction
While this guide focuses on boot carpet rather than front floor mats, the principle applies universally: ensure carpet and adhesive never interfere with vehicle controls. Boot carpet shouldn’t extend under rear seats where it might affect seat adjustment mechanisms.
Check that carpet around the bulkhead doesn’t create a raised edge that could snag items being loaded or unloaded. The carpet should transition smoothly to any adjacent floor surfaces.
Proper Tool Use
Sharp scissors and utility knives make cleaner cuts but also pose cutting hazards. Always cut away from your body, keep blades sharp (dull blades require more force and slip more easily), and store tools safely when not in use.
Dispose of carpet offcuts and adhesive cans properly. Most aerosol adhesives require special disposal as hazardous materials rather than general household waste.
Common Mistakes to Avoid
Learning from others’ mistakes saves time, materials, and frustration. Here are the most common fitting errors and how to prevent them.
Skip the Relaxation Period
Fitting carpet immediately after unboxing creates problems with creases, curled edges, and poor fit. The carpet needs time to flatten and relax from its packaged state. Rushing this step results in visible bumps and edges that refuse to sit flat.
Solution: Plan ahead and unroll the carpet at least two hours before fitting. Overnight is even better. The carpet should lie completely flat before you begin the installation process.
Skipping the Dry Fit
Applying adhesive before checking fit is a recipe for disaster. Once adhesive is on the boot floor, you have limited time to position carpet correctly. Discovering the carpet doesn’t fit properly mid-application leaves you with adhesive where you don’t want it and carpet stuck in the wrong position.
Solution: Always dry fit first. Position the carpet, check all areas, mark reference points, and only then apply adhesive. This extra step takes minutes but prevents major problems.
Poor Surface Preparation
Adhesive needs a clean, dry surface to bond properly. Dust, dirt, oil, and moisture all interfere with adhesion, causing carpet to lift prematurely. A boot floor that looks clean might still have enough contamination to weaken the bond.
Solution: Clean thoroughly with appropriate cleaners. Check for and address any moisture problems. Let the surface dry completely before applying adhesive.
Wrong Adhesive Amount
Too much adhesive wastes material and potentially soaks through carpet, while too little results in weak bonding and lifting edges. Both extremes create problems that are difficult to fix after installation.
Solution: Apply an even, light coat rather than saturating the surface. Practice on a test piece if you’re unsure about coverage. Multiple light coats are better than one heavy application.
Rushing the Process
Fitting boot carpet isn’t a quick job you can squeeze into 30 minutes. Rushing leads to mistakes at every stage — poor preparation, sloppy positioning, uneven smoothing, and inadequate curing time.
Solution: Allow adequate time for the entire process including relaxation, preparation, fitting, and curing. A thorough job takes several hours from start to finish.
Vehicle-Specific Considerations
Different vehicles present unique challenges for boot carpet fitting. Understanding how your specific vehicle type affects the process helps you anticipate and address potential issues.
Classic Car Restoration
Classic cars often have boot areas that differ significantly from modern vehicles. Older materials, different floor configurations, and the presence of restoration work all affect carpet fitting.
Check for surface rust and treat any affected areas before fitting new carpet. Classic car boots may have irregular shapes and unusual contours requiring more detailed trimming work.
Consider using the old carpet as a template if it’s intact enough. This approach provides accurate positioning for cutouts and edges that might be difficult to determine by eye.
Electric and Hybrid Vehicles
EVs and hybrids often have boot floors that differ from traditional vehicles due to battery placement and different structural requirements. Some have raised floors, additional access panels, or different materials.
Check your vehicle’s manual for any specific guidance about boot modifications or carpet fitting. Avoid covering ventilation points, access panels, or safety equipment that might be located in the boot area.
The absence of exhaust systems in EVs means no heat from catalytic converters or exhaust pipes, potentially allowing different adhesive choices. However, battery cooling systems may require maintaining access to certain areas.
Sports Cars and Low Boot Vehicles
Sports cars often feature shallow boot spaces with complex shapes, making access and working room limited. The restricted space affects every aspect of the fitting process from cleaning to adhesive application to final positioning.
Work methodically from one end to the other, as limited access prevents reaching across the boot. You may need to position yourself differently or use tools with longer handles to reach all areas.
Raised vs Lowered Floor Levels
Many modern vehicles have adjustable boot floors that can be raised or lowered. This feature affects carpet fitting as the carpet must fit in the chosen position or be flexible enough to accommodate both positions.
Fit your carpet for the position you use most frequently. If you regularly adjust the floor level, ensure the carpet has enough flexibility or cut sections to work with both configurations.
Troubleshooting Common Problems
Even with careful preparation, problems can arise during or after fitting. Here’s how to address the most common issues.
Bubbles and Wrinkles
If bubbles appear after positioning the carpet, work them toward the nearest edge using firm, even pressure with your hands or a soft roller. For stubborn bubbles, carefully lift the affected area, apply additional adhesive, and press firmly.
Small wrinkles often settle out as adhesive cures. Large wrinkles indicate either insufficient relaxation time before fitting or poor initial positioning.
Edges Lifting
Lifting edges usually indicate insufficient adhesive, poor surface preparation, or inadequate pressure during installation. Apply additional adhesive under the lifted edge and press firmly, using weights if needed to hold it flat while curing.
If edges continue lifting after multiple attempts, the surface may have contamination preventing adhesion. Remove the affected section, clean thoroughly, and reapply adhesive.
Poor Fit Around Wheel Arches
Wheel arches present some of the most challenging curves in a boot floor. If carpet bunches or gaps appear here, check whether relief cuts in the backing (not through visible fibres) help the material conform to the curve.
Small gaps at wheel arches often can’t be avoided with universal carpet. Consider whether additional trim pieces or careful tucking will provide an acceptable finish.
Adhesive Not Bonding
When adhesive fails to bond, the cause is usually contamination, incorrect timing, or incompatible materials. Check that your adhesive is appropriate for both the carpet backing and boot floor material.
Verify you allowed proper tack time before positioning carpet. If adhesive was applied too long before positioning, it may have skinned over and lost bonding ability.
Maintaining Your Boot Carpet
Proper maintenance extends the life of your newly fitted boot carpet and keeps it looking professional. Simple care routines prevent premature wear and maintain adhesion.
Regular Cleaning
Hoover the boot carpet regularly, just as you would interior carpet. Removing dirt and debris promptly prevents grit from working into fibres and causing wear. Use a brush attachment for deeper cleaning.
For muddy boots or pet paws, allow mud to dry completely before Hoovering. Dry mud brushes off more easily than wet mud, which tends to smear and stain.
Dealing with Spills and Stains
Address spills quickly to prevent staining. Blot liquid spills rather than rubbing, which spreads the stain and damages fibres. Use appropriate carpet cleaner for the specific spill type.
For stubborn stains, test any cleaning product on an inconspicuous area first. Some cleaners can affect adhesive or damage certain carpet materials.
Checking Adhesive Integrity
Periodically check carpet edges for any lifting, especially in high-traffic areas or where heavy items are regularly loaded. Early detection allows simple adhesive touch-ups before problems become severe.
Keep a small container of adhesive for touch-ups. Reinforcing lifted edges promptly prevents them from worsening and potentially tearing.
Frequently Asked Questions
What are the steps of carpet installation?
Carpet installation involves preparing the surface, letting carpet relax, dry fitting to check alignment, applying adhesive evenly, positioning carpet from centre outward, smoothing to eliminate bubbles, trimming excess material, and allowing proper curing time. Each step requires patience and attention to detail for professional results.
What are the steps involved in installing new carpet in a car?
Installing car carpet requires removing old carpet and adhesive, thoroughly cleaning the floor, letting new carpet relax flat, dry fitting to verify proper positioning, applying automotive adhesive in sections, pressing carpet firmly into contours, trimming around edges and wheel arches, and allowing 24 hours for full curing.
How do you properly glue automotive carpet to the car’s floor and walls?
Apply automotive spray adhesive evenly to both surfaces, wait for the recommended tack time (usually 10-20 minutes), then press carpet firmly into place. Work from the centre outward to eliminate air bubbles, and pay special attention to contours and edges. Use additional adhesive on problem areas and allow proper curing time before use.
What tools do I need to fit a car boot carpet kit?
Essential tools include scissors or a utility knife for trimming, a straight edge for clean cuts, measuring tape, marker or chalk for marking lines, Hoover and cleaning supplies for preparation, and spray or aerosol adhesive for bonding. Safety equipment like gloves and glasses are also recommended when working with adhesives.
How long does it take to fit a boot carpet kit?
The complete process typically takes 3-4 hours, including carpet relaxation time (1-2 hours), surface preparation (30-60 minutes), and actual fitting with adhesive application and positioning (60-90 minutes). Allow an additional 24 hours for adhesive to fully cure before heavy use.
Conclusion
Learning how to fit a car boot carpet kit properly transforms a potentially frustrating task into a manageable DIY project. The key lies in thorough preparation: letting carpet relax, cleaning surfaces meticulously, and always dry fitting before applying adhesive. These foundational steps prevent most common problems before they occur.
Take your time with adhesive application, working in sections and respecting proper tack times. Position carpet carefully from your reference marks, smooth firmly from centre to edges, and trim precisely for a professional finish. Allow adequate curing time before loading heavy items into your boot.
If you encounter significant challenges — extensive rust, unusual boot configurations, or adhesive repeatedly failing — consider consulting a professional trim specialist. The investment in expert installation often costs less than correcting DIY mistakes. With proper technique and patience, your newly fitted boot carpet will protect your vehicle and enhance its appearance for years to come.