
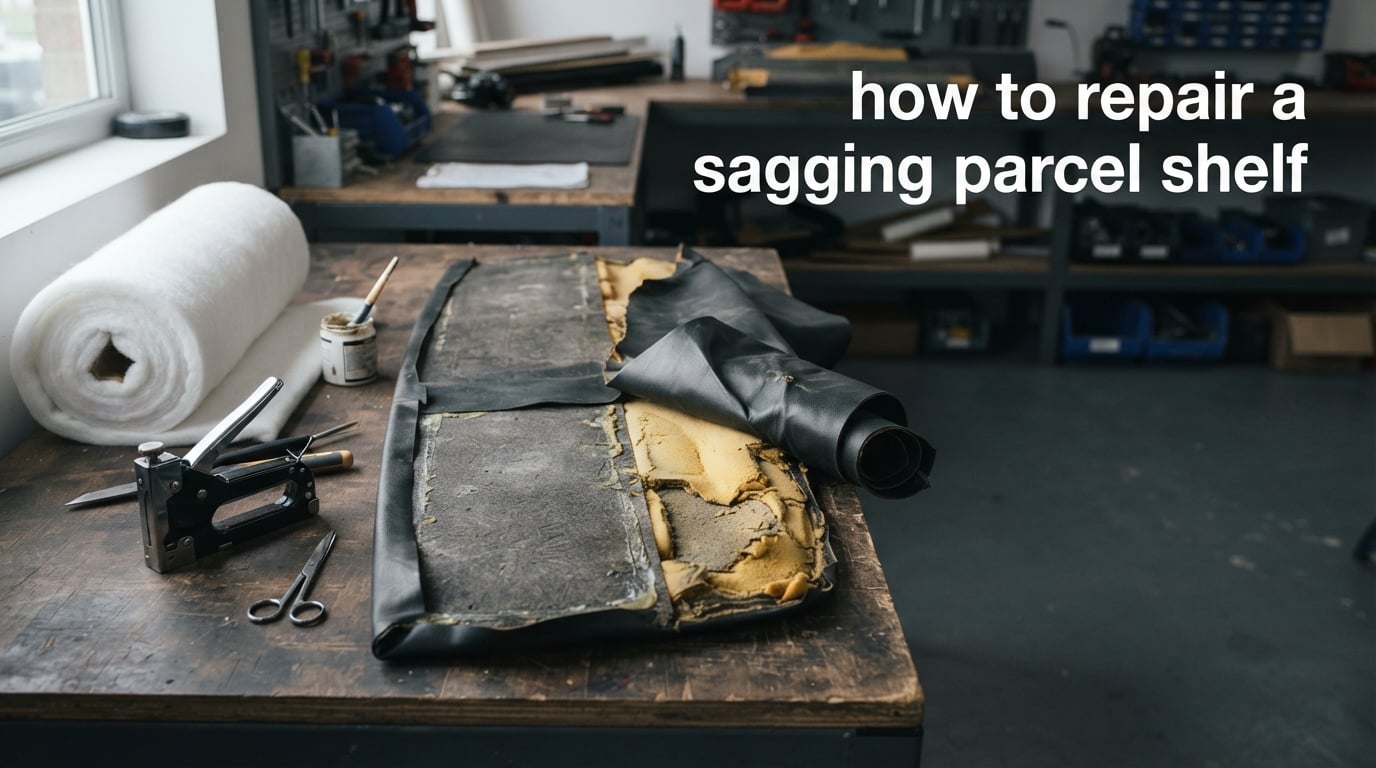
A sagging parcel shelf is one of those faults everyone notices and almost nobody fixes. The shelf still holds a suitcase, so it does not feel urgent, but it rattles over the rear axle, blocks your view through the back window, and a failed side clip can let the whole thing drop forward under braking. On a lot of cars it is also the reason the boot floor behind it gets scuffed and the trim around it gets torn.
The good news is that most of these shelves are not a single moulded part. They are a sandwich: a vinyl or leather trim skin, stapled or bonded to a thin foam layer, sitting on a rigid core board, with the edges captured by clips, brackets or a channel in the body side. Any one of those layers can fail on its own, and each one calls for a different repair.
This guide covers how to repair a sagging parcel shelf properly, starting with diagnosis rather than disassembly. Most forum threads jump straight to a full re-trim rebuild, which is often far more work than the fault needs. We have pulled the whole job apart into three levels of repair, from a ten-minute field fix to a full core and trim rebuild, plus the rattle, clip and hole-filling jobs that sit alongside it. Updated for 2026.
Table of Contents
- What causes a sagging parcel shelf?
- How to remove a rear parcel shelf safely
- How to repair a sagging parcel shelf: three levels of fix
- How to reinstall and load test the parcel shelf
- How to stop a parcel shelf rattle
- Why modern parcel shelves keep falling off again and again
- Materials and supplies for a full rebuild
- Mistakes that ruin the job
- Repair or replace: where the line sits
- Frequently Asked Questions
- Conclusion
What causes a sagging parcel shelf?
A parcel shelf sags when one of four layers stops carrying load: the trim skin is torn or perished, the foam padding has compressed, the core board has cracked or delaminated, or a side clip, bracket or body anchor has failed. The side anchors carry the weight; the foam and vinyl only shape the surface. Finding which layer failed takes two minutes on the car with the shelf still in place.
| Symptom | Likely cause | Fix | Difficulty |
|---|---|---|---|
| Dips in the middle only when loaded | Foam padding compressed, core still sound | Re-bond foam under the skin, add cotton batting to rebuild loft | Easy |
| Visible crease or dip above one rear speaker | Core board cracked or delaminated around the speaker cutout | Bridge the crack with a Masonite or HDPE patch, then reinforce underneath | Medium |
| Shelf drops at one corner, plastic tabs snapped | Integral mounting tabs or clips broken | Bond in a donor-clip impression or a moulded ABS replacement | Medium |
| Replacement clip fits but has nothing to bite into | Body-side anchor missing or stripped | Fabric and epoxy patch around the anchor, or a bolted steel bracket | Hard |
| Shelf sags across its whole width | Overloaded, or the core has lost stiffness along its full span | Full core rebuild, plus a load limit habit | Hard |
| Rattles over the rear axle, no visible sag | Side channel slack or missing damping pad | Re-tension in the channel, add butyl or felt damping | Easy |
| Falls off again weeks after a repair | Moulded plastic tray design fault, or snagged in the boot | Positive retention fix, not another clip swap | Medium |
| Vinyl torn, board underneath fine | Trim skin perished or cut | Re-cover in vinyl over new foam and batting | Medium |
Two rules of thumb. If the shelf holds its shape empty and dips when you load it, the foam or the core is your problem, not the clip. If the shelf will not stay up at all and the plastic edge tabs are visibly snapped, no amount of foam will help you.
It also helps to know what the shelf is made of. Owners on the Rennlist 993 forum found their shelf was a hybrid: an ABS plastic upper section with a separate engineered wood, or Masonite, lower part. Others on the same thread describe the factory material as cowlboard, the same stuff used for door panels. Modern cars are different again, and we cover moulded plastic trays further down.
How to remove a rear parcel shelf safely
Most shelves lift out once the retainers are dealt with, but a few clip into a channel that needs the surrounding trim pulled first. Work from a cold car in the shade, because the vinyl softens in direct sun and tears like paper.
- Empty the boot and lower the rear seats. Folding one or both seat backs gives you a clear line of sight to the shelf edges and stops the shelf bending under its own weight as it comes out.
- Find the retainers. Look underneath for the tabs, and along each side for the clips that engage the channel. Most are visible from below with a torch. A trim clip or a flat screwdriver is enough to lever them out; do not use a wide blade that can mark the body side.
- Note the position of every screw and clip before removing anything. Photograph the shelf in place from two angles. Reinstallation is ten minutes faster and you will not have a mystery screw hole afterwards.
- Protect the glass. If the shelf has a glass top, or sits against the rear screen, lay a blanket or cardboard sheet over it before you pull the trim out. The edge of a Masonite board dragged sideways across a screen will mark it.
- Slide it out toward you, not upward. Most shelves clear the side channels as they move rearwards. If it binds, look for a hidden screw in the side wall before forcing it, because bending the channel is what turns a small job into a bodywork job.
- Keep the screws in a tray and mark left and right. Side channel tabs are often handed, and a Phillips screw driven into a plastic tab with a short grip is easy to chew up.
Once it is out, lay it flat on a bench, vinyl side up, and put a weight on the corners to show the shape of the failure. A shelf that looks flat but is bowed will relax visibly when you press the middle.
How to repair a sagging parcel shelf: three levels of fix
Match the method to the fault. Doing a full re-trim on a shelf whose only problem is a broken clip is a weekend wasted, and a field patch on a delaminated core will fail again within a month. Work through the levels in order and stop when the sag is gone.
Level one: quick field fixes that hold for months
These suit foam collapse, a single crack, or a broken tab where the rest of the shelf is sound. They take under an hour with the shelf on a bench.
- Foam collapse: heat gun on low, or a warm iron held above, to soften the flattened foam, then press the skin back up over a scrap of board. Owners on the Rennlist thread report this gives almost no improvement on foam that is genuinely crushed, so treat it as a short-term measure and follow it with bonding new foam underneath.
- Small crack in the core: clean the edges, wick two-part epoxy into the split, then bridge it with a strip of HDPE or ABS held with epoxy or a plastic staple kit. Work the epoxy in while it is still fluid, not after it skins over.
- Broken plastic tab: bond a short length of aluminium angle or a folded strip of HDPE across the tab, with the screw hole re-drilled to suit. The angle spreads the load into sound material instead of pulling at the crack.
- Everywhere else: a plastic staple kit, or spot-welding small patches with a plastic repair kit, adds more holding power than most people expect on an ABS shelf.
Level two: rebuilding the core board
This is the right method when the board is cracked, delaminated or has lost stiffness along its span. It is the fix used on a Porsche 993 shelf in the Rennlist thread, and a second owner there completed the same rebuild independently and reported the same result.
- Strip the trim. Peel or roll back the vinyl, or pull the staples with a paneling tool. The Rennlist owners who completed this job warn that cheap pneumatic staple guns fail and will not reliably fire the short staples needed here, which is the single most reported failed attempt in these threads.
- Remove the foam and batting. You need a clean, flat substrate to build on, so take everything off the core.
- Mark the original shape. Trace the outline, every cutout, the speaker aperture, the seat belt hole and the rear wiper slot onto the new core. A speaker delete is a good opportunity to fill the hole rather than copy it.
- Cut the new core. Masonite or cowlboard is the usual choice, and one restoration thread specifies a replacement sheet at least 54 by 12 inches for a full-width shelf. Plywood works but is heavier and needs sealing.
- Bond a reinforcement layer underneath. An extra layer of cowlboard bonded under the failure point spreads the load. Use contact cement such as Weldwood, applied to both faces, left to become tacky, then pressed together and rolled or hammered flat.
- Plug the holes you do not want. See the plug technique below for speaker cutouts and deleted seat belt holes.
- Bond the base foam. 1/4 inch PU foam over the core, contact cemented and weighted overnight, restores the shape of the upper surface.
- Leave a 1 inch cotton fibre batting layer on top. The batting is what gives the vinyl a soft crown instead of a flat, board-like look. Second Skin Audio is the supplier most owners name.
Level three: re-covering the shelf in vinyl
Re-covering is the finishing stage, and it is worth doing even if the core only needed a patch, because a repaired board under torn vinyl will look wrong at every car gathering.
- Stretch the vinyl, do not push it. Work from the centre outwards in small sections, pulling slightly as you staple. Pushing the skin into the corners is what creates the ripples everyone ends up with.
- Staple with the right leg length. The Rennlist materials list pairs 22 gauge staples in 3/8 inch crown with 5/32 inch, 1/4 inch and 1/2 inch legs for three different material thicknesses. Very few guns accept the 5/32 inch leg needed at the edges. Check your gun before you start.
- Reuse the original trim if it is intact. If the old vinyl peels off cleanly and has no cracks, it saves you matching grain and sheen, which is the hardest part of the job.
- Expect a sheen difference on new vinyl. 1853N black vinyl is widely used for this repair and matches the texture and colour of the original, but owners report it reads duller until it is coated. A dressing such as 303 brings the sheen back closer to factory.
- Cut, never shears, for holes. A fresh blade in a straightedge or a circle cutter gives a clean edge. Shears crush the foam and leave a ragged lip that shows through the vinyl.
How to plug a deleted speaker cutout or seat belt hole
Deleting the rear speakers, or widening a cutout for a bigger speaker, removes the stiffening ring that was holding the board. That is the single most common reason an otherwise sound shelf starts to droop right over the speaker. Plugging the hole is quick and it puts the stiffness back.
- Cut a 1/8 inch polypropylene plug sized a few millimetres oversize, so it needs a light press fit rather than a gap.
- Dry fit it and trim with a file until the outer face sits just proud of the board, so the foam and vinyl pull tight over it.
- Bond the edge of the plug with two-part epoxy or contact cement as well as the face. A plug glued only on top will eventually spin and back out.
- Sand the plug flat and treat it like any other area of the core when you apply foam, batting and vinyl.
How to repair a broken shelf clip or bracket
A broken clip is the most common structural failure, and the most common reason owners end up in a forum asking what now. The first question is whether the shelf lost its tab or the car lost its anchor, because the fix is completely different.
- Shelf tab broken, body anchor fine: fit the replacement clip, or mould a new one. Take a donor clip from the good side, press an impression into modelling clay, transfer the impression to the broken side and bond it in. This donor-and-clay method comes from the r/AutoBodyRepair thread, where it is the standard answer to a shelf with a new clip and nothing to attach to.
- Body-side anchor missing or stripped: the clip has nothing to bite into. A fabric patch folded over the area and soaked in epoxy forms a reinforced collar around the anchor, and an epoxy-filled hole with a thread-forming insert restores the thread. A small steel or aluminium bracket bolted through the trim is the stronger option if the anchor point is solid.
- Fabric and epoxy as a stopgap: the same thread recommends stitching fabric across the gap as a temporary fix. It holds a shelf up, and it will not hold it up for long, so treat it as a way to get to the car rather than a finished repair.
How to reinstall and load test the parcel shelf
Reinstallation is where a good repair gets undone. The shelf has to go back in the same position, under the same load, or the trim will crease again along a new line.
- Refit the trim pad or gasket first, if the shelf had one. Its job is to stop the vinyl abrading on the body side, and a shelf reinstalled without it will develop a crease along its front edge within months.
- Locate the shelf in the side channels before you engage any clip. Sit it on the pads rather than pushing it in at an angle, because the channel will hold the shelf wherever you first put it.
- Engage one clip at a time and check the shelf is level front to back before the final fasteners go in.
- Tighten screws by hand first, then just enough to pull the tab down. Over-tightening a Phillips screw in a plastic tab strips the head, and then you are drilling it out.
- Load it progressively. Start with half the load you normally carry, drive a short distance over the same bumpy road, then add the rest. A repair that creeps under load is telling you the core is still moving.
- Check again after a few hundred miles. Look at the foam line under the trim and at the tabs. Any new crease is a load problem, not a fitting problem.
How to stop a parcel shelf rattle
A rattle over the rear axle is almost never a loose screw. It is a shelf that is technically seated but has a few millimetres of free play in its side channels, and the fix takes twenty minutes.
- Check the clips are fully seated, and that the side channel itself has not been pulled out of shape by a past failure.
- Re-tension the shelf. Most side channels have a sprung lip or an adjuster that pulls the shelf against its stop. Work along the channel and push the shelf firmly against the body side before the last clip goes on.
- Add damping at the contact points, not across the whole board. Butyl damping tape or a felt strip on the channel contact edge, and a strip on the underside where the shelf meets the trim pad, kills the resonance without deadening the boot.
- Check the trim pad and gasket, because a perished pad is what lets the shelf rock.
- Rule out the boot floor and the rear axle. On some cars a rattle over the axle is the spare wheel tray or a boot hinge, not the shelf, so test with the shelf removed before adding damping.
Damping is the last step, not the first. A shelf that rattles because it is loose will rattle through any tape you add to it.
Why modern parcel shelves keep falling off again and again
If your car has a moulded plastic parcel tray rather than a board with a vinyl skin, most of the classic advice does not apply. There is no staple-able edge, no core to rebuild and no foam to reshape, so a shelf that snaps at its retainers cannot be patched the way a board can. There is also no meaningful foam to restore.
Owners reporting problems in 2026 point at repeat detachments rather than one-off damage. Polestar 2 owners describe repeatedly refitting a retaining clip after the shelf gets snagged in the boot and pulled off, with one owner reporting that several repair attempts have failed. Renault Megane and Tekna owners describe a shelf that constantly falls down on a car with no obvious damage at all, which reads as a design fault in the retention geometry rather than a broken component.
The Ford Puma is the most commonly asked version of this question. If your shelf keeps falling off, check the retention geometry before you buy another clip: the tongue on the shelf is often the part that snaps, and it is usually snapping because the shelf is being levered downward as it is pushed in, or because a bag in the boot catches it. A positive retention modification, where something has to be deliberately released before the shelf can come away, stops that cycle. Replacing the clip a fourth time does not.
For a moulded tray, the practical repair options are narrower: a two-part epoxy or plastic-weld repair on a cracked rib, an HDPE patch bonded across the failure, or a small bracket that positively retains the tray. If the retention point is moulded into a body panel that has no meaningful backup material, the honest answer is a body-side reinforcement plate rather than another clip.
Materials and supplies for a full rebuild
Everything below comes from materials lists that owners on the Rennlist and bmw2002faq threads actually used to complete these repairs. Quantities are for a full-width shelf; check your own dimensions before you cut anything.
| Material | Specification | What it is for |
|---|---|---|
| Masonite or cowlboard | At least 54 by 12 inches for a full-width shelf | New core board |
| Reinforcement offcut | Second layer of the same board | Bonded under the failure point |
| PU foam | 1/4 inch | Base layer over the core |
| Cotton fibre batting | 1 inch | Soft crown under the vinyl |
| Vinyl | 1853N black, plus extra for wrapping and tabs | Trim skin |
| Contact cement | Weldwood or equivalent | Bonding foam, batting and reinforcement |
| Two-part epoxy | Structural grade | Crack repair, plug edges, anchor collars |
| Polypropylene plugs | 1/8 inch | Speaker cutouts and deleted seat belt holes |
| Staples | 22 gauge, 3/8 inch crown, 5/32 inch, 1/4 inch and 1/2 inch legs | Fixing vinyl and light trim |
| Rebond foam block | Sample size | Local support behind collapsed foam |
| Butyl damping tape | Thin strip | Side channel contact points |
| Trim dressing | 303 or equivalent | Matching sheen on new vinyl |
The staple matrix is the part people get wrong, so it is worth spelling out. Match the leg length to the material you are fixing: the 5/32 inch leg for thin trim and edges, 1/4 inch for vinyl over batting, and 1/2 inch where you are fixing through foam into thicker board. Crown size follows the gun, and most staple guns are opinionated about which crown they accept. Check both before you start.
Mistakes that ruin the job
- A cheap pneumatic staple gun. This is the most reported failure across the forum threads. It will not fire the short 5/32 inch staples the edges need, and it stalls on the crown width most upholstery staples use.
- The wrong staple leg length. Too short and the vinyl lifts within weeks. Too long and the staple punches through the face of the core or the foam underneath, showing as dimples in the finished skin.
- Too much heat. Vinyl laid on a hot board or held too near the heat gun melts and sticks to itself. Work in short passes and keep moving.
- Using shears on foam or vinyl. They crush the edge, and the damage shows straight through the finished trim. Use a fresh blade on a straightedge.
- Over-tightening plastic tabs. The head strips, and a stripped head now needs drilling out. Hand-tight, then a nudge.
- Skipping the diagnosis. A full re-trim on a shelf with one broken clip fixes nothing that matters, and the shelf fails again the same way.
- Forgetting the trim pad on reassembly. A missing or perished pad grinds a crease into the new vinyl along the front edge.
- Stapling over loose foam. Any hollow under the skin becomes a permanent dimple. Bond and weight the foam until it is solid before you cover it.
Repair or replace: where the line sits
Repair is the right call when the core is intact or only locally cracked, when the trim is torn but the board is sound, or when the part is no longer manufactured. Used replacement shelves for older cars routinely list at serious money, and on many discontinued models there is simply nothing to buy, which makes repair the only option rather than a preference.
Replace, or take it to a trimmer, when the core has lost stiffness along its whole span and no reinforcement can stop it flexing, when the side channel in the car itself is deformed, or when the shelf is a moulded plastic tray whose retention geometry is broken. A shelf that has already been repaired twice at the same point has told you its load path is wrong.
There is also a third option that sits between the two: have a trimmer recover the skin only, while you do the structural work yourself. That is a sensible split for anyone who has the space and tools but not the upholstery skill, and it costs far less than a full strip-and-rebuild from a shop.
Frequently Asked Questions
What causes a parcel shelf to sag?
Four layers can fail: the trim skin, the foam padding, the core board, or a side clip, bracket or body anchor. The side anchors carry the load, so a shelf that will not stay up is a clip or anchor problem, while a shelf that stays up but dips when loaded is foam or core.
Can you buy a new parcel shelf?
You can for most current models, and pattern-parts suppliers cover some older cars. For many discontinued models nothing is manufactured, and used examples command serious money, which is why repairing is usually the sensible option.
How to repair a broken shelf?
Match the fix to the failure. Bond new foam under collapsed padding, bridge a cracked core with an HDPE or Masonite patch, plug deleted speaker holes with 1/8 inch polypropylene, and bond in a donor clip impression or epoxy collar where a tab or body anchor has broken.
How to stop parcel shelf rattle?
Re-seat and re-tension the shelf in its side channels, check the trim pad and gasket, then add butyl or felt damping at the channel contact points. Fit the damping last, because a loose shelf will rattle through any tape.
My Ford Puma parcel shelf keeps falling off. How can I fix it?
Check the retention geometry, not just the clip. If the shelf tongue snaps when the shelf is pushed in, it is being levered downward as it seats, and a positive retention modification stops the cycle. A fabric and epoxy collar is a short-term stopgap, not a lasting fix.
Can you glue a parcel shelf back together?
Yes for a crack or a broken tab. Clean the edges, wick two-part epoxy into the split while it is still fluid, then bridge it with HDPE or ABS and clamp or weight it until it cures. Glue alone will not restore a board that has lost stiffness along its span.
Is it worth repairing a parcel shelf?
Almost always, if the core is sound or only locally cracked. Used replacements for older cars are expensive and often unavailable, and a rebuilt core with new foam, batting and vinyl looks and performs like factory. Replace only when the core has lost stiffness across its whole span or the car-side channel is deformed.
Conclusion
To repair a sagging parcel shelf, diagnose before you dismantle. A shelf that dips under load is a foam or core problem, a shelf that will not stay up is a clip or anchor problem, and a shelf that rattles is a channel problem. Match your repair to that answer and you will rarely need more than a patch, a length of foam and an hour on a bench.
Save the full core and trim rebuild for the shelves that have genuinely lost stiffness, and treat the staple gun, the leg length and the trim pad as the three things that decide whether the job holds. Once it is back in, load it up again but keep heavy items low in the boot, and the shelf should stay where you put it.