
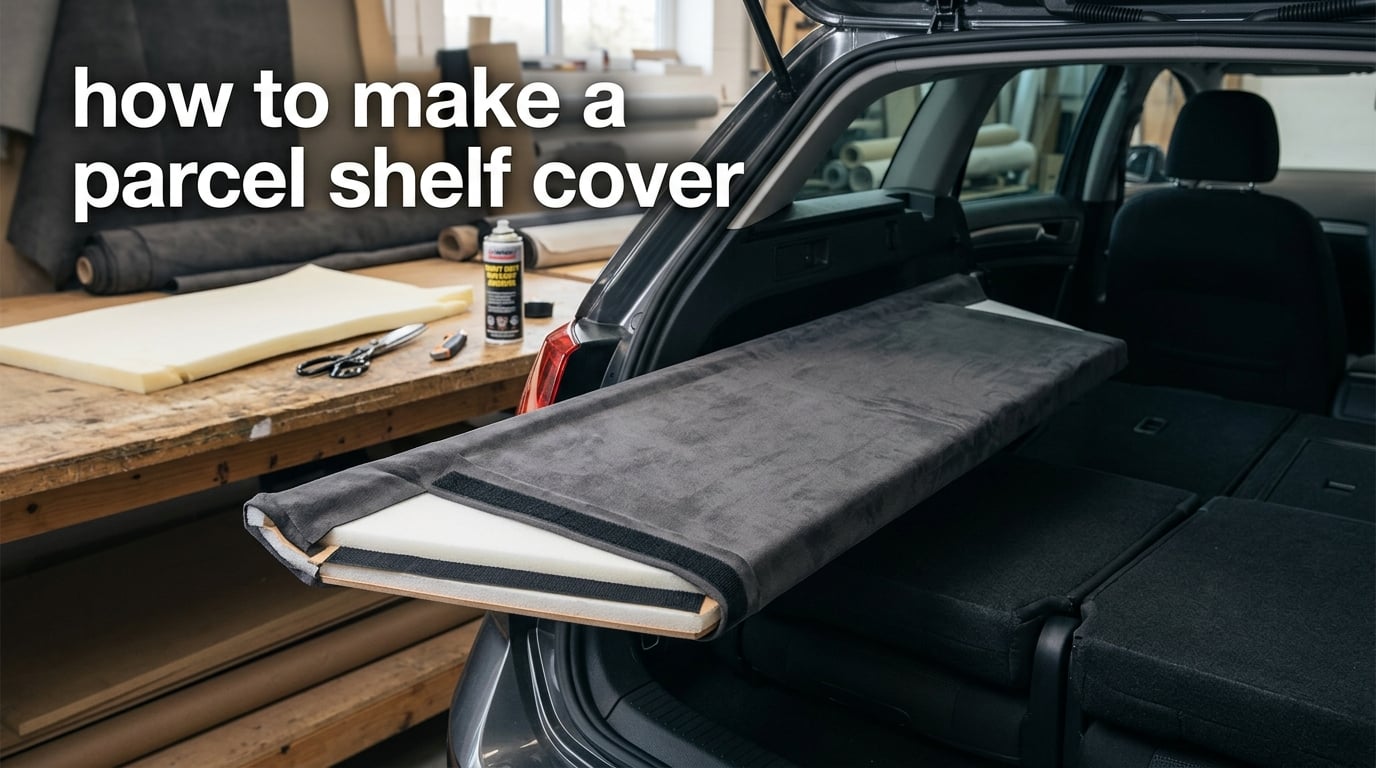
A parcel shelf cover is the panel sitting across your rear cargo area that hides luggage from view and kills the rattle the thin factory board makes behind the rear seats. Learning how to make a parcel shelf cover solves two problems at once: many cars ship with no cargo cover and no anchor points, and the OEM ones that do exist are priced like accessories rather than trim. Build your own and you control the material, the colour, and whether it comes out in ten seconds when you sell the car.
I have built these for hatchbacks, coupes and wagons, and the whole job takes an evening once the shelf is out of the car. The two methods below cover every situation I have run into, and the decision between them takes about thirty seconds.
One thing to settle before you start: a DIY parcel shelf cover only works if you decide what it is for. Hiding valuables from view is a security job. Killing a factory rattle is an acoustics job. Both jobs together usually mean foam-backed fabric rather than plain cloth.
Table of Contents
- What a parcel shelf cover actually does
- Which method should you use: wrap the OEM shelf or build a new panel
- Materials and tools for a DIY parcel shelf cover
- How to remove your OEM shelf without breaking the clips
- Method A: How to wrap your existing parcel shelf
- Method B: How to build a replacement parcel shelf cover panel
- Mounting options ranked from strongest to weakest
- How much weight a DIY parcel shelf cover can hold
- Troubleshooting: corners lifting, frayed edges, clips that will not seat, and sagging
- Cheaper alternatives and other creative ways to cover a shelf
- How to keep the cover removable for resale and dealer inspection
- Frequently Asked Questions
- How to cover a shelf with fabric?
- How can I cover foam board with fabric?
- How can I adhere fabric to foam board?
- What can I use instead of a parcel shelf?
- Is foam board strong enough for a parcel shelf cover?
- How do you remove a parcel shelf without breaking the clips?
- What are the best materials for a DIY parcel shelf cover?
- What are some creative ways to cover a shelf?
- Conclusion
What a parcel shelf cover actually does
Three jobs, and most people only think about the first one.
Concealment. A hard panel blocks the view through the rear glass, so a bag of camera gear is not a target any more. This is why the cover has to look like part of the car rather than a blanket thrown over the seat backs.
Rattle dampening. The factory panel is a thin pressed board. It acts like a drumhead between the road noise coming up through the boot floor and the cabin, and the fix is mass and damping. Adding a layer of closed-cell foam to the underside of the panel is what quiets it, not the fabric on top.
Sag prevention and appearance. Sun-damaged original boards curl, fade and delaminate. A rewrapped panel or a fresh substrate puts the colour back in line with the headliner and the pillar trim, which is usually the difference between a car that looks cared for and one that looks tired.
None of the factory cargo covers on the market dampen anything. They are moulded plastic covers on a roller cassette, and the thin board underneath keeps drumming away. If rattle is your problem, the fix belongs under the panel, not over it.
Which method should you use: wrap the OEM shelf or build a new panel
This is the decision every builder argues about in forum threads, so here it is as a table. Method A keeps your original panel and skins it. Method B throws the original away and builds a replacement from foam board, plywood or closed-cell foam.
| Decision factor | Method A: wrap the OEM shelf | Method B: build a new panel |
|---|---|---|
| Shelf condition | Rigid, flat, intact board | Warped, cracked, delaminated or missing |
| Mounting points | Original clips and holes still work | You are creating your own mounting |
| Rattle performance | Excellent, foam damps the original board | Good if you use foam, poor with bare foam board |
| Load capacity | Same as factory | Limited, see the load section below |
| Time | Two to three hours plus cure | Three to four hours plus cure |
| Reversibility | Very high, heat and peel | High if you use Velcro mounting |
Our rule of thumb: if the factory board is still flat and the clips engage, use Method A. It preserves the factory fit, the factory holes and the factory load rating, and it is the least invasive option for resale.
Use Method B when the board is missing entirely, when the cover delaminated and left you with a warped core, or when the car never had anchor points in the first place. Plenty of newer vehicles ship with a bare cargo bay and nothing to bolt to, which is exactly the situation the most-copied community build was made for: a school tri-fold presentation board, cut to size, stiffened with timber, and Velcroed into place.
Materials and tools for a DIY parcel shelf cover
This is the part most guides skip, and it is the part that decides whether the cover lives one summer or five years. Thickness matters more than fabric choice, so both units are given below.
| Item | Thickness or size | Qty | Cost tier | Best for |
|---|---|---|---|---|
| OEM parcel shelf | Your factory panel | 1 | None | Method A substrate |
| Closed-cell nitrile or EVA foam | 6 to 10 mm (0.25 to 0.4 inch) | 1 sheet | Low | Rattle dampening, the single highest-value item |
| Foam-backed upholstery fabric | 1 to 2 mm (0.04 to 0.08 inch) backing | 0.5 sq m (5.5 sq ft) | Moderate | Appearance plus light damping in one layer |
| Tri-fold presentation board | 3 mm (0.12 inch) | 1 | Low | Method B panel, folds flat for storage |
| Thin plywood | 3 to 4 mm (0.12 to 0.16 inch) | 1 sheet | Low | Method B, stiffer and will not sag |
| Wood batten | 20 x 20 mm (0.75 x 0.75 inch) | 2 lengths | Low | Ribbing and Velcro anchor strips |
| Contact adhesive spray | 3M 90 style | 1 can | Low | Bonding fabric to foam or board |
| Plastic primer | 3M 94 style | 1 can | Low | Plastic and vinyl surfaces that will not bond otherwise |
| Isopropyl alcohol | 70 to 90 percent | 500 ml | Low | Killing factory silicone and mould release |
| Hook and loop tape | 25 to 50 mm (1 to 2 inch) wide | 2 m | Low | Removable mounting, both methods |
| J-roller or squeegee | Standard | 1 | Low | Driving out air bubbles from the bond |
| Utility knife and straightedge | Snap-off blades | 1 each | Low | Cutting foam, board and fabric |
| Hog ring pliers | Standard | 1 | Moderate | Permanent-style trim attachment |
| Trim removal tools | Plastic paddle set | 1 set | Low | Saving the OEM clips, do not skip this |
On adhesive choice: spray contact adhesive is the right default for foam and fabric. It grabs instantly, it tolerates the heat cycling a car interior goes through, and a heat gun plus a plastic trim tool reverses it if you ever need to. PVA and white glue are the wrong tools here because they soften in a hot car and go chalky. Mod Podge is fine for a decorative panel you will never touch with anything but a cloth.
For fabric, match to the headliner rather than to your taste. Dinamica-style suede and Alcantara-type microfibre are what most factory trim uses, and a cover in a different colour reads as an add-on from the outside.
How to remove your OEM shelf without breaking the clips
This is the number one failure point in the whole job, and every experienced builder treats it that way. The trim clips are small plastic parts that are not sold separately in most cases, and a snapped clip leaves a permanent rattle hole and a plastic piece somewhere in the door card.
Work from the centre of the car outwards. Push the shelf up gently with one hand while easing the edge nearest you forward and down, rather than yanking straight up on the corner.
Never use a flat screwdriver at the clip. Use a plastic trim paddle or a wide putty knife, and always support the shelf from underneath as the clips release so the weight does not do the work for you.
If a clip resists, stop and work the shelf side to side. Forcing one clip out twists the mounting tab behind it, and that tab is the part that usually breaks rather than the clip itself.
Mark every clip location in masking tape on the pillar trim as you go. When you refit the shelf, matching the exact slot is what makes the cover seat flush instead of sitting 5 mm proud and rattling.
Method A: How to wrap your existing parcel shelf
Step 1: Measure and template the panel. Before anything comes off, lay paper or thin cardboard over the top face and trace the outline, the speaker cutouts, the third brake light housing and any clip slots. Nothing in this job is guessable, and a template is the difference between one cut and four.
Step 2: Clean the surface with isopropyl alcohol. Factory boards carry a silicone mould release or an anti-rattle coating that will not accept adhesive no matter how long you press. Wipe the top and the underside with isopropyl alcohol, then wipe again once dry, and keep your fingers off the surface afterwards.
Step 3: Cut and test-fit the acoustic foam. Cut the closed-cell foam slightly undersize, about 3 mm (0.12 inch) inside the template line, so the foam does not fight the clip slots. Press it on dry, then peel it back and check that every clip slot and light housing is still fully open.
Step 4: Bond the foam to the underside. This is the layer that does the acoustic work. Spray the board lightly, wait the tack time the can calls for, then lay the foam on and roll it firmly with a J-roller. Work from the centre outward in both directions so air pushes out rather than in.
Step 5: Adhere the fabric with a crosshatch spray pattern. Spray the foam and the fabric backing in a crisscross pattern rather than a wet coat, so the adhesive web grips without soaking through. Bring the fabric down over the panel, starting at the front edge nearest the rear seats, and roll outward toward the edges.
Step 6: Trim the openings and cut the speaker cutouts last. Pull the fabric taut around each opening and trim from the back side with a fresh blade. For a foam-backed material, a heated soldering iron tip melts a clean 8 mm (0.3 inch) hole without fraying the pile, which is far tidier than forcing a knife through it.
Step 7: Refit the shelf and check every clip seat. With the panel back in position, press each clip location firmly and confirm the panel sits flush and level with no daylight along the edge. If a corner sits proud, the template outline is off, not the clip.
Step 8: Let the adhesive cure properly. Give it 24 hours in a cool car before you load anything, and 48 hours before you park in full sun. Contact adhesive grabs instantly but does not reach full strength until it has cycled a few times.
On storing fabric on foam board, the honest answer is that the fabric is the weak point, not the board. Sun through the rear glass and the defroster lines will fade dye and embrittle a backing over a few summers, so if the car is parked outside in a hot climate, expect to redo the cover every three or four years.
Method B: How to build a replacement parcel shelf cover panel
Pick the substrate first, because it sets your load rating.
| Substrate | Rigidity | Weight | Sag resistance | Best for |
|---|---|---|---|---|
| Tri-fold presentation board | Low | Very light | Scores a fold line, folds flat | Light load, removable builds |
| Closed-cell foam | Low | Light | Good | Rattle dampening on a bare panel |
| Thin plywood with batten ribs | High | Moderate | Very good | Repairing a sagging or delaminated shelf |
Step 1: Take a full cardboard template of the cargo opening. This is not the old shelf, because there is no old shelf. Tape card across the bay in the same position and shape the original occupied, then transfer that shape onto your substrate material.
Step 2: Cut the substrate and score a fold line. If you want the panel to fold flat for storage or removal, score a centre fold line with a knife against a straightedge before you glue anything on. Do not cut through the face, just the core.
Step 3: Add timber stiffening and mounting strips. Glue 20 mm (0.75 inch) square battens across the underside for rigidity, and add a batten at each edge to carry a strip of hook and loop tape. This is the construction that lifts out in seconds without leaving a mark.
Step 4: Wrap the panel in fabric. If the substrate is bare foam board, spray adhesive onto the board face, lay the fabric on, and roll it flat with a J-roller. Then bring the edges up and over, mitre the corners, and trim the excess flush with the underside.
Step 5: Trial-fit in the car and adjust before you bond anything permanent. Sit the panel in place, check that nothing fouls the third brake light housing or a rear speaker, and check the sightline over the rear seats. Make your adjustments on the bench, not with the car apart.
Step 6: Mount it and let it settle. Peel the backing off the hook and loop tape on the car-side battens and press the panel down evenly. Drive for a short trip and re-press the edges, because the panel will settle slightly under its own weight.
For a repair instead of a rebuild, mount a thin wood filler panel in the car to set the correct gap, then reupholster that. It is the route long-timers use on a delaminated factory board, and wood will not sag the way the original pressed board did.
Mounting options ranked from strongest to weakest
How the cover attaches matters as much as what it is made of.
| Method | Strength | Removable | Difficulty | Best for |
|---|---|---|---|---|
| Original OEM clips | Factory | Yes | Easy | Method A, any working clip set |
| Hog rings | High | No | Moderate | Permanent trim restoration work |
| Hook and loop tape | Moderate | Yes, instantly | Easy | Method B, resale-friendly builds |
| Adhesive only | High while cold, softens in heat | Possible with heat | Easy | Fabric face to panel, not structure |
Adhesive alone is the weakest structural choice. In a car that reaches high temperatures in summer, a bonded-only panel softens and creeps, and the corner nearest the speaker is where it lets go first. Always give a panel a positive mechanical mount.
How much weight a DIY parcel shelf cover can hold
Be honest about this, because a cover that sags onto the rear glass is a worse problem than no cover.
Foam board with timber ribs, Velcro-mounted, handles soft goods only. The most-copied community build states the ceiling plainly: keys, a wallet and a phone are fine, a hoodie and a coat is about the limit, and it should not be treated as a shelf. That framing is exactly why those builds are trusted.
Plywood with battens handles considerably more, but only if it is supported at three or more points across the span. Unsupported mid-span is what bends a thin panel until it kisses the glass.
Whatever you build, load it over the rear seat backs rather than the centre of the bay, and re-check the fit after a long drive with a load in. Any deflection you find on the drive back is deflection you will get every day after.
Troubleshooting: corners lifting, frayed edges, clips that will not seat, and sagging
1. Corners lifting. Almost always tension. The fabric was pulled tight in the middle and left slack at the corner, and the corner moved once the car got hot. Re-stretch the corner, roll it hard with a J-roller, and if it still lifts, add a dab of adhesive under the lifted edge and clamp it for an hour.
2. Frayed edges. You cut foam-backed fabric against a blunt blade. Change the blade and trim from the backing side, or melt the edge with a soldering iron tip for a clean seal.
3. Clips will not seat. The panel sits proud because the template was cut on the outer line. Trim 3 to 5 mm (0.12 to 0.2 inch) from the offending edge, re-seat, and never force a clip to make a wrong panel fit.
4. The cover sagging onto the rear glass. Add a centre batten across the underside, or move the panel forward so the load sits above the seat backs. If the substrate itself is bowing, the foam board is the wrong choice and you need plywood.
5. A persistent rattle after installation. Check the panel is seated on every clip and that no excess fabric is trapped underneath. A trapped fabric fold acts as a rattle switch under vibration.
Cheaper alternatives and other creative ways to cover a shelf
Sometimes the honest answer is that you do not need to build anything.
A black sheet over a tinted rear window is the most common real-world answer, and Honda Fit owners reach for it constantly. It works, it costs almost nothing, and it is removable in seconds.
A blanket does the same job and doubles as something warm in winter, and that flexibility is genuinely useful on a car with folding rear seats. The problem is that it advertises its own purpose.
That security point is the one people miss. Concealment only works if it does not look like concealment, which is precisely why a fitted panel in matching trim is better than any sheet. A cover that looks like factory trim is concealment, and a sheet draped over the seat backs is a sign.
For a non-vehicle shelf, the same techniques apply almost unchanged: contact paper on a clean flat panel, spray paint on foam board, or upholstery vinyl bonded with contact adhesive. For covering a steel rack, mesh-backed vinyl or a bonded foam layer between the rails is the approach, because bare fabric on steel wears through at every wire edge.
How to keep the cover removable for resale and dealer inspection
Reversibility is what most owners actually care about, and it is a design decision you make in the first hour, not a repair afterwards.
Use hook and loop for anything structural. Keep every drilling and every permanent adhesive off the trim panels, and keep the original clip set intact and bagged in the glovebox.
Do not overspray adhesive on the pillar trim or headliner. If you ever want to remove the cover, heat and a plastic trim tool will lift contact adhesive cleanly, and it will not lift a plastic headliner the same way.
Finally, keep the original shelf if you removed it. A seller or a dealer will be far more comfortable with a car that still has its factory part in the boot, and so will you if the buyer wants the car back as it left the factory.
Frequently Asked Questions
How to cover a shelf with fabric?
Clean the surface with isopropyl alcohol to remove factory silicone, cut a template for every opening, then spray contact adhesive in a crosshatch pattern rather than a wet coat. Lay the fabric on from the front edge and roll outward with a J-roller to push air out instead of trapping it. Trim the excess from the back with a fresh blade, and let the bond cure for 24 hours in a cool car before loading anything.
How can I cover foam board with fabric?
Spray contact adhesive onto the flat face of the foam board, wait the tack time the can calls for, and lay the fabric on before it goes off. Roll firmly from the centre out to the edges. Then wrap the sides and underside, mitre the corners, and trim the excess flush with the underside so the panel still sits flat. A scored fold line before gluing lets the panel fold away for storage.
How can I adhere fabric to foam board?
Use spray contact adhesive, not PVA or white glue. Hold the can roughly 25 cm (10 inch) from the surface and lay down a light crosshatch rather than a wet coat, so the adhesive grips without soaking through the backing. Bring the fabric down at an angle, then press with a J-roller. Full strength arrives after about 24 hours at cool temperatures, longer in a hot car.
What can I use instead of a parcel shelf?
A black sheet or blanket over a tinted rear window is the cheapest option and takes seconds to remove. A fitted foam board or plywood panel gives you a proper shelf with a usable load rating and looks like part of the car. Repurposing a rear seat cushion panel is a common low-cost alternative, though it is heavier and no longer removable. For resale, the removable panel wins on appearance.
Is foam board strong enough for a parcel shelf cover?
For light soft goods, yes, if you add timber ribs. Keys, a wallet, a phone, a hoodie and a coat are a reasonable ceiling for a Velcro-mounted foam board build with battens underneath. It is not a shelf for hard cases or anything you would be upset to find on the glass. If you need more, use thin plywood with batten ribs, which will not bow across the span.
How do you remove a parcel shelf without breaking the clips?
Work from the centre of the car outwards, pushing the panel up with one hand while easing the near edge forward and down. Use plastic trim tools, never a flat screwdriver, and support the panel from underneath so its weight does not snap the clips. If a clip resists, rock the panel side to side rather than pulling harder. Masking tape marks on the pillar trim let you match every slot on the way back in.
What are the best materials for a DIY parcel shelf cover?
For appearance and dampening together, foam-backed upholstery fabric is the best single choice. For maximum rattle control with no visual change, add 6 to 10 mm (0.25 to 0.4 inch) of closed-cell foam under the panel. For stiffness, thin plywood with 20 mm (0.75 inch) square battens beats foam board every time. Match the fabric to the headliner colour and check flame-rating markings on anything aftermarket.
What are some creative ways to cover a shelf?
Contact paper on a clean flat panel is the fastest and cheapest option. Spray paint on foam board works well if you seal the edges first. Upholstery vinyl bonded with contact adhesive wipes clean and resists spills, which suits a cargo area. Foam-backed microfibre in a suede finish matches factory headliners. For a garage shelf or steel rack, a bonded foam layer between the rails stops the fabric wearing through at the wire edges.
Conclusion
To make a parcel shelf cover, you are really choosing between two jobs: skinning a factory panel that is still flat, or building a replacement when the original is gone or warped. Method A takes the evening and keeps the factory fit. Method B takes an extra hour and gives you a removable panel you built yourself.
Whichever route you take, decide the load limit up front, mount it mechanically rather than with adhesive alone, and keep every fixing reversible. That is what makes the cover worth having six years later, and what makes the car easy to sell.