
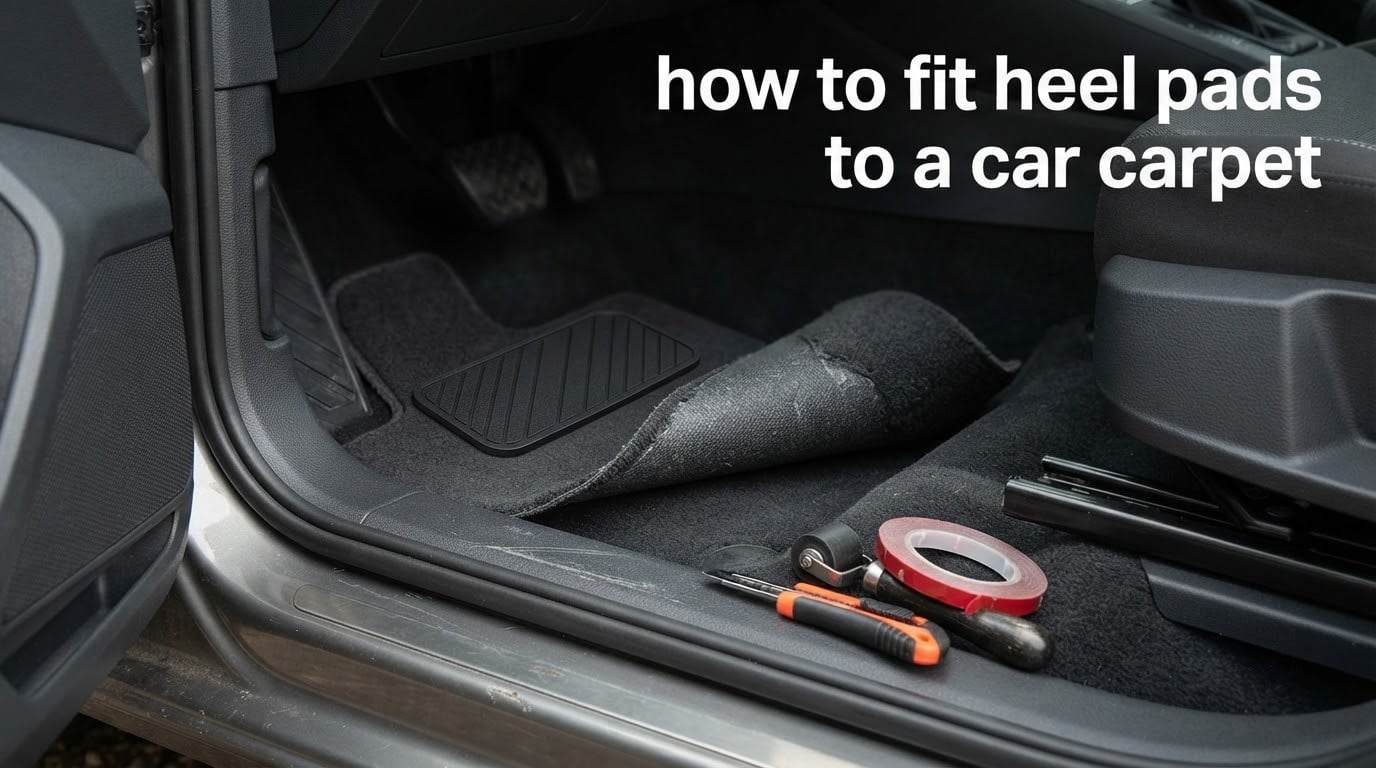
A car carpet heel pad is a small rubber, PVC or hard-plastic plate fitted under the driver’s heel to stop the carpet wearing through and to give the foot a firm, non-slip platform. To fit one, clean and dry the carpet, position the pad under the driver’s heel, bond it with 3M VHB peel-and-stick tape, contact cement, spray adhesive or stitching, then leave it undisturbed for about 24 hours.
Almost every question we get through the trim shop inbox comes down to the same problem: nobody can tell you where the pad is supposed to sit. People guess in inches, they post photos, they argue about whether the pad belongs near the welting or further in. If you are asking how to fit heel pads to a car carpet, the answer is not just a glue technique. It is a position, a surface, a fixing method and a curing window, in that order.
We fit pads on cars every week, and the same four things decide whether the job lasts a year or a decade. As of 2026, nothing on the market has changed the basics, so this guide covers the method we use in the workshop, including the positioning references the forums never give you.
Table of Contents
- What Is a Car Carpet Heel Pad?
- What You’ll Need
- How to Fit a Heel Pad to a Car Carpet, Step by Step
- Where Should the Heel Pad Go on a Carpet Set?
- Choosing the Right Fixing Method
- Fitting a Heel Pad to a Cut or Replacement Carpet Panel
- Curing and Aftercare
- Common Mistakes to Avoid
- Replacing a Worn-Out Heel Pad Without Replacing the Carpet
- Frequently Asked Questions
- Where does the heel pad go on a car carpet?
- What adhesive is best for a heel pad?
- How long should I leave the heel pad before driving?
- Do I need a heel pad on the passenger side?
- How do I make car floor mats stay in place?
- Should you glue down carpet padding?
- How do I shape and cut car carpet for a footwell?
- Is it better to have rubber or carpet car mats?
- Final Checklist Before You Drive
What Is a Car Carpet Heel Pad?
A heel pad is a wear patch. It sits exactly where the driver’s heel lands in every journey, which is the reason it exists. Without one, the pile in that small area is crushed flat, thinned from above, and eventually worn through to the backing or the floor pan below.
The pad does four jobs at once. It spreads the wear across a wider area, it stops the heel sinking into soft pile so the foot stays planted, it blocks shoe-sole stains and black scuffs, and it takes the abrasion that would otherwise cut into the carpet fibres.
Pads come in four common materials, and the material decides how you fix them:
- Rubber or textured PVC with a peel-and-stick face – the most common, bonds straight to the pile or to the carpet backing with no tools at all.
- Hard plastic with moulded granules – extremely durable and easy to wipe clean, but it needs contact cement or mechanical fixing because nothing sticks to it reliably on its own.
- Carpet-faced pads – a small piece of automotive carpet on a rubber base, which blends in on a factory carpet set but can trap grit underneath.
- Sew-on PVC patches – a patch with a pre-punched edge, sold with a blunt sewing needle and thread for people who do not want adhesive anywhere near their carpet.
Three terms come up constantly in installation threads, so it is worth defining them up front. An over-mat is a rubber or carpeted mat fitted on top of the carpet set, and most positioning advice changes depending on whether you run one. Welting is the bound edge of the carpet panel that runs along the footwell side. The H-point is the hip datum used to establish where a seated occupant’s heel naturally lands.
What You’ll Need
Most of this job needs hand tools you already own. Gather everything first, because the adhesive work has to happen in one uninterrupted sitting.
- A vacuum, ideally with an upholstery head, to clear grit from the bonding area.
- Panel wipes or isopropyl alcohol and clean microfiber cloths to degrease the carpet backing and the pad face.
- A pencil or chalk for marking the position before anything is peeled or sprayed.
- A tape measure and a straightedge for checking alignment against the seat bolt and welting.
- Scissors or a craft knife with spare blades for trimming the pad to shape.
- A stiff card or plastic scraper to push out the pad’s corners and press the edges down.
- A roller, a rolling pin, or a firm roller tool to burnish the bond.
- Your fixing method: 3M VHB tape, contact cement, spray adhesive, or a blunt needle with waxed thread.
- Cloths or newspaper to catch overspray if you are using a solvent adhesive, plus a ventilated workspace and gloves.
One more item is optional but saves frustration: a rubber mallet or the heel of your hand for burnishing. It makes no difference to the bond, and it makes a real difference to the corners, which is where pads lift first.
How to Fit a Heel Pad to a Car Carpet, Step by Step
This is the method we use whether the carpet is a full set, a repaired footwell, or a panel cut down for a project car. Read it through once before you start, then work in order.
1. Measure and mark the position
Sit in the driver’s seat at your normal driving position and have someone look at where your heel lands, or mark the spot yourself with a pen on the carpet pile before you get out. Then transfer that mark to the pad layout using the datum points in the next section. Mark the outline lightly with pencil or chalk so you can move it before committing.
2. Lift the carpet and check the backing
Unclip the carpet at the threshold or unbolt the seat slightly so you can see what is underneath. Look at the bonding surface you will actually be gluing: a factory carpet usually has a rubber or latex backing, an OE-style carpet may have a mass or foam-backed construction, and a cheap replacement panel may have a loose woven backing with nothing behind it. This determines whether your adhesive is gripping a solid layer or soaking straight through to the metal floor pan.
3. Clean and dry the bonding area
Vacuum the footwell thoroughly, then wipe the area with panel wipes and follow with a dry microfiber cloth. Any dust, wax, dressing or silicone residue on the backing will kill the bond permanently, and you will not see the failure until the pad peels off months later. Let the area dry completely before you touch an adhesive. If you have applied carpet or rubber dressing to the interior recently, give it a day or two longer.
4. Dry-fit and align the pad
Lay the pad in position with nothing applied to it. Check that it clears the seat rail, the seat bolt covers, the accelerator pedal arm and the door sill, and that it does not sit so far outboard that a shoe overhangs the edge. Drive the car briefly on the pad without adhesive, then check again, because the first alignment is rarely right on the first attempt.
5. Trim the pad to shape
Trim a rectangular pad to a shallow rounded rectangle or a softened square. Rounded corners peel away from sharp ones, and the shape of a heel patch does not need to be square. Cut slowly with a sharp blade and take the corners off last. Keep a 5 mm margin outside your pencil outline so you can trim again after the bond is set.
6. Apply the fixing method
Work the method you chose from the fixing comparison table below, one at a time. Adhesive work is not a place to improvise: open the window, keep solvent away from the headliner and door cards, and follow the tack time the product states rather than guessing. Apply to the pad or the carpet, not both, unless the product instructions specifically call for a two-part application.
7. Press, roll and burnish the pad down
Set the pad down in one motion and do not slide it, because sliding drags adhesive into a smear instead of spreading it evenly. Press the centre first, then work outward to the edges with a scraper, then roll the whole pad firmly with a roller in both directions. Spend extra time on the corners, which carry most of the peel load.
8. Leave it for 24 hours, then check the bond
Do not drive the car, do not put the seat back down on it, and do not slide your foot across the pad. Twenty-four hours without foot traffic gives contact cement and 3M VHB time to reach full grab, and the bond you check at the end of that window is the bond you will have in a year. After curing, run a fingernail along the perimeter; any edge that lifts is lifted permanently, so press it back down now.
Where Should the Heel Pad Go on a Carpet Set?
The pad goes under the driver’s heel, on the driver’s side only, on every car regardless of which side the steering wheel is on. One driver, one patch. A passenger-side pad is optional and only worth fitting if a second person drives the car regularly, because it is a wear patch, not a trim part.
The useful part is the datum. Forum users describe positions as “12 inches from the welting” or “an inch to the left on mine”, which is guesswork with a tape attached. Anchor the pad to something fixed to the car instead.
| Datum point | What to measure from | Typical result |
|---|---|---|
| H-point | Where the seated driver’s heel naturally contacts the carpet | Most reliable anchor. The pad’s front third sits under the ball of the foot, the rear under the heel. |
| Seat bolt | The seat rail fixing bolt just behind the pad | Pad should finish roughly level with, or a little ahead of, the bolt. Many factory carpets place the bolt right on the edge of the welt. |
| Welting | The bound edge of the carpet panel at the footwell side | Users report around 12 inches from the welt on at least one OE-style carpet. Treat that as a starting point, not a rule. |
| Pedal arm | The lower edge of the accelerator arm, measured straight down | The pad usually begins 2 to 3 inches behind this line. A restorer on chevelines.com uses this as his main reference when trimming a new carpet. |
| Door sill | Inboard edge of the sill plate | The pad should be 2 to 4 inches inboard of the sill so a shoe sits on it fully. |
On a right-hand-drive car the whole layout mirrors, but the rule does not change: one pad, under the driver’s heel, on the side where the driver sits. Nobody needs a pad over the passenger footrest.
Installing a pad on an over-mat instead of on the carpet
If you run rubber or carpeted over-mats, decide which one carries the pad before you start. A pad bonded to the over-mat moves with the mat, can be swapped between cars, and is easier to clean. A pad bonded to the carpet sits under the mat and is invisible. A Buick owner on buickforums.com glued a roughly 9 by 7 inch pad to the factory mat itself with Fabri-tac, and reported that it holds up well.
Check the coverage before bonding anything. Owners of newer vehicles report that the driver’s over-mat often does not reach the footrest at all, which is exactly the spot that wears through. If that is your situation, either trim the mat or bond the pad to the carpet underneath it.
Choosing the Right Fixing Method
There are four workable ways to attach a heel pad. The right one depends on the pad material, the carpet backing and how long you want the repair to last.
| Method | Bond strength | Tooling | Best for |
|---|---|---|---|
| 3M VHB peel-and-stick | Very high, rubber and PVC pads | Scissors, scraper, roller | Factory-style carpet, daily drivers, anyone who wants no solvent in the car |
| Contact cement | High, best on rubber and plastic | Brush or squeeze bottle, ventilation | Hard plastic or rubber pads, show cars, permanent repairs |
| Spray adhesive | Medium, variable coverage | Spray gun, mask, newspaper | Carpet-faced pads and light-duty repairs |
| Stitch and bond | Mechanical plus adhesive, hardest to break | Blunt needle, waxed thread | The no-adhesive option, or reinforcing a heavy plastic pad |
3M VHB peel-and-stick is our default. The tape is thick, forgiving of a slightly dusty surface, and it does not soak through the pile. Cut the tape to the pad footprint, leave a couple of millimetres in from the edge, press it on firm, then peel the backing and set the pad down in one movement. An r/cars owner reported that a small pad of roughly 5 by 8 inches with a 3M coating was still bonded after 100,000 miles, which is the strongest durability report we have seen for this application. We were unable to trace the original product, so treat that as an anecdote rather than a specification, and buy a fresh roll from a current seller.
Contact cement is the strongest option and the messiest. Coat one surface only, leave it until tacky, then bring the surfaces together and burnish hard. Once it grabs it does not let go, so alignment has to be right first time. Use it in a ventilated space, away from any naked flame, and expect the smell to linger for a day.
Spray adhesive is quick but unforgiving. Coverage varies, overspray will stick to your nice new carpet, and a thin coat bonds weakly while a thick coat never dries properly. If you use spray, mask everything beyond the pad outline with newspaper and take several light passes rather than one heavy one.
Stitching is the option people choose when they do not want adhesive on a classic interior. Use a blunt upholstery needle and waxed thread, push the thread through from the back so no knots end up on the visible side, and work a running stitch around the pad’s pre-punched edge. Sewing alone gives a mechanical hold; for a hard plastic pad on a loose pile, sewing plus a thin coat of contact cement gives a repair that will outlast the car.
Fitting a Heel Pad to a Cut or Replacement Carpet Panel
A cut-down panel behaves differently from a full carpet set, because you have lost the fixed reference points. The edge you cut is free, and free edges move.
Leave the panel at least 20 mm oversize on all sides until the pad is bonded. Position the pad from the H-point and the seat bolt while the panel is still loose on the floor, not after it is trimmed to the footwell.
Once the pad is set, trim the panel around it. Cut a relief so the pad is not sitting on a tension point, and tuck the carpet edge under the welting with a trim tool. If the panel is mass-backed, work from the back with a knife and a hook blade, because mass backing cuts differently from foam backing and frays less if you score it first. Foam-backed panels should be cut from the front with a sharp blade and a straightedge.
Test the fit before fastening anything down. A mass-backed panel is unforgiving, and restorers on nastyz28.com report it is much harder to fit than a standard carpet. Use the heel pad itself as an alignment reference as you work, because it tells you at a glance whether the panel edge is running true.
Curing and Aftercare
Twenty-four hours with no foot traffic is the minimum. Contact cement grabs quickly but reaches full strength late, and 3M VHB continues to bond for two or three days. If the car has to move sooner, put the seat rail back, keep the interior cool, and drive gently.
Heat helps a solvent adhesive early and hurts a cured one. Park in the sun after fitting and you will speed up the initial grab; park a car with a cured rubber pad in summer sun for years and the pad can creep, because rubber softens and the pile beneath it can compress into a slow slide.
For cleaning, vacuum around the pad edge where grit collects. Wipe rubber and PVC pads with a damp cloth and a mild interior cleaner, and skip solvent dressings, which attack rubber and leave a film that traps dirt. Never pour dressing over the pad edges; that is how the bond fails.
Once a month, run a fingernail under the corners. A lift at a corner is a lift everywhere within a few months, and re-pressing it early costs a minute.
Common Mistakes to Avoid
Nearly every failed heel pad installation traces back to one of a handful of avoidable errors.
- Bonding to the wrong surface. Adhesive on top of the pile grips far less than adhesive on the backing. If the pad must sit pile-up, use a pad with its own adhesive face; if you are bonding to the backing, lift the carpet edge and work underneath.
- Skipping the clean. Dust and wax are invisible and permanent bond killers. Wipe first, every time.
- Guessing the position. A pad two inches too far outboard never gets used and still wears a hole. Anchor to the H-point and the seat bolt.
- Both sides by default. One driver, one pad. Two pads on a one-driver car is money spent where nothing walks.
- Sharp corners. Square corners lift. Round them off.
- Skipping the roller. Hand pressure traps air. Burnishing the pad down is what turns a contact into a bond.
- Driving it home straight away. Half a cure is not a cure, and foot traffic is the fastest way to test an unfinished bond.
- Bonding to a loose woven backing. Cheap replacement panels often have no backing at all, and adhesive soaks through onto the metal. Check before you spray.
| Symptom | Likely cause | Fix |
|---|---|---|
| Pad lifts at the corners | Square corners, no burnishing, or pad overhangs the seat rail | Lift the corners, trim them round, re-bond with 3M VHB and roll firmly |
| Pad slides in heat | Rubber pad softened, pile compressed beneath, car parked in sun | Replace with a hard plastic or carpet-faced pad and bond to the backing with contact cement |
| Sticky residue left behind | Spray adhesive or contact cement soaked through the pile | Brush out loose adhesive, dab with the appropriate cleaner, blot rather than scrub |
| Pad peels off within weeks | Dust or dressing on the bonding surface, or adhesive applied to the wrong side | Strip everything back, degrease both surfaces, re-bond to the backing not the pile |
| Pad is too small, shoe overhangs | Size chosen for a smaller car or measured against the wrong datum | Fit a larger pad, typically 5 by 8 inches or 9 by 7 inches for many cars |
Replacing a Worn-Out Heel Pad Without Replacing the Carpet
If the carpet under the driver is already thin or holed but the rest of the footwell is good, you do not need a new carpet set. Patch it in place.
1. Cut out the old pad and as much flattened pile as you need, working in a rectangle with straight edges. Cut from the bottom of the pile outward, following the existing colour change if there is one.
2. Cut a carpet patch from a matching offcut, oversized by 30 mm on each side. An OE-style supplier patch in the correct colour is far easier than trying to match a fade.
3. Peel the backing off the underside of the damaged area, trim it back to sound carpet, and lay the new patch over the hole with the pile running the same direction as the surrounding pile.
4. Bond the patch with contact cement applied to the backing only, then weight it flat under a board for 24 hours. Trim the excess once it has set and pull the edges down into the pile so the patch is invisible.
5. Fit the new heel pad on top using the same datum points as before, so the wear pattern lands in the same place it always did.
Where the worn area is beyond patching, a cut-down replacement panel for that footwell only is a reasonable middle ground between a repair and a full carpet set. Keep the patch edges under the sill plate and the seat rail where they are hidden.
Frequently Asked Questions
Where does the heel pad go on a car carpet?
The heel pad goes under the driver’s heel, on the driver’s side only, on every car regardless of which side the steering wheel is on. Anchor it to the H-point, where the heel naturally lands, and check that it finishes level with the seat rail bolt and sits two to four inches inboard of the door sill. A passenger-side pad is optional and only useful if a second person drives regularly.
What adhesive is best for a heel pad?
3M VHB peel-and-stick tape is the best all-round choice for rubber or PVC pads, because it grips a slightly dusty surface and needs no solvent in the car. Contact cement gives the strongest permanent bond and suits hard plastic pads. Spray adhesive is the least reliable of the three, and a sewn edge with waxed thread is the option when you want no adhesive at all.
How long should I leave the heel pad before driving?
Allow at least 24 hours with no foot traffic, and ideally 48 if the car will sit in direct sun. Contact cement grabs early but reaches full strength late, and 3M VHB keeps bonding for two to three days. If the car has to move sooner, put the seat rail back, keep the interior cool and drive gently rather than testing the bond with a boot.
Do I need a heel pad on the passenger side?
Only if a second person drives the car regularly. A heel pad is a wear patch for the one spot a heel lands in every journey, so a car with a single driver needs one pad. Fitting a passenger-side pad on a shared car is sensible, and fitting one as standard on a one-driver car is money spent where nothing walks. The same size usually suits both front footwells.
How do I make car floor mats stay in place?
Most mats move because there is nothing positive holding them, so fix the cause rather than the symptom. Use retention spikes or clips around the heel pad area, choose a mat with an anti-slip rubber backing, and check that the mat is large enough to reach the sill and the seat rail. On a rubber mat, a bonded heel patch also stops the mat creeping under braking.
Should you glue down carpet padding?
Glue the heel pad to the carpet backing, not to the pile and not to general trim padding. Adhesive on pile grips poorly and fails within weeks, while the backing gives a full-strength surface. Do not glue the carpet itself down around the pad, because the footwell needs to be serviceable and glued trim makes future repairs far harder.
How do I shape and cut car carpet for a footwell?
Work from a template of the old panel and leave at least 20 mm oversize on every side until the heel pad is bonded. Foam-backed panels cut cleanly from the front with a sharp blade and a straightedge. Mass-backed panels cut from the back with a scored line and a hook blade, and they are far less forgiving, so test the fit before anything is fastened down.
Is it better to have rubber or carpet car mats?
Rubber mats are easier to clean and hold water without absorbing it, and they can take a bonded heel patch. Carpet mats feel more like the factory interior, hide grit better and look correct on a restored car. On a classic restoration, carpet mats suit the trim; on a daily driver that takes wet shoes, rubber mats are the more practical choice.
Final Checklist Before You Drive
If you remember nothing else about how to fit heel pads to a car carpet, remember this order: position, surface, fixing, cure. The order is what separates a pad that is still there after 100,000 miles from one that is in a bin by spring.
One pad, on the driver’s side, under the driver’s heel. Anchored to the H-point, checked against the seat bolt and the welting, and clear of the door sill.
Clean, degreased, bone-dry bonding surface. Backing, not pile. Adhesive applied to one side only, tacked for the time the product states, then rolled down hard with extra attention to the corners.
Twenty-four hours with no foot traffic, then a fingernail check around the whole perimeter. Any edge that lifts now is an edge that lifts permanently.
As of 2026 that is still the method we use in the workshop, and it is the reason our fitted pads are still bonded when the cars come back for a respray a decade later.