
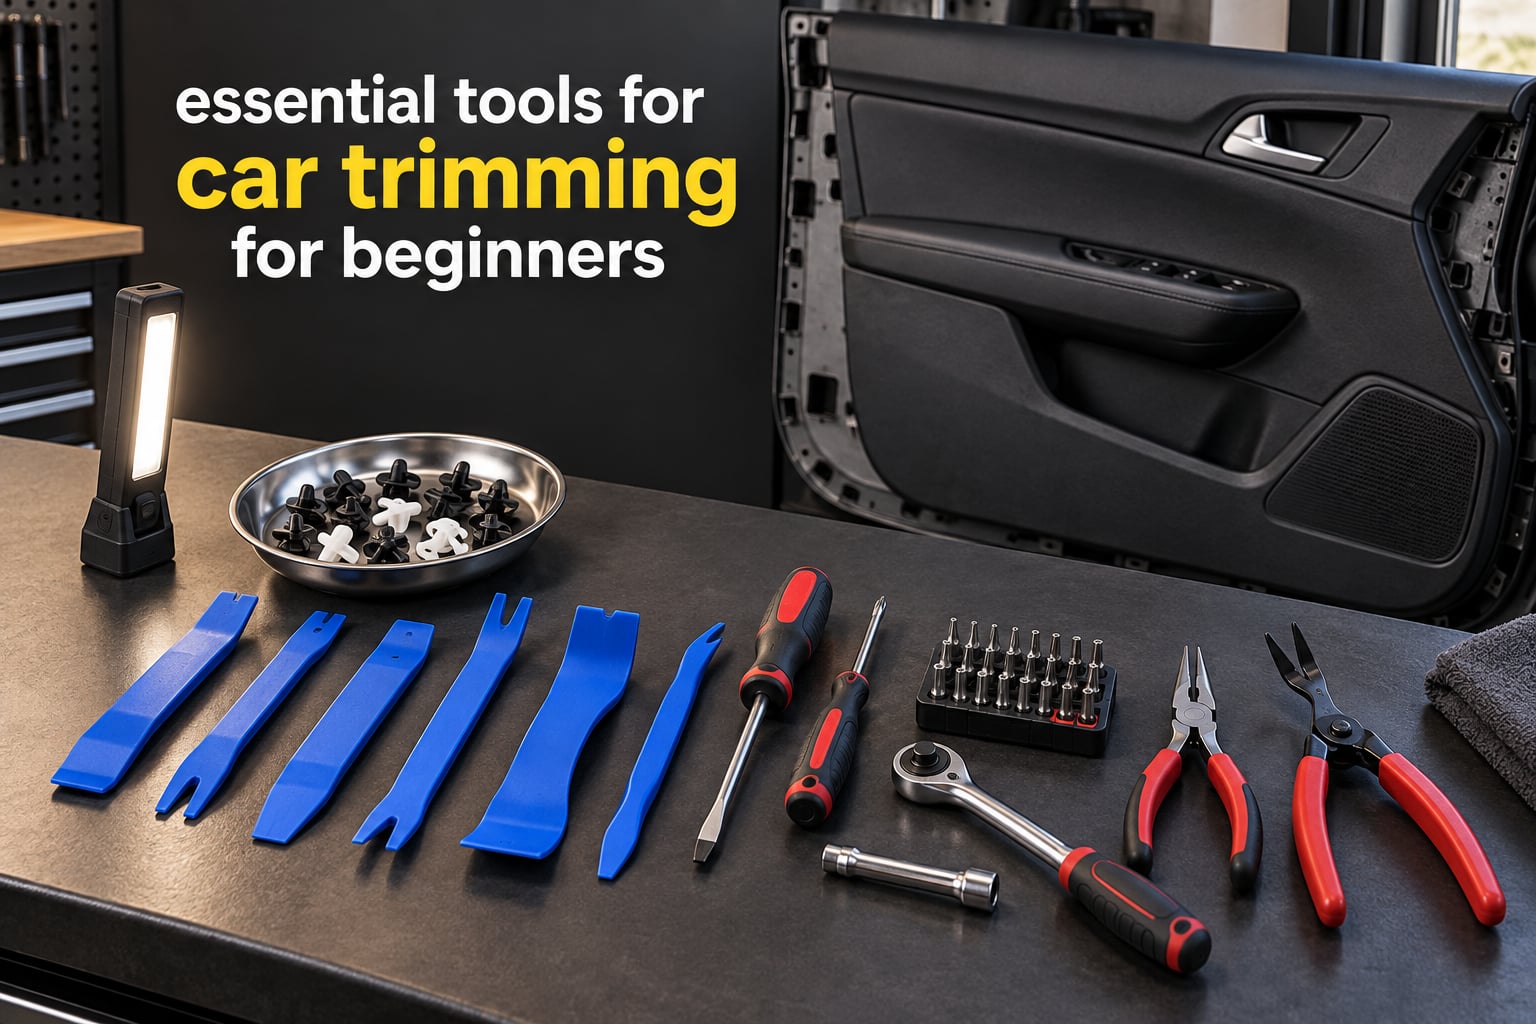
A car trim tool is a flat, non-marring wedge — usually plastic or nylon — used to release the spring clips and push-pin fasteners that hold interior trim panels to the body of the car. Slide it into the seam, apply gentle upward leverage at the clip, and the panel comes off without cracking. If you are searching for car trimming tools for beginners, this guide is the place to start: we have worked through the list, sorted out what you actually need, and marked what you can borrow instead of buy.
Trim removal is the gateway job. Almost everything else in a car interior — replacing a cracked door card, reupholstering a seat, dropping a headliner, sorting out carpet — begins with taking plastic panels off. Get that wrong and you scratch the dashboard, snap the clips, and then the panel rattles forever because it can never sit flush again.
Here is what this guide covers: the twelve tools that matter, what each one is for, how to choose between nylon, plastic and metal pry tools, where the hidden fasteners live, how to run your first door card removal without damage, and what to skip. Updated for 2026.
Table of Contents
- What Car Trimming Actually Covers (and What It Does Not)
- The Essential Tools for Car Trimming: A 12-Tool Checklist
- Choosing a Pry Tool: Nylon vs. Plastic vs. Metal
- Removing Interior Trim Clips and Fasteners Without Breaking Them
- Tools for Door Cards, Window Sills and Dashboard Trim
- Safety and Workshop Setup
- Car Trimming vs. Auto Upholstery vs. Car Detailing
- Should You Buy a Kit or Individual Tools?
- Your First Trim Removal Job, Step by Step
- Fixing Broken Clips and Snapped Trim Tabs
- What to Buy Next: A First-Year Purchase Order
- Frequently Asked Questions
- What is a trim tool for a car?
- What tools do I need to start working on my own car?
- What basic tools do I need in my car?
- What can I use instead of a car trim tool?
- What are the basic tools needed for upholstery?
- What tools are needed for auto upholstery?
- Can I reupholster my car seats myself?
- What size Torx do car interior screws use?
- Conclusion
What Car Trimming Actually Covers (and What It Does Not)
Car trimming is the removal and refitting of the hard interior panels and their fasteners. That is the whole definition, and beginners routinely get it wrong by assuming it drifts into upholstery.
Three related jobs get confused constantly, and each needs a different tool family:
- Trimming — door cards, sills and scuff plates, A-pillar covers, dashboard and centre console trim, window beltline mouldings, interior handles and bezels, headliner edge trim. Held on by clips, screws and push pins.
- Auto upholstery — seat covers, headliner fabric, carpet, door panel inserts. Held on by hog rings, staples, adhesive and thread. Needs sewing and stapling equipment.
- Car detailing — cleaning, clay, polish, coating. No disassembly, no tools beyond cloths and bottles.
So if you are removing a door panel to get at the speaker underneath, that is trimming. If you intend to recover the seat afterwards, expect to buy into a second tool family once the trim is off.
The Essential Tools for Car Trimming: A 12-Tool Checklist
This is the list to buy against. Each entry names the tool first, then explains what it is for.
- Trim removal pry tool set. A multi-piece kit of flat and angled wedges in several widths, usually 11 to 13 pieces. This is the single most useful item in the whole list because every panel job starts with one. The thin wide blades reach into deep seams; the forked end slips behind a clip head.
- Plastic trim wedge or paddle. A wider, stiffer single tool for releasing a panel that has already started to lift. Fewer, bigger edges spread the load better than a narrow blade, so this is your scratch insurance on the second half of the pull.
- Fastener and clip remover. A small forked or plier-style tool that gets under the head of a push-pin fastener and lifts it straight out. Toe or a nail file works; this version just does it without pinching your fingers.
- Flat-blade screwdriver, 6mm and 9mm. For trim tabs that slot rather than clip, and for levering a stubborn edge. A stubby 6mm flat with a flattened tip reaches a door handle bezel recess that a full-size driver will not fit into.
- Phillips screwdrivers, PH1 and PH2. The two sizes you will see on nearly every interior screw. A ratcheting screwdriver with a flip handle covers both and speeds up door card reassembly.
- Torx driver set, T15 to T45. This is the one that catches beginners out. Torx owns the dashboard, console, seat rails and pillar covers on most cars built since the late 1990s. A nine-piece Torx set on a driver handle covers it.
- Quarter-inch ratchet with 9mm and 10mm deep sockets. Interior fasteners are overwhelmingly Torx and those two hex sizes. Deep sockets reach recessed headliner and pillar screws where a shallow socket bottoms out and rounds the head.
- Ratchet extensions, 75mm and 150mm. They turn a two-hour pillar job into a twenty-minute one by getting the socket into a line you cannot reach by hand. Keep one of each in the ratchet case permanently.
- Needle nose pliers. For reaching a fastener that dropped behind the dash, gripping a broken clip, or holding a wire while you reconnect it.
- Side cutters or diagonal pliers. For snipping hog rings, cutting zip ties and trimming cable ties without leaving a sharp stub against bare metal.
- Soft-face hammer. For seating stubborn fasteners and, occasionally, for freeing a panel seam that has been glued shut. Face it with a rubber or plastic head so a slipped blow does not crater the trim.
- Trim clip assortment and a magnetic clip tray. Not a tool, but the pair of things that turn a two-hour job into an afternoon. Buying a fresh set of common clip sizes before you start also removes the excuse to skip refitting.
That is the working set. Anything beyond it belongs to a specialist job, and we will get to that below.
Choosing a Pry Tool: Nylon vs. Plastic vs. Metal
Nylon is the safest choice for beginners, and it is what I recommend for a first kit. It flexes rather than cracking, it will not conduct, and a dropped nylon tool lands on the floor instead of the rocker panel.
Acrylic and ABS plastic pry tools are stiffer and hold an edge better, but they are the ones that leave white stress marks on a soft-touch dashboard. Metal pry tools are for body panels, weatherstrips and seized parts — not for interior plastic, where a slipped metal edge cuts a permanent line into the door card.
| Material | Scratch risk | Strength | Best use |
|---|---|---|---|
| Nylon | Very low | Low to medium | Dash, door card, first jobs |
| Acrylic or ABS plastic | Medium on soft-touch surfaces | Medium | Stiff panels, console, pillar trim |
| Metal | High | High | Seized trim, weatherstrips, body gaps |
What can you use instead of a trim tool? In a pinch: a guitar pick, a plastic gift card, a thin spatula, or a wedge-shaped piece of an old credit card in a folded edge. All of them work, and all of them come with the same warning — an improvised card is thin enough to skate and gouge the panel if you slip. A dedicated wedge has a blunt, tapered profile that spreads the load instead of concentrating it.
Removing Interior Trim Clips and Fasteners Without Breaking Them
Nearly every interior panel is held by a mix of a small number of fastener types, and each one comes off a specific way.
Know your four clip types
Push-pin fasteners have a stem that expands inside a hole in the body. You pull the head straight up while the panel is supported, and the stem collapses as it exits. Tilting the head sideways is what snaps it.
U-clips and J-clips slide into a rectangular slot and are held by a spring leg. A forked clip remover or two small flat blades levered gently outward releases them.
Screw-in trim clips and T-clips have a threaded or barbed centre. Turn or push them out rather than pulling, or the plastic anchor stays in the body panel and you have a hole to fill.
Metal spring clips are the one you cannot service if you lose one. Order replacements by the part number stamped on the back of the panel before you start, not after.
Soak rusted fasteners before you touch them
Interior screws on older cars are the most common reason a first job ends badly. Put penetrating fluid on every screw and give it fifteen minutes before you pick up a driver. If a head starts to strip, stop and use the correct size, not a bigger one — a mismatched driver is what rounds a head in the first place.
Use a clip tray, always
A door card can hold thirty or more small clips, and a magnetic tray or an egg carton keeps them in order. This is the single habit that separates a clean reassembly from a rattle hunt three months later.
Tools for Door Cards, Window Sills and Dashboard Trim
Door cards are the classic first job. Start at the rear edge near the speaker grille, work forward and up around the armrest, and never lever near the painted door shell. Expect one wiring connector for the window switch, one for the courtesy light, and possibly a tweeter lead at the mirror end. Lift the card off the top edge last.
Window sill and scuff plate trim is the easiest job on the car and a good confidence builder. Most are pure plastic: a pry tool at each end, pop the push pins in sequence, and the strip lifts away. The temptation to lever the whole length at once is what cracks the long thin mounting tabs.
Dashboard and centre console trim is where Torx earns its place. The upper dash pad is usually retained by screws behind the A-pillar covers and a row of push pins along the windscreen edge, and the console is typically Torx T20 or T25. Work cold — a dashboard left in direct sun is soft, and soft plastic tears instead of releasing.
A-pillar covers hide the dash screws and are usually held by one clip at the top and friction at the bottom. Pull down and out, never sideways, and expect trim tape or a gasket strip to fight you at the seal.
Safety and Workshop Setup
Trim work is low risk, but the setup still matters. Wear nitrile gloves — interior fasteners are sharp and often oily — and safety glasses, because a clip under tension can launch across the cabin when it releases.
If the job involves lifting a car, use jack stands rated above the vehicle weight and never work under a car held only by a jack. Jack stands do not appear in the twelve-tool list because they are not a trimming tool, but they are non-negotiable the moment the car goes up.
A rechargeable LED work light transforms trim work, because most of the fasteners you need to see are in shadow behind a panel. Keep the battery topped up and it becomes the tool you reach for most.
Work in a ventilated space and avoid a heat gun or a solvent-based adhesive remover in a closed garage. Both are genuinely dangerous in a small space, and a heat gun held too long on a pillar cover will warp the plastic permanently.
Car Trimming vs. Auto Upholstery vs. Car Detailing
These three get blended into one shopping list all the time, and buying the wrong one is expensive. Trimming needs wedges, drivers and a socket set. Detailing needs no tools at all beyond cloths and a bucket.
Auto upholstery is a different craft with a different tool list: an industrial sewing machine, working tables, cutting shears, hog ring pliers, a heat gun, a spray glue gun, a pneumatic staple gun and a compressor. Forums like r/upholstery repeatedly steer beginners away from furniture upholstery kits — webbing stretchers and ripping chisels do not apply to metal-framed vehicle seats, and buying them is the most common early mistake.
What are the basic tools needed for upholstery? For a first repair job, a hand-held needle, heavy-duty thread, a seam ripper, pliers and a staple gun handle most tear repairs. What tools are needed for auto upholstery beyond that? A sewing machine, shears and a steamer — but those belong to your second project, not your first.
Should You Buy a Kit or Individual Tools?
Buy a kit for the pry tools. A twelve-piece trim removal set costs less than two individual wedges and covers widths and profiles you would otherwise buy one at a time as you discover you need them.
Buy individuals for everything else. A ratchet, a socket set, screwdrivers and a Torx set are sold separately across dozens of brands, and the quality difference between a cheap and a mid-tier version is far more visible there — a cheap ratchet’s mechanism wears out within a few months, and a cheap screwdriver handle cracks in the hand under torque.
Work through three budget tiers. The starter tier is a trim removal kit plus a screwdriver set and gloves. The mid tier adds a quarter-inch ratchet with deep sockets, extensions, a Torx set and needle nose pliers — this is the sensible level for most beginners. The professional tier adds trim-specific specialty tools, an impact driver for seat bolts, and a headliner staple gun, and most of that you should rent or borrow first.
Cheap tools cost more than they save when the failure mode is damage. A thin plastic wedge that snaps inside a seam leaves you hunting for the fragment, and a soft-face hammer with a steel face marks the trim it was supposed to protect.
Your First Trim Removal Job, Step by Step
This is a door card removal, done slowly. Do it on a door you do not need to drive that day, so a mistake is not a road safety issue.
- Park, open the door fully and lower the window halfway. The glass needs somewhere to go when the card clears it. Plug a memory saver into the diagnostic port if your car has one, so the window and radio settings survive.
- Photograph everything before you touch it. Ten phone photos of screws, clips and connector locations will save you an hour when you put it back.
- Remove the screws. Usually two Torx or Phillips screws under the trim cover at the armrest and one near the front of the map pocket. Check the manual for the exact locations on your model — they move between generations.
- Pop the courtesy light and switch connector out first. Press the tab, do not pull the wires. Clip connectors seated backwards are the number one cause of a dead window switch.
- Work the pry tool around the perimeter. Start at the rear speaker grille, go forward along the beltline, down the front edge, then along the bottom. Insert the wedge, lift gently, and slide — never twist.
- Move every clip into the tray as you go. Stop and feel along the seam with a fingertip; the ones that feel rigid are the ones still holding.
- Lift the card off the top edge, then reassemble in reverse. Press each clip home with the flat of your palm until you hear it seat. Do not rely on the screws to pull a clip into place.
If a clip will not release, that is the moment to stop and re-check for a hidden screw rather than apply more force. Most broken tabs come from forcing a fastener that was never removed.
Fixing Broken Clips and Snapped Trim Tabs
It happens to everybody. If the mounting tab on the panel snaps but the clip is intact, you can glue the clip back: roughen the tab slightly, clean both surfaces, and use a two-part epoxy that sets hard. Clamp it in place and let it cure fully before refitting.
Hot glue looks like the obvious fix and is the wrong one. It stays slightly flexible, so the panel develops the same rattle you were trying to solve, and it softens again in a hot car.
If the clip itself snapped, replace it. Trim clip assortments cover the most common sizes and are sold by the pack rather than the piece, which is why a simple door card can cost more in clips than in tools. Buying an assortment before you start is cheaper than sourcing them one at a time.
What to Buy Next: A First-Year Purchase Order
Month one: a trim removal kit, a plastic wedge, a PH1 and PH2 screwdriver, a flat blade, and nitrile gloves. That is enough to do a sill plate, a scuff plate and an interior handle.
Month three: a quarter-inch ratchet, 9mm and 10mm deep sockets, a 150mm extension, a Torx set and needle nose pliers. This is when door cards and dashboard trim become comfortable rather than stressful.
Month six: a clip tray, a magnetic pick-up tool, penetrating fluid, a work light and a low-profile impact driver if you plan to move seats. Buy a torque wrench only when you reach jobs with a specified value — interior trim fasteners are rarely torque-critical.
Store the lot in a socket case or a labelled drawer tray, and wipe the drivers before they go away. Rust pits on a screwdriver shaft come from storage, not from use.
Frequently Asked Questions
What is a trim tool for a car?
A car trim tool is a flat, non-marring wedge made from plastic or nylon used to release the spring clips and push-pin fasteners holding interior trim panels to the body. You slide it into the seam, apply gentle upward leverage at the clip and the panel releases, with the wedge spreading the load so neither the plastic panel nor its clips crack.
What tools do I need to start working on my own car?
Start with a trim removal pry tool set, a flat-blade and Phillips screwdriver set, a Torx driver set covering T15 to T45, a quarter-inch ratchet with 9mm and 10mm deep sockets, needle nose pliers, side cutters and nitrile gloves. Add a soft-face hammer, a clip tray and penetrating fluid once you take on your first door card or dashboard job.
What basic tools do I need in my car?
For a portable kit kept in the boot: a ratchet with a socket assortment, a multi-bit screwdriver covering flat, Phillips and Torx, needle nose pliers, side cutters, a small trim removal wedge, a roll of tape and a compact work light. Keep penetrating fluid and a socket extension in the same bag if your car is older than about fifteen years.
What can I use instead of a car trim tool?
A guitar pick, a plastic gift card, a thin spatula or a folded old credit card all work as improvised wedges. They are thinner and sharper than a purpose-made tool, so they skate and can gouge the panel if you slip. A dedicated nylon or plastic wedge has a blunt tapered profile that spreads the load instead of concentrating it.
What are the basic tools needed for upholstery?
For a first repair on car seats or door inserts you need heavy-duty thread, a hand-held needle, a seam ripper, pliers, a staple gun and a staple remover. Trim removal tools are useful too, since the panel has to come off before the fabric is reachable.
What tools are needed for auto upholstery?
A full auto upholstery setup covers an industrial sewing machine, working tables, cutting shears, hog ring pliers, a heat gun, a spray glue gun, a pneumatic staple gun and a compressor. Beginners are advised against furniture upholstery kits: webbing stretchers and ripping chisels do not apply to metal-framed vehicle seats.
Can I reupholster my car seats myself?
Repairing a torn seat or panel insert is a realistic first project. A full reupholstery is a different proposition: it needs pattern matching, hog ring work and a sewing machine, plus access to donor material in a matching colour and grain. Start with a rip repair and treat a full retrim as a project for after you own the tools.
What size Torx do car interior screws use?
T20 and T25 cover the majority of interior trim fasteners on most cars, with T15 common on smaller screws in pillar covers and bezels and T30 or T40 appearing on seat rails and larger structural bolts. A nine-piece Torx set spanning T15 to T45 covers essentially every interior screw you will meet.
Conclusion
Car trimming tools for beginners come down to a short list and a few habits. Buy a trim removal kit, a screwdriver and Torx set, a quarter-inch ratchet with 9mm and 10mm deep sockets and an extension, pliers, cutters and gloves. Work slowly around each seam, pull push-pin fasteners straight up, and keep every clip in a tray.
Start with a sill plate or a scuff plate, move up to a door card, and leave the dashboard until you have done both. Everything else in the list can wait until you know which job you are actually facing.