
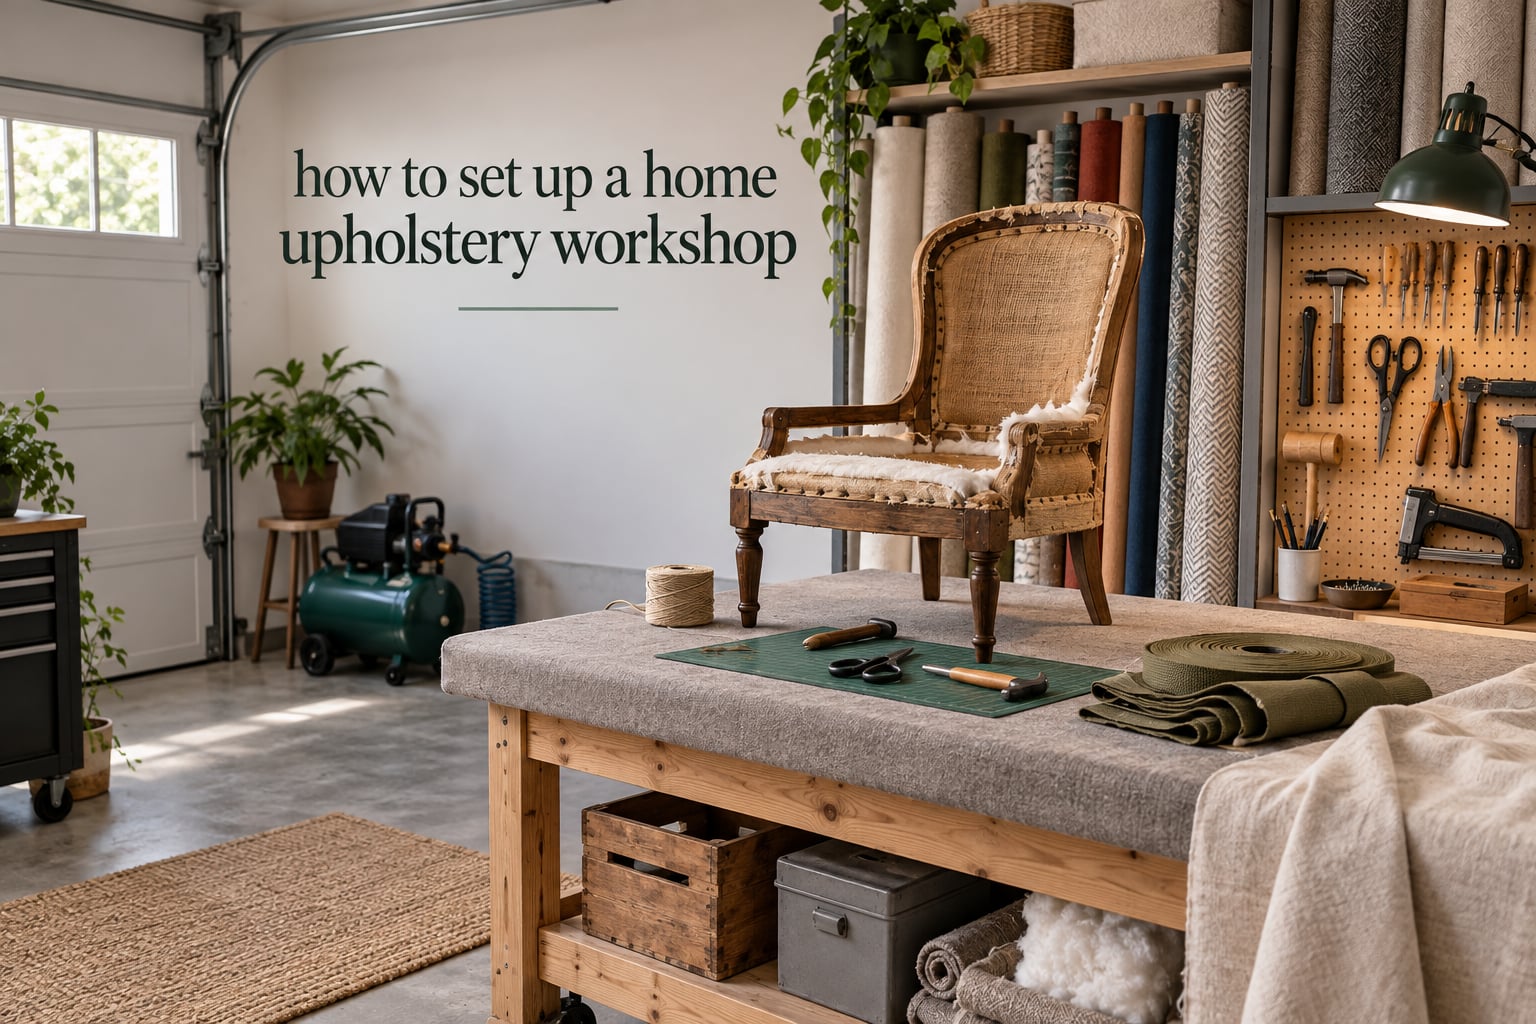
You need roughly 120 square feet to set up a working home upholstery workshop — about 12 by 10 feet — for a single chair project at a time. Add 60 square feet for every additional worker, and double it if you plan to reupholster full sofas and headboards on site rather than moving finished pieces out.
That is the short answer. The longer version is that most beginners start with far less than that, and the space question is rarely the real barrier. On the r/upholstery forum, the same answers come up again and again: a dining room table, a shed, a strip of cleared basement floor. One thread on helping build a workshop runs past twenty comments and lands on the same conclusion every time — start with what you have, and let the work dictate what you add.
So this guide covers the whole journey rather than a single shopping list. We will work through how much floor space you need, where to put it, how to lay it out on paper before you carry anything in, what belongs on the bench, which tools matter on day one, and which ones can wait a year.
We will also cover the parts that almost nobody writes down: ventilation rates, fire safety around foam and spray adhesive, noise and your neighbours, and the home occupation rules that apply if you take money for the work. Those are the details that decide whether a workshop is a pleasant room or a problem you regret.
Updated for October 2026.
Table of Contents
- How Much Space Do You Actually Need?
- What You Need to Set Up a Home Upholstery Workshop
- Choosing and Planning Your Workshop Location
- Sample Workshop Layouts for Garage, Basement and Spare Room
- The Workbench: Your Workshop’s Centrepiece
- The Essential Starter Tool Kit
- Air, Power and Compressor Setup
- Lighting and Ventilation
- Storage and Organisation
- Health, Safety and Household Considerations
- Home Occupation Rules, Zoning and Insurance
- What to Buy First vs What to Buy Later
- First Projects and a 90-Day Setup Plan
- Frequently Asked Questions
- How much space do I need for a home upholstery workshop?
- What are the most important tools for a beginner upholsterer?
- Do I need an air compressor for upholstery?
- Can I teach myself upholstery?
- How long does it take to train to be an upholsterer?
- How do I ventilate an upholstery workshop at home?
- Can I run an upholstery business from my garage?
- Is an upholstery business profitable?
- Conclusion
How Much Space Do You Actually Need?
For a beginner working on chairs, stools and cushions alone, 120 square feet is a comfortable minimum. That is a 12 by 10 foot room, or a single-bay garage with the car moved out.
Here is how the numbers break down by what you intend to build:
| What you are making | Useful floor area | Notes |
|---|---|---|
| Chair seats, stools, small cushions | 80-120 sq ft | Bench, a stool to sit on, room to swing a stapler |
| Chairs, headboards, medium occasional pieces | 120-200 sq ft | Add a separate cutting surface and stack storage |
| Sofas, sectionals, full seating | 200-300 sq ft | Needs clear floor to lay a frame flat and roll it |
| Sofa plus cutting table plus storage | 300-400 sq ft | The realistic one-person trade setup |
| Two people working at once | 400+ sq ft | Two benches, one cutting table, separate finishing area |
Height matters as much as footprint. You want at least 7 feet of ceiling clearance so you can stand a frame on end without hitting your head, and ideally 8 feet if you plan to work on headboards and tall backs. Low garage ceilings make a narrow room feel cramped even when the square footage is fine.
One more measurement people forget: door width. A finished chair or a seat pad is easy to carry through a standard door. A sofa frame on a workhorse is not. Plan your largest piece, measure the route from the work area to the nearest door, and check it before you commit to a layout.
Warning: A single-bay garage is genuinely tight. If you are hoping to keep a vehicle in the same space, budget for a 2.5 to 3 times multiplier on the square footage above, because you are working around a car door.
What You Need to Set Up a Home Upholstery Workshop
This is the short list. If you work through these in order, you have a functional workshop; everything else in this guide is refinement.
- A dedicated work area you can clear of household clutter and keep clear
- A padded workbench or sturdy table, ideally 4 to 5 feet long
- A separate flat cutting surface at least 4 by 8 feet
- Task lighting over both the bench and the cutting surface
- A heavy-duty sewing machine capable of sewing through webbing and multiple fabric layers
- A tape measure, straightedge, fabric shears and a marking pencil or chalk
- A hand staple gun, a tack and staple remover, and a rawhide mallet
- Straight pins, curved upholstery needles and heavy thread
- An iron or steamer for pressing seams and shaping vinyl
- Air supply for a pneumatic staple gun — compressor, hose, regulator and fittings
- Ventilation that moves air out of the room, not just around it
- A fire extinguisher rated for the materials you will use
- Shelving or a tool wall within arm’s reach of the bench
- A waste bin for foam chips, offcuts, staples and needles
That is fourteen items, but eight of them are things most households already have. The genuinely specialised purchases are the workbench, the sewing machine, the stapler and the air supply.
Choosing and Planning Your Workshop Location
Each location has a distinct failure mode. Understanding the failure mode before you start is worth more than any piece of equipment.
Garage
A garage gives you floor area and a wide door, which is exactly what a sofa frame needs. The problems are temperature swings, dust from the driveway, and a door that is frequently open while you are using spray adhesive. Insulate the walls and ceiling if you can, keep a dehumidifier running in winter, and treat the open door as a ventilation problem rather than a convenience.
Basement
A basement is the best natural fit for upholstery because it stays at a stable temperature and humidity, which is kinder to fabrics, foam and adhesives. The trade-offs are low natural light, a possible musty smell, and noise travelling upward more easily than you expect. Ventilation is usually a single window, so an extractor fan on a timer is worth installing early.
Spare room or reception room
A spare room keeps the work inside the house envelope, which is comfortable in winter and convenient for a hobbyist with a day job. The catch is that dust, offcuts and noise become a household negotiation. Many hobbyists use a spare room for sewing and pattern work, and keep only the messier cutting and stripping tasks outside. A folding screen or heavy curtain makes a surprising difference to how a room feels when the iron is out.
Garden shed or outbuilding
A shed is great for storage and for stripping dirty frames, but it is usually unheated and un lit, so it is a poor place to sew. Power supply and lighting are the two things to check before you choose one. If your shed has no socket, everything becomes battery or cordless, which pushes you toward electric rather than pneumatic tools.
| Location | Space | Ventilation | Noise impact | Best for |
|---|---|---|---|---|
| Garage | Good, if the car leaves | Door-dependent | Compressor carries outside | Sofas, frames, large work |
| Basement | Good | Single window usually | Travels upstairs | All-round stable work |
| Spare room | Limited | Normal windows | Straight into the house | Sewing, cushions, slipcovers |
| Shed | Good | Vents only | Isolated from house | Storage, stripping, dirty jobs |
Before you move anything in, spend an evening measuring. Measure the room, then measure every table, shelf, door frame, radiator, socket and window you already own, and draw the result to scale on graph paper. The Upholstery Resource guide to a home-based shop makes the same recommendation, and it is sound: drawing the layout to scale before placing fixtures is the only way to discover the awkward gap you would otherwise find halfway through a build.
Sample Workshop Layouts for Garage, Basement and Spare Room
The sketches below are rough plans, not engineering drawings. Read them as zone logic: dirty work at the entrance, clean work under the light, storage on the walls, and an unbroken path between them.
Single-bay garage, 12 by 20 feet
BACK WALL - storage + pegboard + power
+------------------------------------------------+
|  SHELVES (2ft)   |   CUTTING TABLE 4x8 (2ft)    |
|  1.5ft deep      |   across the rear third        |
+-------------------+-------------------------------+
|                                        |           |
|              CLEAR FLOOR               | SEWING   |
|           8ft x 10ft working area      | CORNER   |
|              for frames                | 4x4ft    |
|                                        |           |
+----------------------------------------+-----------+
|  WORKBENCH 5x2.5ft     |  STOOL         |  COMPRESSOR|
|  1.5ft deep            |                |  in a corner
+-------------------------+----------------+-------------+
DOOR  |
+------------------------------------------------------------+
The bench sits closest to the door so dirty frames come in and out without crossing the clean cutting area. The compressor takes the corner furthest from the bench, partly to keep the hose out of the walkway and partly because a compressor is the loudest thing in the room.
Basement, 15 by 15 feet
+--------------------------------------------------+
| EXTRACTOR FAN  |   WINDOW                          |
|  (x4)          |                                    |
+----------------+------------------------------------+
| ROLLER         |        CUTTING TABLE                |
| CABINET        |        4 x 8 ft, near the           |
| 2x2ft          |        best natural light           |
+----------------+------------------------------------+
|                                                        |
|               CLEAR FLOOR 10x8ft                      |
|                                                        |
|  WORKBENCH 5x2.5ft                    WELDING/STAPLE  |
|  padded top, under-bench baskets        BENCH 3x2ft     |
+--------------------------------------------------+
|  FULL LENGTH SHELVING FOR FABRIC ROLLS (vertical)      |
+--------------------------------------------------+
In a basement, the cutting table goes to the window because daylight plus a task light is far easier on the eyes than a bulb alone. Fabric rolls stand vertically along the longest wall, which keeps a three-metre roll off the floor and out of the dust.
Spare room, 10 by 12 feet
+-------------------------------------------+
| DESK SEWING STATION  |  SHELVING         |
| (use a desk, not a    |  1ft deep        |
|  padded bench)         |                  |
+------------------------+------------------+
|                                            |
|        FOLDING CUTTING TABLE               |
|        4 x 4 ft, stored flat between        |
|        sessions                            |
|                                            |
|   WORKBENCH 4x2.5ft        |   STACKS      |
|   near the door            |   of foam     |
+----------------------------+----------------+
DOOR
+-------------------------------------------+
A spare room cannot hold two big benches, so the compromise is a sewing desk against the wall, one padded bench, and a folding cutting table that lives flat against a wall or under the desk until you need it. Where you cut matters as much as how much room you have, so resist the urge to cut on the kitchen table and accept a slightly longer carry.
One final layout rule: leave a clear 3 foot walkway the full length of the room. Workshop discipline collapses when every tool has a home but nothing has a path.
The Workbench: Your Workshop’s Centrepiece
Your bench is where every project spends most of its hours, so it is the one piece of equipment worth getting right on the first attempt.
Size
Four to five feet long and about 30 inches deep is the range most home upholsterers settle on. A wider bench is not better — it makes it harder to reach the far side without stretching, and it takes more floor space than the extra width earns. Depth matters more than length for most chair work.
Height
A working height of 34 to 38 inches suits almost everyone standing. Taller upholsterers may prefer 40 inches, shorter ones 32. If you can get a bench that adjusts, do it. A hydraulic dog grooming table is the classic budget answer here — used units show up regularly and the height adjustment is worth more than a solid wood top at this stage.
Construction
Look for six or eight legs rather than four. Four legs let a heavy frame rack and twist the whole bench, and the wobble shows up as a skewed staple line. A plywood top with a dense foam layer and a working vinyl or fabric cover gives you a surface you can pin into and staple into without marking the frame underneath. Add a screw or two through the top at intervals and you can replace the cover rather than replace the bench.
Under-bench baskets or shallow drawers are the single most useful storage upgrade. Staples, tacks, needles, snips and webbing all end up within arm’s reach of the working position rather than in a drawer across the room.
Height for your body, not the frame
Whatever height you pick, test it with a real frame on it before you fix anything. A bench that is right for a chair seat may be wrong for a sofa back. A hydraulic base earns its keep here more than anywhere else in the workshop.
The Essential Starter Tool Kit
Here is the tool list, in the order it makes sense to buy. I have kept the trade jargon defined because half of the difficulty of reading upholstery advice is vocabulary.
Buy on day one
- Tape measure and clear acrylic ruler. A clear 24 inch ruler lets you see the fabric edge and the mark at the same time. Cheapest possible upgrades, largest accuracy gain.
- Fabric shears. Large blades, kept sharp. Dull shears chew fabric and slow you down badly.
- Marking tools. Chalk, tailor’s chalk and a permanent marker for templates.
- Straight pins, curved hand needles and heavy thread. Curved needles are for sewing webbing and seams in tight corners where a straight needle will not go.
- Hand staple gun. A long-arm stapler for attaching webbing and fabric to the frame. It is slow but it needs no power, and it teaches you staple placement before you buy anything faster.
- Tack and staple remover. A quality remover is the difference between a five-minute demolition and a forty-minute one. If you cannot afford one, a punch and a hammer is the substitute that circulates in beginner forums.
- Rawhide upholstery mallet. Rawhide, not rubber or plastic. A rubber mallet bounces off hardwood frames and leaves marks; a rawhide mallet drives tacks without both problems.
- An iron or garment steamer. Seam pressing sets the shape of a cover. Steamers are better for bulky foam and shaped work, irons are better for seams.
Buy once you are earning or committed
- A heavy-duty or walking-foot sewing machine. This is usually the biggest single cost in a home setup. A walking foot feeds layers evenly and stops webbing, foam and vinyl from shifting under the needle. A good domestic machine with a walking foot attachment handles a lot of light work, so test before you commit to an industrial one.
- A pneumatic staple gun. A pneumatic staple gun is a stapler driven by compressed air rather than by your hand or a battery. It fires consistently, which means even staple spacing, and it is the tool that makes sofa-scale work practical. Short-nose staples sit flush for visible work; long-nose staples hold better on hardwood and plywood.
- An air compressor with regulator, hose and fittings. Covered in the next section.
- A cutting table and rotary cutter. A large rotary cutter and a cutting mat make long straight cuts across wide fabric fast and accurate.
- A heat gun. For shrinking vinyl and applying heat-activated adhesive. A hairdryer is a poor substitute; it lacks the airflow and the temperature control.
The materials you will keep on hand
These are consumables, not tools, but a workshop without them cannot finish a project.
- Jute webbing and burlap. Jute webbing is the heavy elastic strap that stretches across a seat frame; burlap is the coarse fabric stretched over the webbing to form the foundation layer. Both are what a cushion rests on.
- Tack strip. A tack strip is a flexible steel or plastic strip pinned around the seat edge to give fabric something firm and continuous to attach to. It is a weak point people forget on a first build.
- Basting tape. A paper tape that holds a seam while you stitch it.
- Cambric. A light cotton dust cover that goes over the finished frame before the final cover goes on.
- Piping and welting cord. Bias-cut strips wrapped around cord, sewn into seams to define edges.
- Channel stuffing and a channel stuffer. Channel stuffing is the polyester batting inserted into sewn channels so a cushion holds a defined shape. A purpose-built stuffer works; a cardboard tube cut from a broom handle works nearly as well.
- Foam lock spray adhesive. Bonds foam layers and fabric to foam. Use it in a ventilated space and away from an open flame.
Air, Power and Compressor Setup
Do you need an air compressor for upholstery? No, not to start. You need one for a pneumatic staple gun, and you only need a pneumatic staple gun when you are doing frames large enough that hand stapling becomes the bottleneck.
A hand stapler covers chairs, stools and cushions perfectly well. Add air power when you reach sofas, headboards and anything where a consistent staple line across a long run matters.
Compressor sizing
Match the compressor to the tools rather than buying the largest tank available. A small pancake compressor with a regulator and a 20 to 30 foot hose will drive a pneumatic stapler continuously, because a stapler uses air in short bursts. A large tank buys you a louder compressor and a longer wait for it to refill. Buy quality fittings and a good regulator rather than a bigger tank.
Run a dedicated electrical circuit for the compressor if you can, and keep the machine away from the bench so the hum and the vibration stay out of your work position.
Noise, which is the part nobody mentions
Compressors and pneumatic tools are the top reason people abandon a home workshop. A rubber isolation pad under the compressor feet cuts vibration through a concrete floor. Running the compressor outside under cover, or on a timer so it only runs when you are stapling, contains most of the problem.
People ask on forums whether a compressor is necessary at all, and the substitute that comes up repeatedly is an electric or cordless stapler. It is quieter and needs no hose. It is also heavier in the hand and less consistent on hardwood, which is a fair trade to make deliberately rather than by default.
Power supply
An industrial sewing machine, a heat gun and a compressor together can exceed a single domestic ring circuit. Check what your machine draws, and where the nearest socket sits relative to the bench. Extension leads under a rug or across a walkway are a trip hazard and a fire risk in a room full of fabric and foam.
Lighting and Ventilation
Most beginner guides skip ventilation almost entirely, which is a shame, because it is the difference between a workshop you can work in for years and one that gives you a headache by month three.
Lighting
Overhead lighting alone is not enough for upholstery. Stitching under a single ceiling bulb causes eye strain and hides the small errors that matter, like a missed staple or a pin left in a seam.
- A dedicated LED task light over the bench, ideally on an adjustable arm so you can move it as the frame rotates.
- Unshadowed daylight on the cutting table. Position the table so the window is to your side, not behind you.
- Track lighting if you are wiring up from scratch, so you can aim each head at a specific surface.
- A colour temperature of around 4000K. Warmer light makes it genuinely harder to judge whether a fabric colour matches.
- A torch or headlamp for stripping old covers off frames, where you are working inside the structure and shadows are unavoidable.
Poor lighting is not just uncomfortable. It is the most common cause of crooked seams and misplaced staples, both of which mean redoing work.
Ventilation
Ventilation has a different purpose in upholstery than in woodworking. You are not dealing with sawdust; you are dealing with spray adhesive fumes, foam dust, fibre particles and fabric sizing. What you need is air moving out of the room, not air circulating.
- General ventilation: aim for a steady air change rather than a window propped open. A domestic room typically wants eight to twelve air changes per hour while you are working with adhesives. A small extract fan on a timer, ducted out of the room, does more than an open window and works in winter.
- Local extraction: for spray adhesive and cutting foam, work near an extraction point rather than in the middle of the room. A folding extraction screen with a fan is a cheap way to create a local zone.
- Foam handling: cut foam in a doorway or near the extractor, never in a closed room. Foam chips are the mess upholsterers describe as the devil to pick up, and they stick to everything in the room if you let them build.
- Never use a heat gun in a closed space with adhesives present, and never point a heat gun at upholstery fabric. Vinyl melts and standard fabric scorches.
If you are sensitive to chemicals, ask your retailer for the safety data sheet before you buy a spray adhesive and read it properly. It tells you exactly what ventilation the product needs rather than guessing.
Storage and Organisation
A workshop fails on organisation long before it fails on equipment. Three systems cover almost everything.
Tool wall. A magnetic strip or a full pegboard panel behind the bench keeps hand tools visible and within reach. A shallow tray for the small items — snips, needles, pliers — stops them migrating to the floor. If your bench has a back rail, add hooks to it.
Consumables by job. Put staples, tacks, webbing, tack strip and thread in labelled bins grouped by the task they belong to, not alphabetically. Under-bench baskets work for this better than a wall cabinet because the supplies are used while you are at the bench.
Material storage. Fabric rolls stand vertically in a rack or on end against a wall with a shelf lip; storing them flat on a table takes up four times the space and puts creases in the roll. Foam stacks flat on a high shelf away from the floor, where the damp is lowest. Hardware, buttons and trim go in small drawers sorted by type and size.
Build the tool wall first. It is the cheapest storage you will install and the one you will touch every single day.
Health, Safety and Household Considerations
Fire safety
Foam, adhesives, solvents and fabric in one small room is a genuine fire risk, and it is the risk most home workshops ignore. Foam in particular ignites readily and burns with toxic smoke.
- Keep a multipurpose dry powder extinguisher mounted near the exit, not buried in a drawer, and check its date label.
- Keep spray adhesive and solvents in a metal or ventilated cabinet, away from any heat source.
- Never leave a heat gun running unattended, and give it a heatproof rest.
- Do not store foam and fabric directly against a heater, a lamp or a mains cable run.
- Keep a working smoke alarm in the room and test it. A garage or basement with a high ceiling often needs a second one.
- Know where your gas and electric meters are if you run power tools in a shared space.
Personal protective equipment
Safety glasses when stapling or cutting foam. A respirator or dust mask when cutting foam or sanding, because foam dust irritates fast. Gloves when stripping old upholstery, since old staples and tacks are the injury most experienced upholsterers actually get. Closed shoes whenever you are in the workshop, which sounds obvious until you drop a needle into a sock.
Ergonomics
Back strain is the occupational hazard of this trade, and it arrives gradually. A sofa frame weighs far more than it looks, and lifting one onto a bench is the single most demanding thing you will do regularly.
- Build workhorses — folding trestles or sawhorses with padded tops. They let a frame sit at a workable height without you carrying it, and they are the single most recommended piece of homemade equipment in the upholstery forums.
- Adjust the bench height rather than bending to the job.
- Rotate between sitting and standing. Long assembly sessions are easier than one long session.
- Keep heavy materials, like full foam blocks and metal frames, stored at waist height or on a trolley, not on the floor.
Noise, neighbours and the household
Pneumatic tools, foam cutters and a compressor are loud, and neighbours do notice. Compressor isolation pads, a timer on the compressor, working outside on the hottest days rather than the evening when people are home, and simply telling your neighbours what you are doing before they ask are all effective.
Inside the house, agree on the hours the workshop runs with everyone you live with before you start, not after. It is a negotiation that is much cheaper to have early.
Waste disposal
Plan for it before the first project, because it is the thing that turns a room into a tip. Separate your waste:
- Fabric offcuts into a large bag or bin, kept for patching, stuffing and practice seams rather than going straight out.
- Foam chips bagged separately. Big bags collected by your local waste service are usually fine, but check your local rules on bulky foam.
- Metal staples and tacks into a rigid container, never loose in a bin where they work their way to the bottom.
- Needles and sharps in a rigid container with a lid.
- Adhesive cans and solvent tins through your household hazardous or chemical waste route, not down the drain.
Home Occupation Rules, Zoning and Insurance
Can I run an upholstery business out of my garage? In many places, yes, but usually under rules you need to follow. This is the area where advice goes wrong most often, because what applies depends entirely on where you live.
A home occupation is the planning term for running a business from a home where someone also lives. It is different from a home-based business that makes no sales, produces no noise and involves no employees.
What to check, in order:
- Your local planning authority website or office. Find out whether a home occupation permit is required, and whether upholstery with a compressor and spray adhesive falls inside or outside the definition. Foam, adhesives and noise push many trades into a category that needs permission.
- Zoning and permitted development rules. Some areas allow a home occupation outright; others restrict it to specific streets, house types or building materials.
- Condominium or HOA rules. A lease or title can prohibit a business use regardless of what the council permits. This is the single most common reason a garage workshop is quietly impossible.
- Business registration and name registration. Registering a business name is cheap and quick in most countries, and a lot of first-time traders skip it and then cannot invoice properly.
- Insurance. If you are working for paying customers, public liability cover is not optional in practice. If someone is injured in their home by your work, you are exposed personally. Some trades bodies offer cover at low cost for members.
- Fire risk assessment and smoke alarm rules for the space, especially if you store foam.
- Business rates and council tax exemptions. Trading from a space used for business can affect the domestic rates you pay, and in some places trading without registering creates a liability.
None of this is meant to discourage you. It is meant to prevent the situation where a workshop runs happily for two years and then a neighbour complains, or an insurance claim arrives on a policy you never bought. Talk to your council before you buy a compressor, not after.
What to Buy First vs What to Buy Later
Intimidation at the upfront cost is the most common reason people never start. The table below is the answer: buy the first column, make something, and only move right when the work demands it.
| Buy now | Buy in month two or three | Skip until you have paid work |
|---|---|---|
| Padded workbench or sturdy table | Pneumatic staple gun | Industrial walking-foot sewing machine |
| Hand staple gun | Compressor with regulator and hose | Steam machine |
| Tack and staple remover | Cutting table and rotary cutter | Bazooka long-nose stapler |
| Rawhide mallet | Heat gun | Lift table or frame hoist |
| Tape measure and clear ruler | Workhorses or trestles | Track lighting and rewiring |
| Fabric shears and marking tools | Extractor fan | Second sewing machine |
| Straight pins, needles, thread | Pegboard or magnetic tool wall | Hydraulic cutting table |
| Iron or steamer | Rolling stock carts | Showroom furniture display |
| Task light for the bench | Fire extinguisher and chemical cabinet | Upholstery-cleaning extraction unit |
| Webbing, tack strip, cambric, thread | Foam and piping supplies | Spray adhesive booth |
Two honest notes. A domestic sewing machine with a walking foot attachment will carry you through most beginner and intermediate projects, so treat an industrial machine as a later purchase unless you already know you want one. And a garden blower has genuinely been used as a temporary air source by people in a pinch, but it is a short-lived substitute, not a setup.
If money is the barrier, the cheapest useful workshop is a cleared corner, a folding table with a foam layer on top, a window open, and the hand tools from the first column. Several of the most experienced upholsterers on the forums started exactly there.
First Projects and a 90-Day Setup Plan
What should your first project be? Not a sofa. The single most repeated piece of advice across upholstery forums is to start with a foot stool or a dining chair seat, because both can be finished in an afternoon and both teach you the whole sequence: measure, strip, install webbing, fit the foundation, pad, cut the cover, attach and staple.
A sofa teaches you everything and forgives nothing, and most beginners who start there spend a month on one piece.
The 90-day plan
Week 1-2: Decide the space. Measure it. Draw it to scale. Check power, check the door route for your largest piece, check the council website for whether a home occupation permit applies. Do not buy anything yet.
Week 3-4: Clear and prepare. Strip the space. Get the electrical checked if you need it. Seal and paint if you are in a garage or basement. Install the extract fan.
Week 5-6: Build or buy the bench and the light. This is the biggest single purchase and the one that affects every hour afterwards. Add the task light in the same week so you can judge the bench under real conditions.
Week 7-8: First tools, first project. Buy the first column of the tool table only. Build a foot stool. Allow it to go wrong.
Week 9-10: Sewing setup. Get the machine serviced if you own one, learn the walking foot, and sew a straight seam in webbing and then in fabric.
Week 11-12: Organisation and air power. Install the tool wall, under-bench storage, the waste separation, and then the pneumatic stapler and compressor if you are ready for bigger frames.
Three months in, you should have a room that works, a chair under your arm and a clear idea of which of the two hundred tools available to you are the ones you actually need. That is a very good return on a quarter.
Frequently Asked Questions
How much space do I need for a home upholstery workshop?
About 120 square feet, roughly 12 by 10 feet, is the comfortable minimum for a beginner working on chairs, stools and cushions one at a time. Allow 200 to 300 square feet once you are reupholstering sofas, and roughly double again if two people will work in the space. Aim for at least 7 feet of ceiling height and a door wide enough to carry your largest finished piece out of.
What are the most important tools for a beginner upholsterer?
A tape measure and clear acrylic ruler, sharp fabric shears, marking tools, straight pins and curved needles, a hand staple gun, a tack and staple remover, a rawhide mallet, and an iron or steamer. A heavy-duty sewing machine comes next. A pneumatic staple gun, compressor, cutting table and heat gun can follow later once you are working on larger frames.
Do I need an air compressor for upholstery?
Not to start. A compressor is only needed to drive a pneumatic staple gun, and a hand stapler handles chairs, stools and cushions well. Add air power when you reach sofas and headboards, where a consistent staple line across a long run matters. A small compressor with a good regulator and a 20 to 30 foot hose is enough; you do not need a large tank.
Can I teach myself upholstery?
Yes, and most working upholsterers did. Self-teaching through written guides, online classes and repeat practice works well for the core skills, which are largely procedural. The commonly cited figure among self-taught upholsterers is roughly 200 hours of practice before tackling a full sofa. You will learn fastest by reupholstering something small you already own.
How long does it take to train to be an upholsterer?
Around 200 hours of hands-on practice is the figure self-taught upholsterers most often cite before attempting a full sofa, and beginners consistently report needing about 200 hours of training before larger pieces. That is spread over months, not weeks, and it is faster on small projects than on a single ambitious one.
How do I ventilate an upholstery workshop at home?
Aim for steady air changes rather than an open window, roughly eight to twelve per hour in the room while you are working with adhesives. A small extract fan on a timer, ducted out of the room, is the simplest upgrade. For spray adhesive and foam cutting, work near the extraction point rather than in the centre of the room, and bag foam chips immediately.
Can I run an upholstery business from my garage?
Usually, but check first. A home occupation permit may be required, zoning and HOA or lease rules can prohibit business use outright, and a compressor, spray adhesive and foam may push you into a category that needs explicit permission. Register your business and name, and take public liability insurance before you accept paid work, because you are exposed personally in a domestic space.
Is an upholstery business profitable?
It can be, but rarely from advertising. The pattern that shows up across practitioner accounts is work arriving through friends, family and referrals, with one unpaid or trial job often converting into a paid relationship. Profitability depends far more on your pricing and your time per hour than on how much you sell. Many upholsterers use home workshops as a profitable sideline rather than a sole income.
Conclusion
Working out how to set up a home upholstery workshop is mostly a sequence of decisions, not a shopping expedition. Decide the space, draw the layout to scale, build the bench and light, learn on a small project, and only then add air power and a cutting table.
The parts worth taking seriously are the ones that cost almost nothing to get right: ventilation that moves air out, a fire extinguisher you can reach, a tool wall within arm’s reach, and a check of your council’s rules before the first paid job.
Start with a foot stool, this month, in a corner of a room you can clear. Every experienced upholsterer on the forums started with less than they have now, and most of them started with less than you think you need.