
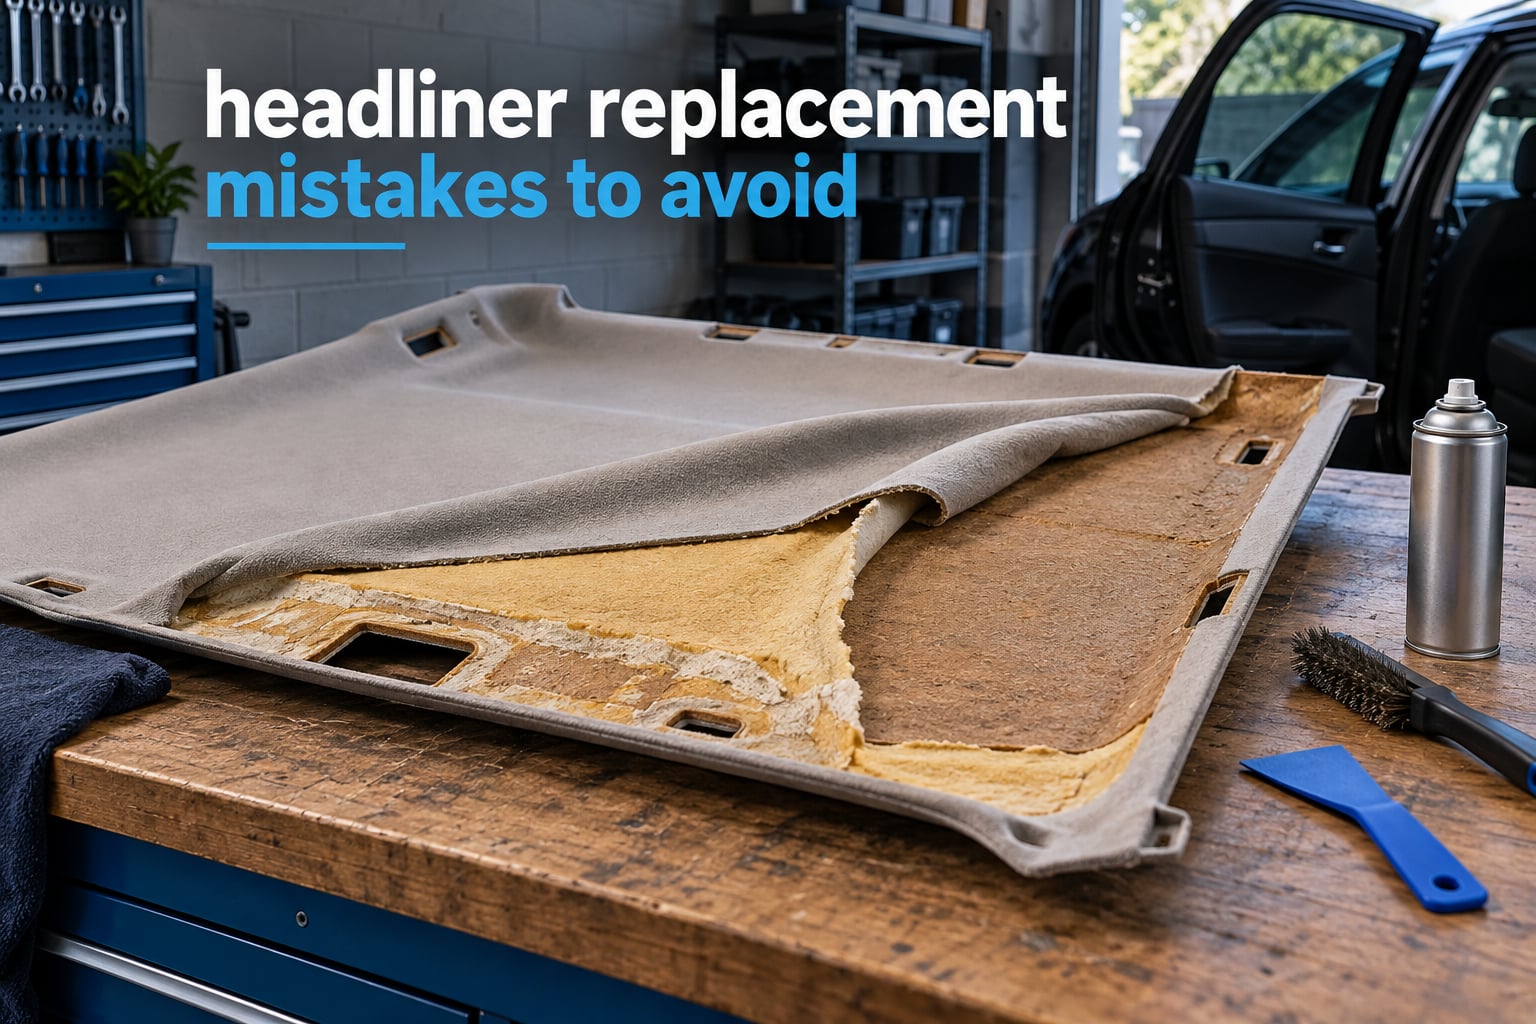
The most common headliner replacement mistakes are skipping diagnosis before removal, using household or super glue instead of automotive-grade adhesive, cutting fabric short, spraying adhesive too heavily and pressing too soon, stretching from the edges inward, and leaving old foam on the roof board. Most of those errors are visible within a month, and several of them are permanent.
A headliner is the fabric-covered roof panel inside your car. It looks like one piece, but it is four: a decorative outer fabric, a thin foam backing, an adhesive layer, and a rigid roof board that everything else is bonded to. When that bond fails, the fabric sags away from the board and hangs into the cabin.
Getting it wrong is expensive in a specific way. A sagging headliner blocks rear visibility, catches water, and drops debris into the back seat. A bad repair also means paying twice: once for the failed attempt and once for the redo, because the old adhesive has to come off before anyone can start over.
Our team at Segal Motor Trimmings has watched enough re-upholstery jobs come back a second time to know that almost every failed headliner traces back to one of ten decisions made before the fabric ever went up. This guide walks through each one, what it looks like when it goes wrong, and how to avoid it.
If you would rather start at the tools list, jump to the tools and materials checklist. If you already have a detached headliner in front of you and want to know whether it can be saved, start with Mistake 1 before touching a screwdriver.
Table of Contents
- The 10 Headliner Replacement Mistakes at a Glance
- What a Headliner Is and Why It Fails First
- Mistake 1: Replacing Without Diagnosing the Cause First
- Mistake 2: Using the Wrong Adhesive
- Mistake 3: Under-Measuring the Fabric and Cutting Too Early
- Mistake 4: Rushing the Adhesive Cycle
- Mistake 5: Stretching Unevenly and Working Edge to Edge
- Mistake 6: Leaving Old Foam and Adhesive on the Board
- Mistake 7: Ignoring Vehicle-Specific Obstacles
- Mistake 8: Breaking Trim and Clips
- Mistake 9: Ignoring Temperature, Humidity, and Cure Time
- Mistake 10: Not Testing the Fit in a Small Section First
- Tools and Materials Checklist
- Adhesive Selection Guide
- Troubleshooting by Symptom After Installation
- When to Stop and Pay a Shop
- Frequently Asked Questions
- Conclusion
The 10 Headliner Replacement Mistakes at a Glance
This table is the short version of the whole guide. Each row names a mistake, what it costs you, how serious the result is, and whether you can undo it.
| Mistake | Consequence | Severity | How hard it is to fix |
|---|---|---|---|
| Replacing without diagnosing why it detached | New headliner sags in the same place | High | Full removal and re-do |
| Using household glue, super glue, or the wrong contact cement | Brittle bond, bleed-through stains, odor | High | Strip the board and start again |
| Under-measuring the fabric and cutting early | Edges cannot wrap, board shows at the perimeter | High | New fabric required |
| Rushing the adhesive cycle | Fingerprints, bleed-through, edge lift | Medium | Sometimes liftable, often not |
| Stretching unevenly, working edge to edge | Diagonal wrinkles that never flatten | Medium | Difficult without full removal |
| Leaving old foam and adhesive on the board | Uneven surface, poor contact, early re-sag | High | Full removal and re-do |
| Ignoring sunroof, curtain airbag, and wiring | Damaged harness, airbag fault code, glass breakage | Critical | Not always repairable |
| Breaking trim, clips, and pillar covers | Missing fasteners, rattles, visible gaps | Medium | Depends on the part |
| Working cold or humid, ignoring cure time | Weak bond, trapped moisture, foam damage | Medium | Peel and re-lay in better conditions |
| Committing the whole board without a test section | One flaw gets multiplied across the whole roof | Medium | Full removal and re-do |
Read the last column before you read anything else. Five of those ten mistakes have the same answer: full removal and re-do.
What a Headliner Is and Why It Fails First
The headliner is a bonded sandwich, and every layer has a job.
- Outer fabric is the visible skin. It is stretched and bonded flat, with no slack built in.
- Foam backing gives the fabric its thickness, hides the board’s texture, and provides a little thermal and acoustic insulation.
- Adhesive is sprayed across the whole board in the factory. It is a contact adhesive, meaning it grabs instantly on contact and gets stronger as it cures.
- Roof board is the structural piece bonded to the metal roof. It is where the dome light, visors, and grab handle mounts attach.
That third layer is why headliners fail early. Adhesive degrades faster than fabric. Heat cycles through the roof all day, every day, and a parked car in summer can push the adhesive past the point where it holds a tensioned fabric for years.
The common causes of a sagging or detached headliner come down to four things:
- Adhesive degradation — the bond loses strength with age and heat, the most common cause by a wide margin.
- Heat exposure — repeated cycling and long periods of direct sun soften the bond line.
- Water damage — a leak, a soaked sunroof seal, or repeated dampness weakens the foam and lets the bond let go at the edges first.
- Age and physical stress — roof racks, heavy cargo, and a long service life eventually break down the original factory bond.
Two more causes show up often enough to name. Roof water drains and A-pillar channels that overflow leave a tide line along one edge. And aftermarket accessories routed along the headrail can add tension the factory never designed for.
None of these is unusual, and none of them is fixed by putting new fabric on the same board without treating the cause. That is the first mistake.
Mistake 1: Replacing Without Diagnosing the Cause First
The short answer to the most-asked question about this job: sometimes yes, a sagging headliner can be fixed without full removal, and sometimes no. It depends entirely on why it detached and how much of the foam is still attached.
A headliner that has sagged in one spot but is still adhered everywhere else can often be pushed back up, re-bonded locally, and left alone. A headliner that has come away from the entire perimeter, or that smells musty because the foam is wet or moldy, cannot be saved in place. Neither can one where the fabric has stretched so far that the foam tore off the board.
Run this check before you decide:
- Does the foam still cling to the board? Press a cloth-covered fingertip into a sagging area. Firm and springy means the foam is intact. Soft, spongy, or crumbling means the foam is gone and replacement is the only option.
- Is the sag local or total? One detached corner near a visor mount is a trim problem. A fabric hanging in the middle of the cabin is a bond problem.
- Is there water or mold damage? Dark staining, a musty smell, or a stiff foam texture means strip it all back to metal or board.
- Did the perimeter bond let go first? That pattern points at heat, water, or an old adhesive that never cured properly in the factory.
A post on r/Cartalk shows how the skip happens in practice: a 1998 C230 with the lining dropping near the rear window, and the first instinct is to glue it back up. That instinct is sometimes right and sometimes seals a water problem inside the roof for another two years.
One caution about cleaning instead of replacing. Several vehicle makers suggest vacuuming a headliner, and a post on jaguarforums pushes back hard on that advice, recommending a soft brush such as a clean paintbrush or shoe brush and nothing more aggressive. Agitation on aged foam is a good way to tear what is already fragile.
Mistake 2: Using the Wrong Adhesive
Adhesive format is the single most common question on the forums, and it is the one place where a wrong choice is genuinely hard to undo. A liquid contact adhesive and a household spray adhesive are not the same product, and super glue is not a headliner adhesive at all.
Super glue cures hard and brittle. It does not flex with the board, and it will print through the fabric as an amber stain when heat later drives the vapor out of it. It also fouls the surface for any future repair.
White glue and general-purpose craft glues shrink as they dry, which pulls the fabric into slack you cannot remove. Household spray adhesive is the most common mistake of all, because it is cheap, easy to grab, and never rated for a 180-degree surface or for a cabin that reaches high temperatures.
What you want is an automotive-grade product, either a contact adhesive sprayed in a controlled pass or a liquid cement applied to both surfaces. A useful rule from the forum threads: if the label does not mention headliner or automotive upholstery, it is the wrong product.
One more caution. A post on r/MechanicAdvice captures the real hesitation: worry about controlling spray angle and making a mess. That is a reason to practice on a scrap board, not a reason to substitute a different adhesive.
Mistake 3: Under-Measuring the Fabric and Cutting Too Early
A headliner is a tensioned surface, not a draped cover. There is no seam allowance and no second chance, because fabric cut short cannot be pulled back over the board edge to wrap it.
Measure from the finished surface, not the raw board. Most roofs need the full panel length plus several inches of extra, distributed around the perimeter for wrapping and for the slots around visors and lights.
Do this before you cut:
- Measure the board at its widest point, front to back, and side to side, including the drop into the headrail channel.
- Add wrap allowance to every edge generously. You can trim excess, and you cannot un-cut a shortage.
- Lay the fabric out and let it relax for a while before marking. Fabric that has been stored rolled arrives under tension and will measure short.
- Pattern the curves. A roof with a deep headrail or a sunroof cutout needs a template, not a rectangle.
- Cut trim and mounting holes only after the fabric is bonded.
A post on r/EP3 makes the point that a full removal means taking down plastic pillar covers, grab handles, sun visors, and lights, which is a lot more disassembly than most first-timers picture. That is also why measuring the real board matters: the shape you need to cover is not the shape of the metal roof.
Mistake 4: Rushing the Adhesive Cycle
Three different clocks run on a contact adhesive, and confusing them causes most failed bonds. Learning them is the single highest-value thing in this guide.
- Flash time is how long you wait after spraying before you bring the two surfaces together. Bring them together too early and you trap solvent, which later bubbles and lifts.
- Tack time is the window after contact during which the bond grabs. It is not full strength, and it is not the end of the process.
- Cure time is how long before the adhesive reaches full strength. This is measured in hours, sometimes a full day, and driving or parking in sun during it is a bad idea.
The second half of this mistake is spraying too much and pressing too hard. A poster on ozvolvo.org described the result exactly: too much adhesive plus firm pressure leaves fingerprints as the adhesive soaks through the foam. That is adhesive bleed-through, and it appears as dark marks wherever you touched the fabric while it was still wet.
To avoid it, apply a light even coat, respect the flash time printed on the can, lay the fabric down in one movement, and press with a broad soft tool rather than your fingertips. Never push hard along a seam.
A caution worth repeating: protect trim and paint with masking before spraying. A post on cherokeeforum.com, in a different context entirely, made the same point about patience — let the material stand before you push on, and do not rush a multi-stage job to save twenty minutes.
Mistake 5: Stretching Unevenly and Working Edge to Edge
Two habits create most wrinkles: starting at an edge and working inward, and pulling the fabric tight in one pass instead of moving it in sections.
The fix is the opposite of what instinct suggests. Start at the center of the board, roughly at the dome light position, and work outward in sections, moving the slack toward the edges as you go. The center becomes the anchor and the perimeter becomes what you trim.
Add relief cuts where the fabric has to change direction around a sunroof or a deep curve. A relief cut is a short slit in the fabric that lets the surrounding material move independently. Without them, the fabric fights you and the tension ends up diagonal, which is exactly the wrinkle pattern that never comes out.
Press the fabric into the recesses and around raised areas rather than pulling it flat. Heat helps move a stubborn wrinkle but must be used carefully; a heat gun held too close to foam can shrink or scorch it, and a post on sailnet.com described resin globs from the original factory install that resisted every attempt to clean them off.
Mistake 6: Leaving Old Foam and Adhesive on the Board
New adhesive bonds to a clean, even, slightly textured surface. Old foam, hardened resin, and lifted liner create a surface that looks fine from below and holds nothing.
Strip it down properly:
- Pull the old fabric off, working from the center outward with the grain of the bond broken gradually.
- Scrape the bulk of the old foam and adhesive with a plastic scraper, keeping metal tools off the board surface.
- Use a wire brush on stubborn foam and a solvent rated for the adhesive to remove the residue.
- Wipe the whole panel and let it dry fully before spraying anything.
- Inspect for pinholes, cracks, and corrosion around drain holes and pillar mounting points.
The question of how to get old foam and resin off the board comes up repeatedly in forum threads, and the answer is mechanical first and chemical second. Patience on the scraper saves solvent, and solvent you save you can use in a ventilated workspace.
Disposal note: solvent adhesive, old foam, and cut fabric do not go in household waste. Take solvent containers to a hazardous waste facility and check local rules for foam and upholstery scraps.
Mistake 7: Ignoring Vehicle-Specific Obstacles
Safety callout. Disconnect the battery negative terminal before working overhead, and read your vehicle’s curtain airbag procedure before you remove any headliner trim. A headliner is part of the curtain airbag deployment path on many models, and trim arranged in the wrong position can stop the bag from deploying correctly. Airbag faults can also set a warning light that needs a scan tool to clear. If you are unsure whether your model has a curtain airbag, assume it does.
Beyond safety, every roof has its own obstacles. Know yours before you start, because these are the parts that turn a straightforward job into a bad day.
- Sunroof. The headliner wraps into the sunroof cassette and the seal. Pulling fabric out of the cassette without noting its position is how sunrifts get pinched.
- Curtain airbag. As above, the trim layout matters and the connector usually needs to be unplugged, not forced.
- Dome light and map light wiring. Two or three connectors on a short harness, easy to snag, easy to break at the plastic tab.
- Sun visors and visor clips. Clips break far more often than people expect, especially older plastic ones.
- Grab handles. Each one hides a nut or screw and a wire on some models.
- Pillar trim and headrail hardware. These carry the headliner board and often hide fasteners under plastic caps.
Work through the disassembly once, methodically, and lay every fastener into a labeled tray or a photograph of its location. A post on r/EP3 described the scale of it plainly: pillar covers, grab handles, visors, and lights all come down first.
Mistake 8: Breaking Trim and Clips
Trim clips are the most frequently broken part of this job, and they are the hardest to replace when the original part is discontinued. Prevention is entirely about technique.
- Use a dedicated trim removal tool or a thin plastic pry bar, never a screwdriver.
- Find every clip location before you pull. A gentle push on the panel to expose a hidden clip beats levering blindly.
- Apply heat only to the area that releases the clip, and only briefly.
- Never pry against a finished surface. Any mark you make on a pillar cover is a mark you cannot blend out.
- Keep every screw, nut, and cap in order, because reassembly goes much faster when you know where each one belongs.
A shop perspective page noted that attempting a headliner repair without specific experience can produce irreversible mistakes such as breaking the headliner frame. Frame and clip damage are the two failures that turn a manageable job into a full interior disassembly.
Mistake 9: Ignoring Temperature, Humidity, and Cure Time
Adhesive chemistry is temperature sensitive, and a roof in an open car park in July is a bad workshop. Warm temperatures generally help flash and cure times. Cold slows everything and leaves solvent trapped in the bond. High humidity can slow cure and encourages trapped moisture under the fabric.
| Condition | What it does to the bond | What to do |
|---|---|---|
| Warm and dry, around 20 to 30 degrees Celsius | Favorable flash and cure behavior | Work in an open, ventilated space out of direct sun |
| Hot and humid | Faster skin, uneven cure, more bleed-through risk | Reduce spray quantity, extend flash time, allow a full cure indoors afterwards |
| Cold | Slow cure, trapped solvent, weak early bond | Warm the vehicle first and delay installation until the panel is at room temperature |
| Damp or leaking roof | No bond will hold over wet foam | Find and fix the leak first, then dry the board completely |
Protect trim and glass from overspray while you work, and ventilate. A detailing post on r/AutoDetailing described a separate but related reality: prolonged overhead work with arm and shoulder pain, and no extractor or steamer available. Overhead work is awkward enough that a folding platform and short work sessions matter more than people expect.
Plan the cure as part of the job, not after it. Park the car in shade or a garage for the full cure period before driving it, and do not stack anything against the headliner.
Mistake 10: Not Testing the Fit in a Small Section First
The last mistake is the most expensive to skip, because it turns a single error into a full-roof error. Do a test section before you commit.
Pick one area, roughly a panel foot square, away from trim and openings. Spray both surfaces the way you plan to spray the whole board, wait the flash time, lay the fabric down, and press with the tool you intend to use.
Then look for the four warning signs:
- Fingerprints or dark marks forming in the foam, which means too much adhesive or too much pressure.
- Solvent odor that persists rather than flashing off.
- Edges that lift when you release pressure, which means insufficient tack.
- Wrinkles that appear as you move toward the perimeter.
If any of those show up, adjust and repeat on a fresh piece of scrap. A test section costs you a few minutes and a small scrap of fabric. Discovering the problem across the whole roof costs you the whole job.
Tools and Materials Checklist
How difficult is a headliner replacement? For a first-timer with basic tools, expect most of a working day on the vehicle plus a full cure period before it goes back into service. A sunroof, multiple visors, and deep headrail channels each add time, and the disassembly is usually the longest part.
Tools and supplies fall into four groups.
Removal tools
- Trim removal tools or thin plastic pry bars, one per fastener style
- Phillips and flat drivers, plus a socket set
- A soft brush, such as a clean paintbrush, for the board
- A plastic scraper and a wire brush for old foam and adhesive
- Utility knife, scissors, and a tape measure
Installation tools
- An automotive-grade contact adhesive, sprayed or liquid
- Masking paper or sheeting and painter’s tape to protect trim and glass
- A broad roller or squeegee for even contact
- A heat gun on low setting, plus a steamer if you have one, for wrinkles
- A stable folding platform for overhead work
Materials
- Headliner fabric in the correct width, plus wrap allowance
- Matching thread and a curved needle for seams and repairs
- Reinforcement patches for the dome light and visor mount areas
Safety gear
- Safety glasses and gloves
- A respirator rated for solvent adhesive, used in a ventilated space
- A battery disconnect and a scan tool if your vehicle has curtain airbags
Adhesive Selection Guide
Compare adhesives on how they behave rather than on brand. Every one of these is a contact adhesive, which means the two surfaces bond the moment they touch and then strengthen over hours.
| Adhesive type | How it works | Heat performance | Working time | Best for |
|---|---|---|---|---|
| Automotive headliner spray adhesive | Solvent spray, one even coat on each surface, no re-spray allowed | Formulated for cabin heat | Short, controlled | Whole-panel bonding on any vehicle |
| Professional contact cement, liquid | Brushed or rolled onto both surfaces, must be assembled while tacky | Resists heat once cured | Short and unforgiving | Shop work, non-porous surfaces, small repairs |
| Spray contact adhesive, general purpose | Multi-use spray, not headliner rated | Varies widely | Medium | Repairing a lifted edge, not a full panel |
| Super glue | Instant rigid bond, no flex | Poor | Instant | Nothing in a headliner |
| Craft and white glues | Water based, shrinks as it dries | Poor | Medium | Nothing in a headliner |
Two rules cover most cases. Use a product whose label names automotive upholstery or headliner use, and use one container rather than mixing. Mixing chemistries across the same panel produces a bond that behaves unpredictably as temperatures change.
Troubleshooting by Symptom After Installation
Search by what you can see, not by which step you think went wrong.
Diagonal wrinkles that will not flatten. The fabric was stretched unevenly, usually from the edge inward. Push them out with a heat gun at low setting while pressing from the center, or accept that the panel needs re-laying.
Fingerprints or dark patches in the foam. Adhesive bleed-through from over-spraying or pressing too early. It cannot be sprayed over. The fabric usually has to come off and the foam replaced.
Bubbles that appear days later. Flash time was too short and solvent got trapped. Small bubbles can be lifted and vented with a pin, but a bubble over a wide area means the bond beneath is not continuous.
Edges lifting within weeks. Usually an adhesion problem at the perimeter from old adhesive left on the board, or from not wrapping the edge far enough. A re-bond of the edge is worth trying before full removal.
Sagging again in the same place. The cause was never addressed. If it is water, a leak, a failed roof drain, or a wet foam panel, the new headliner is now sitting on the same problem.
Musty smell after replacement. Old foam that was never removed. It will get worse, not better, and the headliner has to come down again.
When to Stop and Pay a Shop
What does a headliner replacement really cost, and is it worth doing yourself? The honest answer is that the material side is small and the labor side is large. Shops charge for the disassembly, the surface preparation, and the hours of overhead work, and those hours are what a professional is actually selling.
Stop and take it to a shop when any of these are true:
- The board is cracked, delaminated, or shows rust around mounting points.
- The vehicle has curtain airbags and you have no way to clear the resulting fault code.
- The foam underneath is moldy, wet, or crumbling and the area is large.
- Roof water is coming in and the leak is not diagnosed.
- The fabric pattern is a match to an existing interior you cannot reproduce.
- You do not have a ventilated workspace for solvent adhesive.
Do it yourself when the board is sound, the damage is a bond failure rather than a water or structural failure, and you can give the job an unhurried day plus a full cure period. Under those conditions the mistake list above is the whole difference between a result that lasts and one that does not.
Frequently Asked Questions
Can you fix a sagging headliner without removing it?
Sometimes. If the foam is still firmly attached to the board and the sag is limited to one area, you can push the fabric back up and re-bond it locally with automotive-grade adhesive. If the perimeter has come away completely, the foam is wet, moldy, or crumbling, or the fabric has stretched far enough to tear the foam off, replacement is the only option.
What are the most common causes of a sagging headliner?
Four causes account for most cases: adhesive degradation with age, repeated heat exposure through the roof, water damage from leaks or blocked drains, and general physical stress from roof racks or cargo over many years. Adhesive failure is the most frequent of the four.
How difficult is a headliner replacement?
It is an intermediate job. Expect most of a working day on the vehicle plus a full cure period before the car goes back into service. A sunroof, several visors, and deep headrail channels all add time, and disassembly usually takes longer than installation.
Can I use super glue on a headliner?
No. Super glue forms a hard, brittle bond that does not flex with the board, and heat can drive the vapor out of it and print through the fabric as a permanent stain. Use an automotive-grade contact adhesive or headliner spray adhesive instead.
How long does headliner adhesive take to cure?
Contact adhesives grab within seconds but reach full strength over hours, and some products need a full day. Treat the cure period as part of the job: keep the car in shade or a garage, and avoid pressing on or loading the headliner while it finishes curing.
Why is my new headliner sagging again?
Usually the original cause was never fixed. A leak, a blocked roof water drain, or a wet foam panel will defeat any new bond. Edge lift often means old adhesive was left on the board or the fabric edge was not wrapped far enough. Adhesive bleed-through stains mean the panel has to come down and the foam be replaced.
Conclusion
Headliner replacement mistakes to avoid are mostly decisions made in the first hour: diagnose the cause, use an automotive-grade adhesive, measure generously, respect the adhesive clocks, work from the center outward, and strip the board properly. The rest is patience.
Start with the mistake table, run the diagnostic check in Mistake 1, and do a test section before you commit the whole board. If the board is cracked, the foam is moldy, or there is water coming in, hand the job to a shop and let the interior be apart once instead of twice.