
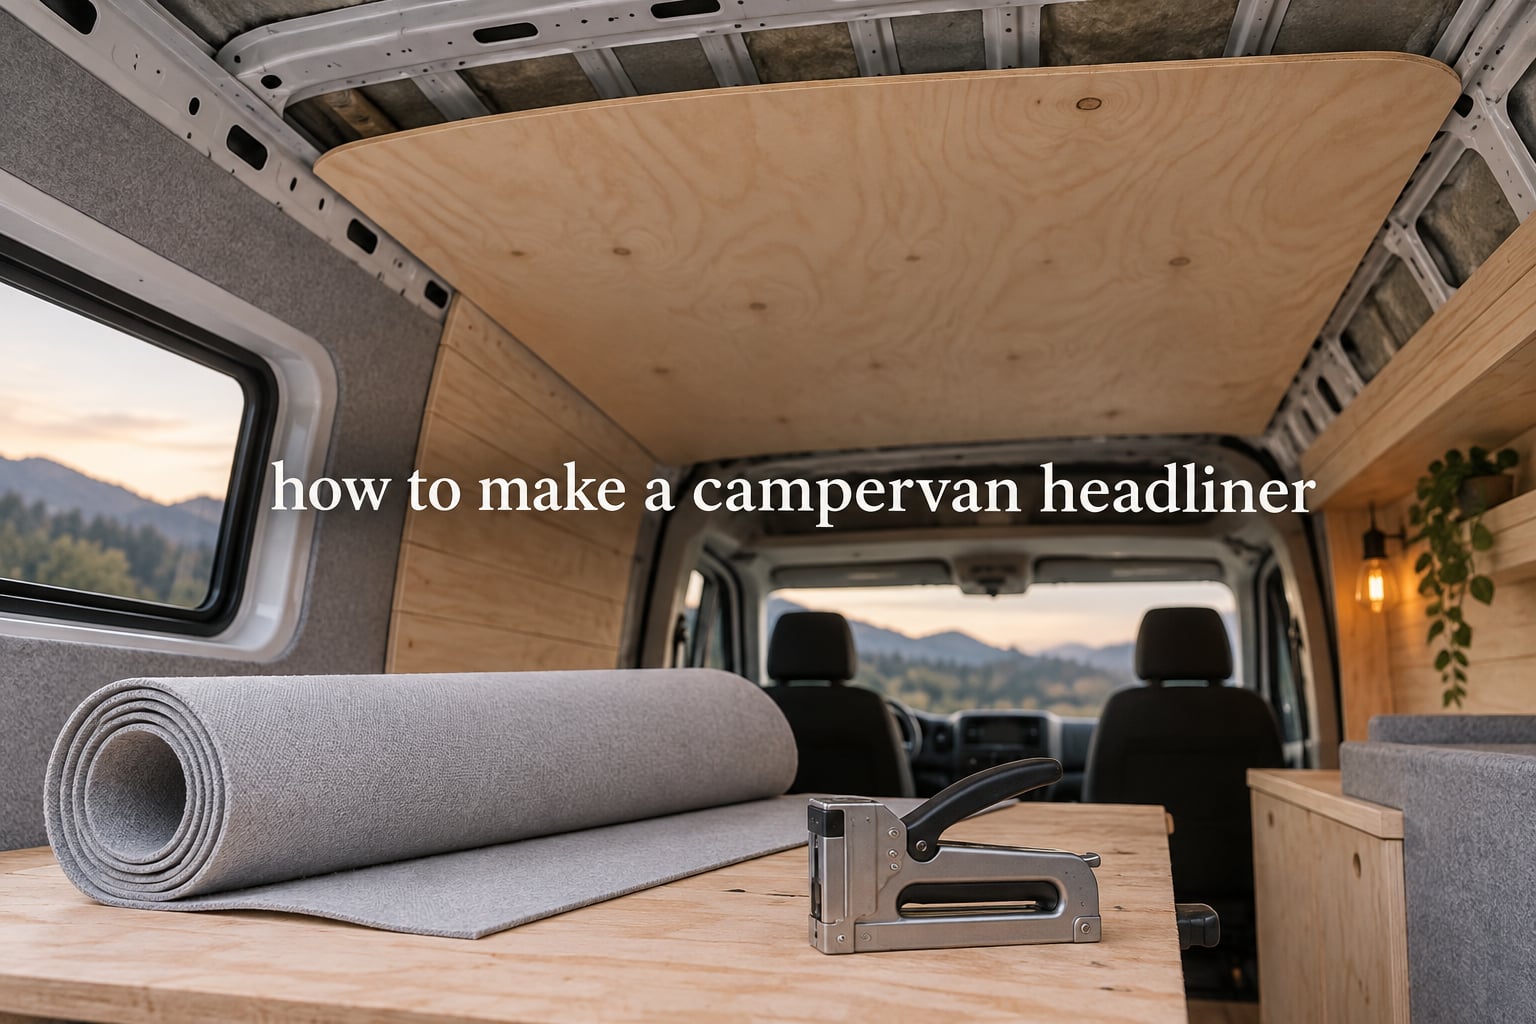
A campervan headliner is the finished ceiling lining inside a van, and learning how to make a campervan headliner is one of the highest-impact steps in a conversion. The headliner is the surface that hides bare roof ribs, wiring and airbag components while giving the interior a finished, insulated and quiet feel. Most builders put it off because it feels fussy, but the process breaks down into a handful of repeatable steps: strip the roof, run the wiring, build a board, mock-fit it, cut the light holes, then stretch and lock the fabric in place. I have walked through this process on multiple builds, and the biggest lesson is that almost every headache comes from skipping the mock-fit stage.
This guide covers the whole job, from a bare cargo van with no factory ceiling to a tired factory Sprinter headliner that needs recovering. You will find the three approaches compared side by side, a full materials and tools checklist with quantities, a ten-step process you can follow in order, and a troubleshooting section for the failures that show up months later.
Table of Contents
- What Is a Campervan Headliner?
- Headliner vs Headliner Shelf: Which Project Is This?
- Choosing Your Headliner Approach: Fabric Strip, Plywood Board or Re-Upholstery
- What You’ll Need: Tools and Materials
- Choosing Headliner Fabric
- How to Make a Campervan Headliner: Step by Step
- Handling the Curved Roof Section
- Wiring and LED Lighting Integration
- Weight and Headroom Budget
- Cost and Time Estimates by Method
- Common Mistakes and How to Avoid Them
- Troubleshooting: Sagging, Wrinkles, Rattling and Heat
- Repair and Refresh: Replacing Fabric on an Existing Headliner
- Starlight and Star-Map Headliners
- Frequently Asked Questions
- How do I install headliner fabric?
- How many yards of fabric do you need for a campervan headliner?
- What is the best fabric to use for replacing a headliner?
- How do I make a headliner not sag?
- How much does it cost to replace a headliner in a van?
- What is the best material for a van ceiling?
- Can you carpet a van ceiling?
- How do I curve plywood for a van roof?
- Do you need a headliner in a campervan conversion?
- Conclusion
What Is a Campervan Headliner?
A campervan headliner is the fabric, panel or plank surface fixed to the roof structure of a van that closes off the cavity above the cab and living space. It spans between the roof ribs and typically runs the full length of the interior, stopping at the doors and at the windscreen header.
The headliner does four jobs at once. It cuts heat loss and condensation from the largest unbroken surface in the vehicle, it absorbs road noise that a bare metal roof turns into echo, it conceals the structural ribs, wiring and curtain-airbag components, and it sets the visual tone of the whole interior.
That last point is why builders treat the ceiling as a finishing step rather than a structural one. Panel walls, cabinetry and flooring tell a visitor what the build cost, but a saggy or stained ceiling tells them the finish was rushed.
Headliner vs Headliner Shelf: Which Project Is This?
These are two different projects that share one word, and searching for the wrong one wastes an afternoon.
A headliner is the ceiling surface itself. That is the subject of this guide. A headliner shelf is the overhead storage box that hangs below the ceiling, usually running above the sliding door and rear doors, sometimes with a garage-length section along one side.
If your van already has a finished ceiling and you want somewhere to put a duffel bag, you want a shelf, not a headliner. If your roof is bare metal, visible ribs or stained sagging fabric, you want a headliner. Some builds do both, and the shelf is always fitted after the headliner, never before.
Choosing Your Headliner Approach: Fabric Strip, Plywood Board or Re-Upholstery
There are three realistic routes, and picking the wrong one is the most common reason a build stalls halfway through.
| Approach | Best for | Relative cost | Time to fit | Durability |
|---|---|---|---|---|
| Fabric strip stretched to ribs | Budget builds, cargo vans, quick finishes | Lowest | 3 to 5 hours | Moderate, sags if unsupported |
| New plywood or composite headliner board | Full conversions, high-roof vans, integrated lighting | Moderate | 10 to 16 hours | High, holds lights and wiring |
| Factory headliner re-upholstery | Sprinter, ProMaster and crew vans with an existing board | Lowest material cost, highest labour | 6 to 10 hours | High if foam is sound |
Fabric strip is the fastest option. You staple or tack a single length of fabric to each rib and trim the edges. It looks clean on a flat-roof van and costs almost nothing, but it has no back-up support in the middle, which is exactly where fabric sags after a few months of road heat.
A plywood board gives you a solid, fixed surface you can cut light holes into, run wiring behind and take a roof fan through. It adds weight, so it needs a weight and headroom budget, but it is the only approach that stays flat over years.
Re-upholstery is the cheapest per square foot and gives the tightest factory finish, because the board already exists and the foam pad does the shaping. It only works while the foam underneath is still sound. Once the foam has dried out and started crumbling, glue has nothing to hold on to and you are back to stripping it.
What You’ll Need: Tools and Materials
Everything below assumes a two-person crew working on a standard high-roof cargo van, and quantities are for a full interior run.
Materials
- Headliner fabric — foam-backed automotive headliner cloth, sold by the metre in standard widths of roughly 150 to 174 cm. Buy 1.4 times the surface area, then add 15 cm per seam and hem.
- Substrate sheet — 6 mm luan, 6 mm okoume, 4 mm PVC foam board or a honeycomb composite panel. Luan is the lightest, okoume is the most stable, PVC foam board is the cheapest and easiest to cut.
- Furring strips — roughly 25 mm by 50 mm softwood, cut to run fore and aft. You need enough to bridge the roof ribs, usually three to four per side on a high-roof van.
- Tacking strip — 12 to 20 mm plywood strips or aluminium trim channel for the edge of the fabric where no trim clip fits.
- Trim clips — the factory-style grille or panel clips from the donor vehicle. They are what make the edge look finished, and a parts-cutter donor van is the cheapest source.
- Upholstery foam — 3 mm or 5 mm closed-cell foam for padding the board edges and trimming the transition between panel and headliner.
- Spray adhesive — a heavy-duty upholstery or construction-grade spray glue such as 3M 90, not a craft tack glue. Two to three cans for a full run.
- Contact cement — optional, for hot or humid climates and for bonding fabric edges that will see heat.
- Construction adhesive — a polyurethane construction adhesive for bonding the board to furring strips. One tube is usually enough.
- Insulation — 25 to 50 mm Thinsulate, closed-cell foam or sheep wool batts, sized to the bay areas between ribs.
- Vapor barrier — a vapour-open membrane or kraft-faced paper to stop condensation forming against the cold metal skin.
- 12V lighting — puck lights, LED strip in an aluminium channel, or a dimmable module. Wire gauge to match your run length.
- Adhesive-backed foam tape for mounting light channels and trim, and 8 mm rivnuts or pop rivets where you want a removable board.
Tools
- Drill with step bit for light cut-outs, and a jigsaw or router for rectangular openings
- Table saw or circular saw with a fine blade, plus a planer or sander for the board
- Mitre saw and a set saw set to roughly a third of plank depth for kerfing
- Staple gun, airless finish stapler preferred, plus a tack hammer and tacking strip
- Butcher paper or card for templating the roof curve
- Panel saw, tape measure, straight edge, chalk line and a marker
- Utility knife, scissors or a proper fabric shears for trimming headliner cloth
- Putty knife and a plastic card for tucking fabric under trim clips
- Safety glasses, ear defenders and a dust mask when cutting board and stripping old foam
- Multimeter and trim wire strippers for the lighting run
How much fabric to buy
Multiply the roof surface area by 1.4 to allow for stretch, then add 15 cm for every seam and hem. A high-roof cargo van ceiling of roughly 9 square metres needs about 13 square metres of cloth, so plan on 14 to 15 square metres including seams. Buying by the running metre, a 170 cm wide cloth means 13 square metres is about 8 metres of drop. This formula is the one number most builders get wrong and then discover three hours into a stretch.
Choosing Headliner Fabric
Foam-backed automotive headliner cloth is the default choice because the backing gives the material body, so it resists sag and hides fasteners. Look for a polyester or polyester-poly blend with a light fastness rating, because a roof surface can reach well over 60 degrees in summer sun and a cheap dye will fade within a season.
Weight and stretch matter as much as colour. A heavier cloth hangs straighter and is easier to keep tensioned, while a very stretchy light fabric can go baggy in the middle of a large bay. If you want a specific colour, check the width first: most headliner cloth is woven in the 150 to 174 cm range, so a standard van roof usually needs one seam running down the centre.
Suede-style and perforated headliner fabrics exist but cost more and stain more easily. Carpet and marine vinyl are the usual alternatives. Carpet is cheap and quiet but needs foam backing to stay flat, while marine vinyl wipes clean and suits a working van at the cost of reflections and noise.
For hot or humid climates, the adhesive choice matters more than the fabric. Standard spray glue softens in a parked van and lets the edges lift within weeks. Pair a heavy-duty spray adhesive with staples or trim clips at every rib so the mechanical fasteners carry the load, and test a small offcut in the sunniest bay for a week before you commit the whole roof.
How to Make a Campervan Headliner: Step by Step
The order matters. Wiring goes in before the board, marking happens before cutting, and cutting happens before the fabric is ever unrolled.
- Measure the roof and choose your approach. Measure between ribs, the overall length, the roof curve height and the distance down to the door frames. Decide here whether you are building a board, stripping fabric to ribs, or recovering an existing headliner.
- Strip the roof down. Remove the factory headliner, trim panels, curtain-airbag components where permitted, and all old adhesive. Sand or scrape the metal and the ribs until nothing is left that will telegraph through the new surface. Do not leave the foam B-pillar plugs in place if they are crumbling, and do not remove airbag hardware.
- Run the 12V wiring and mount the lights. With the roof open, run your positive and negative feeds along the ribs, secure them with clips, and mount the light housings or LED channel where you want them. Terminate everything and test it on battery power before you close the roof up, because reaching a failed fitting afterwards means pulling the whole ceiling back down.
- Fit insulation and a vapour barrier. Cut batts to the bay size with a little overlap, and staple them to the ribs. Follow with a vapour barrier, leaving a small gap around any roof vent or fan housing so you do not trap moisture in the duct.
- Build the headliner board. Cut your substrate sheets to rough size, then fasten them to the furring strips with construction adhesive and screws. Work in sections small enough to lift into the van comfortably but large enough that you are not managing eight separate pieces. Let the adhesive cure fully before anything else.
- Shape the board for a curved roof. On a curved roof such as the Ford Transit, the board must follow the arc. Kerf the back of the sheet, use a paper template to cut the outline, and add short scab strips behind any butt joints so nothing rattles over bumps.
- Mock-fit the board and mark every cut-out. Lift the board into place, prop it up, and use a marker to mark the trim clip positions, the light holes, the fan opening and the door frame edges. This stage is the whole reason the rest of the job goes smoothly, and cutting from marks made in position saves you from a mis-cut hole you cannot reach later.
- Cut the light holes and trim clip holes. Remove the board, drill the pilot holes for the clips, and cut the light openings with a step bit or jigsaw. Test each hole with the actual fitting and trim the opening a few millimetres under the bezel so the trim covers the edge completely.
- Fit trim clips and tacking strips. Screw the trim clips to the ribs and door frames, and run tacking strip or aluminium channel along any edge without a clip. Test-fit the board again to confirm nothing has shifted.
- Stretch and fasten the fabric, then finish the edges. Apply adhesive in light, even passes, let it go tacky, then lay the cloth on from the centre outwards. Work in opposing directions to keep the tension even, staple or tack the perimeter, and push the fabric under the trim clips with a putty knife. Trim the excess and leave every edge tucked, not pinned.
Leave the adhesive to cure with the doors open and the van in shade if you can, and avoid driving hard for a day. The fabric will feel tight at first and settle into a genuinely flat surface over the following week.
Handling the Curved Roof Section
The front of the roof where it curves down towards the cab is where most builds look amateur, and it is the question asked most often in van build groups. The problem is not the fabric. The problem is that you are trying to pull a flat piece of cloth onto a compound curve with nothing to hold it.
Three techniques solve it, and they combine rather than replace one another.
Kerfing means cutting parallel grooves in the back of the board so it can bend. Set your saw depth to about a third of the board thickness, space the kerfs close together, and cut only along the length of the curve. Too deep and the board splits; too far apart and it will not conform.
Paper templating gives you the outline. Hold a large sheet of butcher paper or stiff card against the roof, mark the curve with a pen held perpendicular so the line transfers, then flatten the template on the floor and cut the curve with a long smooth stroke. Transfer the template to the board with a pencil and a straight edge, not a freehand cut.
Scabs solve the short-plank problem. If the curve is too tight for a full-length piece, cut two shorter sections and bridge the joint on the back with a 50 mm strip of plywood or offcut, glued and screwed. Without a scab the joint will bounce and rattle on corrugations.
For the fabric itself, cut it slightly undersized on the curve section and rely on the stretch in the direction you pull. Work from the centre of the curve outward, alternating left and right, and keep a helper holding tension on the far side.
Wiring and LED Lighting Integration
The single most useful decision you can make about a headliner is that the wiring is installed before the board goes up, not after. A puck light fitted to a finished ceiling means a hole through the board, a matching hole in the fabric, and a repair that shows forever.
Plan your light positions around where people actually sit. Two rows of puck lights along the rib lines read better than a single centre row, and a dimmable module lets you run mood lighting at night without touching the main switch. If you are running LED strip, an aluminium channel mounted to the furring strips before the board goes on gives you a clean edge and a heat path.
Give yourself clearance for a roof fan or a Maxxair-style vent. The cut-out is structural, so mark it during the mock-fit, check the clearance against the fan housing once installed, and seal the duct opening with foil tape or foam so the vapour barrier does not sit directly against the duct.
Run the cable in a loom or spiral wrap and clip it to the ribs at roughly 200 mm spacing. Every point where the cable crosses a rib is a future rattle and a future chafe, so add a grommet or a wrap of cloth tape at each crossing.
Weight and Headroom Budget
A headliner is light compared with the rest of a conversion, but on a high-roof van every centimetre of headroom counts and payload adds up fast. For a broad guide, 6 mm luan runs at roughly 1.1 to 1.4 kg per square metre, 6 mm okoume is a little lighter, 4 mm PVC foam board sits near 1.2 kg per square metre, and 4 mm birch ply is the heaviest of the common choices at around 2.5 kg per square metre.
Run that across a 9 square metre ceiling and you are looking at roughly 10 to 23 kg depending on material. Add the furring strips, the foam, the fabric and the lighting, and a full plywood board ceiling commonly lands in the 20 to 30 kg range. That is not a crisis on most vans, but it matters on a high-roof already carrying water tanks, solar and a bed platform, so add it to your payload figure before you order the material.
On headroom, every millimetre of board plus furring strip comes straight off the cabin. Mounting the board directly to the ribs saves the most space, which is why furring strips are optional on a flat roof with no wiring to hide. Where you do need them, keep them to 25 mm and recess them where the rib profile allows.
Cost and Time Estimates by Method
Here is what the three approaches realistically involve. Figures are relative bands, since material pricing moves around, and time assumes you have already got the van apart.
| Method | Material spend | Build time | Tooling beyond a basic kit |
|---|---|---|---|
| Fabric strip to ribs | Low | 3 to 5 hours | Staple gun |
| New plywood board | Moderate | 10 to 16 hours | Table saw, jigsaw, rivet gun |
| Factory re-upholstery | Low | 6 to 10 hours | Spray gun or heavy spray adhesive |
| Board plus starlight fibre optics | High | 16 to 24 hours | Fibre optic light source, drill and rotary tool |
For context, builders regularly cite a 16-hour overhead build including a fan installation as a realistic reference point for a mid-range project, so treat anything much faster as a weekend job only if the van is already stripped.
Common Mistakes and How to Avoid Them
- Cutting before mock-fitting. Every hole you cut from a mark made with the board in position is a hole you will not have to enlarge.
- Stretching the fabric in one direction. Pulling left to right across the whole roof leaves slack on the far side that becomes sag. Work from the centre outward, alternating sides.
- Using craft glue. It softens above roughly 30 degrees and a parked van in summer is well past that.
- Removing airbag components. Curtain-airbag hardware and the foam blocks associated with it are there for a reason. Leave them in place unless your vehicle manual says otherwise, and if they are part of an airbag system, removal can affect insurance.
- Furring strips everywhere. They add weight and take headroom. Use them only where you need a cavity for wiring.
- No relief at the rib joints. The board needs to sit flat on the ribs and float in the bays, not ride the curve of the rib the whole length.
- Trimming fabric with a utility knife on the roof. Cut on a flat surface every time, or you will cut into the foam backing and the edge will fray.
- Forgetting the vent clearance. Mark the fan and vent cut-outs during the mock-fit, not after the board is fixed.
Troubleshooting: Sagging, Wrinkles, Rattling and Heat
The fabric sags in the middle of the bay. Cause: no support behind the cloth and glue alone carrying the load. Fix: add furring strips across the bay at roughly 400 mm centres, or accept that a fabric-strip ceiling needs a mechanical fastener at every rib and a wider adhesive pattern.
Re-bonding old fabric keeps failing. Cause, and this is the one that catches everyone: the foam underneath has dried out and crumbles, so glue just crumbles it further and releases again. The fix is to strip the foam back to the board or the wire mesh beneath and re-bond or staple new fabric to that. Advice in r/howto threads on sagging headliners lands on the same conclusion. Trying to re-glue onto degraded foam wastes the material and the weekend.
Wrinkles at the front curve. Cause: not enough stretch allowance cut into the panel, or a board kerfed too aggressively. Fix: cut a template rather than estimating, kerf to a third of board depth, and use a helper to hold tension while the centre is bonded.
Rattling over corrugations. Cause: a butt joint in the board with nothing bridging it. Fix: scab the joint on the back with a strip of plywood, and bed the board on adhesive or a foam tape strip rather than pushing it tight against the ribs.
Edges lifting in a hot climate. Cause: adhesive softening. Builders in r/vandwellers generally steer each other toward something stronger than standard spray glue in hot locations. Fix: use a heavy-duty upholstery adhesive, add staples or tacking strip along every perimeter edge, and re-press the edges after the first hot spell.
Condensation above the insulation. Cause: an unsealed vapour barrier, or insulation jammed too tight against the skin. Fix: keep a small air gap where practical, seal all edges of the barrier with tape, and check the bays in early morning after an overnight stop.
Repair and Refresh: Replacing Fabric on an Existing Headliner
Not every job needs the board pulled down. Work through this decision tree in order and stop at the first answer that fits.
Is the foam sound? Press firmly in several places. If it springs back and does not shed dust or crumble, the substrate is fine.
Sound foam, fabric just tired or stained. Peel the old cloth back, sand or scrape the foam surface, and re-bond new fabric with spray adhesive. This is the six-to-ten hour job and the cheapest one.
Foam crumbling. Strip it back to the board or mesh, or fit a fresh thin substrate over the old one and recover that. This is the common outcome on vans over ten years old.
Fabric sagging with foam still good. The cause is adhesive failure at the ribs, not bad material. Peel back a section along one rib, clean it, re-bond and refit with staples or tacking strip so the mechanical fix carries the load.
Whichever path you take, do a small test patch in a hidden corner first. A week in the sun tells you more about your adhesive choice than any datasheet.
Starlight and Star-Map Headliners
A star map is the reason many builders take on a board headliner rather than tacking fabric to the ribs, because the lighting has to sit behind something solid. The sequence is the standard board build with one extra stage: drill the fibre or LED points through the finished board, feed the ends through from below, and clip or coil each one so the ceiling surface stays flat.
Mount the light source in a corner or under a shelf where the strands are least visible, run a single supply cable to it, and leave slack so the board can be removed for service. Test the whole run before the fabric goes on, because every point needs a free fibre end.
Frequently Asked Questions
How do I install headliner fabric?
Strip the old covering back to bare metal or a clean board, sand off all old adhesive, and run your 12V wiring while the roof is still open. Fit insulation and a vapour barrier, fix furring strips or your plywood board to the ribs, then mock-fit the board and mark every trim clip and light hole before you cut. Apply spray adhesive in light even passes, let it go tacky, and lay the fabric on from the centre outwards, working in opposing directions. Finish by stapling or tacking the perimeter and pushing the fabric under the trim clips with a putty knife.
How many yards of fabric do you need for a campervan headliner?
Multiply the roof surface area by 1.4 to allow for stretch, then add 15 cm per seam and hem. A high-roof cargo van ceiling of roughly 9 square metres needs about 13 square metres of cloth, so plan on 14 to 15 square metres in total. At a standard headliner width of 170 cm, that is about 8 metres of running fabric.
What is the best fabric to use for replacing a headliner?
Foam-backed automotive headliner cloth is the best all-round choice because the backing gives it body, so it resists sag and hides fasteners. Choose a heavier polyester or polyester-poly blend with a good light fastness rating, since a roof surface gets very hot in summer. Match the cloth width to your roof so you minimise seams, and expect to need one central seam on most vans.
How do I make a headliner not sag?
Sag happens where there is no support behind the fabric. Add furring strips across the bay at roughly 400 mm centres, fasten mechanically with staples or tacking strip at every rib, and apply adhesive generously rather than in a thin coat. If the foam underneath has dried out and crumbles, glue will not hold at all, so strip it back to the board or wire mesh and re-bond to that instead.
How much does it cost to replace a headliner in a van?
It depends on the approach. Re-upholstering a factory headliner is the cheapest in materials because the board and foam already exist. Building a new plywood board is moderate, since you pay for the substrate, fabric, adhesive, insulation and lighting. A full board plus a starlight or fibre optic system sits at the top of the range. Time runs from about 3 to 5 hours for a fabric strip to 16 to 24 hours for a starlight board.
What is the best material for a van ceiling?
For most conversions a 4 to 6 mm plywood or okoume board with foam-backed headliner fabric is the best balance of weight, strength and finish. Luan is the lightest option, PVC foam board is the cheapest and easiest to cut, and birch is the strongest but heaviest. A fabric strip tacked straight to the ribs is the lightest and fastest, but it sags in the middle of each bay.
Can you carpet a van ceiling?
You can, but carpet needs a backing layer to stay flat, and a carpeted ceiling adds both weight and dirt retention. If you carpet, glue the carpet to a thin foam or felt-backed panel rather than straight to the metal, and use a spray adhesive rated for the temperature. Marine vinyl or a wipe-clean headliner vinyl is the better choice in a working van.
How do I curve plywood for a van roof?
Kerf the back of the sheet with parallel grooves at about a third of the board depth, spaced closely together along the length of the curve, then bend it gradually. Mark the outline from a butcher paper template held against the roof rather than eyeballing it. Where the curve is too tight for a full-length piece, cut two shorter sections and bridge the joint on the back with a 50 mm scab strip so it does not rattle.
Do you need a headliner in a campervan conversion?
It is not structurally required, but it is one of the highest-impact finishing steps. The ceiling is the largest surface in the vehicle, so covering it cuts heat loss and echo at once, hides the roof ribs and wiring, and is the detail that most separates a finished conversion from a bare shell. If you are running any lighting or a roof fan, the headliner is the right time to do it.
Conclusion
Working out how to make a campervan headliner comes down to sequence and preparation rather than skill. Run the wiring while the roof is open, mock-fit the board and mark every cut-out before the saw touches it, then stretch the fabric from the centre outwards and lock the edges into trim clips. Get those three things right and the finish looks factory.
My advice before you start: measure twice, buy your fabric on the 1.4 rule, and keep a scrap of the material in the sunniest bay for a week to test your adhesive. Those three habits prevent nearly every complaint I see in headliner threads. Work through the steps in order, and the ceiling becomes the part of the build you are most pleased to show people rather than the part you want to cover up.