
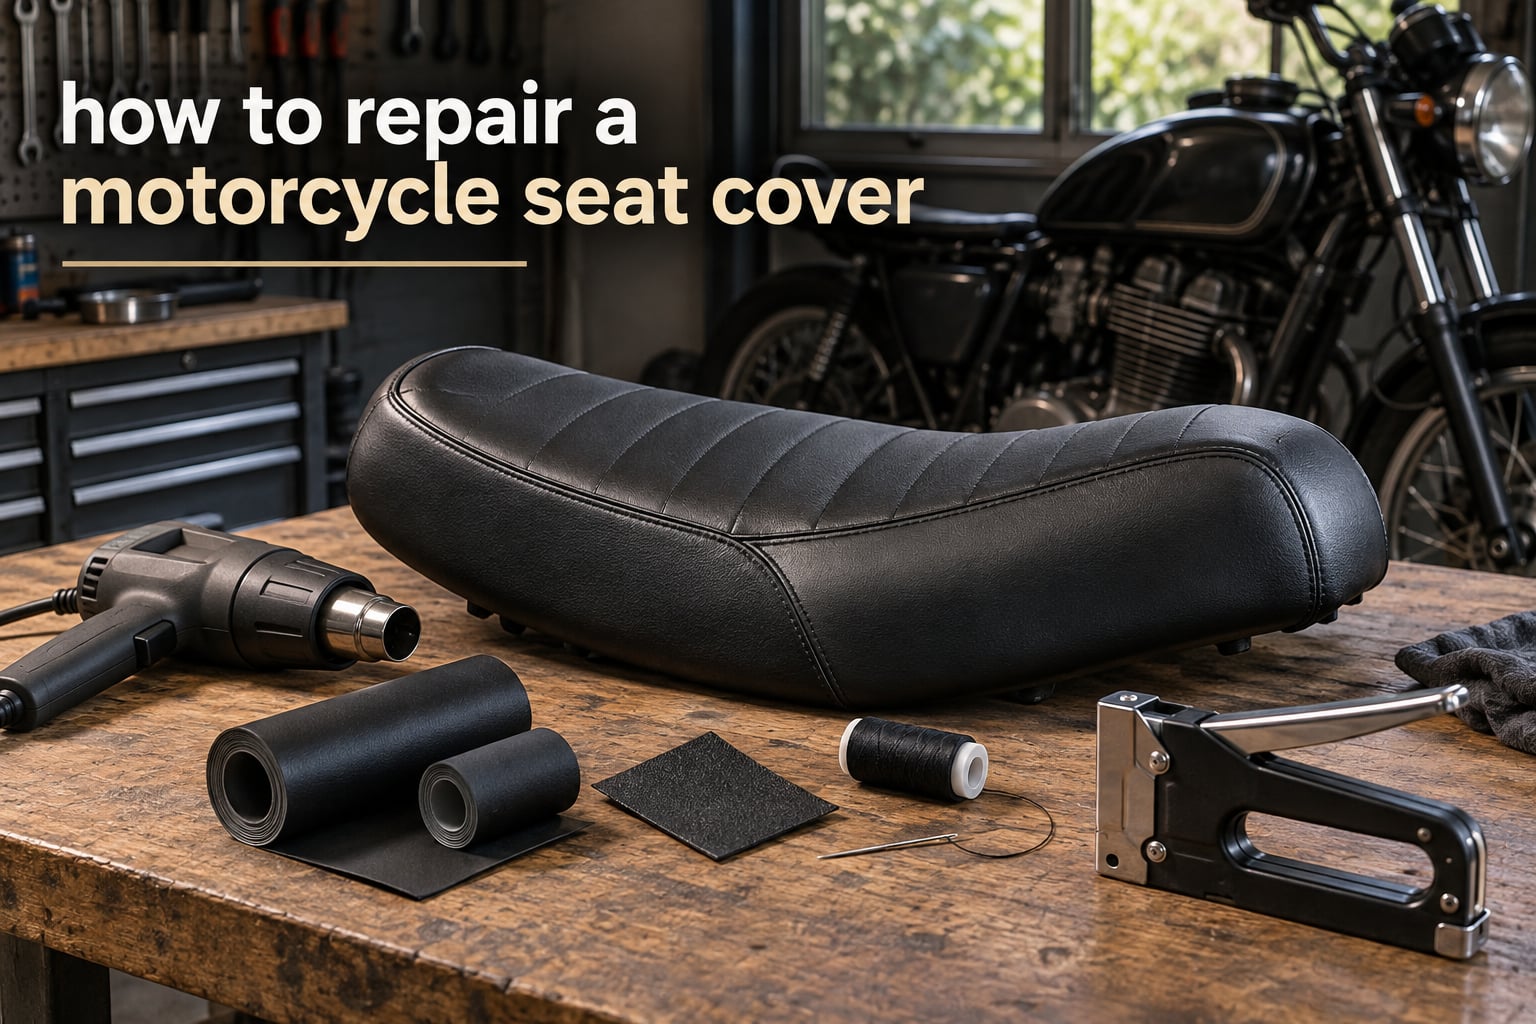
A torn seat is the first thing most owners notice about a tired motorcycle, and the first thing they put off fixing. That delay is what wrecks the seat: a split in the vinyl lets rain and road spray straight into the foam, and once the foam swells and darkens, no amount of patching the cover will bring the cushioning back. Learning how to repair a motorcycle seat cover properly takes an afternoon, and it is the difference between a cosmetic fix and a seat that lasts the rest of the bike’s life.
What follows is the method we use in our own workshop, built around one question first: is this damage worth repairing at all? We cover the four repair paths owners actually use, including the field fixes that get recommended on the forums, and we say plainly where each one fails next. Whether your bike has a vintage hook-and-trim seat or a modern bolt-on seat, the logic is the same.
Last reviewed and updated for 2026.
Table of Contents
- How to Repair a Motorcycle Seat Cover in 6 Steps
- Step 1: Assess the Damage and Choose a Repair Method
- Step 2: Remove the Seat and the Old Cover
- Step 3: Clean and Prepare the Damaged Area
- Three Ways to Fix a Tear: Patch, Adhesive or Stitch
- Step 4: Re-Cover the Seat with New Vinyl or Leather
- Step 5: Check and Replace the Seat Foam
- Step 6: Refit the Trim, Edging and Reinstall the Seat
- Repair Methods Compared: Time, Tools, Durability and Cure
- Match the Repair Material to Your Seat Cover
- Common Mistakes That Ruin a Seat Repair
- Make a Seat Cover Repair Last: Prevention and Aftercare
- When to Replace the Seat Instead of Repairing It
- Frequently Asked Questions
- How do you repair a ripped motorcycle seat?
- What type of tape is best for repairing motorcycle seats?
- What is the best adhesive for fixing vinyl seats?
- How to install a seat cover on a motorcycle?
- What type of foam is used for motorcycle seats?
- Can I make my own motorcycle seat foam at home?
- How long should I wait after a seat repair before riding?
- Conclusion
How to Repair a Motorcycle Seat Cover in 6 Steps
To repair a motorcycle seat cover, remove the seat from the bike, strip off the old cover, clean and dry the damage, then fix it by bonding a patch or liquid adhesive, restitching the seam, or stretching new vinyl or leather back over the foam and reattaching it with staples or rim hooks. Let all adhesives cure for 24 hours before you ride.
Those six stages apply whether you are patching a 2 inch split or recovering the whole seat. Here is the sequence in short form.
- Assess the damage and pick a repair method: patch, adhesive, stitch, or full re-cover.
- Remove the seat from the motorcycle, then take off the old cover from the pan.
- Clean and dry the torn area and the pan, and check the foam underneath.
- Apply the repair using a patch, liquid vinyl adhesive, or double stitching.
- Re-cover with new vinyl or leather if the damage is structural, heat-stretching it tight.
- Refit the trim and chrome edging, reinstall the seat, and allow 24 hours of cure time before riding.
Each stage below gets its own section, so skip ahead to whichever one you are stuck on.
What You Need for the Job
Most owners already own everything required for a patch or stitch repair. The full re-cover is the one that needs a stapler and a heat gun, and no competitor page lists a tool list at all, so here is ours.
- Socket and spanner set for the seat mounting bolts and the seat pan hardware.
- Flat-head screwdriver and flat-nose pliers for trim, edging and spring clips.
- Leather cleaner or vinyl degreaser plus a soft brush and clean rags.
- Utility knife and leather shears for trimming patches and new material.
- Awl or upholstery needle and heavy black thread for seam repairs.
- Cyanoacrylate glue for locking each stitch in place as you sew.
- Patch material to match the cover: Tear-Aid Type B for vinyl, a leather repair kit for leather.
- Staple gun (P1 or 8 mm crown) for re-covering a pan.
- Heat gun or hairdryer for stretching vinyl, used with care.
- Spray adhesive or contact cement for bonding cover to foam.
Step 1: Assess the Damage and Choose a Repair Method
Start by looking at the failure, not the tools. OEM vinyl almost always cracks at the front nose where the rider’s weight folds it, and at the side seams where the cover is pulled around the rim, well before the foam underneath is worn out.
Use this triage to decide the method.
- Hole, burn or puncture under 2 inch across in otherwise sound material: a patch repair is the right call. Above that size the cover has lost structural integrity and a patch will just tear out around its own edge.
- Split or crack in the vinyl with no hole and material still sound: liquid adhesive, and you can hold the split closed while it cures.
- Seam opened up but the cover material itself is fine: stitching restores it properly, and you can add a second line of stitching for a stronger fix.
- Peeling edges or an old glued cover: the cover has to come off completely, and the pan gets re-covered in new material.
- Mould, waterlogging or crumbling foam: no cover repair will save the seat. Replace the foam first or at the same time.
Take a photo of the damage before you touch it. It helps you judge the result afterwards, and if the seat later goes beyond repair the picture is useful for anyone buying a replacement pan.
Step 2: Remove the Seat and the Old Cover
Take the key out first and work on a soft surface, because the trim and small hardware scatter easily. Most bolts are under the seat or behind the side covers, and some bikes hide a stud under the rear fender.
Photograph the seat in place before you unbolt anything, especially where a wiring harness or a grab rail passes through it. Store the bolts in a magnetic tray rather than a cup.
Old covers come off in one of three ways, and knowing which one you have saves an hour of frustration.
- Stapled covers on modern bikes: lever the staples out with a flat screwdriver and lift the cover away from the pan. Pry gently at a corner first to find the staple direction.
- Glued covers on older and restoration work: warm the vinyl with a heat gun and peel it slowly while you push a plastic scraper between the cover and the foam.
- Hooked covers on vintage bikes with chrome edging: remove the edging strip first, then unhook the vinyl loops from the triangular hooks around the seat base rim.
Keep the speed washers. They sit between the edging and the pan and are the cheapest part of the whole job to lose and the most annoying to replace. The same goes for the triangular hooks and any rubber bumpers or bump-stop pieces fitted under the cover edge.
Plug the seat hole in the frame while the seat is off. It is the perfect moment to drop a rag into the opening so grit cannot fall into the subframe or the fuel tank area.
Step 3: Clean and Prepare the Damaged Area
Adhesives and threads both fail for one reason: a surface that was not properly clean and dry. This stage is unglamorous and it decides whether the repair lasts a season or several years.
Work through the area with a leather cleaner or vinyl degreaser and a soft brush, then wipe with a damp rag and a second dry rag. Let it dry completely, which on a warm day means a couple of hours indoors and far longer if the foam is damp underneath.
Once the surface is dry, roughen the edges of a tear lightly with 120 grit paper so the adhesive has something to grip. Feather the edge rather than cutting a hard step, and wipe away the dust with a barely damp cloth afterwards.
For leather, apply a thin coat of leather conditioner to the cleaned area and let it sink in before you patch or stitch. Vinyl does not take conditioner, but a light coat of protectant on the surrounding area helps keep the new patch from drying out faster than the material around it.
Take this stage outdoors or over a bin. Degreaser and solvent-based cements are unpleasant to work over a kitchen table and they will mark a seat cover that is not yet removed.
Three Ways to Fix a Tear: Patch, Adhesive or Stitch
Most repairs fall into one of these three, and each has a different failure mode. Understanding the failure mode is how you decide which one to use.
Method A: Patch Repair for Small Tears, Burns and Holes
A patch works on holes up to about 2 inch across in vinyl or leather, and it is the fastest way to keep rain out of the foam. Bring the patch material to the seat, do not buy a generic one and cut it at the bench, because the grain and colour have to match under the same light as the seat.
- Cut the tear square so there is no loose flap left to fold under, using a sharp blade and a straight edge.
- Trace the tear onto the patch material and cut about half an inch larger all round.
- Sand the back of the patch lightly and clean both surfaces thoroughly.
- Apply the repair adhesive to the back of the patch, following the kit instructions. Vinyl repair patches such as Tear-Aid Type B are a no-heat system, so resist the urge to speed it up with the heat gun.
- Press the patch into place from the centre outwards and weigh it down with something flat overnight.
Shoe goo is a well regarded alternative and works from the underside. Coat a patch of vinyl with shoe goo, push it up into the tear from below, tape the gash closed, and leave it overnight. Fill any remaining voids with more goo once the first pass has set.
What to expect: a patch is a weather seal first and a cosmetic repair second. It will keep water out of the foam for a season or two and it will never blend in completely. Replacing the whole cover is the only permanent fix for a tear larger than that.
Method B: Adhesive-Only Repair for Cracks and Splits
When the vinyl has split but has not opened into a hole, you can close the crack and seal it without any patch material at all. This is the right method for the split down the front nose of a cracked OEM cover.
- Clean and dry the area as described in Step 3.
- Lay masking tape down either side of the split so the adhesive cannot spread onto clean vinyl.
- Tape the split closed from underneath with low-tack tape, pulling the edges together as you work.
- Squeeze a thin bead of liquid vinyl repair adhesive or contact cement into the closed split from the underside.
- Let it cure overnight, then peel the outer masking tape away carefully.
Liquid electrical tape is the pragmatic choice when waterproofing matters more than appearance. Dab it on sparingly, because it sits proud of the surface and shows every mark, but it buys real weather protection on a seat that is ridden through winter rain.
No-heat leather and vinyl kits, such as a RESTOR-IT style kit, handle burns, rips and tears on leather without a heat gun, which is useful if the seat is close to painted surfaces you would rather not risk.
Method C: Stitch Repair for Torn Seams
A seam that has let go while the cover material is still sound is a stitching job, and it is the most durable of the three field repairs. This is the recipe that comes up again and again on owner forums and it is the one we trust most for seams.
- Push the torn edges of the seam back together and pin them with clips or bulldog clips.
- Thread an upholstery needle with heavy black thread, doubled. Waxed thread resists moisture and abrasion better than plain thread.
- Work along the seam, dropping a small bead of cyanoacrylate glue on each stitch before you pull it through, and snipping the thread after every stitch or two.
- Stitch well past each end of the tear into intact material, because stress concentrates at the last good stitch.
- For a load-bearing seam, add a second line of stitching a quarter inch away from the first.
The glue bead is what makes this work. It locks each stitch in place so the thread cannot saw back and forth through the vinyl and re-open the tear from the inside. Expect this repair to outlast any adhesive fix, and expect it to be visible.
Step 4: Re-Cover the Seat with New Vinyl or Leather
Re-covering is the answer when the cover is peeled, brittle, or torn in a place where a patch would fail. If the foam is still good, this is the most reliable fix available and the most permanent.
- Strip the cover off the pan and pull off all remaining staples, hooks and adhesive residue.
- Pull the foam off the pan and check it over, following the foam checks in the next section.
- Lay the new material grain-side up over the foam, aligning the centre line with the centre of the seat, and mark the outline a half inch larger all round.
- Cut the pattern out with a sharp blade, then test fit it dry and trim again if the tension is uneven.
- Fit the cover to the foam first. Spray the foam lightly with adhesive, wrap the material over, and work the front and back before the sides so the cover sits symmetric.
- Staple into the pan, one staple every 30 mm or so, pulling the cover taut as you go. Start at the centre of the front edge and work outwards toward the rear.
- Refit the triangular hooks, speed washers and chrome edging on vintage seats, or the trim clips and spring clips on modern ones.
Warmed vinyl stretches significantly better than cold vinyl, and this is the single technique that separates a tight professional-looking cover from a baggy one. Warm the material with a heat gun held about 200 mm away, keep it moving constantly, and stretch in small increments. Never hold the heat on one spot: the grain and the top coating will scorch and go shiny long before the vinyl softens.
Test on a scrap offcut from the same material first, and test on a hidden area of the cover if you have one. A hairdryer works too, it is just slower, which is fine because you are not in a hurry.
Drawstring-style quick covers that hook under the rim are a temporary solution. The cover moves, creases and wears through faster than anything stapled to the pan, so treat them as a wet-weather stopgap rather than a repair.
Step 5: Check and Replace the Seat Foam
This is the step most guides skip, and it is the one that decides whether your repair survives. Take the foam off the pan and squeeze it.
- Good foam rebounds immediately, feels even under pressure, and is the same colour all the way through.
- Waterlogged foam stays compressed after you let go, and it has permanently expanded so a new cover will not stretch back over it.
- Mouldy foam has dark speckling, a musty smell, or a crumbly surface that breaks when you press it.
- Worn foam shows a flat spot where you sit, or the foam is thinner at the rear than at the front.
Foam density matters for how the seat feels. Firm high-density foam supports you over long distances and holds its shape; softer low-density foam is comfortable for short rides but bottoms out sooner and wears out faster. Match the thickness of the original as closely as you can, and add a thin layer of batting over the top so the cover does not sit directly on the foam and take the imprint of every panel line on the pan.
Cutting new foam to a shape is straightforward with a bread knife and a long serrated blade. Cut slightly undersize on the first pass, then trim to fit, because foam is far easier to take away than to add back. Glue the layers face to face if you are building up thickness rather than replacing outright.
If the foam is salvageable, dry it out fully before re-covering. A foam that still holds moisture will mould again inside a new, airtight cover, and you will be back at this bench within a year with a worse problem than you started with.
Step 6: Refit the Trim, Edging and Reinstall the Seat
Work from the pan outwards. On a vintage seat, clip the cover loops back onto the triangular hooks around the rim, then refit the chrome edging strip with its speed washers and bolts, working from the centre of the front edge around both sides in an even arc.
Do not overtighten the edging bolts. The washers spread the load and the chrome strip is the part that shows, and a bolt squeezed too hard will dent the strip or crush the cover underneath it. Tighten until the edging sits flush, then stop.
On a modern seat, snap the trim clips back on and check that no cover edge is pinched under a clip, because that is where a new tear starts.
Now the cure time. Adhesive and contact cement need time, and this is the part owners skip because they want to ride. Give liquid adhesives and shoe goo 24 hours before the seat takes weight, and give contact cement overnight as well. Patches without heat cure faster, but a few hours of hands-off still beats an immediate failure.
Before you refit the bolts, sit on the seat in the workshop. Put your weight in the position you actually ride in and check that nothing digs into you, that the cover has not pulled out of square, and that the hinge or locking mechanism still engages. Then bolt the seat down and check it once more with the bike on its side stand.
Repair Methods Compared: Time, Tools, Durability and Cure
Here is how the five routes compare, including the professional one, so you can pick before you start.
| Method | Best for | Time on the bench | Tools needed | Durability | Cure before riding |
|---|---|---|---|---|---|
| Patch repair | Holes and burns under 2 inch | 20 to 30 minutes | Blade, sandpaper, repair adhesive | One to two seasons | 4 to 24 hours |
| Adhesive only | Cracks and splits, no hole | 30 minutes plus drying | Tape, liquid vinyl adhesive | One season | 24 hours |
| Stitch repair | Opened seams in sound material | 45 to 60 minutes | Needle, heavy thread, super glue | Best of the field repairs | Immediate, glue sets in minutes |
| Full re-cover | Peeling, brittle or torn covers | 2 to 4 hours | Stapler, heat gun, spray adhesive | Outlasts the bike if foam is sound | 24 hours |
| Upholsterer or dealer | Matched material, hidden damage, unusual covers | Several days | None from you | Factory finish and fit | As quoted |
Note the last row. A certified upholstery shop will assess the fabric condition and tell you honestly whether restitching is enough or whether the cover needs replacing, and that assessment is free of the trial-and-error you would otherwise pay for in your own time.
Match the Repair Material to Your Seat Cover
Most failed seat repairs are material mismatches. The adhesive that works beautifully on smooth vinyl will lift off textured or perforated material, and leather and vinyl need entirely different kits.
- Smooth vinyl takes liquid vinyl repair adhesive, Tear-Aid Type B patches, and shoe goo reliably. This is the easiest material to repair.
- Textured or grain-embossed vinyl needs an adhesive rated for textured surfaces, and any patch should be heat-sealed around the edge to stop it lifting. Clean with a solvent degreaser, not a soap, so no residue sits under the patch.
- Perforated panels need a patch cut from a matching perforated offcut. A solid patch over a perforated area looks wrong from a metre away, and the different surface tension is what makes the edge curl.
- Leather wants a leather and vinyl repair kit, a saddle-stitch needle and heavier thread. Ordinary cyanoacrylate works for stitch locking, but liquid vinyl adhesive does not bond leather well.
- Marine-grade or heavy-duty vinyl on an adventure or touring bike is thicker and more rigid, so it needs more heat and a stronger staple crown. Standard patches peel off this material within weeks.
Match the grain direction as well as the colour. Vinyl stretches far more across the grain than with it, so a patch fitted the wrong way will pucker the first time you sit down.
Common Mistakes That Ruin a Seat Repair
Every one of these we have seen on a bench, and every one is avoidable.
- Gluing over dirt or degreaser film. This is the number one reason patches peel at the edge after a few weeks. Clean, dry, then sand lightly.
- Stretching vinyl from the sides first. Secure the front and back of the cover, then work the sides, and it will stay taut and symmetric instead of bagging at the corners.
- Holding the heat gun still. Constant movement and about 200 mm of standoff. Scorched grain never recovers.
- Overtightening staples and edging bolts. Pull the cover snug, not crushed. Too much tension eventually splits the vinyl at the staple line, which is a worse tear than the one you started with.
- Wrinkles chased at the end. Wrinkles come from pulling unevenly as you fit, not from the last pass. Push a flat card across the vinyl to flatten small bubbles while the adhesive is still wet.
- Riding before the adhesive has cured. Weight on a half-cured joint is what separates it permanently.
- Covering damp foam in an airtight new skin. That is how you guarantee mould. Dry the foam completely, or replace it.
Make a Seat Cover Repair Last: Prevention and Aftercare
A repair is a good moment to deal with what put the tear there. UV exposure and moisture cause most failures.
- Condition leather twice a year with a leather conditioner. Dried-out leather cracks at the fold lines, and the front nose is the first place it goes.
- Protect vinyl from UV with a vinyl protectant or a UV-resistant finish. Ozone and sunlight make vinyl brittle, and a cover that has gone brittle will not take an adhesive patch.
- Keep water out of the foam. Patch tears the day you find them, not the day they get big. A cover is the only waterproofing the seat has.
- Reinforce seams on a new cover with a second line of stitching at the high-stress points, the nose and the side seams, before the first ride.
- In humid or coastal conditions, use marine-grade vinyl and a mildew-inhibiting protectant, and let the seat dry in the sun after a wet ride rather than storing it damp.
When to Replace the Seat Instead of Repairing It
Some seats are past repair, and knowing that early saves you a wasted weekend.
Replace the cover rather than patching it when the tear is larger than 2 inch and sits across a seam or a stretch line, or when the vinyl has gone hard and brittle and no longer flexes without cracking. If the original cover was glued down and the foam underneath is waterlogged and expanded, there is nothing left worth saving.
Replace the whole seat when the pan is cracked or the mounting holes have stripped, when the foam has moulded through, or when the hinge and locking mechanism no longer engage properly. A failing seat latch is a safety problem, not a cosmetic one.
Send it to an upholsterer when you want a factory-matched finish in a specific material, when the cover is a rare pattern or a non-standard shape, or when you have already patched the same spot twice. A seat re-upholstery shop will tell you honestly which of those applies, and a dealer is the right call for a brand-new seat with the original warranty and fit intact.
Frequently Asked Questions
How do you repair a ripped motorcycle seat?
Match the method to the damage. Under 2 inch across, patch it with a repair adhesive or Tear-Aid Type B for vinyl. A split with no hole closes with liquid vinyl adhesive held shut with tape. An opened seam is restitched with heavy thread and a bead of super glue on each stitch. Anything larger, brittle or peeling needs a full re-cover while the foam is still good.
What type of tape is best for repairing motorcycle seats?
There is no tape that holds on its own. Low-tack tape such as painter’s tape is used to hold a split closed while the adhesive cures, and tape can hold the edges of a patch while it sets. For a durable water seal on vinyl, use a liquid repair adhesive or liquid electrical tape instead, and expect the tape itself to be temporary.
What is the best adhesive for fixing vinyl seats?
For smooth vinyl, a liquid vinyl repair adhesive or a no-heat vinyl patch kit is the reliable choice. Shoe goo works well as a sandwich repair pushed up from the underside, then cured overnight. Textured, perforated and marine-grade vinyl need adhesives rated for those surfaces, and standard patches lift off heavy-duty vinyl within weeks. Leather needs a leather and vinyl kit, not a vinyl cement.
How to install a seat cover on a motorcycle?
Remove the seat and strip the old cover, then fit the new material to the foam first: align the centre line, mark the outline half an inch larger than the foam, cut, and test fit dry. Spray the foam lightly, wrap the cover over, secure the front and back before the sides, then staple to the pan every 30 mm working outward from the centre. Refit hooks, speed washers, chrome edging and trim, then allow 24 hours before riding.
What type of foam is used for motorcycle seats?
Motorcycle seat foam is usually open-cell polyurethane. Firm high-density foam gives long-distance support and holds its shape, while softer low-density foam suits short rides but wears out faster. A thin layer of batting over the foam stops the cover taking the imprint of the pan. Waterlogged foam does not return to its original thickness and must be replaced rather than recovered.
Can I make my own motorcycle seat foam at home?
Yes. Cut foam to shape with a long serrated bread knife, slightly undersize on the first pass and trimmed to fit afterwards, and glue layers face to face if you are building up thickness. Matching the original thickness matters more than matching the density, because a thicker cover is harder to stretch back over. If the foam has moulded or crumbled, replace it fully rather than cutting up old material.
How long should I wait after a seat repair before riding?
Give liquid adhesives, contact cement and shoe goo a full 24 hours with the seat unloaded. Patches that cure without heat still benefit from several hours of hands-off time, and no heat gun will speed any of this up safely. Stitched seams with cyanoacrylate can be ridden almost immediately because the glue locks each stitch as you sew. Re-covered seats need the same 24 hours as any adhesive repair.
Conclusion
To repair a motorcycle seat cover, the only decision that really matters is whether the foam underneath is still salvageable. If it is, a patch, an adhesive repair, a stitch or a full re-cover will all bring the seat back, and the re-cover is the one that lasts. If the foam is waterlogged or moulded, no cover repair will hold, and the seat has to be rebuilt from the pan up.
Triage first, then work the six stages in order, and give the adhesive a full 24 hours. Patch the next tear the day you find it, condition the leather twice a year, and the seat you have now should stay on the bike for years.