
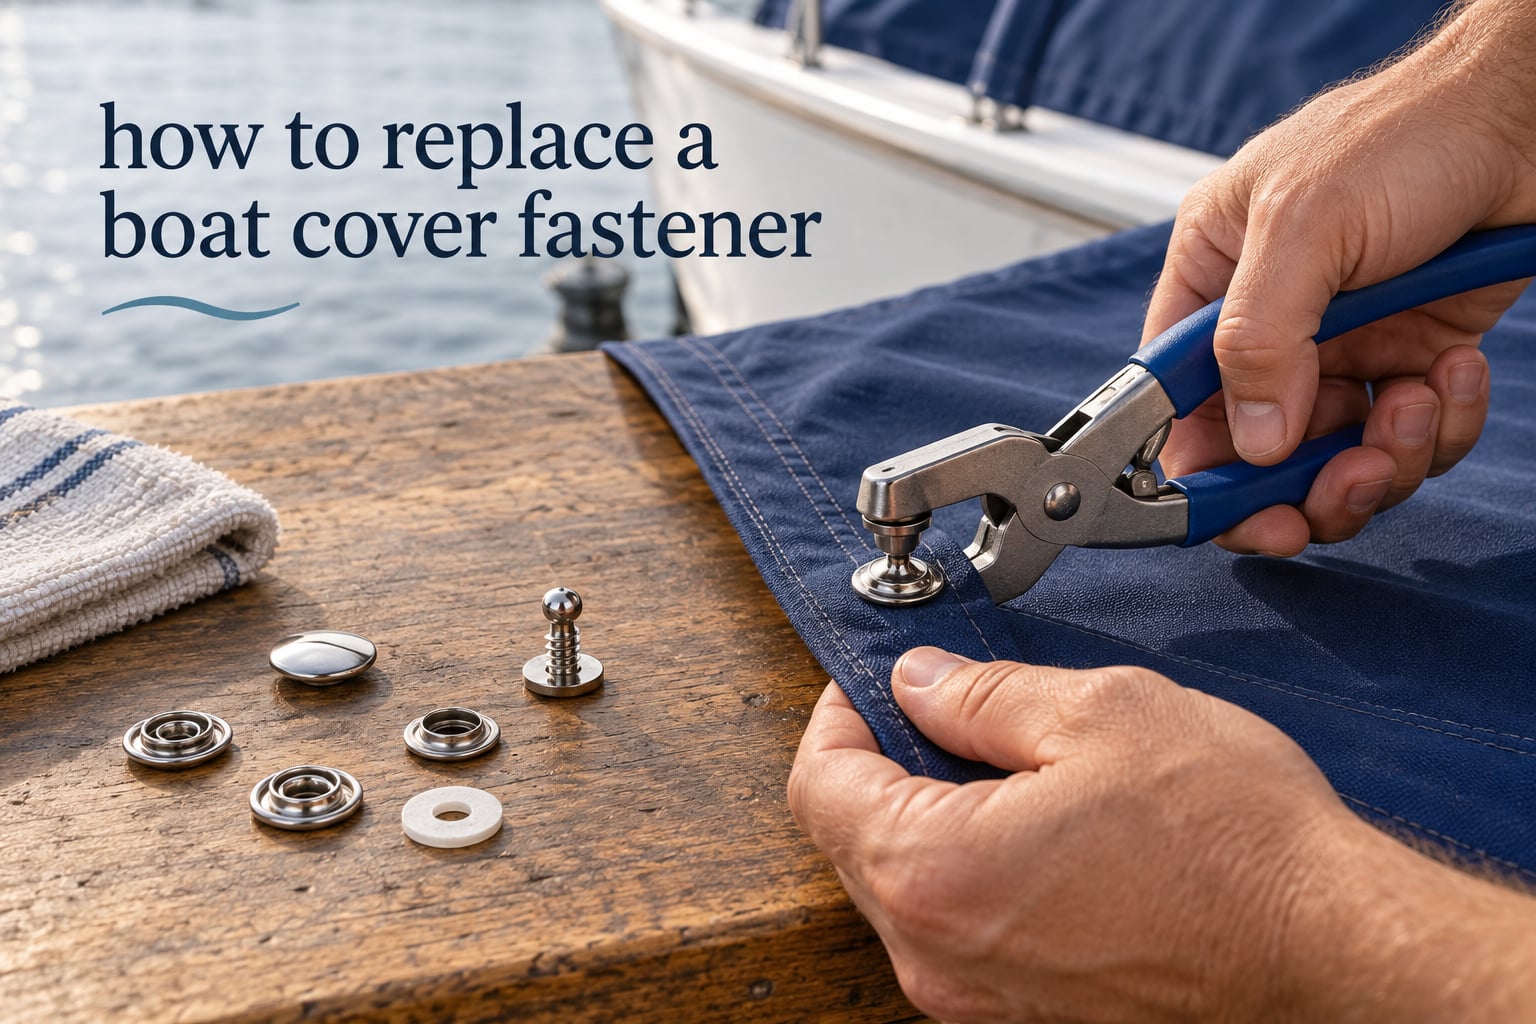
Most boat owners meet their first failed fastener the same way: a gust of wind gets under the cover, the canvas flaps hard, and one corner comes loose. That corner is almost always held by a metal snap, and once you know what the parts are called, replacing a boat cover fastener turns into a short job with a pair of pliers and a snap tool. It is one of those maintenance tasks that looks intimidating until you see it broken down.
This guide covers the full procedure for 2026 boats — removing a failed snap without wrecking the canvas, identifying the correct replacement size, and setting the new fastener so it holds through the season. It also covers the diagnosis step most guides skip, which is figuring out why the old one failed in the first place.
Short answer: To replace a boat cover fastener, identify the size and material of the failed snap, crush the flared socket with cutter pliers and pull the post out, set a new stud or screw stud into the boat, push the new post through the canvas from behind, seat the socket over the stud with a snap tool, then fit the cover back on the boat and check tension before crimping the rest.
Table of Contents
- What Boat Cover Fasteners Are Called
- Why Boat Cover Fasteners Fail
- Tools You Need for the Job
- How to Identify Your Snap Size
- How to Remove the Old Fastener
- How to Install the Replacement Fastener
- Replacing Only the Part That Failed
- Repairing a Stripped Screw Hole in the Deck or Transom
- Stainless Steel vs Nickel-Plated Brass
- Alternatives to Snap Fasteners
- When to Call a Canvas Shop Instead
- Frequently Asked Questions
- How to replace a snap on a boat cover?
- What are the snaps on a boat cover called?
- How to remove a snap button without a tool?
- What size snaps are used on boat covers?
- What is the best snap tool for a boat cover?
- How do I install snaps on my boat cover?
- What can I use instead of snap buttons?
- How to fix a loose snap fastener?
- Conclusion
What Boat Cover Fasteners Are Called
The snaps on a boat cover are a two-piece metal fastener system, and each half has its own name. The half screwed to the boat is the stud. The half set into the canvas is the socket. Knowing those two words is most of what you need, but the full assembly has five parts, and ordering the wrong one is the single most common reason a repair does not take.
- Stud — the male half. It screws into a deck, a console, a backing plate or a bimini frame and presents a solid post.
- Screw stud — a stud with a flat or threaded base made to be screwed down. This is the boat-side part on most covers.
- Socket — the female half. It snaps over the stud post and is the part that releases with a firm pull.
- Post or canvas back — the flared washer on the back of the socket that spreads the load and stops the socket pulling through the canvas.
- Cap — the decorative disc that covers the socket on the visible face of the cover.
One extra piece shows up on locking versions: the Lift-The-DOT fastener, which adds a raised ring you press into with a thumb to release the cover. It is a real upgrade for high-wind use, though several owners on the Trawler Forum thread report that the ring turns stiff after a single season and starts hurting their thumb.
Worth separating clearly: a fastener is the stud-plus-socket assembly that holds the cover to the boat. A clasp is a hook-and-eye or draw latch style clip. The two are not interchangeable, and the snap is the one you will almost always be replacing.
Why Boat Cover Fasteners Fail
Replacing a fastener without diagnosing the cause means you will likely be back at it next season. Here is how the common failures map to an actual fix, based on the symptoms owners describe across the boat owner forums we reviewed.
- The socket will not hold, or pops open by itself. Usually salt and dirt buildup, or a socket that has been re-set too many times and its flare has opened up. Clean both halves in warm soapy water, dry, and add a light film of silicone grease to the male stud before reassembling — a maintenance tip owners repeat across several threads. If it still pops open, the socket has lost its tension and needs replacing.
- The socket pulls out of the canvas. This is the most reported complaint, and a Club SeaRay thread describes the female part coming loose after only a few removals. The cause is an undersized hole, a missing canvas back, or poor setting technique. Replace the socket, keep the canvas back, and set it with a tool that puts a proper flange on the post.
- The screw stud spins and will not tighten. The hole in the deck, console or transom is stripped. This needs the hole repair method further down, not a bigger screw.
- The stud is rusted or pitted. Salt water corrosion, called out repeatedly on Great Grady and Trawler Forum threads about rusty button studs on fiberglass. Stainless resists this best, but a rusted part should be replaced rather than cleaned and returned to service.
- The snaps will not reach each other. Cover fabric shrinks over time, and the stud and socket no longer meet under tension. This is a cover problem, not a fastener problem, and extenders are widely regarded as a poor compromise.
- Removal destroyed the hole. Repeated cutting and pulling enlarges the fabric hole until a new post will not seat in it. Patch or replace the fabric before you set anything.
Tools You Need for the Job
You need very little, and most owners who own a boat end up buying the same short list twice. The important detail is that the setting tool and the removal tool are different, and a plier-style snap tool meant for upholstery is not the same thing as a boat-grade snap setter.
- Cutter pliers or side cutters — the primary removal tool and the fastest way to save canvas.
- Snap tool, vise-grip style — the setting tool for both the stud and the socket. Component makers are specific about this: use the vise-grip style tool, not a press-style punch and die, or the post will not form correctly.
- Screwdriver or nut driver — for removing the old screw stud from the boat. A nut driver is better on a stripped or seized screw.
- Marine lubricant or silicone grease — for the male stud and for any screw going into a fiberglass deck.
- Drill, bits and a punch — only if the drill method becomes necessary, and a punch to start the hole so the bit does not walk.
- Safety glasses — non-negotiable when you crush or drill a fastener. The canvas back is under spring tension once it is set.
- Vise grips — optional, but they grip a snap head so it cannot spin while you drill.
On buying: owners with strong opinions recommend buying a few inexpensive kits of the same tool, using each one on a scrap of canvas, and keeping only the ones that hold a set. Cheap marketplace kits that will not hold a set are the most commonly regretted purchase in every thread we read. The same advice applies to drill bits — buy several of the size you need and keep the one that performs.
How to Identify Your Snap Size
Boat cover snaps come in more than one size, and the three you will meet most often are 5/16 inch, 3/8 inch and 9/16 inch. Measure the outside diameter of the socket, or the cap that covers it, with calipers or a steel rule. If you cannot measure, bring the old socket to the supplier and match it directly.
- 5/16 inch — the common size for canvas cover corners, straps and lighter canvas. Often used on mooring covers and equipment covers.
- 3/8 inch — the most common size on bimini tops, dodger panels and cockpit enclosures with heavier canvas.
- 9/16 inch — the heavy-duty size used on large covers, console covers and thicker multi-layer canvas.
Two related sizing facts matter. The stud size and the socket size must match, and the size of the hole in your canvas is driven by the post, not the cap. If you are unsure whether a stud is single-hole or double-hole, check the pattern of screw holes on the boat side before ordering, because a double-hole screw stud will not drop into a single-hole spot. Snapping the wrong size into a cover looks fine and fails within weeks, so this step is worth two minutes.
How to Remove the Old Fastener
Work with the cover on a flat, stable surface and keep it from catching wind. Put your safety glasses on before you start, and lay a scrap of cardboard under the work area so a dropped post does not disappear into a console. The methods below run from least damaging to most damaging, so work down the list and stop as soon as the fastener comes free.
Method A: Cutter pliers, crush the flare
This is the default and the method practitioners across the forums reach for first. A long thread on The Hull Truth has owners describing the same conclusion: pinch the post almost apart with cutter pliers, then pull it out. It is easier than drilling and it saves the fabric.
- Grip the post as close to the canvas as you can with cutter pliers.
- Squeeze firmly until the post crumples or the flare on the back spreads.
- Keep squeezing and pull straight up while twisting slightly, so the compressed post clears the hole.
- If it will not clear, squeeze it down instead so it shrinks and passes through the fabric.
Snap pliers intended for ear clamps work well for splitting a snap and cost almost nothing if you already own a pair. Ceramic tile snips from the tile department of a hardware store are another carbide-jawed option owners recommend for stubborn fasteners.
Method B: Side cutters or end nippers
If the post will not deform, cut the head off and then remove the stub. Cut as close to the canvas as you can, then use the nippers to nip the remaining post in a way that leaves a small flange rather than a clean flush cut. That flange is what you grip to pull the rest out. The risk here is a torn fabric hole, so go slowly and support the canvas from underneath.
Method C: Drill out the peened post
Drilling is the last resort, not the first. It is the only method that reliably works on a rusted or seized post, and it is the one most likely to damage the cover. Two things go wrong, and both are avoidable.
- The post is spinning instead of cutting. This is the most reported frustration in the drilling threads. Symptoms: the bit heats, nothing comes loose, and the bit rounds off. Grip the snap head with vise grips to stop it turning before you touch the drill to it.
- The bit burns up. Drilling too fast on stainless anneals the bit before it penetrates. Use a cobalt or carbide bit, drill slow at high speed, and drip cutting oil on the crimped head.
Step up through bit sizes rather than forcing one bit: 1/16 inch, then 1/8 inch, then 3/16 inch, matching the post as closely as you can. A conical grinding stone on a rotary tool is a common third option for the last few thousandths. Accept that this method enlarges the fabric hole, and plan to set the replacement in a spot that still has material around it.
One more note: if a socket pulls out but leaves the post intact in the boat, you do not need to remove the stud at all. Remove the screw from below and replace the stud, which saves the deck entirely.
How to Install the Replacement Fastener
Setting a snap is straightforward once you accept that a misaligned snap cannot be fixed later. The alignment check comes first, and owners who fit the cover back on the boat and set each snap individually report the best results. The order below is deliberate.
- Match the parts. Confirm the new stud and socket are the same size and the same material as the hardware still on the cover. Mixed sizes will not mate.
- Mark the stud position. Put the cover on the boat, pull the fabric taut where it should sit, and mark the stud and socket locations with a permanent marker before you drill anything.
- Check alignment. The centre of the new stud and the centre of the new socket must line up in a straight line under tension. If they do not, move the stud position now, not after setting.
- Set the stud or screw stud on the boat. Drill to the diameter the manufacturer calls for, add a dab of sealant under the head if it goes into fiberglass, and tighten firmly. A little movement here shows up later as a fastener that never quite holds.
- Push the post through the canvas. From the back of the cover, push the post of the stud-side assembly through the hole, then place the canvas back and socket over the male post. Follow the sequence a marine component maker uses: post through the fabric, female socket over the post, then set.
- Set it with a vise-grip style snap tool. Position the dies over the socket so the post sits centred, close the handles until the tool stops, and do not squeeze harder than the stop. Over-crimping deforms the post and gives you a snap that feels tight and releases badly.
- Fit the cover and check tension. Before you set the remaining fasteners, put the cover back on the boat and confirm the repaired point holds the fabric where you want it. Adjust and re-set if the pull is uneven.
- Finish the rest. Work outward from the repaired snap, setting each one and testing the closure as you go.
- Fit the cap. The cap goes on last over the finished socket, and it is the only part visible from outside.
Set the stud and the socket from the same side of the tool where the manufacturer specifies dies, and use one tool rather than swapping between a cheap kit and a proper one mid-job. Mixed tooling is why an otherwise correct set comes out loose.
Replacing Only the Part That Failed
This is the most useful cost decision in the whole job, and it comes straight from a vendor guide that reframes replacement around the single failed component rather than the whole assembly. Most of the time one of these applies:
- Only the socket is worn. Keep the stud in the boat and set a new socket. This is the most common repair and the least disruptive to the boat.
- Only the stud is rusted or the hole is stripped. Keep the socket in the canvas and fit a new stud.
- The canvas back has pulled through. Replace the socket and fit a fresh canvas back, and reinforce the fabric with a patch of the same material from behind.
There are three cases where replacing the whole assembly is the right call: the hole in the canvas is already enlarged, the two halves are different sizes or materials, or the surrounding fabric has gone soft and shiny from age. In all three, a fresh matched set set into sound fabric will outlast a pieced-together repair.
Repairing a Stripped Screw Hole in the Deck or Transom
A screw stud spinning in place is a stripped hole, not a broken fastener. The forum remedy is consistent: fill the hole, let it cure, then redrill. A Club SeaRay thread describes it exactly: fill with 5200, dry, then redrill and attach the existing screw.
- Remove the old screw and clean the hole out completely, including any old sealant.
- Fill the hole flush with marine sealant or a two-part epoxy. Let it cure fully — a full cure, not the skin you can touch in an hour.
- Redrill the filled hole to the exact diameter the new stud needs, using a sharp bit and a punch to start it so it does not wander.
- Fit the new stud with a dab of fresh sealant underneath and tighten it properly.
Do not simply move the fastener a few inches to fresh material and assume the problem is solved. On a deck or transom the original hole is usually where the fabric needs the anchor, and sealant squeezed out of the hole is a sign the hole was not fully filled.
Stainless Steel vs Nickel-Plated Brass
Matching the material already on your cover is the single strongest predictor of how long the repair lasts. If you are fitting a complete new set and cannot match the original, stainless is the safer default on a boat that lives in salt water.
- Stainless steel — best corrosion resistance, best choice for saltwater, UV and constant exposure. It is also the harder material to work with, which is why the drilling method needs a good bit and a firm grip on the head.
- Nickel-plated brass — easier to cut and form, softer on tools, and a good match for existing brass hardware. It will show wear and corrosion faster in a salt spray environment.
Marine grade matters more than the label. A cheap plated fitting in a splash zone will pit and seize within a couple of seasons, and a seized snap is the hardest kind to remove. When you replace one fitting, replace its matching partner in the same material so the two halves age together.
Alternatives to Snap Fasteners
If your cover keeps coming loose in wind, the fastener is not necessarily the problem — rigid snaps release under load, and owners are increasingly moving to other systems. Each of these answers the question of what you can use instead of snap buttons:
- Twist-lock fasteners — quarter-turn locks that hold under load and resist wind best. They change the look of the boat, and they cost more to set because the mechanism is more complex.
- Shock cord and toggles — a cord through the cover edge ending in a toggle that latches under tension. Spring free, easy on the canvas, and a good fit for covers that go on and off often.
- Velcro or hook-and-loop — the fastest to operate and quiet, but it collects salt and grit and loses grip when dirty, so it needs regular cleaning.
- Zipper — best for a full enclosure where you need the cover sealed rather than pegged down. It is a sealing solution, not a tie-down solution.
Upgrading one corner to a locking fastener while leaving the rest as snaps gives you mixed hardware, which is fine functionally but is worth doing on all the corners that see the most wind.
When to Call a Canvas Shop Instead
Some jobs are worth handing over, and knowing which ones saves you a ruined cover. Take it in if the failure is in a structural seam or the canvas is split, rather than at a fastener point. The same applies if the fabric around the hole is thin, glossy or hard, because a new post will pull straight through it. Multi-point re-tensioning is another one: if a dozen snaps need repositioning because the cover has lost its shape, a shop can re-cut or patch the panel properly. A single snapped fastener on a healthy cover is genuinely a weekend job, and most owners do it themselves the first time.
Frequently Asked Questions
How to replace a snap on a boat cover?
Remove the failed socket by crushing the flared post with cutter pliers and pulling it out, leaving the stud in the boat where possible. Set the new socket through the canvas from behind, place the canvas back over the post, and crimp with a vise-grip style snap tool. Fit the cover on the boat and check tension before you set the remaining fasteners.
What are the snaps on a boat cover called?
A boat cover snap has two halves. The stud, also called a screw stud, is the male half screwed into the deck, console or bimini frame. The socket is the female half set into the canvas. A post or canvas back flares behind the fabric to spread the load, and a cap covers the finished socket. A snap fastener is the whole stud-and-socket assembly; a clasp is a different type of clip.
How to remove a snap button without a tool?
You can do it with ordinary pliers if the fastener is not seized. Grip the post as close to the canvas as you can, squeeze until it crumples or the back flare spreads, then pull it straight out with a slight twist. Snap pliers made for ear clamps also work. If the post will not deform, you need cutters, and if it is rusted solid you will need a drill.
What size snaps are used on boat covers?
Three sizes cover most marine canvas work. 5/16 inch is common on cover corners, straps, mooring covers and equipment covers. 3/8 inch is the most frequent size on bimini tops, dodger panels and cockpit enclosures. 9/16 inch is the heavy-duty size for large covers, console covers and thick multi-layer canvas. Measure the outside diameter of the existing socket before ordering.
What is the best snap tool for a boat cover?
A vise-grip style snap tool made for marine canvas is the right choice for setting both the stud and the socket. Component makers warn against press-style punch and die tools, which form the post incorrectly and leave a snap that feels tight but releases badly. Owners recommend buying a few inexpensive kits, setting a few snaps on scrap canvas, and keeping only the tool that holds a clean set.
How do I install snaps on my boat cover?
Mark the stud and socket positions on the boat with the cover fitted and pulled taut, and confirm the two centres line up before you drill. Set the stud into the boat, push the post through the canvas from the back, add the canvas back and socket over the post, then crimp with a vise-grip style snap tool until the tool stops. Fit the cap last, and check tension on the boat before setting the rest.
What can I use instead of snap buttons?
The main alternatives are twist-lock fasteners, which resist wind best but cost more to set; shock cord with toggles, which are spring free and gentle on canvas; hook-and-loop tape, which is the fastest to operate but collects salt and grit; and zippers, which seal an enclosure rather than tie a cover down. Owners move away from rigid snaps after repeated wind failures.
How to fix a loose snap fastener?
Start by cleaning both halves in warm soapy water to remove salt and dirt, then dry them and add a light film of silicone grease to the male stud. If the snap still releases itself, the socket has lost tension from being re-set too many times and needs replacing. If the socket pulls out of the fabric, the hole is undersized or the canvas back was missing, so replace the socket and keep a proper canvas back behind it.
Conclusion
To replace a boat cover fastener properly, you only need to do three things well: crush the old post out with cutter pliers instead of drilling it, match the new part to the existing size and material, and check alignment with the cover on the boat before you crimp anything permanently. Miss any one of those and the same snap will be loose again by the end of the season.
Before you close the cover, run a short maintenance routine. Rinse the cover and the fasteners with fresh water after time in salt water, put a light film of silicone grease on the male snap, and check every stud for corrosion and movement once a season. Wear eye protection whenever you work on a fastener, and never let a cover lie loose where wind can catch it. If the fabric around the hole is torn or the surrounding panel has lost its shape, that is the point to hand it to a canvas shop rather than fight it yourself.