
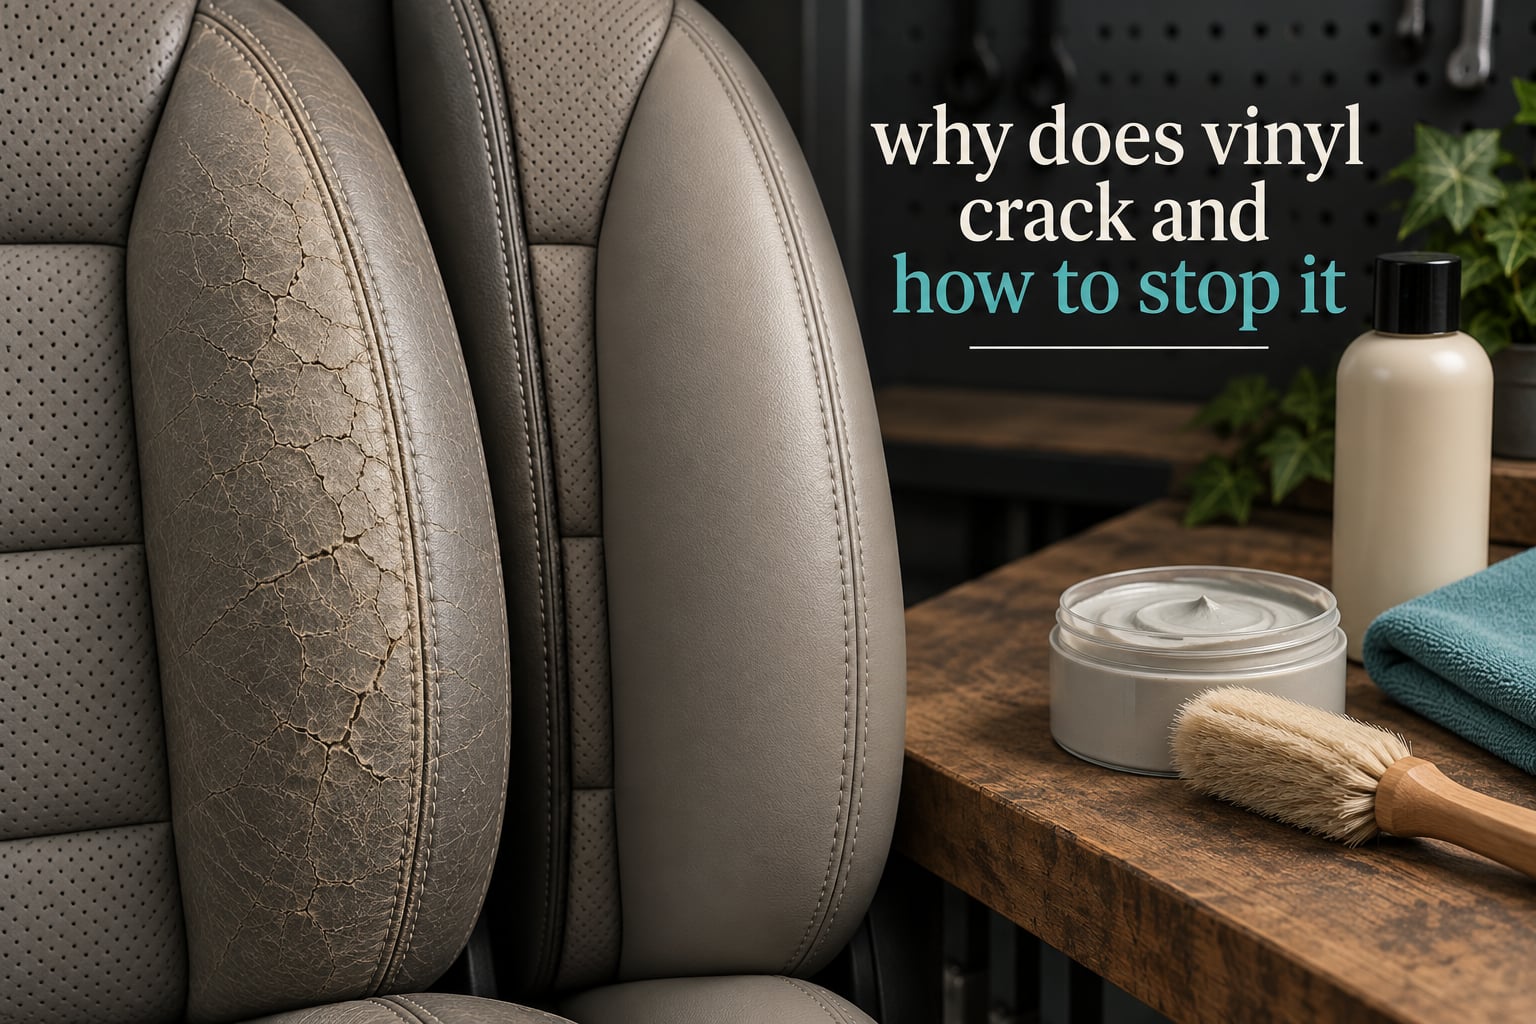
Everything below is about automotive vinyl: car seats, door cards, armrests, dash covers and convertible soft tops. Vinyl also means flooring, siding and fencing, and those crack for different reasons, but a vehicle interior is where the chemistry does the most visible damage.
Vinyl cracks because it is built to be flexible, and flexibility is the first thing it loses. Automotive vinyl is a semi-flexible PVC skin held pliable by plasticisers. Heat and ultraviolet light drive those plasticisers out of the polymer, the surface hardens and shrinks slightly, and it then fractures along the places it flexes most. Conditioning and UV protection slow that loss. Nothing reverses a crack that has already formed.
That distinction matters because cracking is cumulative. A surface that is still matte and slightly stiff in year three can be brought back with a conditioner. A split that has reached the backing or run along a seam cannot be cosmetically repaired at all, and by then the fix is a panel replacement rather than a repair kit. We refreshed this guide for 2026 because the advice has not changed much, but the products owners reach for have.
If you take one thing from this page, take these three points:
- The cause is chemical, not wear. The plasticiser leaves first, the surface embrittles, and the flexing you cannot avoid does the rest.
- Prevention is a three-part routine – clean, condition, protect – repeated on a calendar, not applied when the surface already looks bad.
- Diagnose the stage before you buy anything. A fingernail test separates a surface crack you can treat from a backing failure that needs a trim shop.
Let us start with the chemistry, because everything else follows from it.
Table of Contents
- Why Does Vinyl Crack? The Short Answer
- What Is Actually Happening Inside the Polymer
- The Seven Things That Crack Automotive Vinyl
- Seats, Door Panels, Dash and Soft Tops Fail Differently
- Crack Stage: Can It Be Stopped, Patched, or Replaced?
- How to Stop Vinyl From Cracking
- Repairing Cracked Vinyl Step by Step
- Why Your Last Repair Failed
- What Not to Put on Vinyl, and Why It Makes Things Worse
- Choosing a Repair: Materials, Adhesives and Cost
- Match the Schedule to How and Where You Park
- A 90-Day Vinyl Protection Plan
- Frequently Asked Questions
- How do you stop vinyl from cracking?
- How to fix a crack in vinyl?
- Can cracked vinyl be repaired?
- What type of glue is best for repairing vinyl seats?
- How much does vinyl seat repair cost?
- How long do vinyl convertible tops last?
- What do you put on a convertible top to protect it?
- How to seal a convertible top?
- Is it possible to repair cracked leather car seats?
- What would cause vinyl flooring to crack?
- Conclusion: Stopping Vinyl Cracking Starts Before the First Crack
Why Does Vinyl Crack? The Short Answer
Automotive vinyl cracks because the plasticisers that keep it supple migrate out of the polymer over time, and ultraviolet light plus heat drive that loss faster while breaking down the remaining polymer chains. Once the surface is rigid and slightly shrunk, it fractures wherever it is repeatedly flexed – the driver bolster, the door armrest, the soft-top fold lines and the rear-window seam – and because each crack concentrates stress, new cracks grow toward it and join up.
That sequence is predictable, which is good news. It means the damage can be slowed, and in most cases stopped, as long as you act while the surface is still intact.
What Is Actually Happening Inside the Polymer
A plasticiser is a molecule added to a stiff plastic to make it soft and workable. Automotive vinyl uses oleophilic plasticisers that are attracted to the PVC itself, so they sit between the long polymer chains rather than bonding to them. That is the whole trick: the chains can slide past each other, which is what you feel as pliability.
Two things then pull those molecules out of the arrangement.
- Evaporation and migration. The plasticiser slowly leaves the surface and the interior of the material at different rates, which is why a seat that has been baked in a closed car looks worse on the top face than the underside. As the concentration falls, the chains lose the ability to slide and the material becomes what the industry calls embrittled.
- Ultraviolet photodegradation. UV radiation breaks the long polymer chains themselves rather than dislodging anything. Shorter, damaged chains are stiffer, so the surface loses strength at the same time it is losing softness – two separate failure routes arriving at the same place.
Thermal cycling is the accelerant that ties them together. A dashboard in summer goes from cool to very hot and back several times a day. Each cycle expands and contracts the material slightly, and an already rigid surface fatigues under repeated flexing. Owners on benzworld describe the same idea in practical terms: the vinyl has to stay flexible to be usable, and a repair that is stiff is not really a repair.
Add abrasion at high-contact points and the model is complete. Cracks do not start in the flat middle of a door card. They start where you put your hands, your legs and your shoulder every single day.
The Seven Things That Crack Automotive Vinyl
Most cracked vinyl has more than one cause, but these are the seven we see in that order of frequency.
- Ultraviolet exposure. Tell-tale: pale grey or whitish patches on a dash top or an upper bolster that never see a cloth, then hairline cracks in those same pale areas. Fading and cracking share one cause.
- Age and time. Tell-tale: a fifteen-year-old garage-kept car with a matte, waxy surface and cracks that appear even though the car rarely moved. Calendar age alone will do it.
- Heat. Tell-tale: damage concentrated on the top face of the dash, the seat squab and the roof, all the surfaces facing upward toward glass. Sustained heat accelerates plasticiser loss far beyond what the UV dose alone would explain.
- A dry, ventilated cabin. Tell-tale: cracking concentrated around HVAC vents and the tops of the doors, where conditioned outside air passes over the surface for hours. Moving air strips plasticiser faster than still air.
- Abrasion at high-contact points. Tell-tale: a crack on the outer driver bolster, the door pull, the armrest or the seat edge that opens into a long split. This is the load that starts the failure.
- Chemical attack. Tell-tale: a surface that went shiny and slippery, then stiff, then cracked, shortly after someone used a silicone dressing or a generic tire shine. The coating and the solvent both worked against you.
- A previous repair that went wrong. Tell-tale: a hard, dark mark around a crack that was filled with the wrong adhesive, or a crack that has re-opened along the edge of an old repair. Solvent-based leather glue leaves a rigid patch, and the rigid patch becomes the next stress riser.
Notice that only one of these is really about use. Five of the seven are chemical or thermal, which is why a car that is barely driven in a hot climate can crack harder than one that is used daily in a temperate one.
Seats, Door Panels, Dash and Soft Tops Fail Differently
The mechanism is the same everywhere, but the exposure and the repairability are not.
- Seats take the most mechanical load. The driver bolster and the seat edge flex on every entry, so cracks there start earliest and progress fastest. Perforated inserts and stitched seams fail differently from solid panels, because the holes and thread lines act as stress concentrators.
- Door panels and armrests see a combination of skin contact and constant HVAC airflow along the upper edge. The vinyl there is thin, often backed only by a foam pad, so a deep crack reaches backing quickly.
- Dash and centre console take the most heat and the most direct sun. They fade before they crack, which is useful: fading is an early warning that the plasticiser is on its way out.
- Convertible and soft tops take the harshest combination – full-spectrum sun, standing water, freeze-thaw cycles and permanent folding stress. Folding a top while it is cold, or folding a wet top into the well, sets up exactly the kind of flex-fatigue split that shows up years later along the rear-window seam.
It helps to be certain what you actually own, because the fix changes with the material.
Vinyl, leather, TPO or soft-top fabric
- PVC vinyl upholstery is a plasticised PVC skin on foam or cloth. It stays soft, takes colour readily and accepts a vinyl-specific adhesive. This article is mainly about this material.
- Leather is hide. It hydrates rather than softens, so it responds to leather conditioner, and a hide repair uses a different adhesive system entirely.
- TPO and other rubber-based trim are thermoset elastomers. They weather, fade and stiffen like vinyl, but they do not take a solvent adhesive at all.
- Soft-top fabric – coated polyester or acrylic – is a woven substrate under a pigmented coating. Protectants for it are formulated for fibres and coatings rather than for plasticised PVC.
Two more terms worth knowing: the grain is the moulded surface pattern, and perforation is the pattern of small holes. Matching both is what separates a repair that blends in from one that reads as a repair.
Crack Stage: Can It Be Stopped, Patched, or Replaced?
Stage decides the answer, and the stage is easy to check at home before you spend anything. Press a fingernail into the crack and flex the surrounding area. That single test separates a surface crack, a deep split and a backing failure.
| Stage | What you see and feel | Can it be stopped? | Cheapest effective fix | When replacement is the right call |
|---|---|---|---|---|
| 1. Dry surface | Matte, waxy or pale patch, no visible lines yet. Fingernail finds nothing. | Yes, fully. | Clean, then a vinyl conditioner with a UV blocker, twice a year. | Never. This is the stage where prevention wins. |
| 2. Hairline surface crack | Fine lines, usually pale. Fingernail catches very slightly. Surface still flexes. | Progression, yes. The line itself, no. | Clean and condition to slow further loss, then a flexible filler if you want the line to disappear. | Not yet. Monitor it every six months. |
| 3. Deep split | Opening you can put a fingernail into, edges lifting, vinyl no longer bridges the gap. | No, but it can be stabilised. | Colour-matched filler or a flexible repair kit, sanded flush and sealed, keeping the area pliable. | When the split is longer than your palm, sits on a bolster, or keeps re-opening. |
| 4. Backing or seam failure | Foam or cloth visible through the gap, crack running along a stitch line, perforation edge or the soft-top rear-window seam, or the panel feels spongy and moves. | No. | None. Cosmetic filling will hold for months and then fail again. | Now. Panel replacement or a trim shop is the correct answer. |
One caution on stage three: a filler repair is a functional repair, not a cosmetic one. Owners on benzworld put it plainly – a visible repair is acceptable if the vinyl stays flexible, and that flexibility matters more than the sight line.
How to Stop Vinyl From Cracking
You stop cracking by replacing what leaves, protecting what is left and reducing the load. That is a three-part routine, and the order matters.
- Clean the surface first. Conditioner and protectant only bond to clean vinyl. Use a pH-neutral vinyl or interior cleaner, work it into the grain with a soft microfibre or soft brush, and wipe off the residue. Nothing aggressive, nothing degreasing, no stiff bristle brush.
- Condition to put flexibility back. A dedicated vinyl conditioner carries plasticiser-replacement or emollient ingredients that re-plasticise the surface and slow further loss. Work it into the grain and let it cure fully before the next step. On a soft top, the same idea applies with a top-specific product formulated for a coated substrate.
- Protect against UV and water. A protectant leaves a hydrophobic barrier with UV blockers over the top, so water and contaminants bead and run off instead of sitting on the surface. Applying over a clean, conditioned surface gives a more even and more durable result. Two thin coats beat one heavy coat; respect the cure time on the label before exposing the surface to water or sun.
- Reduce the physical load. Use a seat cover on a high-mileage daily driver, avoid resting a laptop or a hard-edged bag on a bolster, and clean shoes off before getting in rather than scrubbing grit into the seam later.
- Change the parking habit. A garage or a covered carport removes the single largest dose of UV and heat a vehicle takes. Where that is not possible, a windscreen sunshade cuts the dash dose substantially and takes minutes.
Two habits from the detailing forums are worth repeating because they are genuinely effective. On Autopia, owners treating vinyl tops describe the same routine we would recommend for a seat: wash, dry, protect, then reapply the protectant on a fixed cadence and always before long-term storage. And do not fold a convertible top when it is cold. Cold vinyl is stiff vinyl, and folding cold starts the fatigue that shows up as a seam split years later.
Repairing Cracked Vinyl Step by Step
This procedure handles a stage two or stage three crack. It will not rescue a backing failure.
- Clean the crack itself. Open the line gently with a fine pick so cleaner and filler reach the bottom, then clean and dry. Filler applied over trapped grit is a filler that fails early.
- Remove loose, flaking vinyl. Anything that lifts and moves under a fingernail will not hold filler. Trim it back to a stable edge so the remaining material is bonded.
- Choose a PVC-compatible flexible adhesive. This is the single decision that determines whether the repair lasts. Leather glue, general-purpose super glue and craft glues do not bond reliably to plasticised PVC.
- Fill and build in thin passes. Work the adhesive or filler into the crack, let each pass cure, and add another if the line is still open. A thick single pour shrinks as it cures and pulls away from the edges.
- Sand flush. Once fully cured, level the repair with fine abrasive on a backing pad. The goal is a surface that does not catch a fingernail, not a mirror finish.
- Seal and re-condition. Seal the repaired area, then apply your normal protectant over it. Sealing the repair keeps water out of the new interface, which is what usually causes a re-opened crack.
The honest limit: this gets you a flexible, functional, sealed repair. On a dark interior with a close grain it can be very hard to see. On a light one, on a perforation panel, or on a bolster you use daily, expect a visible line. That is fine. A flexible repair that holds for years is a good outcome, and a rigid filler patch that fails in six months is not.
Why Your Last Repair Failed
Most failed vinyl repairs are adhesive failures, and the reason is chemical rather than a technique problem. Leather and fabric adhesives rely on solvents that swell and partially dissolve collagen or fibres. Plasticised PVC does not respond the same way, and a solvent designed for hide will sit on the vinyl surface, flash off and leave a bond that only looks attached.
The result is what owners describe on WranglerForum as a mark that looks like a cigarette burn: a hard, discoloured patch that is stiffer than the vinyl around it. And a stiff patch in a flexing area is worse than the original crack, because it concentrates every subsequent flex into the edges of the repair.
Glue type is not the only variable. On r/AutoDetailing the recurring question is whether to use a kit or strip the loose vinyl back and fill the crevices – and both approaches can work, provided the adhesive is one that bonds to plasticised PVC and the cured repair stays flexible. Super glue with an accelerator gets a reputation it does not deserve here: it cures rigid, it yellows, and it will not flex with the panel.
How to tell a previous repair is going to cause you trouble: press it. If it is harder than the surrounding vinyl, or it flexes in a different way, remove it before you work on the crack underneath.
| Adhesive class | Bonds to plasticised PVC | Flexibility after cure | Best use |
|---|---|---|---|
| Leather or hide adhesive | No | Rigid | Leather only, never vinyl |
| General-purpose super glue | Partial, surface only | Very rigid, yellows | Nothing structural on a flexing panel |
| General-purpose craft or contact adhesive | Unreliable | Varies, often creeps | Avoid on seat and door vinyl |
| PVC or vinyl-specific flexible adhesive and repair filler | Yes | Stays flexible with the panel | Seats, door panels, armrests, soft tops |
On JeepForum the recurring owner question is which kit to buy for a driver seat bolster. The answer is always the same class of product: one formulated for vinyl, and one that stays flexible once cured.
What Not to Put on Vinyl, and Why It Makes Things Worse
Most of the products that make vinyl look best for a week are the ones that shorten its life. Each of these does real chemical damage rather than cosmetic harm.
- Silicone-based dressings. They deposit a slick film that masks the matte sign of plasticiser loss, so you stop noticing the early warning. The film also blocks any conditioner or protectant you apply later from reaching the vinyl, and it collects dust along the grain.
- Generic tire shine. Formulated for rubber, not for plasticised PVC. It is solvent-heavy, and repeated use pulls plasticiser out of the surface while leaving a hard shell. Shiny, slippery and brittle is the exact combination owners complain about.
- Alcohol and harsh degreasers. These dissolve and displace plasticiser directly, and they lift pigment at the same time. Fine for a one-off spot on a non-critical surface, wrong as a routine interior cleaner.
- Bleach and ammonia-based products. They attack the colour and, on repeated use, the backing coating. They also leave residue that traps moisture against the surface.
- Stiff bristle brushes, abrasive pads and pressure washing a door card. Cracking is a fatigue problem, and aggressive mechanical work creates micro-cracks that become crack starters.
Quick test if you are unsure about a product: read the label for the words vinyl or PVC. If they are not there and the product is meant for tyres, leather, glass or household surfaces, keep it away from your interior.
Choosing a Repair: Materials, Adhesives and Cost
Choose by stage, not by how bad the crack looks in a photograph. A deep split that has reached the backing cannot be cosmetically repaired at any budget, and spending on a kit there is wasted money.
The economics follow a simple shape. A single repaired crack is a small job with small materials cost, so the cost is dominated by the technician’s time and the access needed to get at the panel – which is why seat bases, door pockets and centre-console surrounds cost more to reach than the crack size suggests.
Panel replacement sits above that: the part is the main variable, and the main cost drivers are whether the panel is a separate trim piece or part of a larger assembly, whether it is perforated or colour-matched, and whether the stitching has to be rebuilt. Full reupholstery sits above that again because foam, labour and pattern matching all come into it.
The break-even logic is straightforward: if more than a couple of cracks on the same panel are at stage three, or the panel has one stage four split, the cost of a panel replacement is usually less than paying for repeat repairs that fail. The reverse is equally true: a single stage two crack on an otherwise clean interior is not a reason to reupholster a whole seat.
Our rule of thumb is to recommend panel replacement when the backing is compromised, and repair when the vinyl itself is the only thing damaged. We would rather tell you a repair will hold for years than sell a reupholstery you did not need – and a technician who only ever recommends one of those two is not diagnosing, they are selling.
Match the Schedule to How and Where You Park
Exposure decides cadence. Applying a soft-top protectant on schedule to a garage-kept car is wasted effort, while a coastal daily driver on a three-month cycle will be visibly failing within a year.
- Garage-kept or rarely driven. Clean and condition twice a year. Inspect before every long storage period. A UV protectant is low priority because the dose is already low.
- Temperate daily driver, outdoors. Clean and condition every six months, reapply a UV protectant every six to nine months, and inspect bolsters and the dash top each spring.
- Desert, high-UV or hot-summer daily driver. Condition every three to four months, protectant every three months, and expect the dash and upper bolsters to need attention first. Consider a fitted cover or a carport for the dash specifically.
- Coastal and salt-air. Same cadence as a hot climate, plus a fresh-water rinse of the exterior and lower door edges, because salt residue holds moisture against the vinyl and blocks protectant.
- Stored vehicles and classic cars. Clean, condition, protect, and never fold a top or leave a window down for months. Then repeat the whole routine before the car comes out of storage rather than after.
Whatever the tier, the sequence stays the same: clean first, condition second, protect third, and never the other way round.
A 90-Day Vinyl Protection Plan
Four checkpoints get you through a season without a special project. This is the routine we would run on a vehicle that is already showing a pale patch on a bolster.
- Day 1 – Clean and condition. Vacuum the crevices. Clean every vinyl surface with a pH-neutral product, dry fully, then condition the seats, door cards, armrests and dash top. Let it cure before anything else touches the surfaces.
- Day 1 – Protect. Apply a UV protectant in two thin coats over the clean, conditioned vinyl, working into the grain. On a soft top use a top-specific protectant, and keep it off the plastic rear window. Check an inconspicuous spot first for colour shift.
- Day 1 – Triage. Run the fingernail test on every crack you can see and sort each one into a stage from the table above. Anything at stage four goes on a list for a trim shop, not a parts order.
- Day 30 – Look, do not touch. Photograph the bolsters, the armrests and the dash in the same light. Most changes at this point are dirt, not damage. Clean only where it needs it.
- Day 60 – Repair window. If you decided to fix anything, do it on a dry, cool day with time to let each pass cure. Sand flush, seal, then reapply protectant over the repair.
- Day 90 – Reassess. Compare against the day one photos. If the pale patches have not grown, the routine is working and you repeat it at the interval your exposure tier calls for. If they have, the surface has lost enough plasticiser that a trim shop assessment is worth more than another bottle of conditioner.
If you would rather have the stage assessment done before you buy anything, that is exactly the conversation a trim shop is there for, and we are happy to look at your panels and tell you honestly whether a repair or a replacement is the sensible call.
Frequently Asked Questions
How do you stop vinyl from cracking?
Clean the vinyl, condition it with a dedicated vinyl conditioner, then protect it with a UV-blocking protectant, and repeat on a fixed calendar rather than when the surface looks tired. Parking in a garage or under a cover removes the largest single dose of UV and heat, and it does more than any product. Avoid silicone dressings and tire shine, which leave a slick film and a rigid shell that accelerates embrittlement.
How to fix a crack in vinyl?
Clean the crack, trim back any loose flaking vinyl, fill it in thin passes with a PVC or vinyl-specific flexible adhesive or filler, let each pass cure, then sand flush and seal. Use a fine pick to open the line before cleaning so the filler reaches the bottom. Expect a functional, flexible repair rather than an invisible one, especially on a light-coloured or perforated panel.
Can cracked vinyl be repaired?
Yes, as long as the crack is in the vinyl surface and has not reached the backing or a seam. A fingernail test tells you which you have: if the fingernail barely catches, it is a surface crack and it can be filled and sealed. If you can see foam or cloth through the gap, or the crack runs along stitching, perforation or a soft-top rear-window seam, it is a backing failure and only a panel replacement will hold.
What type of glue is best for repairing vinyl seats?
A flexible adhesive or repair filler formulated for PVC or vinyl upholstery. Leather and hide adhesives rely on solvents that do not bond reliably to plasticised PVC, and general-purpose super glue cures rigid and yellows. A stiff repair is worse than the original crack because it concentrates every later flex into its edges. Match the grain and perforation pattern if the repair sits on a visible insert.
How much does vinyl seat repair cost?
A single repaired crack is a small job whose cost is dominated by the technician’s time and how much of the seat base or door pocket has to be taken apart to reach it, not by the size of the crack. Panel replacement costs more and is driven by the part, whether it is a separate trim piece, and whether stitching and perforation have to be rebuilt. If two or more cracks on one panel are deep, replacement is usually the cheaper long-term answer.
How long do vinyl convertible tops last?
It depends far more on exposure and storage than on age. A top kept garaged, cleaned, protected and never folded cold will outlast one on a daily driver parked in full sun for a decade or more. The usual failure pattern is UV fading first, then cracking along the fold lines and at the rear-window seam, where freeze-thaw and permanent folding stress concentrate the damage.
What do you put on a convertible top to protect it?
A convertible top protectant applied to a clean, dry top in two thin coats, with the full cure time respected before water or sun exposure. It leaves a hydrophobic barrier with UV blockers so water and contaminants bead off instead of sitting on the coating. Work it in gently with a soft brush or microfibre, and never apply it over contamination or onto a plastic rear window.
How to seal a convertible top?
Clean and dry the top first, apply the protectant in two thin coats, and let each coat cure fully before the next and before the top is exposed. Repeat on a fixed cadence and always before long-term storage. If a fold-line or rear-window seam has already split, sealing slows water getting into the split but will not close a seam that has failed.
Is it possible to repair cracked leather car seats?
Yes, but with a different system from vinyl. Leather hydrates rather than softens, so it responds to leather conditioner, and repairs use hide-compatible adhesives and fillers rather than PVC products. The staged approach is the same: clean, fill in thin passes, level, then seal and condition. A vinyl-specific adhesive on leather will not bond properly and leaves a stiff patch.
What would cause vinyl flooring to crack?
Vinyl flooring cracks mainly from subfloor movement, moisture underneath causing the adhesive or seam to let go, and ageing makes the sheet brittle so it splits at joints instead of flexing. That is a different failure from automotive vinyl, which cracks from plasticiser loss and UV damage. This page covers vehicle seats, door panels, dash covers and convertible soft tops only.
Conclusion: Stopping Vinyl Cracking Starts Before the First Crack
Vinyl cracks because the plasticisers that keep it flexible leave the polymer, and ultraviolet light and heat speed up both that loss and the breakdown of the chains themselves. Once the surface embrittles, ordinary use – bolsters, armrests, fold lines – does the rest, and the damage compounds because every crack concentrates the next one.
So the honest answer to how to stop vinyl from cracking is that you cannot stop a crack once it has opened, but you can reliably stop the cracking. Clean, condition, protect, and follow the cadence your exposure actually calls for. When a crack is already there, diagnose the stage first, and use a flexible vinyl-specific adhesive rather than anything borrowed from the leather drawer.
If you are not sure which stage you are looking at, book an assessment before you buy a repair kit. We will tell you whether a repair will hold, whether the backing has gone, and where replacement genuinely is the better call.